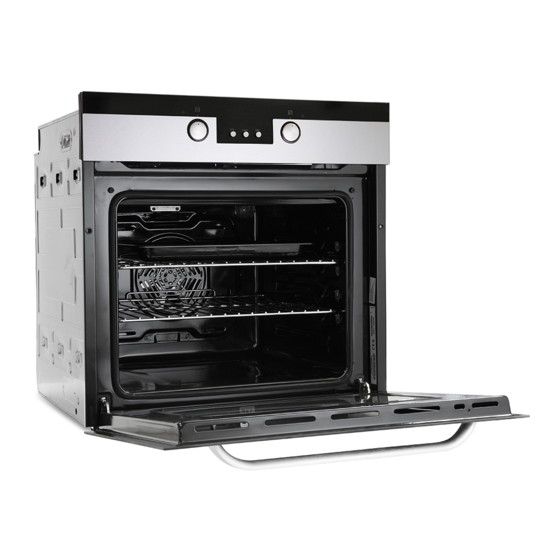
Summary of Contents for montpellier SFO60LED
- Page 1 Installation and Operating Instructions MODEL: SFO60LED Built-In Oven Please read these instructions carefully before attempting to install or use this appliance. It is advisable to keep these instructions in a safe place for future reference.
- Page 2 Introduction montpellier branded appliance . It Thank you for choosing this has been designed to give years of trouble-free use provided it is installed and maintained correctly. Please read these instructions carefully before installing or using your appliance. It is advisable to keep your purchase and installation receipts with these instructions in a safe place for future reference.
- Page 3 Your 2 year Manufacturer's guarantee THIS DOES NOT AFFECT YOUR STATUTORY RIGHTS. Your new montpellier appliance carries a free guarantee which protects you against the cost of repairs during the first 24 months from date of purchase provided that: Any claim is accompanied by evidence of the model reference, model serial number and proof of purchase, such as a Sales Receipt, showing that the appliance was purchased within the 24 months prior to the date of claim.
-
Page 4: Description Of The Appliance
Description of the Appliance Control Panel Handle Oven Door Child Lock Tray Lower Heating Element Upper Heating Element Wire Grill Racks Oven Light Turbo Heating Element Air Outlet Shutters... - Page 5 CONTENTS: Section 1. Safety Advice Section 2. Installation Section 3. Operating the Appliance Section 4. Maintenance...
- Page 6 Section 1. Safety Advice - Please read this booklet thoroughly before installing and switching on the appliance. The manufacturer accepts no responsibility for incorrect installation and usage. - This appliance is guaranteed for domestic use only. - The appliance is not intended for use by persons (including children) with reduced physical, sensory or mental capabilities, or lack of experience and knowledge, unless they have been given supervision or instruction concerning the use of the appliance by a person responsible for their...
- Page 7 Section 2. Installation Remove all packaging and protective film from the appliance. Position the appliance in a dry atmosphere. The following dimensions are provided as a guide for installation – your installer will carry out the installation in accordance with the current regulations. Your installer will connect the power cable in accordance with the current regulations.
- Page 8 2.2 Installing your Built-in Oven Insert the oven into the cabinet by pushing it forward. Open the oven door and insert 2 screws into the holes located on the oven frame. When the product frame touches the wooden surface of the cabinet, tighten the screws.
- Page 9 Installing your Built-in Oven Continued. Contact with electrical or insulated parts must be prevented. Insulating parts must be fitted in a way that ensures they cannot be removed using any kind of tool. We do not recommend installing this appliance near a refrigerator or freezer as the performance of those appliances will be affected due to residual heat.
- Page 10 2.3 Electrical Connection This appliance can be fitted with a 13 amp plug and plugged into a standard 13 amp socket. However, we recommend that it is ‘hard wired’ to a suitable fused point adjacent to the appliance housing and protected with a 20 amp fuse. Please note that a switchable spur should be accessible above the work surface to allow the power to be turned off by the user.
- Page 11 Section 3. Operating the Appliance 3.1. Control Panel 3.2 Oven Function Control Knob Defrost Function – The oven warning lights will be turned on and the fan will start operating. To use the defrost function, we recommend you place your food on the third shelf from bottom. This function will not cook or bake your food, it will only help defrost it.
- Page 12 3.3. Thermostat and Timer Oven Thermostat - Once you have selected an oven cooking function you are able to adjust the oven thermostat knob to the desired temperature. Upon reaching the selected temperature the indicator light will switch off. The thermostat signal light will be on or off in order to maintain the temperature.
- Page 13 Semi-Automatic Time Adjustment – This function is used to cook within a desired time frame. Once the function and thermostat are set and the food is in the oven, press the MODE button until you see “stop” on the timer screen, the symbol “A”...
- Page 14 Full Automatic Programming – This function is used to cook after a certain period of time, within a certain duration. Once the function and thermostat are set and the food is in the oven, press the MODE button until you see “stop” on the timer screen, the symbol (A) will begin to flash.
- Page 15 Section 4. Maintenance Before any maintenance or cleaning work is carried out, DISCONNECT the appliance from the ELECTRICITY supply and ensure that the appliance is completely cool. 4.1. Cleaning the interior of the oven Clean spillages from inside the oven as soon as possible after use. Ensure the oven is turned off before cleaning.
- Page 16 If after the previous checks there is still a fault, please contact the Repairtech Service Helpline below. Please ensure that you have the model number, serial number, date of purchase and retailers information available before you make the call. Should your appliance develop a fault, please call the Repairtech Service Helpline on: 01527-888133...
- Page 17 Important Note: This appliance is marked according to the European directive 2002/96/EC on Waste Electrical and Electronic Equipment (WEEE). By ensuring this product is disposed of correctly, you will help prevent potential negative consequences for the environment and human health, which could otherwise be caused by inappropriate waste handling of this product.


Need help?
Do you have a question about the SFO60LED and is the answer not in the manual?
Questions and answers