Table of Contents
Advertisement
Advertisement
Table of Contents

Related Manuals for PITSOS WKP1000D8


Summary of Contents for PITSOS WKP1000D8
- Page 1 WKP1000D8 Washing machine...
-
Page 2: Your New Washing Machine
Your new washing machine Display rules : Warning! You have chosen a Pitsos washing machine. This combination of symbol and signal word indicates a possibly dangerous Please take a few minutes to read and situation. Not heeding the warning can become familiar with the advantages of cause death or injuries. -
Page 3: Intended Use
Intended use Intended use Contentse n I n s t r u c t i o n M a n u a l a n d I n s t a l l a t i o n I n s t r u c t i o n s Safety instructions For private domestic use only. - Page 4 Safety instructions Reaching into the drum Cut through the mains cable ■ ■ when it is turning can cause and remove it, along with injuries to hands. plug. Do not reach into the drum Destroy the lock on the ■ when it is turning.
-
Page 5: Environmental Protection
Environmental protection Do not let children touch the If the laundry is subsequently dried ■ in a tumble dryer, select the spin hot washing machine door. speed according to the tumble dryer manufacturer's instructions. Environmental protection Packaging/used appliance E n v i r o n m e n t a l p r o t e c t i o n Dispose of packaging in an environmentally-responsible manner. -
Page 6: Y Main Points In Brief
Main points in brief Main points in brief M a i n p o i n t s i n b r i e f Connect the mains Turn on the water Sort the laundry. Open the door. plug. tap. -------- Select a programme Observe the... -
Page 7: Washing Machine
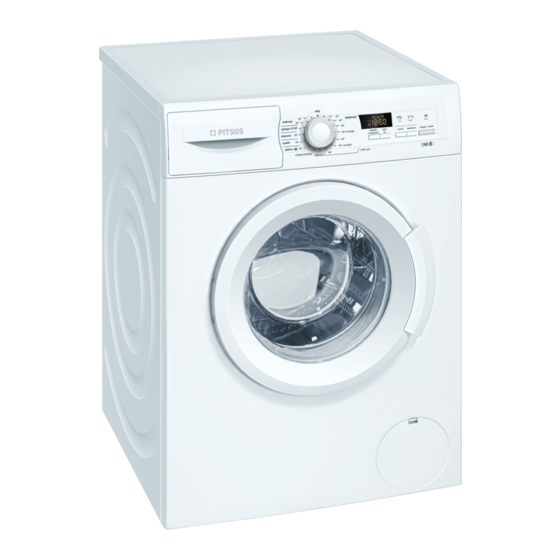
Getting to know the appliance Getting to know the appliance Washing machine G e t t i n g t o k n o w t h e a p p l i a n c e ( Detergent drawer ~ Page 15 8 Washing machine door with window handle 0 Controls/display elements 9S Open the washing machine door... -
Page 8: Control Panel
Getting to know the appliance Control panel ( Programme selector for selecting a @ V + quick (SpeedPerfect), 2 Πρόπλυση programme and for switching the machine on and (Pre-Wash) Additional programme settings 0 Display panel for settings and information H Ü έναρξη/παύση (Start/Reload), for starting, interrupting (adding laundry) and cancelling a programme 8 στύψιμο... -
Page 9: Prepare The Laundry
Laundry You can find examples of levels of Laundry soiling on – Light: Do not pre-wash, select P repare the laundry the V SpeedPerfect setting if L a u n d r y necessary Caution! – Normal Damage to the appliance/fabrics –... -
Page 10: Correct Selection Of Detergent
Detergent Detergent Saving Soiling/note Reduced temper- Light C orrect selection of detergent ature and deter- No visible dirt or stains. Cloth- D e t e r g e n t gent quantity as ing has taken on some body The care label is crucial for selecting per the recom- odour, e.g.: the correct detergent, temperature and... -
Page 11: Overview Of Programmes
Overview of programmes Overview of programmes Programmes on the programme selector O v e r v i e w o f p r o g r a m m e s Programme/type of laundry/information Settings Name of programme Max. load; Short explanation of the programme or the fabric for which it is suita- * Reduced load for V SpeedPerfect ble. - Page 12 Overview of programmes Programme/type of laundry/information Settings ευπαθή (Delicates) Max. 2 kg For delicate, washable fabrics, e.g. made of silk, satin, synthetic 30 °C fibres or blended fabrics (e.g. silk blouses, silk scarves) – – – ... 800 rpm Use a detergent which is suitable for machine washing deli- Note: G, 2 cates or silk.
-
Page 13: Programme Default Settings
Programme default settings Before starting the programme, the Programme default programme end ("Ready in" time) can be pre-selected in increments of one settings hour (h = hours) up to a maximum of 24 hours. The temperature, spin speed and P r o g r a m m e d e f a u l t s e t t i n g s programme duration ("Ready in"... -
Page 14: Operating The Appliance
Additional programme settings Select programme/switch on Additional programme the appliance settings If you have activated the Note: V SpeedPerfect childproof lock, you must first deactivate A d d i t i o n a l p r o g r a m m e s e t t i n g s it before you can set a programme. -
Page 15: Placing Laundry Into The Drum
Operating the appliance The indicator lamp for the button lights after another. It is possible to change up if a setting is active. the settings. The settings are not saved when the Measure and add detergent appliance is switched off. and care products Additional settings ~ Page 14 Overview of programmes from... -
Page 16: Start The Programme
Operating the appliance appropriate dispenser and place it in the drum. Start the programme Select the Start/Pause A button. The indicator lamp lights up and the programme starts. Measuring aid A For liquid detergent During the programme, the display panel shows the "Ready in" time or, Compartment II Detergent for the main wash, after starting the wash programme, the... -
Page 17: Adding Laundry
Operating the appliance Adding laundry Press Start/Reload . For programmes at low temperatures: After starting the programme, you can Press Start/Reload. add or remove laundry as required. Select Spin or Drain. To do this, press the Start/Reload Press Start/Reload. button. The Start/Reload indicator lamp flashes Programme end during rinse and the machine checks whether it is... -
Page 18: A Utomatic Load Sensing
Sensors Remove any foreign objects from the Place large and small items of Note: ■ drum and the rubber seal – risk of laundry evenly in the drum. ~ Page 23 rusting. Leave the washing machine door ■ and detergent drawer open so that any residual water can dry away. -
Page 19: M Setting The Signal
Setting the signal Setting the signal S e t t i n g t h e s i g n a l 1. Activate the setting mode for the signal volume Set to stop. Press and hold the Spin speed button + Press and hold the button for approx. -
Page 20: Cleaning And Maintenance
Cleaning and maintenance be obtained via our website or from our Cleaning and after-sales service. maintenance Detergent drawer and housing Warning C l e a n i n g a n d m a i n t e n a n c e If the washing machine contains Danger of death! detergent or fabric softener residues:... -
Page 21: The Drain Hose At The Siphon Is Blocked
Cleaning and maintenance Open and remove the service flap. To prevent unused detergent Note: from flowing straight into the drain during the next wash: Pour 1 litre of water into compartment II and start the [ Empty programme. The drain hose at the siphon is blocked Take the drain hose out of the Switch off the appliance. -
Page 22: Emergency Release
Faults and what to do about them. Warning Risk of injury! You may injure your hands if you reach into the drum while it is turning. Do not reach into the drum when it is turning. Wait until the drum has stopped turning. For standard and Aqua-Secure Caution! models, clean the filter on the rear of... -
Page 23: Information On The Display Panel
Faults and what to do about them. Information on the display panel Display Cause/remedial action The washing machine door is unlocked. It is possible to add laundry. Temperature too high. Wait until the temperature drops. ■ Water level too high. Not possible to add laundry. Close the washing machine ■... - Page 24 Faults and what to do about them. Faults Cause/remedial action Detergent solution is not – – – 0 (Rinse hold = without final spin) selected? ■ emptied. Clean detergent solution pump. ~ Page 20 ■ Clean the waste pipe and/or drainage hose. ■...
-
Page 25: After-Sales Service
After-sales service Faults Cause/remedial action YES appears on the dis- The washing machine door is unlocked. It is possible to add laundry. play in reload mode. If you cannot correct a fault yourself (after switching off/on) or a repair is required: Turn the programme selector to Off. -
Page 26: Energy And Water Consumption, Programme Duration And Residual Moisture For The Main Washing Programmes
Consumption rates Consumption rates Energy and water consumption, programme duration and C o n s u m p t i o n r a t e s residual moisture for the main washing programmes (approximate values) Programme Load Energy consumption* Water* Programme duration* Cotton 20 °C... -
Page 27: J Technical Data
Technical data Standard-Programs for Cotton under EU-Regulation 1015/ Load Programme du- 2010 ration Programme Cottons ú 8 kg 3 _ h Programme Cottons ú 4 kg 3 _ h Programme Cottons û 4 kg 3 ] h Programme setting for testing and energy labelling in accordance with Directive 2010/30/EU with cold water (15 °C). -
Page 28: Positioning And Connecting
Positioning and connecting P Water supply hose on standard/Aqua- Positioning and Secure models connecting *depending on the model Included with the appliance In addition, a hose clamp ( 24 - 40 mm P o s i t i o n i n g a n d c o n n e c t i n g diameter, available from specialist Check the machine for transport Note:... -
Page 29: Installation Surface
Positioning and connecting leaks and water damage, you must Do not remove the appliance covering follow the instructions in this section. plate. Notes Notes In addition to the safety information Recess width of 60 cm required. ■ ■ listed here, the local water and Only install the washing machine ■... -
Page 30: Hose And Cable Lengths
Positioning and connecting Unscrew and remove all four transport brace screws. Remove the sleeves. To do this, remove the mains cable from the holders. Fit the covers. Lock the covers firmly The following are available from Tip: in place by applying pressure to the specialist dealers/the after-sales snap-in hooks. -
Page 31: Water Outlet
Positioning and connecting Only tighten the screw connections Open the water tap carefully, Note: ■ by hand. If the screw connections checking the leak tightness of the are tightened too much with a tool connection points. The screw (pliers), the thread may be connection is under mains water damaged. -
Page 32: Electrical Connection
Positioning and connecting In doing so, hold the foot tight and do not adjust its height. The lock nuts on all four appliance feet must be screwed tightly against the housing. Drainage into a siphon ■ The connection point must be secured using a hose clamp with a diameter of 24-40 mm (available from specialist dealers). -
Page 33: Before Washing For The First Time
Positioning and connecting The mains cable is only replaced by To prevent foaming, only use Note: ■ a qualified electrician (if this is half of the amount of detergent necessary). Replacement mains recommended by the detergent cables are available from the after- manufacturer. - Page 34 Positioning and connecting Before initial use: Notes The transport locks must be ■ removed. To prevent unused detergent from ■ flowing straight into the drain during the next wash: Pour approximately 1 litre of water into compartment II and select and start the [ Empty programme.
- Page 35 *9000998136* 9000998136 (9504)
Need help?
Do you have a question about the WKP1000D8 and is the answer not in the manual?
Questions and answers