Table of Contents
Advertisement
Advertisement
Table of Contents

Related Manuals for Asus RT-AC58U


Summary of Contents for Asus RT-AC58U
-
Page 1: User Guide
User Guide RT-AC58U Wireless-AC1300 Dual Band Gigabit Router... - Page 2 Product warranty or service will not be extended if: (1) the product is repaired, modified or altered, unless such repair, modification of alteration is authorized in writing by ASUS; or (2) the serial number of the product is defaced or missing.
-
Page 3: Table Of Contents
Table of contents Getting to know your wireless router Welcome! ..................6 Package contents .................6 Your wireless router ..............7 Positioning your router ..............9 Setup Requirements ..............10 Router Setup ................11 1.6.1 Wired connection ..............11 1.6.2 Wireless connection .............12 Getting started Logging into the Web GUI ............. - Page 4 Table of contents Using AiCloud ................41 3.6.1 Cloud Disk ................42 3.6.2 Smart Access ................44 3.6.3 Smart Sync ................45 Configuring the Advanced Settings Wireless ..................46 4.1.1 General ..................46 4.1.2 WPS ....................49 4.1.3 Wireless MAC Filter ...............51 4.1.4 RADIUS Setting ..............52 4.1.5 Professional ................53 LAN ....................
- Page 5 Utilities Device Discovery ............... 80 Firmware Restoration .............. 81 Setting up your printer server ..........82 5.3.1 ASUS EZ Printer Sharing .............82 5.3.2 Using LPR to Share Printer ..........86 Download Master ..............91 5.4.1 Configuring Bit Torrent download settings ....92 5.4.2 NZB settings ................93...
-
Page 6: Getting To Know Your Wireless Router
Getting to know your wireless router 1.1 Welcome! Thank you for purchasing an ASUS RT-AC58U Wireless Router! The ultra-thin and stylish RT-AC58U features both 2.4GHz and 5GHz dual bands which delivers super fast gigabit wireless-AC speeds up to 867 Mbps on the 5 GHz band & 300 Mbps on the 2.5 GHz band concurrently. -
Page 7: Your Wireless Router
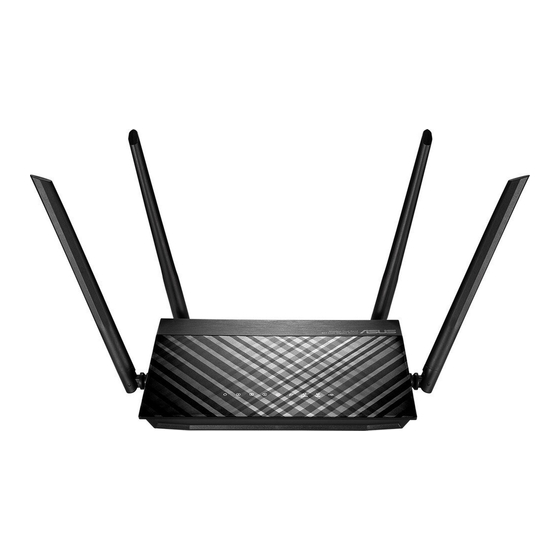
1.3 Your wireless router Power LED Off: No power. On: Device is ready. Flashing slow: Rescue mode Flashing quick: WPS is processing. WAN (Internet) LED Off: No power or no physical connection. On: Has physical connection to a wide area network (WAN). 2.4GHz LED / 5GHz LED Off: No 2.4 GHz or 5 GHz signal. -
Page 8: Specifications
Reset button This button resets or restores the system to its factory default settings. Power button Press this button to power on or off the system. Power (DC-IN) port Insert the bundled AC adapter into this port and connect your router to a power source. LAN 1 ~ 4 ports Connect network cables into these ports to establish LAN connection. -
Page 9: Positioning Your Router
2.4GHz computer peripherals, Bluetooth devices, cordless phones, transformers, heavy-duty motors, fluorescent lights, microwave ovens, refrigerators, and other industrial equipment to prevent signal interference or loss. • Always update to the latest firmware. Visit the ASUS website at http://www.asus.com to get the latest firmware updates. • To ensure the best wireless signal, orient the four antennas as shown in the drawing below. 90 ° 90 °... -
Page 10: Setup Requirements
1.5 Setup Requirements To set up your wireless network, you need a computer that meets the following system requirements: • Ethernet RJ-45 (LAN) port (10Base-T/100Base-TX/1000Base- • IEEE 802.11a/b/g/n/ac wireless capability • An installed TCP/IP service • Web browser such as Internet Explorer, Firefox, Safari, or Google Chrome NOTES: • If your computer does not have built-in wireless capabilities, you may install an IEEE 802.11a/b/g/n/ac WLAN adapter to your computer to connect to the network. -
Page 11: Router Setup
1.6 Router Setup IMPORTANT! • Use a wired connection when setting up your wireless router to avoid possible setup problems. • Before setting up your ASUS wireless router, do the following: • If you are replacing an existing router, disconnect it from your network. • Disconnect the cables/wires from your existing modem setup. If your modem has a backup battery, remove it as well. • Reboot your cable modem and computer (recommended). 1.6.1 Wired connection NOTE: You can use either a straight-through cable or a crossover cable for wired connection. -
Page 12: Wireless Connection
3 Using another network cable, connect your modem to your wireless router’s WAN port. 4. Insert your modem’s AC adapter to the DC-IN port and plug it to a power outlet. 1.6.2 Wireless connection RT-AC58U Smart phone Tablet Modem Internet... - Page 13 To set up your wireless router via wireless connection: 1. Insert your wireless router’s AC adapter to the DC-IN port and plug it to a power outlet. 2 Using the bundled network cable, connect your modem to your wireless router’s WAN port. 3.
-
Page 14: Getting Started
Getting started 2.1 Logging into the Web GUI Your ASUS wireless router comes with an intuitive web graphical user interface (GUI) that allows you to easily configure its various features through a web browser such as Internet Explorer, Firefox, Safari, or Google Chrome. -
Page 15: Quick Internet Setup (Qis) With Auto-Detection
2.2 Quick Internet Setup (QIS) with Auto- detection The Quick Internet Setup (QIS) function guides you in quickly setting up your Internet connection. NOTE: When setting the Internet connection for the first time, press the Reset button on your wireless router to reset it to its factory default settings. - Page 16 2. The wireless router automatically detects if your ISP connection type is Dynamic IP, PPPoE, PPTP and L2TP. Key in the necessary information for your ISP connection type. IMPORTANT! Obtain the necessary information from your ISP about the Internet connection type. for Automatic IP (DHCP) for PPPoE, PPTP and L2TP...
- Page 17 NOTES: • The auto-detection of your ISP connection type takes place when you configure the wireless router for the first time or when your wireless router is reset to its default settings. • If QIS failed to detect your Internet connection type, click Skip to manual setting and manually configure your connection settings. 3. Assign the wireless network name (SSID) and security key for your 2.4GHz and 5 GHz wireless connection.
-
Page 18: Connecting To Your Wireless Network
2.3 Connecting to your wireless network After setting up your wireless router via QIS, you can connect your computer or other smart devices to your wireless network. To connect to your network: 1. On your computer, click the network icon in the notification area to display the available wireless networks. -
Page 19: Configuring The General Settings
Configuring the General settings 3.1 Using the Network Map Network Map allows you to configure your network’s security settings, manage your network clients, and monitor your USB device. -
Page 20: Setting Up The Wireless Security Settings
3.1.1 Setting up the wireless security settings To protect your wireless network from unauthorized access, you need to configure its security settings. To set up the wireless security settings: 1. From the navigation panel, go to General > Network Map. 2. On the Network Map screen and under System status, you can configure the wireless security settings such as SSID, security level, and encryption settings. -
Page 21: Managing Your Network Clients
4. From the Security Level dropdown list, select the encryption method for your wireless network. IMPORTANT! The IEEE 802.11n/ac standard prohibits using High Throughput with WEP or WPA-TKIP as the unicast cipher. If you use these encryption methods, your data rate will drop to IEEE 802.11g 54Mbps connection. -
Page 22: Monitoring Your Usb Device
3.1.3 Monitoring your USB device The ASUS Wireless Router provides a USB port for connecting USB devices or USB printer to allow you to share files and printer with clients in your network. NOTE: To use this feature, you need to plug a USB storage device, such as a USB hard disk or USB flash drive, to the USB port on the rear panel of your wireless router. - Page 23 IMPORTANT! You first need to create a share account and its permission /access rights to allow other network clients to access the USB device via an FTP site/third-party FTP client utility, Servers Center, Samba, or AiCloud. For more details, refer to the section 3.5.Using the USB Application and 3.6 Using AiCloud in this user manual.
- Page 24 Safely removing the USB disk IMPORTANT! Incorrect removal of the USB disk may cause data corruption. To safely remove the USB disk: 1. From the navigation panel, go to General > Network Map. > Eject USB disk. When 2. In the upper right corner, click the USB disk is ejected successfully, the USB status shows Unmounted.
-
Page 25: Creating A Guest Network
The Guest Network provides temporary visitors with Internet connectivity via access to separate SSIDs or networks without providing access to your private network. NOTE: RT-AC58U supports up to six SSIDs (three 2.4GHz and three 5GHz SSIDs). To create a guest network: 1. - Page 26 4. To configure additional options, click Modify. 5. Click Yes on the Enable Guest Network screen. 6. Assign a wireless name for your temporary network on the Network Name (SSID) field. 7. Select an Authentication Method. 8. Select an Encryption method. 9.
-
Page 27: Using The Traffic Manager
3.3 Using the Traffic Manager 3.3.1 Managing QoS (Quality of Service) Bandwidth Quality of Service (QoS) allows you to set the bandwidth priority and manage network traffic. To set up bandwidth priority: 1. From the navigation panel, go to General > Traffic Manager > QoS tab. - Page 28 4. On the user-defined QoS rules page, there are four default online service types – web surf, HTTPs and file transfers. Select your preferred service, fill in the Source IP or MAC, Destination Port, Protocol, Transferred and Priority, then click Apply. The information will be configured in the QoS rules screen.
- Page 29 5. On the User-defined Priority page, you can prioritize the network applications or devices into five levels from the user- defined QoS rules’ dropdown list. Based on priority level, you can use the following methods to send data packets: • Change the order of upstream network packets that are sent to the Internet.
-
Page 30: Monitoring Traffic
3.3.2 Monitoring Traffic The traffic monitor function allows you to access the bandwidth usage and speed of your Internet, wired, and wireless networks. It allows you to monitor network traffic even on a daily basis. NOTE: Packets from the Internet are evenly transmitted to the wired and wireless devices. -
Page 31: Setting Up Parental Control
3.4 Setting up Parental Control Parental Control allows you to control the Internet access time. Users can set the time limit for a client’s network usage. To use the parental control function: 1. From the navigation panel, go to General > Parental control. 2. -
Page 32: Using The Usb Application
USB hard disk or USB flash drive, in the USB 2.0 port on the rear panel of your wireless router. Ensure that the USB storage device is formatted and partitioned properly. Refer to the ASUS website at http://event.asus.com/2009/networks/disksupport/ for the file system support table. - Page 33 3. Select the access rights that you want to assign to the clients accessing your shared data. 4. Create your domain name via the ASUS DDNS services, read the Terms of Service and then select I will use the service and accept the Terms of service and key in your domain name.
-
Page 34: Using Servers Center
You can also select Skip ASUS DDNS settings then click Next to skip the DDNS setting. 5. Click Finish to complete the setting. 6. To access the FTP site that you created, launch a web browser or a third-party FTP client utility and key in the ftp link (ftp://<domain name>.asuscomm.com) you have previously... - Page 35 To launch the Media Server setting page, go to General > USB application > Servers Center > Media Servers tab. Refer to the following for the descriptions of the fields: • Enable DLNA Media Server: Select ON/OFF to enable/ disable the DLNA Media Server. Enable iTunes Server?: Select ON/OFF to enable/disable the iTunes Server.
- Page 36 2. Follow the steps below to add, delete, or modify an account. To create a new account: a) Click to add new account. b) In the Account and Password fields, key in the name and password of your network client. Retype the password to confirm.
- Page 37 3. From the list of folders, select the type of access permission that you want to assign for specific folders: • R/W: Select this option to assign read/write access. • R: Select this option to assign read-only access. • No: Select this option if you do not want to share a specific file folder.
- Page 38 To use FTP Share service: Ensure that you have set up your FTP server through NOTE: AiDisk. For more details, refer to the section 3.5.1 Using AiDisk. 1. From the navigation panel, click General > USB application > Servers Center > FTP Share tab. 2.
-
Page 39: G/4G
3.5.3 3G/4G 3G/4G USB modems can be connected to RT-AC58U to allow Internet access. NOTE: For a list of verified USB modems, please visit: http://event.asus.com/2009/networks/3gsupport/ To set up 3G/4G internet access: 1. From the navigation panel, click General > USB application >... - Page 40 NOTE: PIN code may vary from different providers. • Username / Password: The username and password will be provided by the 3G/4G network carrier. • USB Adapter: Choose your USB 3G / 4G adapter from the dropdown list. If you are not sure of your USB adapter’s model or the model is not listed in the options, select Auto.
-
Page 41: Using Aicloud
To use AiCloud: 1. From Google Play Store or Apple Store, download and install the ASUS AiCloud app to your smart device. 2. Connect your smart device to your network. Follow the instructions to complete the AiCloud setup process. -
Page 42: Cloud Disk
1. Insert a USB storage device into the wireless router. 2. Turn on Cloud Disk. 3. Go to https://router.asus.com and enter the router login account and password. For better user experience, we recommend that you use Google Chrome or Firefox. - Page 43 4. You can now start accessing Cloud Disk files on devices connected to the network. NOTE: When accessing the devices that are connected to the network, you need to enter the device’s user name and password manually, which will not be saved by AiCloud for security reason.
-
Page 44: Smart Access
3.6.2 Smart Access The Smart Access function allows you to easily access your home network via your router’s domain name. NOTES: • You can create a domain name for your router with ASUS DDNS. For more details, refer to section 4.3.5 DDNS. • By default, AiCloud provides a secure HTTPS connection. Key in https://[yourASUSDDNSname].asuscomm.com for a very secure Cloud Disk and Smart Access usage. -
Page 45: Smart Sync
1. Launch AiCloud, click Smart Sync > Go. 2. Select ON to enable Smart Sync. 3. Click Add new account. 4. Enter your ASUS WebStorage account password and select the directory that you want to sync with WebStorage. 5. Click Apply. -
Page 46: Configuring The Advanced Settings
Configuring the Advanced Settings 4.1 Wireless 4.1.1 General The General tab allows you to configure the basic wireless settings. To configure the basic wireless settings: 1. From the navigation panel, go to Advanced Settings > Wireless > General tab. 2. Select 2.4GHz or 5GHz as the frequency band for your wireless network. - Page 47 4. In the Hide SSID field, select Yes to prevent wireless devices from detecting your SSID. When this function is enabled, you would need to enter the SSID manually on the wireless device to access the wireless network. 5. Select any of these wireless mode options to determine the types of wireless devices that can connect to your wireless router: • Auto: Select Auto to allow 802.11AC, 802.11n, 802.11g, and...
- Page 48 • WPA/WPA2 Personal/WPA Auto-Personal: This option provides strong security. You can use either WPA (with TKIP) or WPA2 (with AES). If you select this option, you must use TKIP + AES encryption and enter the WPA passphrase (network key). • WPA/WPA2 Enterprise/WPA Auto-Enterprise: This option provides very strong security.
-
Page 49: Wps
4.1.2 WPS WPS (Wi-Fi Protected Setup) is a wireless security standard that allows you to easily connect devices to a wireless network. You can configure the WPS function via the PIN code or WPS button. NOTE: Ensure that the devices support WPS. To enable WPS on your wireless network: 1. - Page 50 NOTE: WPS supports authentication using Open System, WPA-Personal, and WPA2-Personal. WPS does not support a wireless network that uses a Shared Key, WPA-Enterprise, WPA2-Enterprise, and RADIUS encryption method. 3. In the WPS Method field, select Push Button or Client PIN code.
-
Page 51: Wireless Mac Filter
4.1.3 Wireless MAC Filter Wireless MAC filter provides control over packets transmitted to a specified MAC (Media Access Control) address on your wireless network. To set up the Wireless MAC filter: 1. From the navigation panel, go to Advanced Settings > Wireless >... -
Page 52: Radius Setting
4.1.4 RADIUS Setting RADIUS (Remote Authentication Dial In User Service) Setting provides an extra layer of security when you choose WPA- Enterprise, WPA2-Enterprise, or Radius with 802.1x as your Authentication Mode. To set up wireless RADIUS settings: 1. Ensure that the wireless router’s authentication mode is set to WPA-Enterprise, WPA2-Enterprise, or Radius with 802.1x. -
Page 53: Professional
4.1.5 Professional The Professional screen provides advanced configuration options. NOTE: We recommend that you use the default values on this page. In the Professional Settings screen, you can configure the following: • Frequency: Select the frequency band that the professional settings will be applied to. - Page 54 • Date to Enable Radio (weekend): You can specify which days of the weekend wireless networking is enabled. • Time of Day to Enable Radio: You can specify a time range when wireless networking is enabled during the weekend. • Set AP isolated: The Set AP isolated item prevents wireless devices on your network from communicating with each other.
-
Page 55: Lan
• Wireless multicast forwarding: Select Enable to allow the wireless router to forward multicast traffic to other wireless devices that support multicast. Select Disable to prevent the router from forwarding multicast transmissions. • Enable WMM APSD: Enable WMM APSD (Wi-Fi Multimedia Automatic Power Save Delivery) to improve power management between wireless devices. -
Page 56: Dhcp Server
To modify the LAN IP settings: 1. From the navigation panel, go to Advanced Settings > LAN > LAN IP tab. 2. Modify the IP address and Subnet Mask. 3. When done, click Apply. 4.2.2 DHCP Server Your wireless router uses DHCP to assign IP addresses automatically on your network. - Page 57 3. In the Domain Name text box, enter a domain name for the wireless router. 4. In the IP Pool Starting Address field, key in the starting IP address. 5. In the IP Pool Ending Address field, key in the ending IP address.
-
Page 58: Route
4.2.3 Route If your network makes use of more than one wireless router, you can configure a routing table to share the same Internet service. NOTE: We recommend that you do not change the default route settings unless you have advanced knowledge of routing tables. To configure the LAN Routing table: 1. -
Page 59: Iptv
4.2.4 IPTV The wireless router supports connection to IPTV services through an ISP or a LAN. The IPTV tab provides the configuration settings needed to set up IPTV, VoIP, multicasting, and UDP for your service. Contact your ISP for specific information regarding your service. -
Page 60: Wan
4.3 WAN 4.3.1 Internet Connection The Internet Connection screen allows you to configure the settings of various WAN connection types. To configure the WAN connection settings: 1. From the navigation panel, go to Advanced Settings > WAN > Internet Connection tab. 2. - Page 61 • Enable WAN: Select Yes to allow the router Internet access. Select No to disable Internet access. • Enable NAT: NAT (Network Address Translation) is a system where one public IP (WAN IP) is used to provide Internet access to network clients with a private IP address in a LAN. The private IP address of each network client is saved in a NAT table and is used to route incoming data packets.
- Page 62 To avoid connection issues due to an unregistered MAC address, you can: • Contact your ISP and update the MAC address associated with your ISP service. • Clone or change the MAC address of the ASUS wireless router to match the MAC address of the previous networking device recognized by the ISP.
-
Page 63: Port Trigger
4.3.2 Port Trigger Port range triggering opens a predetermined incoming port for a limited period of time whenever a client on the local area network makes an outgoing connection to a specified port. Port triggering is used in the following scenarios: • More than one local client needs port forwarding for the same application at a different time. -
Page 64: Virtual Server/Port Forwarding
• Trigger Port: Specify a trigger port to open the incoming port. • Protocol: Select the protocol, TCP, or UDP. • Incoming Port: Specify an incoming port to receive inbound data from the Internet. • Protocol: Select the protocol, TCP, or UDP. NOTES: • When connecting to an IRC server, a client PC makes an outgoing connection using the trigger port range 66660-7000. - Page 65 NOTE: When port forwarding is enabled, the ASUS router blocks unsolicited inbound traffic from the Internet and only allows replies from outbound requests from the LAN. The network client does not have access to the Internet directly, and vice versa.
- Page 66 2. Configure the following settings below. When done, click Apply. • Enable Port Forwarding: Choose Yes to enable Port Forwarding. • Famous Server List: Determine which type of service you want to access. • Famous Game List: This item lists ports required for popular online games to work correctly.
- Page 67 • You will need a client outside your LAN but has Internet access (referred to as “Internet client”). This client should not be connected to the ASUS router. • On the Internet client, use the router’s WAN IP to access the server.
-
Page 68: Dmz
4.3.4 DMZ Virtual DMZ exposes one client to the Internet, allowing this client to receive all inbound packets directed to your Local Area Network. Inbound traffic from the Internet is usually discarded and routed to a specific client only if port forwarding or a port trigger has been configured on the network. -
Page 69: Ddns
DNS name rather than WAN IP address. • Server and Host Name: Choose ASUS DDNS or other DDNS. If you want to use ASUS DDNS, fill in the Host Name in the format of xxx.asuscomm.com (xxx is your host name). -
Page 70: Nat Passthrough
• Enable wildcard: Enable wildcard if your DDNS service requires one. NOTES: DDNS service will not work under these conditions: • When the wireless router is using a private WAN IP address (192.168. x.x, 10.x.x.x, or 172.16.x.x), as indicated by a yellow text. • The router may be on a network that uses multiple NAT tables. 4.3.6 NAT Passthrough NAT Passthrough allows a Virtual Private Network (VPN) connection to pass through the router to the network clients. -
Page 71: Ipv6
4.4 IPv6 This wireless router supports IPv6 addressing, a system that supports more IP addresses. This standard is not yet widely available. Contact your ISP if your Internet service supports IPv6. To set up IPv6: 1. From the navigation panel, go to Advanced Settings > IPv6. 2. -
Page 72: Firewall
4.5 Firewall The wireless router can serve as a hardware firewall for your network. NOTE: The Firewall feature is enabled by default. 4.5.1 General To set up basic Firewall settings: 1. From the navigation panel, go to Advanced Settings > Firewall >... -
Page 73: Keyword Filter
To set up a URL filter: 1. From the navigation panel, go to Advanced Settings > Firewall > URL Filter tab. 2. On the Enable URL Filter field, select Enabled. 3. Enter a URL and click the button. 4. Click Apply. 4.5.3 Keyword filter Keyword filter blocks access to webpages containing specified keywords. -
Page 74: Network Services Filter
3. Enter a word or phrase and click the Add button. 4. Click Apply. NOTES: • The Keyword Filter is based on a DNS query. If a network client has already accessed a website such as http://www.abcxxx.com, then the website will not be blocked (a DNS cache in the system stores previously visited websites). - Page 75 To set up a Network Service filter: 1. From the navigation panel, go to Advanced Settings > Firewall > Network Service Filter tab. 2. On the Enable Network Services Filter field, select Yes. 3. Select the Filter table type. Black List blocks the specified network services.
-
Page 76: Administration
4.6 Administration 4.6.1 Operation Mode The Operation Mode page allows you to select the appropriate mode for your network. To set up the operating mode: 1. From the navigation panel, go to Advanced Settings > Administration > Operation Mode tab. 2. -
Page 77: System
4.6.2 System The System page allows you to configure your wireless router settings. To set up the System settings: 1. From the navigation panel, go to Advanced Settings > Administration > System tab. 2. You can configure the following settings: • Change router login password: You can change the password and login name for the wireless router by entering a new name and password. -
Page 78: Firmware Upgrade
4.6.3 Firmware Upgrade NOTE: Download the latest firmware from the ASUS website at http://www.asus.com To upgrade the firmware: 1. From the navigation panel, go to Advanced Settings > Administration > Firmware Upgrade tab. 2. In the New Firmware File field, click Browse to locate the downloaded file. -
Page 79: System Log
4.7 System Log System Log contains your recorded network activities. NOTE: System log resets when the router is rebooted or powered off. To view your system log: 1. From the navigation panel, go to Advanced Settings > System Log. 2. You can view your network activities in any of these tabs: • General Log • DHCP Leases • Wireless Log... -
Page 80: Utilities
• W indows Printer Utility v1.0.5.5 at http://dlcdnet.asus.com/pub/ ASUS/LiveUpdate/Release/Wireless/Printer.zip • The utilities are not supported on MAC OS. 5.1 Device Discovery Device Discovery is an ASUS WLAN utility that detects an ASUS wireless router device, and allows you to configure the wireless networking settings. To launch the Device Discovery utility: • From your computer’s desktop, click Start >... -
Page 81: Firmware Restoration
5.2 Firmware Restoration Firmware Restoration is used on an ASUS Wireless Router that failed during its firmware upgrading process. It uploads the firmware that you specify. The process takes about three to four minutes. IMPORTANT: Launch the rescue mode on the router before using the Firmware Restoration utility. -
Page 82: Setting Up Your Printer Server
5.3 Setting up your printer server 5.3.1 ASUS EZ Printer Sharing ASUS EZ Printing Sharing utility allows you to connect a USB printer to your wireless router’s USB port and set up the print server. This allows your network clients to print and scan files wirelessly. - Page 83 NOTE: Network printer utility is supported on Windows® XP, Windows® Vista, and Windows® 7 only. To install the utility on Mac OS, select Use LPR protocol for sharing printer. 3. Unzip the downloaded file and click the Printer icon to run the network printer setup program.
- Page 84 4. Follow the onscreen instructions to set up your hardware, then click Next. 5. Wait a few minutes for the initial setup to finish. Click Next. 6. Click Finish to complete the installation.
- Page 85 7. Follow the Windows OS instructions to install the printer driver. ® 8. After the printer’s driver installation is complete, network clients can now use the printer.
-
Page 86: Using Lpr To Share Printer
5.3.2 Using LPR to Share Printer You can share your printer with computers running on Windows® and MAC operating system using LPR/LPD (Line Printer Remote/ Line Printer Daemon). Sharing your LPR printer To share your LPR printer: 1. From the Windows® desktop, click Start > Devices and Printers >... - Page 87 3. Select Create a new port then set Type of Port to Standard TCP/IP Port. Click New Port. 4. In the Hostname or IP address field, key in the IP address of the wireless router then click Next.
- Page 88 5. Select Custom then click Settings. 6. Set Protocol to LPR. In the Queue Name field, key in LPRServer then click OK to continue.
- Page 89 7. Click Next to finish setting up the standard TCP/IP port. 8. Install the printer driver from the vendor-model list. If your printer is not in the list, click Have Disk to manually install the printer drivers from a CD-ROM or file.
- Page 90 9. Click Next to accept the default name for the printer. Click Finish to complete the installation.
-
Page 91: Download Master
5.4 Download Master Download Master is a utility that helps you download files even while your laptops or other devices are switched off. NOTE: You need a USB device connected to the wireless router to use Download Master. To use Download Master: 1. -
Page 92: Configuring Bit Torrent Download Settings
5. Use the navigation panel to configure the advanced settings. 5.4.1 Configuring Bit Torrent download settings To configure BitTorrent download settings: 1. From Download Master’s navigation panel, click Bit Torrent to launch the Bit Torrent Setting page. 2. Select a specific port for your download task. 3. -
Page 93: Nzb Settings
5.4.2 NZB settings You can set up a USENET server to download NZB files. After entering USENET settings, Apply. -
Page 94: Troubleshooting
1. Launch the Web GUI. Go to Advanced Settings > Administration > Firmware Upgrade tab. Click Check to verify if the latest firmware is available. 2. If the latest firmware is available, visit the ASUS global website at http://www.asus.com/Networks/Wireless_Routers/ to download the latest firmware. - Page 95 SSID (wireless network name), encryption method, and password are correct. Check if your network settings are correct. • Each client on the network should have a valid IP address. ASUS recommends that you use the wireless router’s DHCP server to assign IP addresses to computers on your network.
- Page 96 • Some cable modem service providers require you to use the MAC address of the computer initially registered on the account. You can view the MAC address in the web GUI, Network Map > Clients page, and hover the mouse pointer over your device in Client Status.
-
Page 97: Frequently Asked Questions (Faqs)
6.2 Frequently Asked Questions (FAQs) I cannot access the router GUI using a web browser • If your computer is wired, check the Ethernet cable connection and LED status as described in the previous section. • Ensure that you are using the correct login information. The default factory login name and password is “admin/admin”. Ensure that the Caps Lock key is disabled when you enter the login information. - Page 98 The client cannot establish a wireless connection with the router. NOTE: If you are having issues connecting to 5Ghz network, make sure that your wireless device supports 5Ghz or features dual band capabilities. • Out of Range: • Move the router closer to the wireless client. • T ry to adjust antennas of the router to the best direction as described in section 1.4 Positioning your router.
- Page 99 • SSID has been hidden. If your device can find SSIDs from other routers but cannot find your router’s SSID, go to Advanced Settings > Wireless > General, select No on Hide SSID, and select Auto on Control Channel. • If you are using a wireless LAN adapter, check if the wireless channel in use conforms to the channels available in your country/area.
- Page 100 Internet is not accessible. • Check if your router can connect to your ISP’s WAN IP address. To do this, launch the web GUI and go to General> Network Map, and check the Internet Status. • If your router cannot connect to your ISP’s WAN IP address, try restarting your network as described in the section Restart your network in following sequence under Basic Troubleshooting.
- Page 101 The following are the factory default settings: User Name: admin Password: admin IP address: router.asus.com SSID (2.4GHz): Refer to the label at the bottom of the router SSID (5GHz): Refer to the label at the bottom of the router Firmware upgrade failed.
- Page 102 Cannot access Web GUI Before configuring your wireless router, do the steps described in this section for your host computer and network clients. Disable the proxy server, if enabled. NOTE: The screenshots provided are for Windows® 7 only. The steps and options may be different for Windows®...
- Page 103 MAC OS 1. From your Safari browser, click Safari > Preferences > Advanced > Change Settings... 2. From the Network screen, deselect FTP Proxy and Web Proxy (HTTP). 3. Cllick Apply Now when done. NOTE: Refer to your browser's help feature for details on disabling the proxy server.
- Page 104 3. To obtain the IPv4 IP settings automatically, tick Obtain an IP address automatically. To obtain the IPv6 IP settings automatically, tick Obtain an IPv6 address automatically. 4. Click OK when done. MAC OS 1. Click the Apple icon located on the top left of your screen.
- Page 105 Disable the dial-up connection, if enabled. Windows ® 1. Click Start > Internet Explorer to launch the browser. 2. Click Tools > Internet options > Connections tab. 3. Tick Never dial a connection. 4. Click OK when done. NOTE: Refer to your browser's help feature for details on disabling the dial-up connection.
-
Page 106: Appendices
We believe in providing solutions for you to be able to responsibly recycle our products, batteries, other components, as well as the packaging materials. Please go to http://csr.asus. com/english/Takeback.htm for the detailed recycling information in different regions. - Page 107 against harmful interference in a residential installation. This equipment generates, uses and can radiate radio frequency energy and, if not installed and used in accordance with the instructions, may cause harmful interference to radio communications. However, there is no guarantee that interference will not occur in a particular installation.
-
Page 108: Safety Information
Radio Frequency (RF) Exposure Information The radiated output power of the ASUS Wireless Device is below the Industry Canada (IC) radio frequency exposure limits. The ASUS Wireless Device should be used in such a manner such that the potential for human contact during normal operation is minimized. - Page 109 Canada, avis d’Industry Canada (IC) Cet appareil numérique de classe B est conforme aux normes canadiennes ICES-003 et RSS-210. Son fonctionnement est soumis aux deux conditions suivantes: (1) cet appareil ne doit pas causer d’interférence et (2) cet appareil doit accepter toute interférence, notamment les interférences qui peuvent a ecter son fonctionnement.
-
Page 110: Licensing Information
GNU General Public License Licensing information This product includes copyrighted third-party software licensed under the terms of the GNU General Public License. Please see The GNU General Public License for the exact terms and conditions of this license. All future firmware updates will also be accompanied with their respective source code. - Page 111 price. Our General Public Licenses are designed to make sure that you have the freedom to distribute copies of free software (and charge for this service if you wish), that you receive source code or can get it if you want it, that you can change the software or use pieces of it in new free programs;...
- Page 112 that any patent must be licensed for everyone’s free use or not licensed at all. The precise terms and conditions for copying, distribution and modification follow. Terms & conditions for copying, distribution, & modification 0. This License applies to any program or other work which contains a notice placed by the copyright holder saying it may be distributed under the terms of this General Public License.
- Page 113 2. You may modify your copy or copies of the Program or any portion of it, thus forming a work based on the Program, and copy and distribute such modifications or work under the terms of Section 1 above, provided that you also meet all of these conditions: a) You must cause the modified files to carry prominent notices stating that...
- Page 114 In addition, mere aggregation of another work not based on the Program with the Program (or with a work based on the Program) on a volume of a storage or distribution medium does not bring the other work under the scope of this License.
- Page 115 If distribution of executable or object code is made by offering access to copy from a designated place, then offering equivalent access to copy the source code from the same place counts as distribution of the source code, even though third parties are not compelled to copy the source along with the object code.
- Page 116 License, they do not excuse you from the conditions of this License. If you cannot distribute so as to satisfy simultaneously your obligations under this License and any other pertinent obligations, then as a consequence you may not distribute the Program at all. For example, if a patent license would not permit royalty-free redistribution of the Program by all those who receive copies directly or indirectly through you, then the only way you could satisfy both it and this License would be to...
- Page 117 versions of the General Public License from time to time. Such new versions will be similar in spirit to the present version, but may differ in detail to address new problems or concerns. Each version is given a distinguishing version number. If the Program specifies a version number of this License which applies to it and “any later version”, you have the option of following the terms and conditions either of that version or of...
- Page 118 NO WARRANTY 11 BECAUSE THE PROGRAM IS LICENSED FREE OF CHARGE, THERE IS NO WARRANTY FOR THE PROGRAM, TO THE EXTENT PERMITTED BY APPLICABLE LAW. EXCEPT WHEN OTHERWISE STATED IN WRITING THE COPYRIGHT HOLDERS AND/OR OTHER PARTIES PROVIDE THE PROGRAM “AS IS” WITHOUT WARRANTY OF ANY KIND, EITHER EXPRESSED OR IMPLIED, INCLUDING, BUT NOT LIMITED TO, THE IMPLIED WARRANTIES OF MERCHANTABILITY AND FITNESS FOR A PARTICULAR PURPOSE.
- Page 119 For Turkey only Authorised distributors in Turkey: BOGAZICI BIL GISAYAR SAN. VE TIC. A.S. Tel. No.: +90 212 3311000 Address: AYAZAGA MAH. KEMERBURGAZ CAD. NO.10 AYAZAGA/ISTANBUL CIZGI Elektronik San. Tic. Ltd. Sti. Tel. No.: +90 212 3567070 Address: CEMAL SURURI CD. HALIM MERIC IS MERKEZI No: 15/C D:5-6 34394 MECIDIYEKOY/ ISTANBUL KOYUNCU ELEKTRONiK BiLGi iSLEM SiST.
-
Page 120: Asus Contact Information
ASUS COMPUTER INTERNATIONAL (America) Address 8 00 Corporate Way, Fremont, CA 94539, USA Telephone +15107393777 Fax +15106084555 Website usa.asus.com Online support support.asus.com ASUS COMPUTER GmbH (Germany and Austria) Address H arkort Str. 21-23, D-40880 Ratingen, Germany Support Fax +49-2102-959931 Website asus.com/de Online contact eu-rma.asus.com/sales Technical Support Telephone (Component) +49-2102-5789555 Telephone Germany... -
Page 121: Networks Global Hotline Information
Slovak Republic 00421-232162621 08:00-17:00 Mon-Fri Czech Republic 00420-596766888 08:00-17:00 Mon-Fri Switzerland-German 0041-848111010 09:00-18:00 Mon-Fri Switzerland-French 0041-848111014 09:00-18:00 Mon-Fri Switzerland-Italian 0041-848111012 09:00-18:00 Mon-Fri United Kingdom 0044-1442265548 09:00-17:00 Mon-Fri Ireland 0035-31890719918 09:00-17:00 Mon-Fri Russia and CIS 008-800-100-ASUS 09:00-18:00 Mon-Fri Ukraine 0038-0445457727 09:00-18:00 Mon-Fri... - Page 122 Networks Global Hotline Information Region Country Hotline Numbers Service Hours Australia 1300-278788 09:00-18:00 Mon-Fri New Zealand 0800-278788 09:00-18:00 Mon-Fri Japan 09:00-18:00 Mon-Fri 0800-1232787 09:00-17:00 Sat-Sun 09:00-18:00 Mon-Fri 0081-570783886 ( Non-Toll Free ) 09:00-17:00 Sat-Sun Korea 0082-215666868 09:30-17:00 Mon-Fri Thailand 0066-24011717 09:00-18:00 Mon-Fri 1800-8525201 Singapore...
- Page 123 Countries Croatia 00385-16401111 09:00-17:00 Mon-Fri Montenegro 00382-20608251 09:00-17:00 Mon-Fri Serbia 00381-112070677 09:00-17:00 Mon-Fri Slovenia 00368-59045400 08:00-16:00 Mon-Fri 00368-59045401 Estonia 00372-6671796 09:00-18:00 Mon-Fri Latvia 00371-67408838 09:00-18:00 Mon-Fri Lithuania-Kaunas 00370-37329000 09:00-18:00 Mon-Fri Lithuania-Vilnius 00370-522101160 09:00-18:00 Mon-Fri NOTES: • UK support e-mail: network_support_uk@asus.com • For more information, visit the ASUS support site at: http://support.asus.com...
- Page 124 ASUSTeK Computer Inc. Tel: +886-2-2894-3447 Address: 4F, No. 150, LI-TE RD., PEITOU, TAIPEI 112, TAIWAN Authorised representative in Europe ASUS Computer GmbH Address: HARKORT STR. 21-23, 40880 RATINGEN, GERMANY Authorised distributors in Turkey BOGAZICI BIL GISAYAR SAN. VE TIC. A.S.