Table of Contents
Advertisement
Quick Links
Advertisement
Table of Contents

Related Manuals for Siemens HP243525M


Summary of Contents for Siemens HP243525M
- Page 1 Instruction manual HP243525M...
- Page 3 In the unlikely event of a fault, look here for information on how to rectify minor faults yourself. A detailed table of contents will help you to find your way around quickly. Enjoy your meal! Instruction manual HP243525M 9000485591 S-190290-03...
-
Page 4: Table Of Contents
Table of contents Safety information ....... . Before installation ........Information for your safety . - Page 5 Table of contents Upper glass cover ........Cleaning agents .
-
Page 6: Safety Information
d Safety information Read this instruction manual carefully. Keep the instruction and the installation manuals, as well as the various accessories, in a safe place. Please pass on these manuals and the accessories to the new owner if you sell the appliance. Before installation Transport damage Check the appliance for damage after unpacking it. - Page 7 Electricity/gas lines must not touch the rear of the appliance. When the appliance is in operation, the rear of the appliance heats up. This can cause damage to the power cables. Never trap cables of electrical appliances in the hot oven door or pull over the hot cooking surfaces.
- Page 8 Do not hang highly combustible materials, such as curtains, near this appliance. You must not operate the hob if there are no pans on the cooking zones. Grease deposits in the filter of the extractor hood may ignite. The high heat may damage the cooker hood. There is a risk of fire.
-
Page 9: Causes Of Damage
Causes of damage Always use the burners by placing a saucepan on Damage in the cooking area (hob) them. Do not heat empty pans or saucepans. The bottom of the saucepans would be damaged. The bottom of the saucepan must be flat. The saucepan must be centred on the burners. -
Page 10: Gas Connection
Gas connection Installation must be carried out only by authorised personnel or a service employee authorised by the manufacturer and in accordance with the "Gas connection and conversion guidelines". The setting requirements for this appliance are noted For the authorised personnel or service on the identification plate located on the back of the employee authorised... -
Page 11: Problems With The Gas Installation / Smell Of Gas
The rated working pressure of your appliance is: Safety information for natural gas (G20) 20 mbar; for LPG (G30) 30 mbar; for LPG (G31) 37 mbar. Your appliance must be operated with these pressures. All the information on the rating plate of your appliance is based on these pressures. -
Page 12: Electrical Connection
Electrical Installation must be carried out by an authorised connection service employee. A 16A circuit breaker is required for the connection. The appliance has been designed to be used with 220 240V mains current. If the voltage drops below 180 V, then the electrical igniter system will not function. -
Page 13: Energy And Environment Tips
Energy and environment tips Here you can find tips on how to save energy when baking and roasting in the oven and when cooking on the hob and how to dispose of your appliance properly. Environmentally friendly disposal Dispose of packaging in an environmentally friendly manner. -
Page 14: Saving Energy With The Hob
Saving energy with the hob Always use a saucepan which is the correct size for your food. A larger, less full saucepan requires a lot of energy. Always place a suitable lid on the saucepan. The gas flame must always be in contact with the base of the saucepan. -
Page 15: Positioning The Appliance
Positioning the appliance The product must be installed in accordance with the dimensions provided and it must be placed directly on the kitchen floor. It should not be placed over another object. The distance between the top of the cooker and the lower part of the hood should be adjusted according to the guidelines provided by the hood manufacturers. -
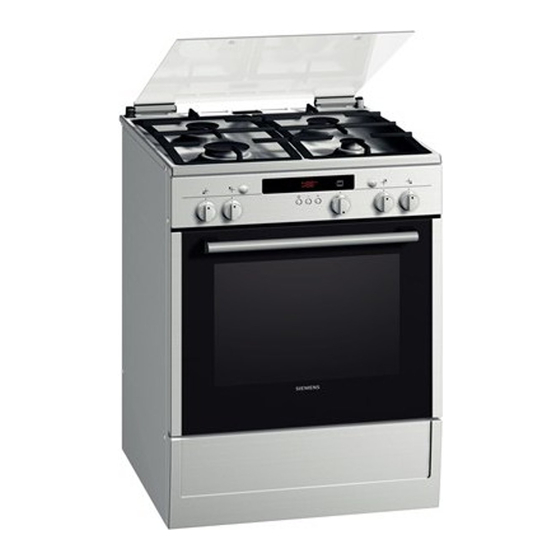
Page 16: Your New Oven
Your new oven This section will familiarise you with your new appliance. With the help of your user guide, you will learn about the hob, the oven and the accessories. Upper lid Steam outlet The upper lid must be open when the Important: when the oven appliance is in operation. -
Page 17: Hob
Steam outlet Caution: Hot air is released from here. Normal burner Normal burner Power burner Economy burner Heating efficiency Diameters of pots and pans of the burners suitable for the burners Economy burner 1 kW 12 18 cm Normal burner 1.75 kW 18 24 cm Power burner 3 kW... - Page 18 Hotplate controls You can use the four hotplate controls to control the heat output provided by each hotplate. Setting Function/gas burners Off position Ú • – Settings range Large flame = highest power Economy flame = lowest power At the end of the settings range there is a limit stop. Please do not turn the knob beyond this stop.
-
Page 19: Oven
Oven Heating efficiency of the burners Lower gas burner in oven 3 kW Gas grill in oven 2.1 kW Function selector switch Turn the function selector switch to the left to heat the oven or turn it to the right to select the grill function. Settings 150 270 The temperature range that is used for... - Page 20 Control buttons and display panel Clock button j Use this button to set the timer a and the cooking time ?. Minus button Use this button to reduce the values set. Plus button + Use this button to increase the values set.
- Page 21 Aluminium baking tray For cakes and biscuits. Push the baking tray into the oven with the sloping edge facing towards the oven door. Protective sheet To use during grilling. Use the protective sheet to protect control panel and buttons from overheating. Install the protective sheet in the channel which is located underneath the front panel, whilst keeping the oven door open.
- Page 22 Glass pan HZ 336000 A deep baking tray made of glass. Can also be used as a serving dish. Enamel baking tray with non stick Cakes and biscuits can be removed more easily from the baking coating HZ 331010 tray. Push the baking tray into the oven with the sloping edge facing towards the oven door.
-
Page 23: Before Using For The First Time
Before using for the first time In this section you will find out about everything you need to do before using the oven for the first time. Read the safety information in the section "Important information". Clean the accessories. When the ? symbol Press the j clock switch. - Page 24 2. Keep on pushing the function selector switch of the oven and push the ignition button at the same time. 3. The gas coming out of the lower gas burner of the oven is ignited by the ignition button. Keep on pushing the function selector button on the oven for about 10 seconds to activate the safety system.
-
Page 25: Pre Cleaning The Burner Body And Upper Cover
3. Pushing the function selector button, turn it to the right and select the grill function #. 4. Keep on pushing the function selector switch of the oven and push the ignition button at the same time. 5. The gas released from the gas grill of the oven is ignited by the ignition button. -
Page 26: Pre Cleaning The Accessories
Pre cleaning the accessories Please wash the accessories thoroughly with soapy water and a cleaning cloth before using them. Making settings on the hob The hob is equipped with 4 burners. Here you will see how to light the gas burners. Lighting the burners Ensure that the burner casings are correctly fitted and the caps sit exactly on top. -
Page 27: Hotplate Settings Table
5. Set the required height of the flame. The flame does not burn constantly in the range between • (switched off) and • (large flame). Therefore, always set the height of the flame to a setting between the • large flame and – small flame. - Page 28 Example: Food Hotplate Heat setting Heating up and keeping warm Soups Economy burner Small flame size Steaming* Fish Regular burner Between large and small flame size Boiling* Potatoes and other Regular burner Between large vegetables, meat and small flame size Cooking* Rice (Pilaf), Regular burner...
-
Page 29: The Lower Gas Burner Can Be Adjusted As Follows
Setting up the oven Tables and tips You can find the appropriate standards for many different foods here. The lower gas burner can be Igniting the lower gas burner, you can bake on a single tray, keeping the oven lid closed. adjusted as follows Example: Baking at: 150 ºC 1. -
Page 30: The Oven Grill Is Adjusted As Follows
Safety system If the gas coming out of the oven burner is turned off for some reason, the safety system will be activated and the gas flow cut. Do not use the ignition system for more than 15 seconds. If the burner does not ignite within 15 seconds, stop using the mechanism and wait for at least 1 minute before you attempt to ignite the burner once again. - Page 31 5. Pushing the function selector button, turn it to the right and select the grill function #. 6. Keep on pushing the function selector switch of the oven and push the ignition button at the same time. 7. The gas released from the gas grill of the oven is ignited by the ignition button.
-
Page 32: Timer
Timer You can use the timer as a kitchen timer. It operates independently of the oven. The timer has a special signal. This means that you can tell whether the set timer period has elapsed or the cooking time is complete. Setting procedure Example: 20 minutes 1. - Page 33 3. Set the timer period using the + or - button. The timer starts after a few seconds. The a symbol lights up in the display. The time counts down visibly. A signal sounds. Press the j clock button. The The time has elapsed display goes out.
-
Page 34: Basic Settings
Basic settings Your oven has several basic settings. You can change the basic settings for the signal duration and the reset time for the setting. Basic setting Function Change to Signal duration Signal after cooking Signal duration 1 = approx. 2 = approx. -
Page 35: Care And Cleaning
2. Change the basic setting using the + or - button. 3. Confirm with the j clock button. A 2 for the basic setting of the reset time appears in the display. Change the basic setting as described in step 2 and press the j clock button. -
Page 36: Upper Glass Cover
Upper glass cover Clean the upper cover and dry the cover before opening it. Clean the upper cover with glass cleaning agents. You can remove the upper cover for cleaning if needed. To pull it out, hold it with both hands on both sides when the cover is open and pull it up. - Page 37 Stainless steel surfaces Clean with warm soapy water and a soft cloth. For stainless steel surfaces, always wipe in the direction of the grain so as not to scratch the surface. Dry with a soft cloth. Always remove any flecks of limescale, grease, starch and egg white immediately.
- Page 38 Metal ring of electric hotplate The colour of the metal ring changes over time. However, it is possible to restore the colour. Clean the ring with the scourer side of a sponge, using a cream detergent. Meanwhile, do not touch the other hob surfaces. They may be damaged. Knobs Clean with warm soapy water and a dish cloth.
-
Page 39: Detaching And Attaching The Oven Door
Detaching and attaching the oven For cleaning purposes and to remove the door panels, door you can detach the oven door. The oven door hinges each have a locking lever. When the locking levers are closed (Fig. A), the oven door is secured in place. - Page 40 Attaching the door Reattach the oven door in the reverse sequence to removal. 1. When attaching the oven door, ensure that both hinges are inserted straight into the opening (Fig. A). 2. The notch on the hinge must engage on both sides (Fig.
-
Page 41: Removing And Installing The Door Panels
Removing and installing the door To facilitate cleaning, you can remove the glass panels from the oven door. panels 1. Detach the oven door and lay on a cloth with the handle facing down. 2. Unscrew the cover on top of the oven door. To do this, undo the right and left hand screws. -
Page 42: Procedure To Be Applied In The Event Of A Fault
Procedure to be applied in the event of a fault Faults generally occur for simple reasons. Please note the following fault warnings before contacting the after sales service: Fault Possible reason Information/correcting Appliance is not operating. Plug is not connected to Connect the plug to the power the power socket. -
Page 43: Replacing The Bulb In The Oven Ceiling Light
Fault Possible reason Information/correcting The door seal has come Check the position and fitting of the out or is not correctly door seals, correct as required. assembled. The door seal is down. Replace the door gasket. Oven is not heating. Plug is not connected to Connect the plug to the power the power socket. -
Page 44: After Sales Service
4. Replace the bulb with one of the same type. 5. Screw on the glass cover again. 6. Remove the tea towel and switch on the circuit breaker. Replacing the glass cover You must replace a damaged glass cover. The replacement glass cover may be obtained from the after sales service. -
Page 45: Tested For You In Our Cooking Studio
Tested for you in our cooking studio Here you will find a selection of dishes and the ideal settings for them. We will show you which type of heating and which temperature are ideal for your dish. You can find information about suitable accessories and the height at which they should be inserted. -
Page 46: Cooking Tables For Oven Bottom Gas Burner
Cooking tables for Tableof instructions for putting cold food in the oven. oven bottom gas burner Heat right through the interior of the oven by burning the gas coming from the bottom burner. This means that the bottom section of the meals are better cooked. -
Page 47: Gas Operated Grill Pan
Gratin and casseroles Tin above grill Height Tempera Cooking time, ture ºC minutes Baked macaroni Rectangular glass dish Potato gratin Baking tin Vegetable casserole Earthenware casserole dishes Gas operated grill Table of guidelines for placing cold food in the oven. Meats should be turned over once three quarters of the grilling time has elapsed. - Page 48 HP243525M 9000 485591 SE S en S 190290-03...