Leviton DMX-512 Installation & Operation Manual
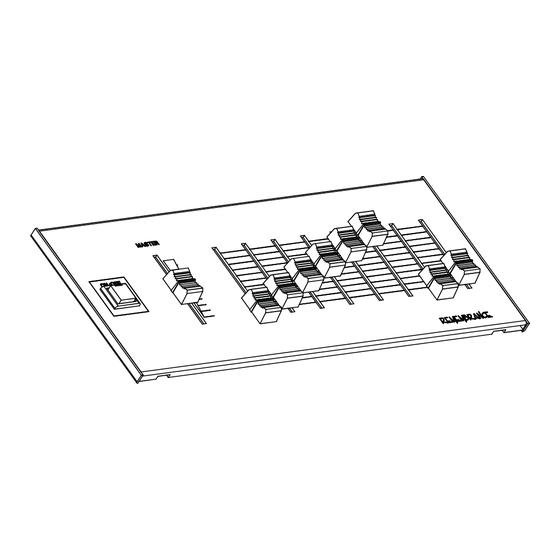
Remembrance control stations
Hide thumbs
Also See for DMX-512:
- User manual (40 pages) ,
- Installation and operating manual (21 pages) ,
- Quick reference manual (12 pages)
Table of Contents
Advertisement
Quick Links
Advertisement
Table of Contents

Subscribe to Our Youtube Channel
Related Manuals for Leviton DMX-512


Summary of Contents for Leviton DMX-512
- Page 1 Remembrance DMX-512 and Analog Control Stations Installation & Operation Guide...
-
Page 3: Table Of Contents
Take control PCB .................11 2 Channel Analog Fader PCB ............11 ANA-2-DMX Scene Processor PCB ..........11 System Design Considerations Place HHR or DMX-512 IN jacks near DMX stations ....13 Power Supply Requirements ............13 DMX Station Current Supply ..........13 Analog Station Current Demands .........14 Current Calculation Examples .............15... - Page 4 12 Channel Analog Station (Cat. No. 009-RMB81-012) ..38 Entry Station (Cat. No. 010-RMB81-021) ......39 Panic Station (Cat. No. 011-RMB81-022) ......40 4 Channel DMX-512 Station (Cat. No. 017-RMB81-104) ..41 6 Channel DMX-512 Station (Cat. No. 018-RMB81-106) ..42 12 Channel DMX-512 Station (Cat. No. 019-RMB81-112) ..43 0-10V Analog Dimmer ............44...
-
Page 5: System Overview
Remember when control stations could be set up as independents, or group them with masters all without having to have a lap top, memorize DMX-512, know Windows 95 or battle the great configuration labyrinths envisioned by dyslexic software engineers? Everything was modular and simple. -
Page 6: What Is Needed
What is needed? • 0-10 VDC or DMX-512 Dimmers/Ballast’s. • A DMX-512 Control Console for developing Scenes (DMX stations only). • A +12to +16 VDC Power Supply or Analog Stations (this power supply is not required when used in conjunction with a DMX Station. -
Page 7: Control Station Operation
Control Station Operation Play Mode Action Result • Press the ON/OFF (Panic) The LED will light, indicating button to activate the station. the station is active. An Entry or Panic station will automatically activate a scene. • Adjust Master Fader if The Master Fader proportionally applicable. -
Page 8: Dmx Snapshot Record Mode
DMX Snapshot Record Mode (For DMX control stations only) Action Result The removed jumper on JP1 puts • Insure JP1 Jumper is out on the Processor in DMX Snapshot ANA2DMX Processor. mode. • Insure Record Lock is off. Record Lock disables any attempt to record scenes. -
Page 9: Record Example
Action Result • Slide the Channel Fader up to This snapshots the DMX512 data full where the scene is to be stream, saving the entire scene recorded (continue to hold the under the proportional control ON/OFF button). of the channel fader that slid to full. -
Page 10: Dmx Channel Mode
DMX Channel Mode (For DMX control stations only) Action Result • Install Jumper JP1 on This puts processor in channel ANA2DMX PCB. mode. • Dial up the starting address on This selects the DMX start rotary switches SW1, SW2, and address for fader A1. -
Page 11: Component Functions Take Control Pcb
Component Functions Take control PCB The take control PCB has a single switch for ON/OFF operation. The take control PCB requires +12 to +16 Volts DC @ 25mA connected across +V and common to operate. The PCB provides a regulated +10.6 VDC source when the ON/OFF switch is activated (turned on) and 0 Volts when off. - Page 12 Finally, slide the fader up to full for the channel you wish to record the scene into. As long as the record lockout is not enabled, the scene will be saved onto that channel, and will proportionally fade relative to the slide pot.
-
Page 13: System Design Considerations
System Design Considerations Place HHR or DMX-512 IN jacks near DMX stations Place a Hand Held Remote Jack from the control console or a DMX- 512 IN Jack where the console could be plugged in near any station that will be used to snapshot scenes on a frequent basis. This way scenes can be activated from the console in the same place they are to be recorded. -
Page 14: Analog Station Current Demands
Analog Station Current Demands +V power supply requirements for a single station (+12 to +16 VDC) Station Type Catalog No. # of Gangs Entry Station 25mA 010-RMB81-021 Panic Station 25mA 011-RMB81-022 1 Channel 30mA 001-RMB81-001 Analog 2 Channel 30mA 002-RMB81-002 Analog 35mA 003-RMB81-003... -
Page 15: Current Calculation Examples
Current Calculation Examples 3 Grouped Stations Current demand calculation for qty 3, 6 channel stations connected in a group; T/C connected between stations, therefore only one station can be on at a time. +V Amps = 50mA (station 1) + 5mA (station 2) + 5mA (Station 3) = 60mA 3 Independent Stations Current demand calculation for qty 3, 6 channel stations connected... -
Page 16: System Cable Requirements
System Cable Requirements All DMX-512 lines ..........Belden # 9829 cable. All Analog lines .........Alpha # 1898/x C cable. 1000 feet MAX!! Where x = the # of conductors All AC1 and AC2 lines ........18 gauge 600V wire. Cross Referenced Analog Compatible Cable... -
Page 17: Eliminate Ground Loops
Apply the following rules: DMX daisy-chain configuration rules (Multiple DMX Stations connected in serial along one DMX-512 line) 1. Do not connect COM between DMX stations. -
Page 18: Dmx Bridge Rules
DMX bridge rules (2 or more DMX Stations tied together with COM, each processing its’ own DMX-512 line) 1. Tie stations together using COM. 2. Use a separate 10V/5VA transformer for each DMX Station. 3. Connect the shield drain wire to DGND on the DMX-1 station. -
Page 19: Advanced Topics
Advanced Topics Use of blocking (steering) Diodes What is a Diode? A diode is a one-way valve. It allows current to flow in a forward direction, but not in a reverse direction. The input is the anode, or un- banded end of the part; and the output is the cathode, or banded end of the part. - Page 20 The 1N4004 is considered a rectifier diode, and is excellent for high-current applications, like the take control circuitry, but it would perform poorly as a signal diode, because it requires significant current to operate properly. Page 20 of 48...
-
Page 21: Addendum
Addendum Concerning New REMEMBRANCE Preset Stations: Wiring Details 8 Preset Station: Refer to 8 Channel Analog Station Wiring Diagram and Colortran Production Drawings for connection (013-RMB81-028, details of this Preset Station in your specific system. 021-RMB81-148, 022-RMB81-188) 4 Preset Station: Refer to Colortran Production Drawings for connection details of this Preset Station in your (012-RMB81-024,... -
Page 22: Jumper Settings
Procedure 1. JP3 must be installed on this station. 2. Activate DMX-512 scene from control console or DMX-512 portion of control station. On I series e racks, or I series E Quad racks, a relative fade time for the preset may be... - Page 23 20% = 2 seconds 10% = 1 seconds 0% = Instantaneous 3. Turn off all other control sources, so only DMX-512 generated scene is active. 4. Press and hold the "OFF" Button. The "OFF" LED will turn and stay red.
-
Page 24: Sample System Configurations
Sample System Configurations Page 24 of 48... -
Page 25: Multi-Purpose Room With A/V Control Booth
Multi-Purpose Room With A/V Control Booth Page 25 of 48... -
Page 26: Small Church (All Analog Stations)
Small Church (All Analog Stations) Page 26 of 48... -
Page 27: Theater With Houselights / Rehearsal Lights
Theater With Houselights / Rehearsal Lights Page 27 of 48... -
Page 28: Dual Dmx-512 Bridge
Dual DMX-512 Bridge Page 28 of 48... -
Page 29: Wiring Diagrams
Wiring Diagrams Page 29 of 48... -
Page 30: Channel Analog Station (Cat. No. 001-Rmb81-001)
ON / OFF FRONT VIEW ANALOG CONTROL HARNESS ALPHA 1898/5C TO OTHER ORANGE BY OTHERS STATIONS NO CONNECT OR TO VOUT WHITE 0-10V DIMMERS BLACK GREEN-VOUT FROM ENTRY STATION / PANIC STATION REAR VIEW 2 GANG 3-1/2" DEEP FAIR 5/16" BACK BOX BY OTHERS ACCESS... -
Page 31: Channel Analog Station (Cat. No. 002-Rmb81-002)
ON / OFF FRONT VIEW ANALOG CONTROL HARNESS ALPHA BLUE 1898/6C TO OTHER ORANGE BY OTHERS STATIONS NO CONNECT OR TO VOUT WHITE 0-10V DIMMERS BLACK GREEN-VOUT FROM ENTRY STATION / PANIC STATION REAR VIEW 2 GANG 3-1/2" DEEP FAIR 5/16"... -
Page 32: Channel Analog Station (Cat. No. 003-Rmb81-003)
MASTER ON / OFF FRONT VIEW ANALOG CONTROL BROWN HARNESS ALPHA BLUE 1898/7C TO OTHER ORANGE BY OTHERS STATIONS NO CONNECT OR TO VOUT WHITE 0-10V DIMMERS BLACK GREEN-VOUT FROM ENTRY STATION / PANIC STATION REAR VIEW 4 GANG 3-1/2" DEEP FAIR 5/16"... -
Page 33: Channel Analog Station (Cat. No. 004-Rmb81-004)
MASTER ON / OFF FRONT VIEW ANALOG YELLOW CONTROL BROWN ALPHA HARNESS BLUE 1898/8C TO OTHER ORANGE BY OTHERS STATIONS NO CONNECT OR TO VOUT WHITE 0-10V DIMMERS BLACK GREEN-VOUT FROM ENTRY STATION / PANIC STATION REAR VIEW 4 GANG 3-1/2"... -
Page 34: Channel Analog Station (Cat. No. 005-Rmb81-005)
MASTER ON / OFF FRONT VIEW GRAY VIOLET ANALOG YELLOW CONTROL BROWN ALPHA HARNESS BLUE 1898/10C TO OTHER ORANGE BY OTHERS STATIONS NO CONNECT OR TO VOUT WHITE 0-10V DIMMERS BLACK GREEN-VOUT FROM ENTRY STATION / PANIC STATION REAR VIEW 5 GANG 3-1/2"... -
Page 35: Channel Analog Station (Cat. No. 006-Rmb81-006)
MASTER ON / OFF FRONT VIEW GRAY VIOLET ANALOG YELLOW CONTROL BROWN ALPHA HARNESS BLUE 1898/10C TO OTHER ORANGE BY OTHERS STATIONS NO CONNECT OR TO VOUT WHITE 0-10V DIMMERS BLACK GREEN-VOUT FROM ENTRY STATION / PANIC STATION REAR VIEW 5 GANG 3-1/2"... -
Page 36: Channel Analog Station (Cat. No. 007-Rmb81-008)
8 Channel Analog Station (Cat. No. 007-RMB81-008) Page 36 of 48... -
Page 37: Channel Analog Station (Cat. No. 008-Rmb81-010)
10 Channel Analog Station (Cat. No. 008-RMB81-010) Page 37 of 48... -
Page 38: Channel Analog Station (Cat. No. 009-Rmb81-012)
12 Channel Analog Station (Cat. No. 009-RMB81-012) Page 38 of 48... -
Page 39: Entry Station (Cat. No. 010-Rmb81-021)
ANALOG / DMX STATION TERMINATION REFERENCE ON / OFF PRP-31316-02 IS CALLED OUT SEPERATELY. SHOWN HERE FOR REFERENCE ONLY. WIRE NUT AS REQUIRED CONNECT AS BY OTHERS DESIRED TO TERMINALS ON PRP-31316-02 APPROPRIATE PRP-31316-02 ANALOG STATION. PRP-31316-02 PRP-31316-02 CONTROL FOR FRONT VIEW PRP-31316-02 CHANNELS 1... -
Page 40: Panic Station (Cat. No. 011-Rmb81-022)
ANALOG / DMX STATION TERMINATION REFERENCE PANIC PRP-31316-02 IS CALLED OUT SEPERATELY. SHOWN HERE FOR REFERENCE ONLY. WIRE NUT AS REQUIRED CONNECT AS BY OTHERS DESIRED TO TERMINALS ON PRP-31316-02 APPROPRIATE PRP-31316-02 ANALOG STATION. PRP-31316-02 PRP-31316-02 CONTROL FOR FRONT VIEW PRP-31316-02 CHANNELS 1 PRP-31316-02... -
Page 41: Channel Dmx-512 Station (Cat. No. 017-Rmb81-104)
* OFF = CHANNEL MODE SINGLE SEQUENCE DMX- BLUE/WHT = CHANNEL MODE DUAL REPEAT SEQUENCE DMX+ RECL * OFF = CHANNELS PILE ONTO DMX-512 IN = CHANNELS REPLACE DMX-512 IN LVLS. * OFF = 6 CHANNEL STATION = 4 CHANNEL STATION TO DIMMER RACK RESERVED... -
Page 42: Channel Dmx-512 Station (Cat. No. 018-Rmb81-106)
* OFF = CHANNEL MODE SINGLE SEQUENCE DMX- BLUE/WHT = CHANNEL MODE DUAL REPEAT SEQUENCE DMX+ RECL * OFF = CHANNELS PILE ONTO DMX-512 IN = CHANNELS REPLACE DMX-512 IN LVLS. * OFF = 6 CHANNEL STATION = 4 CHANNEL STATION TO DIMMER RACK RESERVED... -
Page 43: Channel Dmx-512 Station (Cat. No. 019-Rmb81-112)
12 Channel DMX-512 Station (Cat. No. 019-RMB81-112) Page 43 of 48... -
Page 44: 0-10V Analog Dimmer
NSI Cat. No. N2408 Colortran Model ENR 12 OR 24 with 1:1 DIMMER Universal Control Module # 166-902 (3) TERMINATION 1:1 (1-12) DIMMER TERMINATION ORANGE ORANGE BLUE BLUE BROWN BROWN YELLOW YELLOW VIOLET BLACK GRAY PINK WHITE DMX- NOT USED RED/GRN DMX- ANALOG... -
Page 46: Warranty
Leviton warrants to the original consumer purchaser and not for the benefit of anyone else that this product at the time of its sale by Leviton is free of defects in materials and workmanship under normal and proper use for two years from the purchase date. - Page 48 DI-00X-RMB81-00F...
Need help?
Do you have a question about the DMX-512 and is the answer not in the manual?
Questions and answers