Table of Contents
Advertisement
MARINE
2D
Part Number
700-21
For V-8 Engines
INSTALLATION, TUNING, AND
TROUBLESHOOTING MANUAL
NOTE: These instructions must be read and fully understood before beginning
installation. If this manual is not fully understood, installation should not be
attempted. Failure to follow these instructions, including the pictures may result
in subsequent system failure.
Advertisement
Table of Contents

Subscribe to Our Youtube Channel
Related Manuals for Holley pro-jection 2D

Summary of Contents for Holley pro-jection 2D
- Page 1 MARINE Part Number 700-21 For V-8 Engines INSTALLATION, TUNING, AND TROUBLESHOOTING MANUAL NOTE: These instructions must be read and fully understood before beginning installation. If this manual is not fully understood, installation should not be attempted. Failure to follow these instructions, including the pictures may result in subsequent system failure.
-
Page 2: Table Of Contents
TABLE OF CONTENTS: 1.0 INTRODUCTION ........................3 2.0 WARNINGS, NOTES, AND NOTICES..................3 3.0 PARTS IDENTIFICATION .....................4 4.0 ADDITIONAL ITEMS REQUIRED FOR INSTALLATION .............6 5.0 TOOLS REQUIRED FOR INSTALLATION................6 6.0 SYSTEM OVERVIEW......................7 7.0 REMOVAL OF EXISTING FUEL SYSTEM ................7 8.0 INSTALLATION OF THE MARINE PRO-JECTION FUEL SYSTEM ........8 8.1 Adapter Plate Installation ....................8 8.1.1 Square Flange Manifolds ....................8 8.1.2 Universal and Spread Bore Manifolds................9... -
Page 3: Introduction
1.0 INTRODUCTION Holley Performance Products has written this manual for the installation of the marine PRO-JECTION 2D fuel injection system. This manual contains all the information needed to install this system. Please read all the WARNINGS, NOTES, and TIPS, as they contain valuable information that can save you time and money. -
Page 4: Parts Identification
3.0 PARTS IDENTIFICATION ITEM DESCRIPTION SERVICE PART TBI Assembly 700 CFM Complete 500-13 Electronic Control Unit (ECU) D Systems Wiring Harness 534-34 Fuel Pump 12-927 Fuel Pump Clamp Flame Arrestor 720-1 Manifold Adapter (square flange) 17-6 Universal Manifold Adapter 17-41 Universal Manifold Adapter Gasket 508-5 Square Flange Manifold Adapter Gasket... - Page 5 Item 4 Item 5 Item 6 Item 7 Item 8 Item 9 Item 10 Item 11 Item 12 Item 13 Item 14 Item 15 Item 16 Item 17 Item 18...
-
Page 6: Additional Items Required For Installation
Item 19 Item 20 Item 21 Item 22 Item 23 Item 24 Item 25 Item 26 Item 27 Item 28 Item 29 Item 30 Item 31 Item 32 4.0 ADDITIONAL ITEMS REQUIRED FOR INSTALLATION • more 3/8” Marine fuel hose marked U.S.C.G. Type A1 (if needed) •... -
Page 7: System Overview
NOTE: Although every possible precaution was taken in the design of the digital ECU to prevent interference from radio sources, the use of solid core spark plug wires may interfere with the operation of the ECU. Holley recommends the use of either suppression or spiral wound spark plug wires, such as Holley Part #’s 50-9800, 50-9801, or 50-9804. -
Page 8: Installation Of The Marine Pro-Jection Fuel System
8.1 Adapter Plate Installation Determine which type of mounting flange you have on your intake manifold. A square flange accepts a standard Holley carburetor or universal, and a spread bore flange accepts a Rochester Quadra-Jet carburetor. Make sure the gasket surface on the mounting flange is clean and any old gasket material has been removed. -
Page 9: Universal And Spread Bore Manifolds
NOTE: Some applications originally equipped with a Quadra-Jet carburetor may require the use of Holley’s throttle cable bracket P/N 717-6. NOTE: Mercruiser applications will require the throttle cable bracket P/N 717-6 and Holley's linkage adapter P/N 717-7. Install the bracket along with the proper gaskets between the manifold and the adapter plate. -
Page 10: Throttle Body Installation
Remove any studs or brackets that are on the carburetor throttle lever and transfer them over to the lever of the TBI in the same relative location. Connect the throttle cable to the lever using the original equipment hardware. If Using the Holley 717-6 and/or 717-7 throttle linkage kits. -
Page 11: Fuel Pump Installation
DANGER! STICKING THROTTLE MAY RESULT IN UNCONTROLLED ENGINE OR BOAT SPEED. THIS COULD CAUSE PROPERTY DAMAGE, PERSONAL INJURY, OR DEATH. A STICKING THROTTLE MAY BE CAUSED BY IMPROPERLY INSTALLED THROTTLE CABLES, LACK OF CLEARANCE FOR ANY OF THE THROTTLE LINKAGE, OR BY BINDING THROTTLE LINKAGE. CHECK ALL THROTTLE CABLES FOR PROPER INSTALLATION AND ALIGNMENT AND ACTUATE THE THROTTLE TO CHECK FOR ANY POTENTIAL BINDING OR CLEARANCE PROBLEMS AND REPAIR ANY PROBLEMS. -
Page 12: Return Line Installation
8.6 Return Line Installation The Holley digital PRO-JECTION System requires a return fuel line to the fuel tank so that unused fuel can be routed from the throttle body. There are two methods of installing a return line on a boat. The preferred method is to run a hose or line from the throttle body outlet back to the fuel tank. -
Page 13: Inlet Fuel Line Installation
8.7.2 Installation with Fuel Return Line to Electric Pump Holley recommends that the mechanical pump be removed in this case. However, the pump can be optionally retained if the user wants to supply the electric pump with the mechanical pump. Install the 3/8” hose from the boat fuel tank and fuel filter to the 3/8”... -
Page 14: Coolant Temperature Sensor
The ECU then adjusts the fuel delivery to maintain a stoichiometric fuel delivery (14.7:1 Air / Fuel Ratio). NOTE: The installation of an oxygen sensor will operate with the digital ECU. This requires use of the Holley Digital PRO- JECTION 2D Closed Loop Kit for 1 and 2-Barrel Applications, P/N 534-54. -
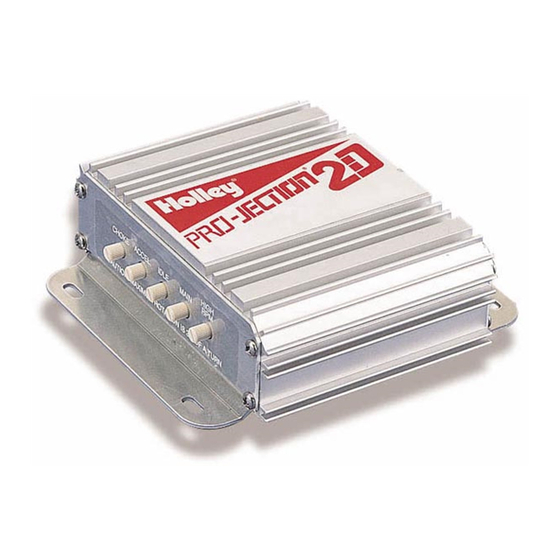
Page 15: Mounting The Electronic Control Unit (Ecu)
Figure 7 Figure 8 If the oxygen sensor is being installed directly into the exhaust manifold, the manifold will have to be drilled and tapped for the oxygen sensor threads. The location for the oxygen sensor should be chosen very carefully. The sensor must be located in an area that can be drilled without passing through any of the manifold water jackets. -
Page 16: Engine Wiring Harness
NOTE: All connections shown MUST be made in order for the PRO-JECTION 2D system to operate properly. Pick a suitable location on the interior of the boat in which the ECU can be mounted. Ensure the mounting location allows for sufficient length of the wiring harness and clearance for connectors and the adjustment knobs on the front of the ECU are accessible before mounting the ECU. -
Page 17: Electrical Connections
12.0 ELECTRICAL CONNECTIONS The cable assembly plugs into the ECU and also connects to the throttle body, fuel pump, sensors, electrical power, and ground. Apply a small amount of dielectric grease to all electrical terminals and connections. WARNING! Keep all wires away from hot or moving parts as much as possible. Your kit includes cable ties to secure wires clear. -
Page 18: Final Connections
WARNING! For proper operation, the voltage on the fuse holder wire should be 12-15 volts while the engine is running and should remain above 8.5 volts while the engine is being started. Low voltage will result in poor operation or an inoperative system. Double check the voltage after the installation is complete. WARNING! The use of solid core ignition wires may adversely affect the function of the electronic control unit. -
Page 19: Main
should "open circuit", causing a lean condition, the back up automatically takes place. If the TPS "short circuits", causing a rich condition, you must remove the wire harness connector from the TPS. The idle will be richer and top speed will be limited in this mode. -
Page 20: High Rpm
The setting of the mechanical idle speed is critical in the operation of the Digital ECU and is best accomplished by using a tachometer. If your vehicle is not equipped with a tachometer, Holley highly recommends one be used. To adjust, follow the... -
Page 21: Setting The Throttle Position Sensor (Tps)
DANGER! ENSURE THE THROTTLE IS NOT STICKING. A STICKING THROTTLE MAY RESULT IN UNCONTROLLED ENGINE OR BOAT SPEED. THIS COULD CAUSE PROPERTY DAMAGE, PERSONAL INJURY, AND/OR DEATH. Start the engine. With the engine running at idle, insert a flat blade screwdriver into the head of the idle adjustment screw located on the front of the throttle body on the driver’s side of the vehicle. -
Page 22: Tuning The Digital Ecu For Performance
Turn the adjustment knob labeled MAIN, clockwise until the engine rpm reaches a maximum value and the engine rpm just begins to drop. If your vehicle is equipped with a Holley rich / lean indicator, adjust the MAIN adjustment knob until the green center light on the unit remains stable. -
Page 23: Tuning The Accel
The CHOKE adjustment knob controls the fuel delivery to the engine during a cold start. Adjustment to the CHOKE should be made after the engine has cooled down completely. After the engine has cooled down completely (Holley recommends allowing the engine to sit overnight), start the engine. Immediately after starting the engine, shift the transmission into gear and accelerate slowly. -
Page 24: Maintenance And Storage
Add Holley fuel system cleaner to the gas tank every 3 months according to the directions on the system cleaner. This will keep injector patterns optimal for best performance and economy. - Page 25 Electrical Connections Section 12.0 Injector flows fuel - Poor Engine ground wire connection - Clean ground location and tighten with ignition switch connection in the “RUN” position - Leaky fuel injector - Replace fuel injector and engine not running “CLEAR FLOOD” - Throttle does not open fully - Check for interference between the throttle mode does not...
-
Page 26: Adjusting The Fuel Pressure
20.2 Testing the Coolant Temperature Sensor The coolant temperature sensor used with the PRO-JECTION 2D system is a single wire sensor. The ECU supplies a fixed voltage to the sensor. The resistance within the sensor varies with temperature and this variation in resistance is used by the... -
Page 27: Testing The Throttle Position Sensor
20.3 Testing the Throttle Position Sensor A properly adjusted and functioning throttle position sensor is essential to the proper operation of the PRO-JECTION 2D system. The TPS is a precision electrical component that acts as a variable resistor. The ECU provides a reference voltage to the TPS. -
Page 28: Testing The Oxygen Sensor (If Equipped)
20.4 Testing the Oxygen Sensor (if equipped) The PRO-JECTION D system oxygen sensor performance can be evaluated. Probe the gray wire from the oxygen sensor connector with the positive (+) lead of a digital voltmeter. With the engine running open loop, the meter reading should be near zero or one volt. - Page 29 NOTES: NOTES:...
- Page 30 Holley Copyright 1999 Printed in U.S.A. Performance Products Inc 199R-10028-1 Date: 11-11-99...
Need help?
Do you have a question about the pro-jection 2D and is the answer not in the manual?
Questions and answers