Table of Contents
Advertisement
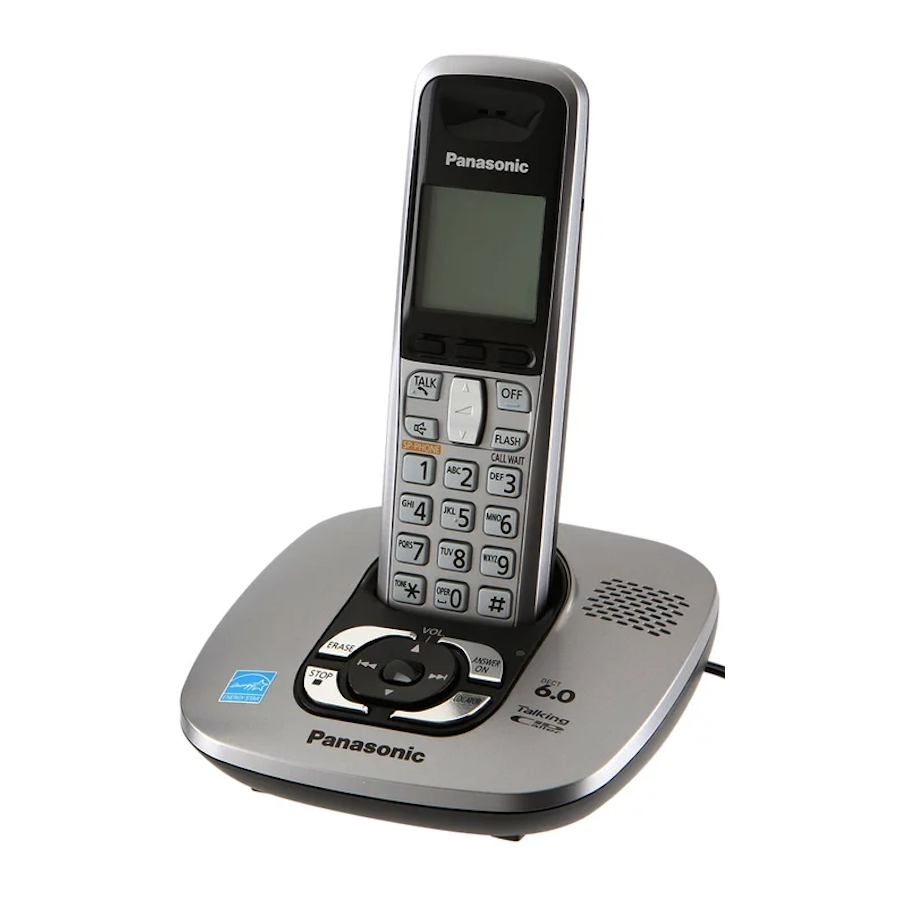
Model shown is KX-TG6431.
Panasonic's environmental declaration labels
This mark is an environmental label
showing that the products are certified
as Panasonic's Green Products.
Standby power consumption
reduced by 59%
Thank you for purchasing a Panasonic product.
This unit is compatible with Caller ID. You must subscribe to the appropriate
service offered by your service provider/telephone company.
Charge the batteries for about 7 hours before initial use.
Please read these operating instructions before using the unit and save
them for future reference.
For assistance, visit our website:
http://www.panasonic.com/help for customers in the U.S.A. or Puerto
Rico.
Consulte "Guía Rápida Española", página 52.
Operating Instructions
Expandable Digital Cordless Answering System
KX-TG6431
Model No.
KX-TG6441
with 2 Handsets
KX-TG6432
Model No.
KX-TG6442
with 3 Handsets
KX-TG6433
Model No.
KX-TG6443
with 4 Handsets
KX-TG6434
Model No.
KX-TG6444
with 5 Handsets
KX-TG6445
Model No.
Advertisement
Table of Contents

Related Manuals for Panasonic KX-TG643


Summary of Contents for Panasonic KX-TG643
-
Page 1: Operating Instructions
Charge the batteries for about 7 hours before initial use. Please read these operating instructions before using the unit and save them for future reference. For assistance, visit our website: http://www.panasonic.com/help for customers in the U.S.A. or Puerto Rico. Consulte “Guía Rápida Española”, página 52. Operating Instructions... -
Page 2: Table Of Contents
Table of Contents Introduction Model composition ....3 Accessory information ... . . 4 Important Information For your safety . -
Page 3: Introduction
Series KX-TG6431 series KX-TG6441 series *1 KX-TG6431/KX-TG6441: Intercom calls can be made between the handsets by purchasing and registering one or more optional handsets (page 5). For assistance, please visit http://www.panasonic.com/help ■ KX-TG6441 series Base unit Part No. KX-TG6431 KX-TG6431... -
Page 4: Accessory Information
Charger *1 PNKL1010Z1: Black metallic *2 PNYNTGA641TR: Black metallic *3 PNKE1029Z1: Black metallic *4 PNWETG6432T: Black metallic PNWETG6432M: Metallic gray *5 The handset cover comes attached to the handset. For assistance, please visit http://www.panasonic.com/help Quantity KX-TG KX-TG 6431/ 6432/ KX-TG... -
Page 5: Expanding Your Phone System
Additional/replacement accessories Please contact your nearest Panasonic dealer for sales information (page 60). Accessory item Order number Rechargeable HHR-4DPA batteries L To order, please call 1-800-332-5368 or visit http://www.panasonic.com/batterystore Battery requirement: – Nickel metal hydride (Ni-MH) type battery – 2 AAA (R03) batteries for every handset... -
Page 6: Important Information
These conditions can cause fire or electric shock. Confirm that smoke has stopped emitting and contact the Panasonic Call Center at 1-800-211- PANA (1-800-211-7262). L Unplug from power outlets and never touch the inside of the product if its casing has been broken open. -
Page 7: Important Safety Instructions
Check with local codes for possible special disposal instructions. SAVE THESE INSTRUCTIONS For best performance Base unit location/avoiding noise The base unit and other compatible Panasonic units use radio waves to communicate with each other. L For maximum coverage and noise-free communications, place your base unit: –... -
Page 8: Specifications
Dispose of used batteries according to the instructions. Notice ENERGY STAR ® As an ENERGY STAR Participant, Panasonic has determined that this product meets the ENERGY STAR guidelines for energy efficiency. ENERGY STAR is a U.S. registered mark. -
Page 9: Getting Started
Setting up Connections L Use only the supplied Panasonic AC adaptor PQLV219. ■ Base unit Press plug firmly. “Click” To single-line telephone jack (RJ11C) DSL/ADSL filter* (Not supplied) Correct Wrong Base Base unit unit *For DSL/ADSL service users ■ Charger (120 V AC, 60 Hz) For assistance, please visit http://www.panasonic.com/help... -
Page 10: Note When Setting Up
Panasonic T-adaptor (page 5). Emergency power can be supplied to the unit by connecting a Panasonic battery back-up power supply noted on page 5. Note for battery installation L Use the supplied rechargeable batteries. -
Page 11: Controls
G Receiver H Display I {OFF} J {FLASH} {CALL WAIT} K Microphone For assistance, please visit http://www.panasonic.com/help L Charge contacts ■ Control type A Soft keys The handset features 3 soft keys. By pressing a soft key, you can select the feature shown directly above it on the display. -
Page 12: Display
K {REDIAL} {PAUSE} L {HOLD} M {SP-PHONE} (Speakerphone) SP-PHONE indicator N {FLASH} {CALL WAIT} O {MUTE} P {CONF} (Conference) Q {MEMO} For assistance, please visit http://www.panasonic.com/help Display Handset display items Item N O P Q & & Meaning Within range of a base unit Out of range of a base unit The line is in use. -
Page 13: Initial Settings
“Tone”: For tone dial service. “Pulse”: For rotary/pulse dial service. {MENU} i {#}{1}{2}{0} {V}/{^}: Select the desired setting. {SAVE} i {OFF} For assistance, please visit http://www.panasonic.com/help Getting Started Date and time {MENU} i {#}{1}{0}{1} Enter the current month, date, and year by selecting 2 digits for each. -
Page 14: Making/Answering Calls
(each 48 digits max.). {REDIAL} {V}/{^}: Select the desired phone number. For assistance, please visit http://www.panasonic.com/help Erasing a number in the redial list {REDIAL} {V}/{^}: Select the desired phone number. i {ERASE} {V}/{^}: “Yes” i {SELECT}... -
Page 15: Answering Calls
Adjusting the handset ringer volume Press {^} or {V} repeatedly to select the desired volume while the handset is ringing for an incoming call. For assistance, please visit http://www.panasonic.com/help Making/Answering Calls Note: L You can also program the handset ringer volume beforehand (page 23). -
Page 16: Useful Features During A Call
L While an outside call is on hold, the SP-PHONE indicator on the base unit flashes. (KX-TG6441 series: page 3) For assistance, please visit http://www.panasonic.com/help Mute While mute is turned on, you can hear the other party, but the other party cannot hear you. -
Page 17: Call Share
During an outside call, this feature is turned on automatically when necessary. For assistance, please visit http://www.panasonic.com/help Making/Answering Calls L When this feature is turned on, ( is displayed. -
Page 18: Shared Phonebook
L When you assign the ringer ID to an entry in the shared phonebook using one handset, it is applied for all handsets. For assistance, please visit http://www.panasonic.com/help Character table for entering names Character & ’... -
Page 19: Chain Dial
L To turn the ringer ID off, select “No Ringer ID”. {SAVE} i {OFF} Erasing entries Find the desired entry (page 18). {ERASE} For assistance, please visit http://www.panasonic.com/help Shared Phonebook {V}/{^}: “Yes” i {SELECT} i {OFF} Chain dial This feature allows you to dial phone numbers in the phonebook while you are on a call. -
Page 20: Programming
L To exit the operation, press {OFF}. Note: L See page 22 for the default settings. Main menu Caller list Answering device V.M. access Intercom For assistance, please visit http://www.panasonic.com/help Sub-menu 1 Sub-menu 2 – Play new msg. Play all msg. Erase all msg. Greeting... - Page 21 Initial setting " Customer support *1 If you program these settings using one of the handsets, you do not need to program the same item using another handset. For assistance, please visit http://www.panasonic.com/help Sub-menu 1 Sub-menu 2 Ringer setting Ringer volume...
- Page 22 {1}{6}{5} LCD contrast {1}{4}{5} (Display contrast) {3}{4}{0} Message alert Play all msg. {3}{2}{4} (msg.: messages) For assistance, please visit http://www.panasonic.com/help Setting code {1}: Once {2}: Daily {0}: <Off> – – {1}: On {0}: <Off> {1}: On {0}: <Off> – {1}: <On> {0}: Off –...
- Page 23 Store V.M. no. (V.M.: Voice mail) Talking {1}{6}{2} CallerID (Handset) {*}{1}{6} Talking CallerID (Base unit) For assistance, please visit http://www.panasonic.com/help Setting code – – – {1}: 1min {2}: 2min {3}: <3min> {0}: Greeting only – <111> {2}–{7}: 2–7 rings <4>...
- Page 24 “A”. *10This feature allows the unit to automatically adjust the date and time setting when caller information is received. To use this feature, set the date and time first. For assistance, please visit http://www.panasonic.com/help Setting code {1}: <Caller ID auto>...
-
Page 25: Special Programming
Note: L To correct a digit, press {^} or {V} to move the cursor to the digit, then make the correction. For assistance, please visit http://www.panasonic.com/help Programming Changing the start and end time {MENU} i {#}{2}{3}{7} Continue from step 3, “Turning silent mode on/off”, page 25. - Page 26 27). When a call is received, the unit rings for a short time while the caller is being For assistance, please visit http://www.panasonic.com/help identified. If the unit recognizes the call as unwanted, “Caller blocked” is displayed and the unit sends out a busy tone to the caller, and then disconnects the call.
-
Page 27: Registering A Unit
Up to 6 handsets can be registered to the base unit. Important: L See page 5 for information on the available model. For assistance, please visit http://www.panasonic.com/help Programming Registering a handset to a base unit The supplied handset and base unit are pre-registered. -
Page 28: Caller Id Service
For assistance, please visit http://www.panasonic.com/help Talking Caller ID This feature lets you know who is calling without looking at the display. -
Page 29: Caller List
“1”. {MENU} i {#}{2}{1}{3} {V}/{^}: Select the desired entry. For assistance, please visit http://www.panasonic.com/help Caller ID Service Press {EDIT} repeatedly until the phone number is shown in the desired format. - Page 30 {V}/{^}: Select the desired entry. L To edit the number, press {EDIT} repeatedly until the phone number is shown in the desired format. {SAVE} {V}/{^}: “Phonebook” i {SELECT} Continue from step 2, “Editing entries”, page 19. For assistance, please visit http://www.panasonic.com/help...
-
Page 31: Answering System
– If you recorded your own greeting message, the same message is still For assistance, please visit http://www.panasonic.com/help Answering System announced to callers even though their messages are not recorded. Turning the answering... -
Page 32: Greeting Message
(Resetting to a pre-recorded greeting message) If you want to use a pre-recorded greeting message once you record your For assistance, please visit http://www.panasonic.com/help own greeting message, you need to erase your own greeting message. {MENU} i {#}{3}{0}{4} {YES} i {OFF}... -
Page 33: Listening To Messages Using The Handset
L To switch to the receiver, press {C}. Operating the answering system during playback Operation {^} or {V} Adjust the receiver/speaker volume For assistance, please visit http://www.panasonic.com/help Answering System Operation Repeat message Skip message Stop playback {STOP} Erase currently {ERASE}... -
Page 34: Voice Memo
“111”. {MENU} i {#}{3}{0}{6} Enter the desired 3-digit remote access code. i {SAVE} i {OFF} For assistance, please visit http://www.panasonic.com/help Using the answering system remotely Dial your phone number from a touch-tone phone. After the greeting message starts, enter your remote access code. -
Page 35: Answering System Settings
To resume operation, enter a remote command within 15 seconds, or the voice guidance starts. *3 For Spanish voice guidance only For assistance, please visit http://www.panasonic.com/help Turning on the answering system remotely If the answering system is off, you can turn it on remotely. -
Page 36: Message Alert
Caller’s recording time You can change the maximum message recording time allotted to each caller. You can also select “Greeting only” For assistance, please visit http://www.panasonic.com/help which sets the unit to greet callers but not record messages. The default setting is “3min”. -
Page 37: Voice Mail Service
L When storing your voice mail access number and your mailbox password, press {PAUSE} to add pauses (page 14) between the access number and For assistance, please visit http://www.panasonic.com/help Voice Mail Service the password as necessary. Contact your service provider/telephone company for the required pause time. - Page 38 L If your voice mail service uses voice mail tones, the tones are heard from any phone connected to the same For assistance, please visit http://www.panasonic.com/help line. If you want to use another phone to listen to voice mail messages, you have to dial your access number manually.
-
Page 39: Intercom/Locator
– To page a specific handset, enter the handset number. – To page all handsets, press {0} or wait for a few seconds. L To stop paging, press {INTERCOM}. For assistance, please visit http://www.panasonic.com/help Intercom/Locator When you finish talking, press {INTERCOM}. Answering an intercom call Handset Press {C} to answer the page. -
Page 40: Transferring Calls, Conference Calls
Handset 1: Press {CONF}. L To leave the conference, press {OFF}. The other parties can continue the conversation. For assistance, please visit http://www.panasonic.com/help L To put the outside call on hold, press {HOLD}. To resume the conference, press {CONF}. Note:... - Page 41 ■ To establish a conference call: Base unit: Press {CONF}. L To leave the conference, press {SP-PHONE}. Other parties can continue the conversation. L To put the outside call on hold, press {HOLD}. To resume the conference, press {CONF}. For assistance, please visit http://www.panasonic.com/help Intercom/Locator...
-
Page 42: Useful Information
(A). Connect the AC adaptor cord and telephone line cord (B). Hooks For assistance, please visit http://www.panasonic.com/help Insert the hooks on the wall mounting adaptor into holes 1 and 2 on the base unit. Adjust the adaptor to hold the base unit, then push it in the direction of the arrow until it clicks into place. - Page 43 83 mm 102 mm inches) (4 inches) For assistance, please visit http://www.panasonic.com/help To remove the wall mounting adaptor While pushing down the release levers (A), remove the adaptor (B). Charger Drive the screws (not supplied) into 83 mm the wall.
-
Page 44: Error Messages
No link. Reconnect base AC adaptor. Requires subscription to Caller ID. Store V.M. no. For assistance, please visit http://www.panasonic.com/help Cause/solution L The called unit is in use. L Other units are in use and the system is busy. Try again later. -
Page 45: Troubleshooting
I have changed the display language to a language I cannot read. While programming, the handset starts to ring. For assistance, please visit http://www.panasonic.com/help Cause/solution L Make sure the batteries are installed correctly (page 9). L Fully charge the batteries (page 9). - Page 46 Problem _ is displayed. Noise is heard, sound cuts in and out. For assistance, please visit http://www.panasonic.com/help Cause/solution L The maximum number of handsets (6) is already registered to the base unit. Cancel unused handset registrations from the base unit (page 27).
- Page 47 Caller information is not displayed. Caller information is not announced. For assistance, please visit http://www.panasonic.com/help Cause/solution L The ringer volume is turned off. Adjust the ringer volume (page 15, 23). L Silent mode is turned on. Turn it off (page 25).
- Page 48 *1 KX-TG6441 series: page 3 Answering system Problem The unit does not record new messages. For assistance, please visit http://www.panasonic.com/help Cause/solution L Depending on your service provider/telephone company, the unit may display or announce the caller’s information at the 2nd ring or later.
- Page 49 Caution: L To avoid permanent damage, do not use a microwave oven to speed up the drying process. For assistance, please visit http://www.panasonic.com/help Cause/solution L Someone is using the unit. Wait for the other user to finish. L A caller is leaving a message. Wait for the caller to finish.
-
Page 50: Fcc And Other Information
Also, you will be advised of your right to file a complaint with the FCC if you believe it is necessary. For assistance, please visit http://www.panasonic.com/help The telephone company may make changes in its facilities, equipment, operations or procedures that could affect the operation of the equipment. - Page 51 – Connect the equipment into an outlet on a circuit different from that to which the receiver is connected. For assistance, please visit http://www.panasonic.com/help Useful Information – Consult the dealer or an experienced radio/TV technician for help.
-
Page 52: Guía Rápida Española
Guía Rápida Española Guía Rápida Española Instalación Unidad base L Use sólo el adaptador de corriente Panasonic PQLV219 incluido. “Clic” A la toma de teléfono de línea única (RJ11C) Filtro DSL/ADSL* (no se suministran) *Para usuarios de líneas DSL/ADSL Auricular L UTILICE SÓLO baterías de Ni-MH tamaño AAA (R03). - Page 53 {MENU} i {#}{1}{0}{1} Introduzca el día, mes y año actuales. i {OK} Introduzca la hora y minuto actuales (formato de reloj de 24 horas). {GUARDA} i {OFF} Para obtener ayuda, visite http://www.panasonic.com/help (sólo en inglés) Guía Rápida Española Subir volumen Bajar volumen...
- Page 54 Para ajustar el volumen del timbre de la unidad base Directorio telefónico compartido (Auricular) Para añadir entradas Para hacer llamadas Para obtener ayuda, visite http://www.panasonic.com/help (sólo en inglés) Marque el número telefónico. i {C}/{s} {C}/{s} {OFF} Oprima {^} o {V} repetidamente mientras habla.
- Page 55 Entonces puede grabar su mensaje. L No puede introducir los comandos remotos mientras esté grabando su mensaje o después de hacerlo. Para obtener ayuda, visite http://www.panasonic.com/help (sólo en inglés) Oprima {ANSWER ON} para encender y apagar el contestador de llamadas.
- Page 56 ¿Cómo se contestan las llamadas en espera (segunda llamada)? Para obtener ayuda, visite http://www.panasonic.com/help (sólo en inglés) Causa y solución L El auricular está demasiado lejos de la unidad base. Acérquelo. L El adaptador para corriente de la unidad base no está...
- Page 57 Es posible que su teléfono requiera servicio. Visite nuestro sitio web para obtener más información acerca de la resolución de problemas:http://www.panasonic.com/help (sólo en inglés) Para obtener ayuda, visite http://www.panasonic.com/help (sólo en inglés) Guía Rápida Española “Cargando” aparece.
- Page 58 Continúa apareciendo Es posible que su teléfono requiera servicio. Visite nuestro sitio web para obtener más información acerca de la resolución de problemas:http://www.panasonic.com/help (sólo en inglés) Para obtener ayuda, visite http://www.panasonic.com/help (sólo en inglés) No aparece “Sin Enlace Reconecte Adaptador”...
- Page 59 Oprima {OK}, y después oprima {OFF} después de que se emita un pitido largo. Para obtener más información acerca del registro, visite http://www.panasonic.com/RegisterYourHandset (sólo en inglés) Para obtener ayuda, visite http://www.panasonic.com/help (sólo en inglés) Guía Rápida Española {MENU} {LOCATOR} Opr. LOCATOR...
-
Page 60: Appendix
TTY users (hearing or speech impaired users) can call 1-877-833-8855. Accessory Purchases (United States and Puerto Rico) Purchase Parts, Accessories and Instruction Books online for all Panasonic Products by visiting our Web Site at: http://www.pstc.panasonic.com or, send your request by E-mail to: npcparts@us.panasonic.com... -
Page 61: Warranty (For United States And Puerto Rico)
Limited Warranty Coverage If your product does not work properly because of a defect in materials or workmanship, Panasonic Consumer Electronics Company (referred to as “the warrantor”) will, for the length of the period indicated on the chart below, which starts with the date of original purchase (“Limited Warranty period”), at its... - Page 62 L Carefully pack your unit, preferably in the original carton. L Attach a letter, detailing the symptom. L Send the unit to PSTC (Panasonic) Exchange Center, prepaid and adequately insured. L Do not send your unit to Panasonic Consumer Electronics Company listed on the back cover or to executive or regional sales offices.
-
Page 63: Index
Index Additional handset: 27 Alarm: 25 Answering calls: 15 Answering system Call screening: 31 Erasing messages: 32, 33, 35 Greeting only: 36 Listening to messages: 32, 33, 34 Number of rings: 35 Recording time: 36 Remote access code: 34 Remote operation: 34 Ring count: 35 Toll saver: 35 Turning on/off: 31, 35... - Page 64 One Panasonic Way, Secaucus, New Jersey 07094 Copyright: This material is copyrighted by Panasonic Communications Co., Ltd., and may be reproduced for internal use only. All other reproduction, in whole or in part, is prohibited without the written consent of Panasonic Communications Co., Ltd.