
Related Manuals for Cateye HL-EL6000RC


Summary of Contents for Cateye HL-EL6000RC
- Page 1 RECHARGEABLE HEADLIGHT HL-EL6000RC Manual Design Pat. Pending Copyright© 2016 CATEYE Co., Ltd. HLEL6000RC-160822...
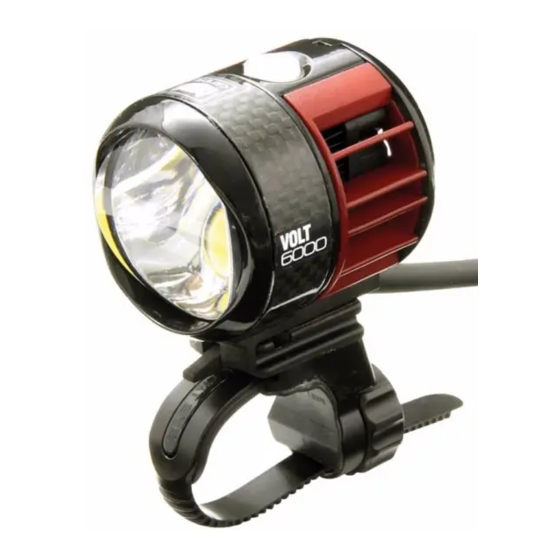
- Page 2 COMPONENTS FlexTight™ bracket Helmet mount Control unit Light unit (H-34N HP ) (Helmet mount HP) Battery unit Fixing strap Auxiliary strap Extension cable Cable cover (BA-608) Remote control switch Rubber band (Large/Small) (WSW-001) Battery charger...
-
Page 3: Precautions On Use
Modifications The FCC requires the user to be notified that any detergent then wipe off moisture with a dry cloth. Never • S ecurely connect the plug and fasten the strap. changes or modifications made to this device that are not expressly apply paint thinner, benzine or alcohol; damage will Otherwise, they may come off while riding, causing the approved by CatEye Co., Ltd. may void the user’s authority to operate result. light to turn off, or you could topple over if the cable gets the equipment. caught in the wheel. • W hen the connecting plug is dirty with mud, etc., clean... -
Page 4: Handling The Remote Control Switch
PRECAUTIONS ON USE Handling the remote control switch This ultra high intensity light can generate a significant amount of heat during operation and there is a risk of fire or burns. Using the light under the following conditions is dangerous. • The remote control switch and the light have ID-based pairing function in order to elimi- • Do not place hands or any other objects in front of the lens while the light is in use. nate interference with other devices. • Do not use the light with the lens facing downward on any table, wooden, or otherwise Although the IDs have been paired at the factory, check that the remote control switch potentially flammable surface. -
Page 5: How To Charge Battery Unit
HOW TO CHARGE BATTERY UNIT Always charge the product before use. PRECAUTIONS ON CHARGING To AC Power Outlet • If the battery unit is wet, wipe off moisture with a dry cloth before charging the batteries. • Be sure to use only the supplied battery charger (applicable to 100 - 240 volts). The battery charger is indoor use only. • Do not leave the battery unit for a long time with the battery Battery charger charged. • When the operating time decreases significantly, the battery life is close to an end. Replace the battery unit with a new one. • Dispose of used battery units appropriately according to local regulations. * The standard charging time and run time are guideline values and may vary depending on the operating environment. * With the included battery unit BA-608 (6800 mAh), the battery is approximately 80% charged approximately 3 hours after the start of charging. -
Page 6: How To Mount To A Bicycle
HOW TO MOUNT TO A BICYCLE (1/3) Light unit Remote control switch PRECAUTIONS WHEN MOUNTING (Page. 11) • Be sure to tighten the dial by hand. When you tighten it too hard with a tool, the screw thread may be stripped. • Round off the cut edge of the bracket strap to prevent injury. Rubber band • Ensure that the frame is clean, and then pull the fixing strap tightly to fix the control unit in place. If the control unit is not securely fixed in place, the battery unit may shift or come off due to impacts during riding. • When some cables are installed along the top tube, attach the cable cover in ad- vance to protect the cable from any force applied. Otherwise, it may cause trouble Bracket Dial in braking or gear shifting. Fixing strap Cable cover • Pay attention to the arrangement of the cable so that it does not interfere with the handling of the bicycle. Auxiliary strap Do not secure the cable at an acute angle because the wire inside the cable may break. • Do not use a damaged rubber band. Control unit Battery unit... - Page 7 HOW TO MOUNT TO A BICYCLE (2/3) Bracket Rubber pad Strap Dial Light unit Click Release lever Screw To remove the light unit, pull it forward while pulling up the CAUTION!: Check the dial and screw on the bracket periodically, and use release lever. them without any loosening.
- Page 8 HOW TO MOUNT TO A BICYCLE (3/3) Control unit Position alignment mark Control unit Battery unit Unlock Ring Plug Lock Knob Slide Set the knob of the control unit to the “Unlock” position, align the battery unit with the position alignment mark, and then slide the battery unit into place. CAUTION!: After you connect the battery unit, be sure to set the knob back to the “Lock”...
- Page 9 MOUNTING THE LIGHT UNIT ON A HELMET (1/3) Remote control switch How to handle the battery unit (Page. 11) Carry the battery unit in a pocket or bag, with the rubber pad removed. Before doing that, be sure that the cable of the battery unit is properly accommodated. Auxiliary strap Light unit Rubber band Helmet mount Extension cable...
- Page 10 MOUNTING THE LIGHT UNIT ON A HELMET (2/3) Bracket strap Light unit Click Release lever Put the bracket strap through the air vent on the helmet, and secure it firmly. To remove the light unit, pull it forward while pulling up the release lever. Secure the cable to the backside of the helmet using the auxiliary strap.
- Page 11 MOUNTING THE LIGHT UNIT ON A HELMET (3/3) Set the knob of the control unit to the “Unlock” position, align Unlock Battery unit the battery unit with the position alignment mark, and then slide the battery unit into place. Slide CAUTION!: After you connect the battery unit, be sure to set the knob back to the “Lock” position to Lock lock the battery unit in place. Knob To remove the battery unit, set the knob to the “Unlock”...
-
Page 12: Mounting And Pairing The Remote Control Switch
MOUNTING AND PAIRING THE REMOTE CONTROL SWITCH How to mount How to pair Follow the steps below to pair the remote control switch with a light unit. * The included remote control switch has been paired with the light unit at the factory, so pairing is not necessary before use. CAUTION!: • Do not look directly at the light when it is on. -
Page 13: Switch Operation
SWITCH OPERATION hours hours hours Switch (Battery indicator) Approx. Approx. Approx. Click Click Press and hold Dynamic Middle (6000 lm) (4000 lm) (2000 lm) Press and hold Double-click Click Click 11 12 hours hours hours hours Approx. Approx. Approx. Approx. Double-click Click Click Click... -
Page 14: Protection Functions
PROTECTION FUNCTIONS REPLACING THE REMOTE CONTROL SWITCH BATTERY Temperature control After you replace the battery, check that the light turns on when you press the remote control switch near the control unit. If it does not turn on by pressing If the temperature of the light unit increases abnormally while the light is on, the the paired remote control switch, it may be at the end of battery life. -
Page 15: Spare/Optional Parts
SPARE/OPTIONAL PARTS 5343020 5338829N 5341832N 5343040 Light unit FlexTight™ bracket Helmet mount Control unit (H-34N HP ) (Helmet mount HP) 5343030 5343050 5342180 5343080 5342190 Battery unit Fixing strap Auxiliary strap Extension cable Cable cover (BA-608) UK 5343061 UL 5343062 EC 5343063 AS 5343064 5343070 5447010 1603860 Remote control switch... -
Page 16: Specifications
CatEye products are warranted to be free of defects from materials and workmanship for a period of 2 years Lithium battery (CR1632) x 1 from original purchase. If the product fails to work during normal use, CatEye will repair or replace the defect at Remote control switch (Approx 10 months) no charge.
Need help?
Do you have a question about the HL-EL6000RC and is the answer not in the manual?
Questions and answers