Table of Contents
Advertisement
Available languages
Available languages
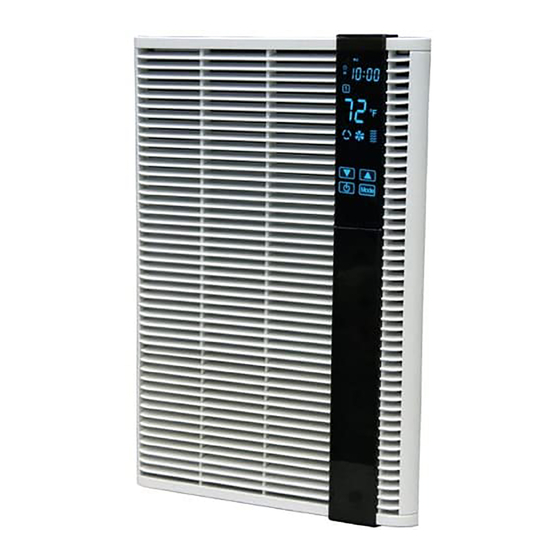
HTSS Series
Smart Series™ Wall Heater
Specifications
MODEL
GRILLE
NUMBER
COLOR
HT2024SS
Gray
HT2024SSNW
Nothern White
HT1502SS
Gray
HT1502SSNW
Nothern White
WHEN USING ELECTRIC APPLIANCES, BASIC PRECAU-
TIONS SHOULD ALWAYS BE FOLLOWED TO REDUCE THE
RISK OF FIRE, ELECTRIC SHOCK, AND INJURY TO PER-
SONS, INCLUDING THE FOLLOWING:
1. READ ALL INSTRUCTIONS before installing or using the
heater.
2. ELECTRICAL SHOCK HAZARD: Disconnect all electrical
power coming to heater at circuit breaker box or main
disconnect switch and lock in OFF position before wiring. All
wiring must be in accordance with The National Electrical
Code and applicable local codes and ordinances.
The heater must be properly connected to an effective
building ground.
3. Verify the supply voltage coming to heater is the same as
shown on the heater nameplate before energizing.
Energizing at a voltage in excess of nameplate voltage will
damage heater and void warranty.
4. This heater has hot and arcing or sparking parts inside.
Do not install or use in areas where gasoline, paint, or flam-
mable liquids are used or stored.
5. Do not install this heater upside down, sideways, in ceiling,
or floor. Install only as shown in this manual. Refer to
Mounting Clearances, page 2 for minimum clearances that
must be maintained.
6. The heater assembly must be installed in the back box pro-
vided. Do not operate the heater without the grille installed.
7. This heater is not approved for use in corrosive
atmospheres such as marine, green house or chemical
ECR 39729
IMPORTANT INSTRUCTIONS
VOLTS
AMPS
WATTS
240
1.0 - 8.3
250 - 2000
240
1.0 - 8.3
250 - 2000
120
1.6 - 12.5
200 - 1500
120
1.6 - 12.5
200 - 1500
WARNING
SAVE THESE INSTRUCTIONS
WIRE
BTUHR
SIZE
853 - 6826
14AWG
853 - 6826
14AWG
682 - 5120
12AWG
682 - 5120
12AWG
!
storage areas.
8. Do not use outdoors.
9. Extreme caution is necessary when any heater is used by or
near children or invalids and whenever the heater is left
operating or unattended.
10. This heater is hot when in use. To avoid burns, do not let
bare skin touch hot surfaces. Keep combustible materials,
such as furniture, pillows, bedding, papers, clothes, and
curtains away from heater. Do not block air intakes or
exhaust in any manner. For efficient and safe operation, we
recommend keeping all items at least 3 feet from front of
heater.
11. Do not insert or allow foreign objects to enter any ventilation
or exhaust opening as this may cause an electric shock or
fire, or damage the heater.
12. Should the heater become blocked or otherwise overheat, it
is provided with a manual-reset thermal safety switch and
alarm light that will activate to alert that the heater has
cycled off. If warning light is on, check to see if the reason
for the overheating can be identified.
blockage, allow heater to cool, then press Reset button.
Heater should return to normal operation. Do not continue
to use heater if it repeatedly cycles off. Have it inspected
and repaired by a qualified repair person.
11. Use this heater only as described in this manual. Any other
use not recommended by the manufacturer may cause fire,
electric shock, or injury to persons.
05/13
Remove any
5200-11170-000
Advertisement
Table of Contents

Related Manuals for Marley HT2024SSNW


Summary of Contents for Marley HT2024SSNW
-
Page 1: Important Instructions
AMPS WATTS BTUHR SIZE HT2024SS Gray 1.0 - 8.3 250 - 2000 853 - 6826 14AWG HT2024SSNW Nothern White 1.0 - 8.3 250 - 2000 853 - 6826 14AWG HT1502SS Gray 1.6 - 12.5 200 - 1500 682 - 5120... -
Page 2: Installation Instructions
INSTALLATION Junction Box INSTRUCTIONS Cover Back Box Heater ssembly To prevent a possible fire, injury to persons or damage to the heater, adhere to the following: 1. Disconnect all power coming to heater at main service Screws panel before wiring or servicing. (8) Total 2. - Page 3 1. In new construction without the finished wall in place, posi- 5. Insert one #8, three inch long wood screw (not provided) tion the back box against the side of stud allowing the side to through the free side of the back box not mounted to the stud extend beyond the stud so it will be flush with the finished and secure in the lower mounting hole.
-
Page 4: Operating Instructions
Receptacle in back of grille Ribbon Connector Bottom Bezel Red Warning Light Figure 4- Ribbon Connector Manual Reset FOR HEATERS RATED 240 VOLTS: Safety Limit 1. Connect the black (L1) heater pigtail to the black power lead. 2. Connect the red (L2) heater pigtail to the other black power lead. -
Page 5: Maintenance Instructions
TO RESET SAFETY LIMIT (SEE FIGURE 5) The manual reset button is located behind the bottom bezel just ALL OTHER SERVICING SHOULD BE PERFORMED BY AN below the red warning light. To access the button, gently pull out ELECTRICIAN OR QUALIFIED PERSON on the bottom tab of the bottom bezel and snap off. -
Page 6: Repair Parts
Marley Engineered Products Service Center. Within the limitations of this warranty, inoperative units should be returned to the nearest Marley authorized service center or the Marley Engineered Products Service Center, and we will repair or replace, at our option, at no charge to you with return freight paid by Marley. It is agreed that such repair or replacement is the exclusive remedy available from Marley Engineered Products. - Page 7 NOTES / NOTAS / NOTES...
- Page 8 NOTES / NOTAS / NOTES...
-
Page 9: Instrucciones Importantes
AMPERIOS WATTS BTUHR DE ALAMBRE HT2024SS Gris 1,0 - 8,3 250 - 2000 853 - 6826 14AWG HT2024SSNW Northern White 1,0 - 8,3 250 - 2000 853 - 6826 14AWG HT1502SS Gris 1,6 - 12,5 200 - 1500 682 - 5120... -
Page 10: Instrucciones De Instalación
INSTRUCCIONES DE Cubierta de la caja INSTALACIÓN de conexiones Caja de respaldo Conjunto calefactor Para evitar la posibilidad de incendios, lesiones personales o averías en el calefactor, cumpla las siguientes indicaciones: Desconecte la alimentación del calefactor en el panel de suministro eléctrico antes de instalarlo o repararlo. - Page 11 1. En construcción nueva sin pared terminada, coloque la caja de 240 voltios (dos alambres de energía), el alambre de color blanco debe respaldo contra el lado de la columna permitiendo que el lado se cambiarse utilizando cinta eléctrica negra para cumplir con el NEC. El extienda más allá...
-
Page 12: Instrucciones De Operación
Receptáculo en la parte trasera de la rejilla Conector tipo cinta Bisel inferior Bombilla roja de advertencia Figura 4- Conector tipo cinta Límite de 1. Conecte el cable flexible de conexión negro (L1) del calefactor con el seguridad de alambre negro de energía. reinicio (reset) 2. -
Page 13: Instrucciones De Mantenimiento
PARA REINICIAR EL LÍMITE DE SEGURIDAD (VEA LA FIGURA 5) El botón de reinicio (reset) manual está ubicado detrás del bisel inferior justo debajo de la bombilla roja de advertencia. Para lograr acceso al TODOS LOS DEMÁS PROCEDIMIENTOS DE MANTENIMIENTO botón, jale suavemente hacia afuera la lengüeta inferior del bisel inferior DEBEN SER REALIZADOS POR UN ELECTRICISTA O PERSONA y remueva a presión. - Page 14 Marley más cercano o al Centro de Servicio de Marley Engineered Products, y nosotros repararemos o reemplazaremos, según nuestra elección, sin costo para usted, con el costo de envío de regreso pagado por Marley. Se acuerda que dicha reparación o reemplazo es el remedio exclusivo disponible de parte de Marley Engineered Products.
-
Page 15: Instructions Importantes
WATTS BTUHR DE FILS HT2024SS Gris 1,0 - 8,3 250 - 2 000 853 - 6 826 14AWG HT2024SSNW Blanc du Nord 1,0 - 8,3 250 - 2 000 853 - 6 826 14AWG HT1502SS Gris 1,6 - 12,5 200 - 1 500... -
Page 16: Instructions D'installation
INSTRUCTIONS Couvercle de boîtier D'INSTALLATION de raccordement Boîtier arrière Ensemble de radiateur Pour éviter un possible départ d’incendie, des blessures corporelles ou des dommages au radiateur, respectez ces consignes : Débranchez toute alimentation secteur arrivant au panneau de service principal avant de câbler ou d’intervenir pour du service. (8 au total) Toutes les procédures de câblage et les raccordements doivent être en conformité... - Page 17 1. Dans une construction neuve sans finition de mur en place, posi- n'étant permis que pour le neutre du secteur. tionnez le boîtier arrière contre le côté d'un poteau mural, en le 5. Insérez une vis à bois #8 de trois pouces de long (non fournie) au laissant dépasser légèrement du poteau pour arriver de niveau travers du côté...
-
Page 18: Instructions D'utilisation
Prise à l'arrière de la grille Connecteur ruban Enjoliveur inférieur Voyant rouge d'alerte Restauration Figure 4 – Ruban connecteur manuelle de limite de RADIATEURS PRÉVUS POUR 240 VOLTS : sécurité 1. Branchez le fil noir en queue de cochon (L1) du radiateur avec le fil noir d'arrivée de phase du secteur. -
Page 19: Instructions D'entretien
RESTAURATION DE LA LIMITE DE SÉCURITÉ (SEE FIGURE 5) Le bouton de restauration manuelle est situé derrière l'enjoliveur inférieur, juste sous le voyant rouge d'alerte. Pour accéder à ce bou- TOUTES LES AUTRES INTERVENTIONS DE SERVICE DOIVENT ton, tirez doucement sur l'enjoliveur inférieur pour qu'il se désolidarise. ÊTRE MENÉES PAR UN ÉLECTRICIEN OU UNE PERSONNE N'utilisez pas d'outil pour l'enlever, vous pourriez l'abîmer. -
Page 20: Pièces De Rechange
GARANTIE LIMITÉE Tous les produits fabriqués par Marley Engineered Products sont garantis contre les défauts dus à la main-d'oeuvre et aux matériaux pendant un an à compter de leur date d'installation, à l'exception des éléments chauffants qui eux portent une garantie dans les mêmes conditions de cinq ans. Cette garantie ne s'applique pas pour des dommages résultant d'accident, de mésusage ou d'altération ;...
Need help?
Do you have a question about the HT2024SSNW and is the answer not in the manual?
Questions and answers