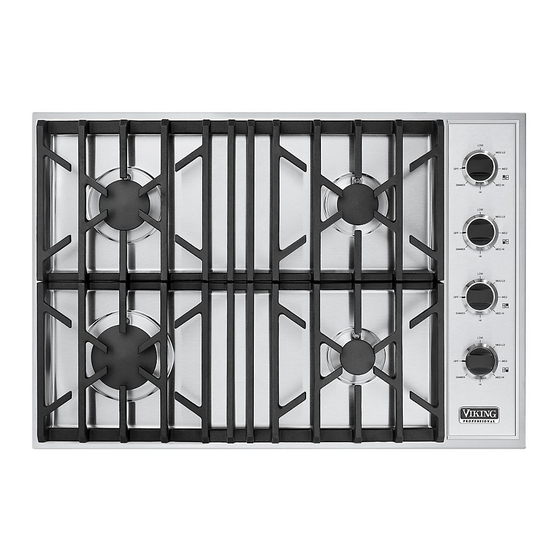
Viking VGSU104 Installation Manual
Professional and designer built-in gas cooktops
Hide thumbs
Also See for VGSU104:
- Installation manual (10 pages) ,
- Brochure & specs (32 pages) ,
- Brochure & specs (24 pages)
Table of Contents
Advertisement
Advertisement
Table of Contents

Summary of Contents for Viking VGSU104
- Page 1 Viking Installation Guide ® Viking Range Corporation 111 Front Street Greenwood, Mississippi 38930 USA (662) 455-1200 For product information, call 1-888-VIKING1 (845-4641) or visit the Viking Web site at vikingrange.com Professional and Designer Built-In Gas Cooktops (061510) F20562C EN...
-
Page 2: Table Of Contents
Table of Contents IMPORTANT – Please Read and ollow Warnings & Important Safety Instructions _______________________________________________3 Your safety and the safety of others is • Before beginning, please read these Dimensions (VGSU Professional) _______________________________________________________6 very important. instructions completely and carefully. Specifications (VGSU Professional) _____________________________________________________7 We have provided many important safety Dimensions (DGSU Designer) _________________________________________________________8 messages in this manual and on your... - Page 3 IMPORTANT – IMPORTANT – Please Read and ollow Please Read and ollow DANGER WARNING WARNING FIRE/EXPLOSION CHEMICAL HAZARD ELECTRICAL GROUNDING If not installed, operated and HAZARD maintained in accordance INSTRUCTIONS IF THE INFORMATION IN The cooktop must be electrically grounded with the manufacturer’s THIS MANUAL IS NOT in accordance with local codes or, in the...
-
Page 4: Dimensions (Vgsu Professional)
Dimensions Specifications (VGSU Professional) (VGSU Professional) 30” Gas Cooktop Professional Gas Cooktops Description VGSU104 VGSU164 - 3 / ( 7 8 4 ” Overall width 30-3/4” (78.1 cm) 36-3/4” (93.3 cm) Overall height from bottom 5” (12.7 cm) to top of grate Overall depth from rear 21”... -
Page 5: Dimensions (Dgsu Designer)
Dimensions Specifications (DGSU Designer) (DGSU Designer) 30” Gas Cooktop Designer Gas Cooktops Description DGSU100/101 DGSU160/161 - 3 / Overall width 30-3/4” (78.1 cm) 36-3/4” (93.3 cm) ( 7 8 4 ” . 1 c Overall height from bottom 4-3/8” (11.1 cm) to top of grate Overall depth from rear 21”... -
Page 6: Dimensions (Dgcu Designer)
Dimensions Specifications (DGCU Designer) (DGCU Designer) 30” Gas Cooktop 36” Gas Cooktop Designer Gas Cooktops Description DGCU105/106 DGCU165/166 DGCU155/156 - 3 / ( 7 8 4 ” Overall width 30-3/4” (78.1 cm) 36-3/4” (93.3 cm) 45” (114.3 cm) - 3 / . -
Page 7: Cutout Dimensions
( 1 2 5 ” ( t o i c k - 1 / ( 7 2 2 ” 30”W. Cooktop (VGSU104) over 30”W. Electric Oven (VESO130/530) VGSU104 VGSU164 DGSU100/101 DGSU160/161 26-7/8” (68.3 cm) min. to 34-3/8” (87.3 cm) min. to 29-1/8”... -
Page 8: Cutout Dimensions (Dgsu/Dgcu Cooktop Over Single Electric Oven)
. from the right side of the cutout. ” m ( 9 1 ( 4 5 Downdraft Dimensions DGSU100/101 DGSU160/161 DGCU105/106 DGCU165/166 DGCU155/156 VGSU104 VGSU164 i n . 29-1/8” 34-7/8” 42-7/8” 28-1/16” 34-1/4” ” m (74.0 cm) (88.6 cm) (109 cm) (71.3 cm) -
Page 9: Clearance Dimensions (Wood/Composite Overlay)
Clearance Dimensions Electrical & Gas Requirements (Wood/Composite Overlay) The bottom of a standard hood should be Electrical Requirements Manual shut-off valve: 30” (76.2 cm) min. to 36” (91.4 cm) max. There is no connection necessary beyond • The installer-supplied valve must be / C o above the countertop. -
Page 10: General Information
Electrical & Gas Requirements General Information Rigid Connections: Initial Ignition of Burners Electrical Requirement CAUTION • Incoming gas is brought from an intake All cooktops are tested before leaving the Normal grounded household current, pipe (not supplied) at the rear of the unit factory. -
Page 11: Installation
Installation VGSU Bracket Installation Optional Gasket Countertop Countertop Cooktop Cooktop Bracket Screw Bracket Eye Bolt Screw hold down brackets using the #10 x 1/2” sheet Remove the grates and burner caps. Turn the cooktop upside down and place on the Screw the eye bolt into the self-retaining nut and metal screw to the burner box. -
Page 12: Final Preparation
All servicing should be referred to a qualified technician. grease, etc. remaining from the manufacturing process. Some stainless Contact Viking Range Corporation, 1-888-VIKING1 (845-4641), for the nearest service parts steel parts may have a plastic protective distributor in your area or write to: wrapper which must be peeled off.


