
Related Manuals for stabo freecomm 250


Summary of Contents for stabo freecomm 250
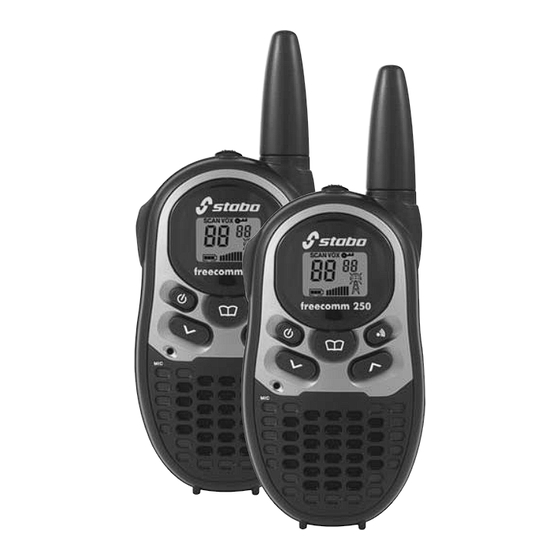
- Page 1 Art.-Nr. 20251 stabo freecomm 250 PMR 446 Handsprechfunkgerät / radio handheld Bedienungs- anleitung Owners Manual Wichtig / Important...
- Page 2 Damit Sie Ihre Geräte optimal nutzen können und viel Freude daran haben, lesen Sie bitte als erstes diese Bedienungsanleitung aufmerksam und vollständig durch! Beachten Sie unbedingt die Sicherheitshinweise, um Gefahren für sich und andere zu vermei- den oder Schäden an den Geräten zu verhindern. Bewahren Sie die Anleitung sorgfältig auf.
- Page 3 Wichtige Informationen Der Funkstandard PMR 446 ist in AT, BE, CH, DE, DK, ES, FI, FR, GB, GR, IE, NL, NO, PL, PT, SI freigegeben (anmelde- und gebührenfrei). In IT besteht Anmeldepflicht: von Einwohnern Italiens wird bei der Anmeldung der Funkgeräte eine einmalige Gebühr erhoben! (Urlauber können ihre Geräte für die Dauer des Aufenthalts in Italien ohne Anmeldung frei nutzen.)
- Page 4 Lieferumfang Anzeige im Display...
-
Page 5: Bedienelemente Und Anschlüsse
Bedienelemente und Anschlüsse 1. Antenne (Die Antenne ist fest mit dem Gehäuse verbunden: versuchen Sie niemals, sie abzuschrauben!) 2. LC-Display 3. Ruf-Taste: -Tasten: 5. Lautsprecher 6. Mikrofon 7. Menü-Taste: 8. Ein-/Aus-Taste 9. PTT: Sende-Taste 10. DC-Ladebuchse... -
Page 6: Vorbereitungen Für Den Betrieb
Vorbereitungen für den Betrieb! Laden der Akkuzellen Vor der Inbetriebnahme der Geräte müssen die Akkuzellen zunächst geladen werden (Ladezeit ca. 12 bis 14 Stunden). Maximale Ladezeiten:... - Page 7 Hinweis: Sicherheitshinweise Ladegerät Betrieb mit Batterien Wichtige Hinweise Entsorgungshinweise Akkuzellen/Batterien...
- Page 8 Energie-Management Batteriekapazitäts- Anzeige Gürtelclip Gürtelclip anbringen Gürtelclip abnehmen...
- Page 9 Funktionen Hinweis: Wird eine Einstellung nicht innerhalb von 10 Sekunden bestätigt übernimmt das Gerät automatisch die letzte Einstellung. Gerät ein-/ausschalten Lautstärke einstellen Kanal auswählen Hinweis: Stellen Sie immer bei beiden Funkgeräten denselben Kanal ein! 1ch. Senden Empfang Monitor-Funktion...
- Page 10 Rufton Auswahl der Rufton- Melodie CA 1 Tastenquittungston Quittungston aktivieren to o to on Quittungston deaktivieren to on to oF Roger Beep Roger Beep aktivieren ro oF ro on Roger Beep deaktivieren ro on ro oF...
- Page 11 VOX Funktion VOX aktivieren VOX oF VOX on VOX deaktivieren VOX on VOX oF Automatischer Suchlauf (Scan) Kanal-Suchlauf aktivieren SCAN Suchlauf deaktivieren SCAN Tastatursperre Tastatursperre aktivieren Tastatursperre deaktivieren...
- Page 12 Displaybeleuchtung Pflege-Hinweise Entsorgungshinweis Defekte elektrische/elektronische Geräte und verbrauchte Akkus gehören nicht in den Hausmüll!
-
Page 13: Technische Daten
Problembeseitigung Fehler/Lösung Laden Sie die Akkuzellen bzw. erneuern Sie die Batterien. Prüfen Sie, ob bei beiden Geräten derselbe Kanal eingestellt ist. Sie sind außerhalb der Reichweite: verringern Sie die Entfernung zu Ihrem Funkpartner. Die Tastatursperre ist eingeschaltet: deaktivieren Sie die Tastatursperre Technische Daten £... -
Page 14: General Notes
General notes Please read this manual carefully and completely to make yourself familiar with the various functions of your radio set. Make sure to observe the safety instructions to avoid any danger for you and other persons as well as damage to the radio set. Keep the operating instructions in a safe place. - Page 15 Important information The radio standard PMR 446 is assigned in AT, BE, CH, DE, DK, ES, FI, FR, GB, GR, IE, NL, NO, PL, PT, SI (free of charge and with- out any registration). There is obligatory registration in IT: Italian residents have to pay a nonrecurring charge upon registration of the radio set! (Tourists may use their radio sets free of charge for the duration of their stay in Italy.)
- Page 16 Scope of delivery The display...
-
Page 17: Control Elements And Connections
Control elements and connections 1. Antenna: The antenna is fixed to the housing, do not try to unscrew 2. LC display 3. Call key: keys: 5. Speaker 6. Microphone 7. Menu key: 8. On/off key 9. PTT key: 10. DC charging socket... - Page 18 Provisions for the operation! Charging of the batteries Before the commissioning of the radio sets the batteries have to be charged (charging time approx. 12 to 14 hours). Maximum charging times:...
- Page 19 Note: Safety instructions for the power supply Operation with not rechargeable batteries Important notes: Information on disposal of batteries...
- Page 20 Energy management Battery level indicator Attach/take off belt clip...
-
Page 21: Operation Functions
Operation/functions Note: If a setting is not activated within 10 seconds the radio set will automatically adopt the last setting. Switching on/off the radio set Adjusting the volume Select channel Note: Always adjust both radio sets to the same channel! 1 ch Transmitting Receiving... - Page 22 Call tone Selection of the call tone Key tone mode Activate key tone mode to oF to on Deactivate key tone mode to on to oF Roger Beep Activate roger beep o oF o on Deactivate roger beep o on o oF...
- Page 23 VOX function Activate VOX VOX oF VOX on Deactivate VOX VOX on Automatic scan Activate scanning SCAN Deactivate scanning SCAN Key lock Activate key lock Deactivate key lock Display lighting...
-
Page 24: Care Instructions
Care instructions Disposal instruction Electric and electronic devices are not to be thrown into the domestic waste. Troubleshooting Fault/Remedy Charge the batteries or renew the batteries. Adjust the same channel for all radio sets. If you are out of reach, reduce the distance to your radio partner. The key lock is switched on. - Page 25 Technical data £ Channel frequency table...
- Page 27 Hersteller - Garantie stabo Elektronik GmbH, Münchewiese 16, 31137 Hildesheim/Deutschland...
- Page 28 Telefon lösen. Schicken Sie deshalb Ihr neues Gerät nicht gleich zurück, STOP sondern nutzen Sie die telefonische Beratung des stabo Service-Teams. Unsere Techniker kennen sich mit den Geräten sehr genau aus und stehen Ihnen gerne mit praktischen Tipps und kompetenten Ratschlägen...
Need help?
Do you have a question about the freecomm 250 and is the answer not in the manual?
Questions and answers