Advertisement
INSTALLATION INSTRUCTIONS FOR PART 99-8213
APPLICATIONS
Toyota Prius 2004-2005
99-8213
KIT FEATURES
• ISO DIN Head Unit Provisions with Pocket
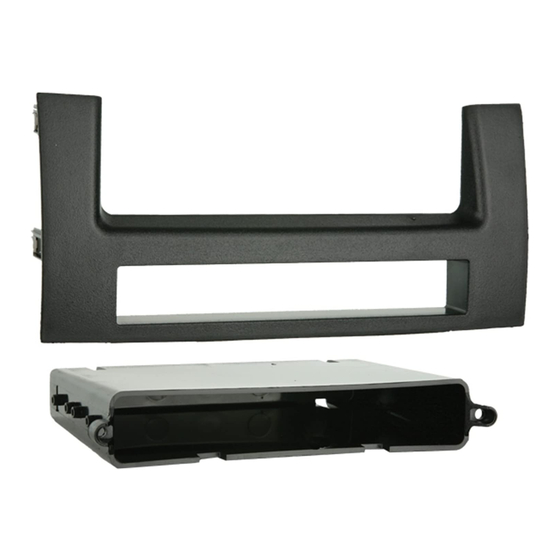
KIT COMPONENTS
A) Radio Housing w/ Pocket • B) Pocket • C) (2) Phillips Screws
B
C
A
TOOLS REQUIRED:
Socket Wrench • Flat Blade Screwdriver • Phillips Screwdriver • Utility Knife • Tape or Heat Shrink Tubing
1-800-221-0932
www.metraonline.com
© COPYRIGHT 2004-2007 METRA ELECTRONICS CORPORATION
Advertisement
Table of Contents

Related Manuals for Metra Electronics 99-8213


Summary of Contents for Metra Electronics 99-8213
- Page 1 INSTALLATION INSTRUCTIONS FOR PART 99-8213 APPLICATIONS Toyota Prius 2004-2005 99-8213 KIT FEATURES • ISO DIN Head Unit Provisions with Pocket KIT COMPONENTS A) Radio Housing w/ Pocket • B) Pocket • C) (2) Phillips Screws TOOLS REQUIRED: Socket Wrench • Flat Blade Screwdriver • Phillips Screwdriver • Utility Knife • Tape or Heat Shrink Tubing 1-800-221-0932 www.metraonline.com...
- Page 2 99-8213 Dash Disassembly ........1-2 Kit Assembly .
- Page 3 99-8213 TOYOTA PRIUS 2004-2005 Disconnect the negative battery terminal to prevent an accidental short circuit. Unsnap panel with vent on driver’s side and remove. (Figure A) Remove (2) Phillips screws on panel below steering column with hood release on it and remove panel.
- Page 4 99-8213 TOYOTA PRIUS 2004-2005 (CON’T) Remove (2) Phillips screws from flip open panel below radio, unclip and remove. (Figure E) Remove (2) 10mm bolts from info center display above radio, unclip and remove. (Figure F) Remove (2) 10mm bolts from top of radio assembly.
- Page 5 99-8213 ISO DIN HEAD UNIT PROVISIONS For the pocket to fit properly inside the dash the sides of the pocket need to be trimmed. (Figure A) Using a utility knife carefully cut off the 4 round pieces on each side of the pocket.
- Page 6 99-8213 CLIMATE CONTROL WIRING For the climate controls to operate properly, the following steps need to be followed: Locate the 20 way white connector that has 5 wires in it that was plugged into the factory radio. (see diagram) You will need the small gauge white wire in pin 10 and the small gauge pink wire in pin 9.
- Page 7 Re-connect the negative battery terminal and test the unit for proper operation. Reassemble radio and dash assemblies in reverse order of disassembly using the 99-8213 in place of the factory panel.
- Page 8 INST998213 1-800-221-0932 www.metraonline.com Rev. 04/12/07 © COPYRIGHT 2004-2007 METRA ELECTRONICS CORPORATION INST99-8213...
Need help?
Do you have a question about the 99-8213 and is the answer not in the manual?
Questions and answers