Advertisement
Quick Links
User
Manual
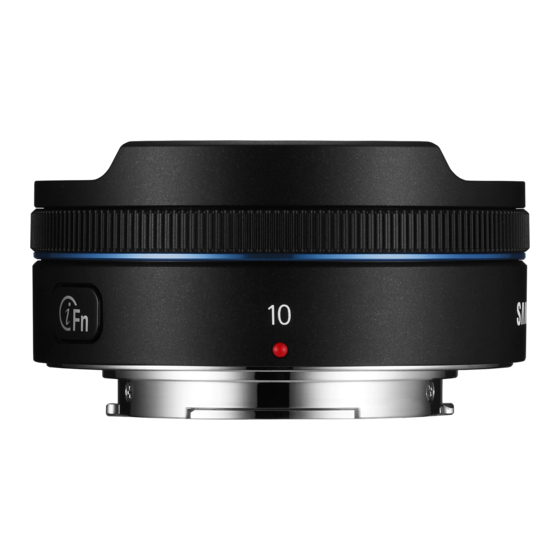
SAMSUNG 10mm F3.5 Fisheye
ENG / SPA / FRE
This User Manual has been specially designed to guide you through the basic functions and features of your device.
Please read the User Manual carefully to ensure safe and correct use.
A
1
4
2
3
B
C
E
F
LENS FOR A UNIQUE AND FUN PERSPECTIVE
Before Using This Device
Thank you for purchasing the Samsung Lens. The illustrations used
in this manual may differ from the actual items. Some functions
described in this manual may not be available depending on the
camera model. Update the fi rmware of the camera body and lens.
Visit www.samsung.com to download the fi rmware.
Unpacking
Lens, Lens cap, Lens mount cover, Case, User manual
Layouts
(See illustration A)
1 Lens mount index 2 Focus ring 3 Lens 4 i-Function button
5 Lens information contacts
Attaching and Removing the Lens
► To attach the lens,
1
Remove the lens cap, lens mount cover, and body cap.
• Grab the outer edge of the lens cap and pull it away from the
lens body to detach it. (See illustration B)
2
Align the red mark on the lens with the red mark on the
camera body. Then, rotate the lens as shown in the illustration
AD68-08102A (1.3)
until it locks into place. (See illustration C)
► To remove the lens, press and hold the lens release button, and
then rotate the lens as shown in the illustration.
(See illustration D)
5
• Align the grooves on the lens and the lens cap and then push
the cap toward the lens body until it clicks into place.
(See illustration E)
Using the focus ring
(See illustration F)
In the MF mode, adjust the focus manually by rotating the focus
ring on the lens. You can select the MF mode on the camera.
Use the MF Assist function on the camera to aid with manual
focusing. Refer to your camera manual for more details.
Using i-Function
When you press the i-Function button on the lens, you can select
E to adjust the depth of field or select Z to zoom
in on a subject. You can also adjust some shooting options. This
feature is available only when your camera supports i-Function.
Available options may differ depending on shooting modes.
1
D
Rotate the mode dial to P, A, S, M, or i.
2
Press [i-Function] on the lens to select a setting.
(See illustration G)
• Available settings may differ depending on the shooting mode.
Setting
Shooting mode
Setting
Aperture value
E
i
Exposure value
Z
P, A, S, M, i
Shutter
White Balance,
S, M
ISO
speed
3
Rotate the focus ring on the lens to adjust the setting
(or to change the zoom rate in Z mode).
G
[English]
• To select the items that will appear when you press the
i-Function button on the lens, you can use the
iFn Customizing menu on your camera.
• When you use Z and rotate the focus ring, the photo
resolution will vary according to changes in the zoom rate.
Shooting
1
Attach the Fisheye lens to the camera.
2
Adjust the focus.
• Set the focus method on the camera.
Auto Focus (AF): The focus is adjusted automatically when
you half-press the shutter.
Manual Focus (MF): The focus can be adjusted manually by
rotating the focus ring on the lens.
3
Capture a photo.
• The Fisheye Lens produces strong visual distortion to give
images a convex appearance. The edges of photos taken with
a fi sheye lens may be dark. To offset this, adjust the aperture
value one or two steps higher.
• You cannot attach a fi lter when you use a Fisheye Lens.
Specifi cations
Lens Name
SAMSUNG 10mm F3.5 Fisheye
Focal Length
10 mm
Focal Length in 35 mm Equivalent 15.4 mm
Lens Construction-Elements
7
Lens Construction-Groups
5
Aspherical Elements
1
Angle of View
180°
Maximum Aperture
F3.5
Minimum Aperture
F22
Number of Diaphragm Blades
7
Minimum Focus Distance
0.09 m
Maximum Magnifi cation
0.22X
Lens Hood
N/A
Optical Image Stabilizer
No
Mount Type
Samsung NX Mount
Max. Diameter
58.8 mm
Length
26.3 mm
Weight (Lens Only, Approx.)
72 g
Operating Temperature
0–40 °C
Operating Humidity
5–85 %
Shooting mode
Specifi cations may change without notice for better performance.
A, M
P, A, S
State of California Proposition 65 Warning (US only)
P, A, S, M
WARNING : This product contains chemicals known to the
State of California to cause cancer and birth defects or other
reproductive harm.
LENTE QUE BRINDA UNA PERSPECTIVA ÚNICA Y DIVERTIDA
Antes de utilizar este dispositivo
• Para seleccionar los elementos que aparecerán al presionar
el botón i-Function en la lente, puede utilizar el menú
Gracias por adquirir la lente Samsung. Las ilustraciones que se
Personalización iFn de la cámara.
utilizan en el manual del usuario pueden ser diferentes de los
• Al utilizar Z y girar el anillo de enfoque, la resolución de
elementos reales. Algunas funciones descritas en este manual
la foto varía de acuerdo con los cambios en el rango de zoom.
podrían no estar disponibles según el modelo de la cámara.
Actualice el fi rmware del cuerpo y la lente de la cámara.
Disparo
Visite www.samsung.com para descargar el fi rmware.
1
Desembalaje
Coloque la lente de ojo de pez en la cámara.
2
Ajuste el enfoque.
Lente, Tapa de la lente, Tapa de montaje de la lente, Funda,
Manual del usuario
• Defi na el método de enfoque en la cámara.
Enfoque automático (AF): El enfoque se ajusta
Diseño
(Ver ilustración A)
automáticamente al presionar el obturador hasta la mitad.
Enfoque manual (MF): El enfoque puede ajustare
1 Índice de montaje de la lente 2 Anillo de enfoque 3 Lente
manualmente girando el anillo de enfoque de la lente.
4 Botón i-Function 5 Contactos de información de la lente
3
Tome una fotografía.
Colocar y retirar la lente
• La lente de ojo de pez produce una fuerte distorsión visual que
► Para colocar la lente
aporta una apariencia convexa a las imágenes. Los bordes de
1
las fotografías tomadas con una lente de ojo de pez podrían
Retire la tapa de la lente, la tapa de montaje de la lente y la
ser oscuros. Para equilibrar este efecto, ajuste el valor de
cubierta del cuerpo.
apertura uno o dos pasos más alto.
• Tome el borde externo de la tapa de la lente y tíre de él en
• No podrá colocar un fi ltro al utilizar una lente de ojo de pez.
dirección opuesta al cuerpo de la lente para retirarla.
(Ver ilustración B)
Especifi caciones
2
Haga coincidir la marca colorada de la lente con la marca
colorada del cuerpo de la cámara. Luego, gire la lente como
Nombre de la lente
se muestra en la ilustración hasta que se ajuste en su sitio.
(Ver ilustración C)
Distancia focal
Distancia focal en equivalente a 35 mm 15,4 mm
► Para retirar la lente, mantenga presionado el botón de
desenganche, y luego gire la lente como se muestra en la
Construcción de la lente - Elementos
ilustración. (Ver ilustración D)
Construcción de la lente - Grupos
• Alinee los surcos de la lente y la tapa de la lente, y luego
Elementos Asféricos
empuje la tapa hacia el cuerpo de la pante hasta que quede
fi jo en su lugar. (Ver ilustración E)
Vista angular
Uso del anillo de enfoque
Apertura máxima
(Ver ilustración F)
Apertura mínima
En el modo MF, ajuste el enfoque manualmente girando el anillo
Número de láminas del diafragma
de enfoque de la lente. Puede seleccionar el modo MF en la
cámara.
Distancia mínima de enfoque
Amplifi cación máxima
Ajuste la función de Asistencia MF para obtener ayuda con el enfoque
manual. Consulte el manual de su cámara para conocer más detalles.
Cubierta de la lente
Estabilizador de imagen óptica
Uso de i-Function
Tipo de montaje
Al presionar el botón i-Function en la lente, podrá seleccionar
Diámetro máximo
E para ajustar la profundidad de campo, o Z para
Distancia
hacer zoom sobre un objetivo. También podrá ajustar algunas
Peso (Sólo lentes, Aprox.)
opciones de disparo. Esta función solo está disponible si la
cámara admite i-Function. Las opciones disponibles pueden variar
Temperatura de funcionamiento
según el modo de disparo.
Humedad de funcionamiento
1
Gire el selector de modos hasta P, A, S, M o i.
2
Las especifi caciones pueden cambiar sin previo aviso para un
Presione [i-Function] en la lente para seleccionar una
mejor rendimiento.
confi guración. (Ver ilustración G)
• La confi guración disponible puede variar según el modo de
disparo seleccionado.
Confi guración Modo de disparo
Confi guración
Modo de disparo
i
Valor de apertura
E
A, M
Valor de
Z
P, A, S, M, i
P, A, S
exposición
Velocidad del
Balance de
S, M
P, A, S, M
obturador
blancos, ISO
3
Gire el anillo de enfoque de la lente para modifi car los ajustes
(o para modifi car el nivel de zoom en el modo Z).
[Español]
SAMSUNG 10mm F3.5
Fisheye
10 mm
7
5
1
180º
F3.5
F22
7
0,09 m
0,22X
N/A
No
Montaje Samsung NX
58,8 mm
26,3 mm
72 g
0–40 °C
5–85%
Advertisement

Related Manuals for Samsung 10mm F3.5 Fisheye


Summary of Contents for Samsung 10mm F3.5 Fisheye
- Page 1 Thank you for purchasing the Samsung Lens. The illustrations used Gracias por adquirir la lente Samsung. Las ilustraciones que se iFn Customizing menu on your camera.
- Page 2 • Make sure to change lenses only in a clean environment and do not Lea las siguientes sugerencias de seguridad detenidamente para utilizar el • Samsung no es responsable de los daños causados por el uso con Veuillez lire attentivement les conseils de sécurité suivants pour une lorsque l’appareil photo est éteint.