Table of Contents
Advertisement
Available languages
Available languages
Model K360M
High Pressure Washer Operator Manual
Overview . . . . . . . . . . . . . . . . . . . . . . . . . . . . . . . . . .1
Precautions . . . . . . . . . . . . . . . . . . . . . . . . . . . . . . .1-3
Assembly Instructions . . . . . . . . . . . . . . . . . . . . . . . . .3
Operating Instructions . . . . . . . . . . . . . . . . . . . . . . . . .4
Using the Accessories . . . . . . . . . . . . . . . . . . . . . . . .5
Working with Detergents . . . . . . . . . . . . . . . . . . . . . . .6
Shut Down and Clean-Up . . . . . . . . . . . . . . . . . . . . . .7
Taking a Break . . . . . . . . . . . . . . . . . . . . . . . . . . . . . .7
Winterizing and Long-Term Storage . . . . . . . . . . . . . .7
Cleaning Tips . . . . . . . . . . . . . . . . . . . . . . . . . . . . .8-9
Optional Cleaning Accessories . . . . . . . . . . . . . . . . . .9
Troubleshooting . . . . . . . . . . . . . . . . . . . . . . . . . .10-11
Specifications
Max. Operating Pressure
Max. Water Volume
Voltage
Amp Draw
In Canada Call:
1-800-465-4980
or visit our website:
www.karcher.ca
1400 PSI
1.7 GPM
120 V
14 AMPS
Advertisement
Chapters
Table of Contents

Related Manuals for Kärcher K360M


Summary of Contents for Kärcher K360M
-
Page 1: Table Of Contents
Model K360M High Pressure Washer Operator Manual Overview ........1 Precautions . -
Page 2: Overview
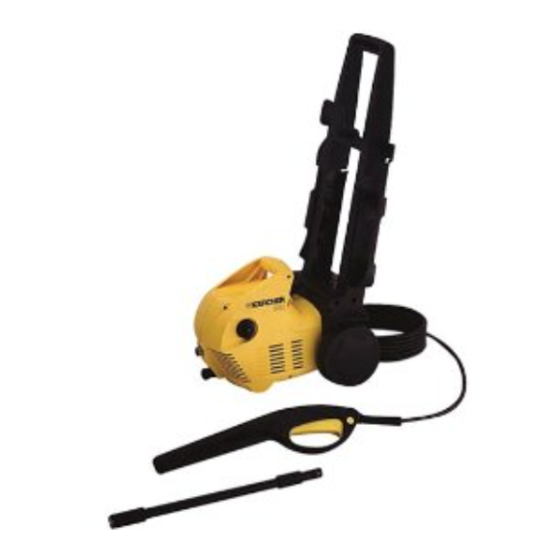
Model K360M OVERVIEW Item Description 1. Vario spray wand 2. Dirtblaster ® wand 3. Spray wand extension 4. Package of 8 screws (not pictured) 5. Trigger gun 6. Trigger gun safety lock 7. High pressure hose 8. Mobile adapter bracket with wheel (qty. 2) 9. -
Page 3: Precautions
IMPORTANT PRECAUTIONS – Read First! Safety Warnings heat and sharp edges. Always disconnect the extension cord from the receptacle When using this product, basic precau- before disconnecting the product from the tions should always be followed: extension cord. If you are using an •... -
Page 4: Precautions
IMPORTANT PRECAUTIONS – continued Water Supply (Cold Water Only) • The water supply temperature must not • Water hose must be at least 3/4 inch exceed 104°F/40°C. in diameter. • Never use the pressure washer to draw • Flow rate of water supply must not fall in water contaminated with solvents, below 2.5 GPM (gallons per minute). -
Page 5: Operating Instructions
OPERATING INSTRUCTIONS Step 1 Step 2 Connect the high pressure hose to Insert the spray wand of the unit’s high pressure outlet. your choice into the spray wand extension. Push in and turn clockwise to lock spray wand in place. Step 3 Step 4 Connect garden hose... -
Page 6: Using The Accessories
USING THE ACCESSORIES Vario spray wand The Vario spray wand allows you to adjust the cleaning pressure. To clean at maximum pressure, the Vario wand must be positioned to the high pressure setting (+). To apply detergent, the wand must be positioned to the low pressure setting (-). For higher pressure turn wand collar in the... -
Page 7: Working With Detergents
WORKING WITH DETERGENT Karcher Pressure washers operate at two pressures. The high pressure setting is used for cleaning, you cannot apply detergents when working at high pressure. To apply detergents you must be operating at low pressure. For best results see Cleaning Tips on pages 8 &... -
Page 8: Taking A Break
SHUTTING DOWN & CLEAN-UP Step 1 Step 2 Step 3 Step 4 Remove de- tergent suction tube from Turn the switch to Turn off the water Press trigger to container and insert into off position and source. release water 1 gallon of fresh water. unplug cord from pressure. -
Page 9: Cleaning Tips
Always clean from top to bottom a new section of the cleaning surface, be and from left to right. For removing sure to overlap the previous section to extremely stubborn stains, use Karcher eliminate stop marks and ensure a more Dirtblaster ®... -
Page 10: Optional Cleaning Accessories
To remove caked-on mud from damage. garbage cans, lawn mower blades, wheel- barrows or other non-sensitive metal sur- Recommendations: faces, you may want to use the Karcher • Before cleaning any surface an inconspic- Dirtblaster ® Nozzle. uous area should be cleaned to test spray... -
Page 11: Troubleshooting
TROUBLESHOOTING Disconnect the machine from the power source before making any repair. Symptom Cause Solution Motor will not start. On/Off switch is in the “OFF” Turn switch to the “ON” (I) position. (O) position. Power cord is not plugged in. Plug in power cord. - Page 12 Call service center. damaged or worn. Oil Drip. Oil seals are damaged Call service center. or worn. If you encounter any additional In Canada Call: difficulties not listed, please call 1-800-465-4980 our service center for help. or visit our website: www.karcher.ca...
-
Page 13: Fiche Technique
Modèle K360M Nettoyeur haute pression manuel d’instructions Vue d’ensemble ......1 Précautions .......1-3 Instructions de montage . -
Page 14: Vue D'ensemble
Modèle K360M Vue d’ensemble Réf. Désignation 1. Lance de vaporisation Vario 2. Lance Dirtblaster ® 3. Rallonge de la lance de vaporisation 4. Emballage de 8 vis (non montré) 5. Pistolet 6. Verrou de sûreté du pistolet 7. Boyau à haute pression 8. -
Page 15: Précautions
PRÉCAUTIONS IMPORTANTES – Lire d’abord! Précautions pas une rallonge de façon abusive et ne tirez pas de sécurité d’un coup sec pour la débrancher. Gardez la ral- longe loin de la chaleur et des extrémités tran- Lorsque vous utilisez ce produit, des pré- chantes. -
Page 16: Instructions De Montage
PRÉCAUTIONS IMPORTANTES – suite Alimentation en eau • La température de l'eau ne doit pas dépasser 40 °C/104 °F. (N'utiliser que de l'eau froide) • Ne jamais utiliser le nettoyeur haute pression • Le diamètre du tuyau souple d'alimentation en pour aspirer de l'eau contaminée par des eau doit avoir au moins 3/4 de pouce. -
Page 17: Instructions D'utilisation
INSTRUCTIONS D’UTILISATION Étape1 Étape 2 Fixez le boyau à haute pression à la Insérez la lance de vapor- sortie haute pression de l’appareil. isation de votre choix dans la rallonge. Pressez contre le ressort de tension et tournez en position de verrouillage. Étape 3 Étape 3 À... -
Page 18: Utilisation Des Accessoires
UTILISATION DES ACCESSOIRES Lance de vaporisation Vario La lance de vaporisation Vario vous permet d’ajuster la pression selon le nettoyage. Pour nettoyer à la pression maximale, la lance Vario doit être placée à la position (+). Pour l’emploi de détergent, la lance doit être placée à la position (-). Pour augmenter lapression,tournez la bague vers la... -
Page 19: Utilisation Avec Du Détergents
UTILISATION AVEC DU DÉTERGENT Les nettoyeurs à pression Karcher fonctionnent à deux niveaux de pression. La position haute pression est employée pour le nettoyage et ne doit pas être utilisée pour l’emploi de détergent. Les détergents doivent être appliqués à basse pression. -
Page 20: Arrêt De L'appareil Et Nettoyage
ARRÊT DE L’APPAREIL ET NETTOYAGE Étape1 Étape 2 Étape 3 Étape 4 Retirez le tube de succion de déter- Placez l’interrup- Fermez le robinet Appuyez sur la gent du contenant et l’in- teur à la position d’eau. gâchette pour sérez dans un récipient de arrêt (O) et évacuer la pres- 4 litres rempli d’eau claire. -
Page 21: Conseils Pour Le Nettoyage
à droite. Pour chevaucher la surface précédente pour enlever les taches extrêmement rebelles, éviter de laisser des marques d'arrêt et utiliser la lance «Dirtblaster ® » Karcher. obtenir de meilleurs résultats. Attention : Ne pas utiliser la lance Voitures, camions, «Dirtblaster ®... -
Page 22: Accessoires De Nettoyage En Option
• Lance de vaporisation pour dessous de caisse • Rallonge pour boyau de 7,5 m. (25 pi.) • Nettoyeur pour tuyaux • Brosse de lavage rotative • Boyau de succion d’eau Aux Canada appelez: 1-800-465-4980 ou visitez notre site web: www.karcher.ca... -
Page 23: Dépannage
DÉPANNAGE Débranchez l’appareil avant d’effectuer toute réparation. Symptômes Causes Remédes Le moteur ne Interrupteur marche/arrêt est la Placez l’interrupteur à la position position arrêt (O). marche (I). démarre pas. Le cordon d’alimentation n’est Branchez le cordon d’alimentation. pas branché. La rallonge est trop longe. Remplacez par une rallonge de 25 pi de calibre 12/2 ou par une rallonge de La rallonge n’a pas le bon calibre. - Page 24 à l’appareil. détergent. Le détergent est trop épais. Diluez le détergent; pour de meilleurs résul- tats, utilisez un détergent de marque Karcher. Le filtre du tube de succion Faites couler de l’eau dans le filtre pour de détergent est obstrué.