Yealink SIP-T20P User Manual
Hide thumbs
Also See for SIP-T20P:
- User manual (110 pages) ,
- Quick start manual (39 pages) ,
- Admin manual (7 pages)
Table of Contents
Advertisement
Quick Links
Advertisement
Table of Contents

Subscribe to Our Youtube Channel
Related Manuals for Yealink SIP-T20P


Summary of Contents for Yealink SIP-T20P
-
Page 2: About This Guide
About This Guide Thank you for choosing this Enterprise IP Phone which is especially designed for power users in the office environment. It features fashion and sleek design, abundant telephony applications, broad interoperability with the popular 3 party VoIP products, fulfilling the VoIP deployment needs from enterprise and ITSP. -
Page 3: Table Of Contents
Tables of Contents Getting Started.................- 1 - Packing List ..........................- 1 - Assembling the Phone........................ - 2 - Configuration and Registration ....................- 4 - Configuring via Web Page ....................- 4 - Configuring via keypad...................... - 5 - Overview ..................- 6 - Keypad Instruction........................ - Page 4 Call Forward ........................- 20 - During an Active Call ......................- 20 - Mute ..........................- 20 - Call Hold .......................... - 20 - Call Waiting ........................- 21 - Call Transfer........................- 21 - 3-way Conference ......................- 22 - Voicemail .........................
-
Page 5: Getting Started
Enterprise IP Phone Getting Started Getting Started Packing List The following components are included in your package: Enterprise IP Phone Phone Stand Power Adapter - 1 -... -
Page 6: Assembling The Phone
Enterprise IP Phone Getting Started Handset & Handset Core Ethernet Cable Quick Installation Guide & Quick Reference Check this list before installation to ensure that you have received each item. If you are missing any items, contact your IP phone reseller. Assembling the Phone This section introduce how to assemble the phone with the components in the packing list:... - Page 7 Enterprise IP Phone Getting Started 1) Attach the Stand, as shown below: 2) Connect Handset and Headset, as shown below: Note: Headset is not provided in the packing list. Please contact your distributor for more information. 3) Connect Network and Power There are two ways for network and power source connections.
-
Page 8: Configuration And Registration
Enterprise IP Phone Getting Started Note: If inline power is provided, do not install AC adapter. Make sure the Ethernet cable and switch/hub are PoE compliant. The Internet Port can be also connected to Hub/Switch/IP PBX or other internet devices. The phone can also share the network connection with other network devices such as PC. -
Page 9: Configuring Via Keypad
Enterprise IP Phone Getting Started PPPoE: If you are using the xDSL Modem, you can connect your phone to the internet via PPPoE mode. Please contact your ISP for the User Name and Password for internet access. Note: Using the wrong network parameters may result in inaccessibility of your phone and may also have an impact on your network performance. -
Page 10: Overview
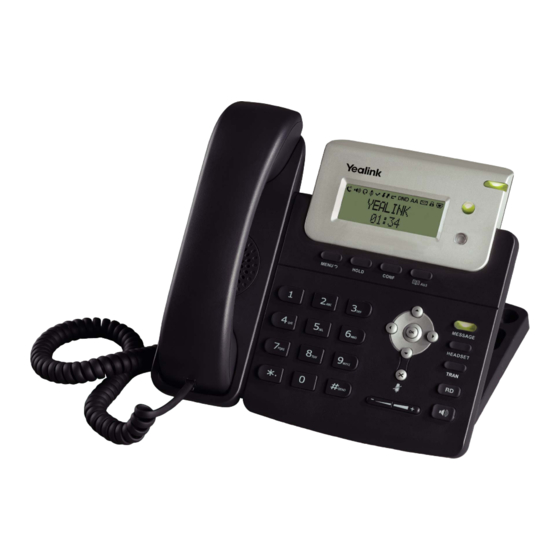
Enterprise IP Phone Overview Overview Keypad Instruction You can check the following list which introduces the IP phone’s keypad in details: Power Indication LED It will show the power status, it will be on if the phone is powered, off if the phone is not powered. -
Page 11: Led Instruction
Enterprise IP Phone Overview Navigation Keys Use the navigation keys to navigate in the display menus and confirm/cancel actions. Audio Device Control Keys Use the audio device control keys to perform the following actions depending on your phone type: : Adjust the volume of the handset, headset, speaker and ring tone; :... -
Page 12: Icon Instruction
Enterprise IP Phone Overview Icon Instruction The IP Phone displays different kinds of icons on its LCD, you can refer to the following table for their meanings: Icon Description Flashes when the internet is disconnected Missed calls Call in Call out Input Method: all letters and numbers Input Method: numbers Input Method: letters in lower case... - Page 13 Enterprise IP Phone Overview Phone Options Phone UI Web UI Status --IP Address √ --MAC Address √ √ --Firmware √ --Network √ --Phone --Accounts Call Features --Forward √ --Call Waiting √ --Auto Answer √ √ --“#” as send √ --Hot Line √...
-
Page 14: Customizing Your Phone
Enterprise IP Phone Customizing Your Phone Customizing Your Phone General Settings Phone Status You can view the status of your phone using the Phone interface or the Web interface. This option allows you to review: IP address; MAC address; Firmware; Network status: Mac, WAN Type, WAN IP, WAN Mask, LAN Type, LAN IP, LAN Mask, Gateway, Pri DNS and Sec DNS;... -
Page 15: Time And Date
Enterprise IP Phone Customizing Your Phone To change the language via Phone interface: 1) Press MENU->Settings->Basic ->Language. 2) Scroll through the list of available languages. 3) Press OK button when the desired language is highlighted. The language appears on the graphic display will be changed to the one you choose. 4) Press MENU key to return to the previous screen. -
Page 16: Keypad Lock
Enterprise IP Phone Customizing Your Phone Keypad Lock You can lock the keypad of your phone when you are temporarily not using it. This function helps you to protect your phone from unauthorized use. You can lock the following specific keys: MENU Keys: The MENU softkeys can not be used until unlocked. -
Page 17: Ring Tones
Enterprise IP Phone Customizing Your Phone 3) Press OK button to save the contrast change or MENU key to cancel. To adjust the volume when you are in an active call: When Handset/Headset/Hands-free mode is activated, press the Volume Adjustment Bar to a comfortable level. -
Page 18: Codec Selection
Enterprise IP Phone Customizing Your Phone Note: The ring tone file format must be in 16bits WAV format (via Ulaw Compression), 8K sample rate (monophony). Blank or other special characters can not be included in the file name. Codec Selection The IP phone supports the following voice codecs: G.722, G.723_53, G.723_63, G.726-16, G.726-24, G.726-32, G.726-40, G.729, PCMU, and PCMA. -
Page 19: Contact Management
Enterprise IP Phone Customizing Your Phone Contact Management Edit/Add/Delete Contact You can store a large number of contacts in your phone's directory. You can add, edit, delete, dial, or search for a contact in this directory. To add a contact via Phone interface: 1) Press MENU->Address Book->OK. -
Page 20: Other Settings
Enterprise IP Phone Customizing Your Phone 2) Browse the specific contact list file in .doc format, and then click Import button. The imported contact lists will be showed in the Address Book. 3) Click the Export button to export the contact list. Note: Import/Export Contact List can be only set via Web interface. -
Page 21: Dial Now
Enterprise IP Phone Customizing Your Phone 2) Enter the desired Prefix and Replace. 3) Press Add button to save the changes. 4) You can also delete a specific one from the dial plan list by pressing Del button. Note: Please contact with your system administrator for the country/area code if you want to set the dial plan. -
Page 22: Block Out
Enterprise IP Phone Customizing Your Phone 2) Enter the desired “x/.” 3) Press Add button to save the changes. 4) You can also delete a specific one from the dial plan list by pressing Del button. Note: x represents any numbers; . represents any letters. Block Out The specific phone numbers can be forbidden to be call out from your IP phone. -
Page 23: Using The Basic Call Functions
Enterprise IP Phone Using the Basic Phone Functions Using the Basic Call Functions Making a call Call Devices You can make a phone call via the following devices: 1) Pick up the handset, icon will be showed in the idle screen. 2) Press the Speaker button, icon will be showed in the idle screen. -
Page 24: Denying An Incoming Call
Enterprise IP Phone Using the Basic Phone Functions Denying an incoming call Press MENU key to deny the incoming call directly. Call Forward This feature allows you to forward an incoming call to another phone number e.g. a cell phone or voice mailbox. The display showed icon. -
Page 25: Call Waiting
Enterprise IP Phone Using the Basic Phone Functions might play a melody or message to the other party while waiting. Other calls can be received and made while having a call on hold. To hold/resume a call: 1) Press the HOLD button to put your active call on hold. 2) If there is only one call on hold, press the HOLD button again to retrieve the call. -
Page 26: 3-Way Conference
Enterprise IP Phone Using the Basic Phone Functions To Attended Transfer via Phone interface: 1) Press TRAN button during the active conversation, the call will be on hold, there will be a dial tone. Dial the second telephone number. 2) When the phone is answered, you can have a private conversation without the first person hearing it, then hang up to complete the transfer. - Page 27 Enterprise IP Phone Using the Basic Phone Functions Note: Please contact your system administrator for the connecting code. Different systems have different codes. To retrieve the new voicemail via the Phone interface: 1) Press the MESSAGE button directly. 2) You may be prompted to enter the password which is needed to connect to your VoIP telephony system.
-
Page 28: Using The Advanced Phone Functions
Enterprise IP Phone Using the Advanced Phone Functions Using the Advanced Phone Functions Account Setting Please refer to the previous part “Configuration and Registration” for the basic account setting information. The following table lists the instruction of the field about the advanced Account Setting. -
Page 29: Network Setting
Enterprise IP Phone Using the Advanced Phone Functions Network Setting PC Port Setting Please refer to the previous part “Configuration and Registration” for the basic Network WAN setting information. The following table lists the instructions of the field about the Network PC Port Setting. -
Page 30: Vlan Setting
Enterprise IP Phone Using the Advanced Phone Functions To configure PC Port settings via Phone interface: 1) Press Menu->Settings->Advanced. 2) Enter the password required, scroll to Network option, press OK button, select PC port, and press OK button to enter. 3) If you choose Bridge, it will return to the previous menu. -
Page 31: Https
Enterprise IP Phone Using the Advanced Phone Functions HTTPS This IP phone can support HTTPS (Hypertext Transfer Protocol over Secure Socket Layer). Adding SSL layer under HTTP, in short, it is a security version of HTTP. Users can set this transmission mode via web page. To configure HTTPS settings via Web interface: Go to Network->Advanced, choose WebServer option, in the pull-down menu of Type field, choose the transmission mode, then click the Confirm button to save the changes. -
Page 32: Administrator/User Password
Enterprise IP Phone Using the Advanced Phone Functions Administrator/User Password Administrator mode grants unlimited access to the phone configuration on both web and phone user interface. The administrator/user password is used to access: Web interface along with user name. the advance settings of the phone such as Network, Account, Reset to Factory Settings via the Phone interface. -
Page 33: Firmware Update
Enterprise IP Phone Using the Advanced Phone Functions 5) It will take a few minutes to reset, please do not power off during resetting, or it will cause flash memory error. To reset to factory via Web interface: 1) Choose Upgrade->Basic. 2) Click Reset button. -
Page 34: Decryption
Enterprise IP Phone Using the Advanced Phone Functions The parameters of the Autoprovision: Parameter Description Update Protocol The phone can be updated via TFTP, FTP or HTTP. TFTP Server If you choose TFTP as protocol TFTP, you need to enter the TFTP server IP address and port. -
Page 35: System Log Export
Enterprise IP Phone Using the Advanced Phone Functions Note: You can ask your system administrator for the decrypt password. System Log Export If there are any errors happened in your phone, you can export the system log and send to your system administrator for diagnosis. To export the System Log: Choose Upgrade->Advanced, select Export System Log, click Export button to export the file to your local computer. - Page 36 Enterprise IP Phone Using the Advanced Phone Functions To edit the tone filed via Web interface: 1) Choose Phone->Tones. 2) Enter the frequency and time period(in ms) as the following format: Frequency /Time Period (for example 400/200). 3) Press Confirm button to save the changes, Cancel to cancel the changes. Note: Please contact your system administrator for more information about the frequency and time period parameters.
-
Page 37: Trouble Shooting
Enterprise IP Phone Trouble Shooting Trouble Shooting I can not register to the server? 1) Check the IP address. If you set your WAN port in DHCP mode, please make sure that your DHCP server is on. 2) Check your gateway. 3) Check your DNS server. - Page 38 Enterprise IP Phone Trouble Shooting How to send SMS? You could edit the SMS in the MENU-> Messages->Text Messages. Note: Make sure that the SIP server you have registered supports SMS function. How to update the firmware? 1) Enter the webpage of your phone, go to Upgrade, then you can find the option” Select and Upgrade Firmware”...
Need help?
Do you have a question about the SIP-T20P and is the answer not in the manual?
Questions and answers