Table of Contents
Advertisement
Quick Links
Download this manual
See also:
User Manual
Advertisement
Table of Contents

Subscribe to Our Youtube Channel
Related Manuals for Staco Energy Unistar V


Summary of Contents for Staco Energy Unistar V
-
Page 1: User Manual
Uninterruptible Power Supply 1/2/3 kVA Single Phase, On-Line Double Conversion (Universal Tower / Rack Mount) USER MANUAL 003-2519 REV A... -
Page 2: Table Of Contents
Table of Contents . Important Safety Warnings ........................3 1-1. Transportation ............................ 3 1-2. Preparation ............................3 1-3. Installation ............................3 1-4. Operation ............................3 1-5. Maintenance, service and faults ......................4 2. Installation and setup ..........................5 2-1 Rear panel view ........................... 5 2-2. -
Page 3: Important Safety Warnings
1. Important Safety Warnings Please strictly comply with all warnings and operating instructions in this manual. Save this manual and carefully read the following instructions before installing the unit. Do not operate this unit before reading through all safety information and operating instructions carefully. 1-1. -
Page 4: Maintenance, Service And Faults
disconnect the mains. Prevent fluids or other foreign objects from getting inside the UPS system. The EPO, RS-232 and USB circuits are IEC 60950 safety extra low voltage (SELV) circuits. This circuit must be separated from any hazardous voltage circuits by reinforced insulation. -
Page 5: Installation And Setup
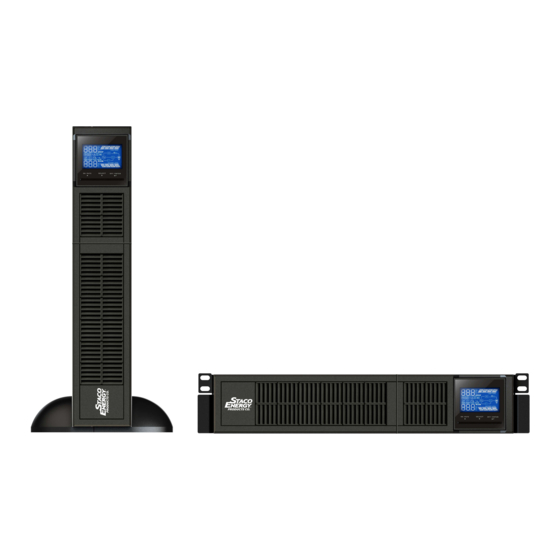
e) Disconnect charging source prior to connecting or disconnecting battery terminals. f) Determine if battery is inadvertently grounded. If inadvertently grounded, remove source from ground. Contact with any part of a grounded battery can result in electrical shock. The likelihood of such shock can be reduced if such grounds are removed during installation and maintenance. - Page 6 3 kVA 1. Programmable outlets: connect to non-critical loads. 2. Output receptacles: connect to mission-critical loads. 3. AC input 4. Input circuit breaker 5. Emergency power off function connector (EPO) 6. USB communication port 7. RS-232 communication port 8. SNMP intelligent slot 9.
-
Page 7: Operating Principle
2-2. Operating principle The operating principle of the UPS is shown as below. The UPS is composed of mains input, TVSS and EMI/RFI filters, rectifier/PFC, inverter, battery charger, DC-to-DC converter, battery, dynamic bypass and UPS output. 2-3. Install the UPS For safety consideration, the UPS is shipped out from factory without connecting battery wires. -
Page 8: Tower Installation
Install UPS and external battery Tower Installation Install UPS alone Install UPS and external battery NOTE: When installing the UPS or battery pack with feet, keep 2.76in distance from the edge of the unit. page 8 / 26 003-2519... -
Page 9: Setup The Ups
2-4. Setup the UPS Step 1: UPS input connection Plug the UPS into a two-pole, three-wire, grounded receptacle only. Avoid using extension cords. CAUTION: For 1 and 2 kVA models, to reduce the risk of fire, connect only to a circuit provided with 20 amperes maximum branch circuit overcurrent protection in accordance with the National Electric Code, ANSI/NFPA 70. - Page 10 Step 5: Disable and enable EPO function Keep pin 1 and pin 2 closed for UPS normal operation. To activate EPO function, cut the wire between pin 1 and pin 2. Short terminals for UPS normal operation. Step 6: External battery connection Connect one end of external battery cable to UPS unit and the other end to battery pack.
-
Page 11: Battery Replacement
4. When your computer restarts, the monitoring software will appear as an orange plug icon located in the system tray, near the clock. 2-5 Battery Replacement NOTICE: This UPS is equipped with internal batteries and only service personnel can replace the batteries. -
Page 12: Battery Kit Assembly (Option)
Step 7 Put the front panel back on the unit. 2-6 Battery Kit Assembly (option) NOTICE: Replacement battery pack comes fully assembled from the factory. Consult factory for details. 2-battery kit – 1 kVA Step 1: Remove adhesive tapes. Step 2: Connect all battery terminals by following below picture. - Page 13 Step 3: Put assembled battery packs on Step 4: Cover the other side of plastic shell as one side of plastic shells. shown below. Then, battery kit is fully assembled. 6-battery kit – 3 kVA Step 1: Remove adhesive tapes. Step 2: Connect all battery terminals by following below picture.
-
Page 14: Operation
3. Operation 3-1. Button operation Button View Button Function Turn on the UPS: Press and hold ON/Mute button for at least 2 seconds to turn on the UPS. Mute the alarm: After the UPS is turned on in battery mode, press and hold this button for at least 5 seconds to disable or enable the alarm system. -
Page 15: Lcd Panel
3-2. LCD Panel Display Function Remaining backup time information Indicates the remaining backup time in pie chart. Indicates the remaining backup time in numbers. H: hours, M: minute, S: second Fault information Indicates that warning and fault occurred. Indicates the warning and fault codes. The codes are listed in detail in section 3-5. -
Page 16: Audible Alarm
Battery information Indicates the Battery level by 0-25%, 26-50%, 51-75%, and 76-100%. Indicates the battery is at fault. Indicates low battery level and low battery voltage. Input & Battery voltage information Indicates the input voltage or frequency or battery voltage. Vac: Input voltage, Vdc: battery voltage, Hz: input frequency 3-3. -
Page 17: Ups Settings
3-5. UPS Settings There are three parameters to set up the UPS. Parameter 3 Parameter 1: Program alternatives. Refer to below table. Parameter 1 Parameter 2 and Parameter 3 are the setting options or values for each program. Parameter 2 01: Output voltage setting ... - Page 18 04: ECO enable/disable Interface Setting ENA: ECO mode enable DIS: ECO mode disable(Default) 05: AECO enable/disable Interface Setting ENA: Advanced ECO mode enable DIS: Advanced ECO mode disable(Default) 06: Bypass mode enable/disable when UPS is off Interface Setting ENA: Bypass mode is enabled when UPS is off DIS: Bypass mode is disabled when UPS is off (Default)
-
Page 19: Operating Mode Description
09: Acceptable input voltage range setting Interface Setting For 200/208/220/230/240 VAC models, you may choose the following selection for acceptable input voltage range: 110/300 flashing in turns: The acceptable input voltage range is from 110V to 300V. 160/260 flashing in turns: The acceptable input voltage range is from 160V to 260V. -
Page 20: Faults Reference Code
Frequency When input frequency is within 40 Hz to 70 Converter mode Hz, the UPS can be set at a constant output frequency, 50 Hz or 60 Hz. The UPS will still charge battery under this mode. Battery mode When the input voltage is beyond the acceptable range or power failure occurs and alarm is sounding every 4 seconds, UPS will backup power from battery. -
Page 21: Warning Indicator
3-8. Warning indicator Warning Icon (flashing) Alarm Sounding every second Low Battery Sounding twice every second Overload Sounding every second Battery is not connected Sounding every second Over Charge Sounding every second Site Fault Sounding every second EPO enable Sounding every second Over temperature Sounding every second Charger failure... - Page 22 Symptom Possible cause Remedy UPS is overloaded Remove excess loads from The icon is flashing UPS output. on LCD display and alarm is UPS is overloaded. Devices Remove excess loads from sounding twice every second. connected to the UPS are UPS output.
-
Page 23: Storage And Maintenance
5. Storage and Maintenance Operation The UPS system contains no user-serviceable parts. If the battery service life (3-5 years at 25°C ambient temperature) has been exceeded, the batteries must be replaced. In this case, please contact the manufacturer for replacement battery packs. Be sure to deliver the spent battery to a recycling facility. -
Page 24: Specifications
6. Specifications MODEL (SCV) 10001 10001-LB 20001 20001-LB 30001 30001-LB 1000 VA 900 VA 2000 VA 1700 VA 3000 VA 2500 VA Capacity 900 W 810W 1800 W 1530 W 2700 W 2250 W INPUT Rated 100VAC-120VAC voltage Low Line 80 VAC/70 VAC/60 VAC/55 VAC ±... - Page 25 MODEL (SCV) 10002 10002-LB 20002 20002-LB 30002 30002-LB Capacity VA/W 1000 VA / 900 W 2000 VA / 1800 W 3000 VA / 2700 W INPUT Rated 220-240 VAC Voltage Low Line 160 VAC/140 VAC/120 VAC/110 VAC ± 5 % Transfer (based on load percentage 100%-80% / 80%-70% / 70%-60% / 60%-0) Voltage...
-
Page 26: Battery Pack Specification
Battery Pack Specification Model SCV-BAT-1K SCV-BAT-2K SCV-BAT-3K Used with UPS Models Battery Type 12V 9Ah 12V 9Ah 12V 9Ah Battery Numbers Dimensions (DxWxH) 14.96 x 17.24 x 3.46 18.9 x 17.24 x 3.46 23.62 x 17.24 x 3.46 Net Weight(LBS) 37.7 63.93 90.83...
Need help?
Do you have a question about the Unistar V and is the answer not in the manual?
Questions and answers