Bernina 1300MDC Instruction Manual
Hide thumbs
Also See for 1300MDC:
- User manual (167 pages) ,
- Instruction manual (92 pages) ,
- Brochure (2 pages)

Related Manuals for Bernina 1300MDC


Summary of Contents for Bernina 1300MDC
- Page 1 Instruction Manual Bedienungsanleitung Manual de instrucciones Manuel d'instructions 1300MDC...
-
Page 2: Important Safety Instructions
BERNINA is committed to the protection of the environment. We strive to minimize the environmental impact of our products by continuously improving product design and our technology of manufacturing. At the end of life please dispose of this product in an environmentally responsible way according to the national directive. -
Page 3: Reglas De Seguridad
3. No trabajar con esta máquina si el cable o el enchufe están dañados, ella no funciona bien o está estropeada, si se ha dejado caer al suelo o dentro del agua. Llevar inmediatamente la máquina al próximo representante Bernina o al especialista correspondiente par con trolarla y/o arreglarla. -
Page 4: Sicherheitsvorschriften
1. Die Overlockmaschine nie unbeaufsichtigt stehen lassen, solange sie am Stromnetz angeschlossen ist. 2. Nach Gebrauch und vor einer Reinigung die Maschine immer vom Stromnetz trennen. 3. Vor einem Glühlampenwechsel immer Netzstecker herausziehen. 1300MDC: max. 15W (120V), max.10W (220 -240V), Glühlampen verwenden. -
Page 5: Consignes De Sécurité
1. Ne pas laisser la surjeteuse sans surveillance tant qu'elle est raccordée au réseau. 2. Après usage et avant un nettoyage, séparer toujours la machine du réseau. 3. Retirer la fiche du réseau pour changer une ampoule. Employer des ampoules pour modèle 1300MDC: max. 15W (120V), max. 10W (220 - 240V). -
Page 6: Bienvenida
Should you require further assistance, your automatischer Spitzenanhebung an! BERNINA dealer will be a good choice to visit. He has also a large selection of optional accessories ready for you, which can make the Um den vollen Nutzen aus der Maschine und all den Zusatzfunktionen application range of your BERNINA serger even larger. -
Page 7: Table Of Contents
Contents Safety regulations ............. 1 3.4. Trial Sewing - Serger / Overlock Mode ....52 Welcome ................5 3.5. Adjusting Thread Tension - Serger Contents ................6 / OL Mode ............... 52 1. Machine Overview and Installation 3.6. Practical Sewing - Serger / Overlock ▪... -
Page 8: Indice
Indice Reglas de seguridad ............2 3.6. Costura práctica - Overlock Bienvenida ................ 5 ▪ Sobrecoser la cadena de hilo al inicio de la costura ... 53 Indice ................. 7 ▪ Sobrecoser la cadena de hilo al final de la costura ..54 1. -
Page 9: Inhalt
Inhalt Sicherheitsvorschriften ............3 3.5. Feineinstellen Fadenspannungen - OL Stiche ..52 Willkommen ............... 5 3.6. Praktisches Nähen - Overlock Inhalt ................. 8 ▪ Fadenkette beim Nähbeginn einnähen ..... 53 1. Maschinenübersicht und Inbetriebnahme ▪ Fadenkette am Nähende einnähen ......54 ▪... - Page 10 Table des matiéres Consignes de sécurité ............4 3.5. Réglage fin de la tension du fil - points de surjet ..52 Welcome ................5 3.6. Couture - surjet Table des matieres ............9 ▪ Début de la couture, pose d’une chaînette de fil ..53 1.
-
Page 11: Vista Por Delante
1.1. Details of the Machine / 1.1. Detalles de la máquina 1.1. Details der Maschine / 1.1. Détails de la machine Front view Vorderansicht 1. Looper cover with built in knife guard 1. Greiferdeckel mit integrierter 2. Looper cover opening indent Messerabdeckung 3. -
Page 12: Detrás De La Tapa De La Lanzadera
1.1. Details of the Machine / 1.1. Detalles de la máquina 1.1. Details der Maschine / 1.1. Détails de la machine Inside looper cover Hinter dem Greiferdeckel 1. Selection lever for overlocking or roll hemming 1. Stichwahlhebel für Overlocken oder Rollsäumen 2. -
Page 13: Regulación De La Máquina
fit, contact a qualified electrician to install the proper polarized main socket. Do not modify the plug in any way.(for USA, Canada only) *For 1300MDC use only the foot control model YC-482 (USA,CANADA), YC-483N (220-240V) Pedal de mando Enchufar el pedal de mando en el enchufe de la máquina overlock (A) y segui-... -
Page 14: Guía-Hilo
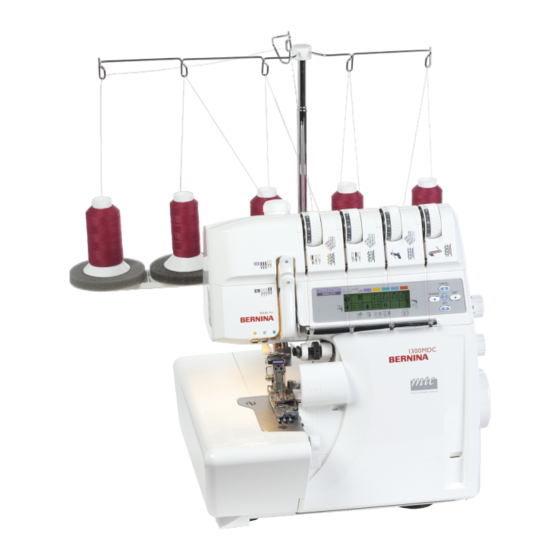
1.2. Machine Setup / 1.2. Regulación de la máquina 1.2. Einrichten der Maschine / 1.2. Equipement de la machine Thread Guide Push the support rod firmly into the socket on the back of the machine. Raise the support rod (C) fully, turning slightly until the position catches engage. Position the thread guide (D) on the thread stand so that the arrow is to the front. -
Page 15: Colocación De Los Conos De Hilo/ Bobinas
BERNINA recomienda la utilización de hilo Overlock de alta calidad, como Mettler Metrosene®, Poly Sheen® e Isacord. BERNINA empfiehlt den Einsatz von hochwertigem Overlockfaden wie Mettler Metrosene®, Poly Sheen® und Isacord. BERNINA vous recommande de choisir des fils de qualité pour surjet de marques reconnues comme Metrosene®, Poly Sheen® et Isacord. -
Page 16: Interruptor Principal Y De La Luz
T he s win g -o u t p re s s e r f oo t (p a t e nt e d Der ausschwenkbare Nähfuss (patentiert by BERNINA) provides easy access for durch BERNINA) verbessert die Übersicht threading needles or loopers. It is also easier beim Einfädeln von Greifern und Nadeln. -
Page 17: Subir / Bajar La Cuchilla Superior
2.1. Basic Operating Procedures / 2.1. Manejo 2.1. Bedienung / 2.1. Commandes Raising / lowering the upper knife Obermesser hochstellen/senken • Switch the machine off (power • Maschine ausschalten, switch "0") Hauptschalter auf „О“ stellen. • Turn the handwheel towards you until the •... -
Page 18: Cambio Del Prensatelas
2.1. Basic Operating Procedures / 2.1. Manejo 2.1. Bedienung / 2.1. Commandes Changing the presser foot Nähfuss auswechseln • Switch the machine off (power • Maschine ausschalten, Hauptschalter switch "0") auf „О“ stellen. • Raise the presser foot. • Nähfuss hochstellen. •... -
Page 19: Tapa De La Lanzadera
2.1. Basic Operating Procedures / 2.1. Manejo 2.1. Bedienung / 2.1. Commandes Looper cover To open, press to the right with your thumb in the indent provided and tilt the cover towards you. To close push it up and press lightly to the right. The cover engages automatically. -
Page 20: Volante
2.1. Basic Operating Procedures / 2.1. Manejo 2.1. Bedienung / 2.1. Commandes Handwheel The handwheel turns anti-clockwise, in the direction as indicated by the arrow above the handwheel. Inside the looper cover there is an indicator window to show two important positions of the handwheel: A: red = threading position - needles at the highest point B: purple = positon to engage / disengage the upper looper - needles at the low- est point... -
Page 21: Colocar Agujas
2.1. Basic Operating Procedures / 2.1. Manejo 2.1. Bedienung / 2.1. Commandes Inserting the needles Needles can be inserted quickly and easily with the practical needle inserter (A). Switch the machine off ( Power switch to "0") Disconnect machine from electricity supply. Raise the needles. -
Page 22: Agujas
2.2. Nadel und Faden / 2.2. Aiguille et fil Needles Nadeln Your BERNINA overlocker/serger is prepared to hold needles of the Ihr BERNINA Overlocker ist eingestellt, dass er mit normalen Haus- system 130/705H (household needles). For standard applications use haltnadeln des Systems 130/705H arbeitet. Bitte benützen Sie für universal needles of the sizes No.70 -90 (equivalent to 10-14 in the US). -
Page 23: Selección Del Hilo
L'emploi de fils décoratifs demande de réduire la vitesse de couture. Toujours tirer la chaînette de fil en arrièse avant de commencer la couture. Effectuer toujours un essai avant de travailler avec les fils décoratifs. BERNINA vous recommande de choisir des fils de qualité pour surjet de marques reconnues comme Metrosene®, Poly Sheen® et Isacord. -
Page 24: Tabla Hilo - Aguja
2.2. Needle and Thread / 2.2. Aguja e hilo 2.2. Nadel und Faden / 2.2. Aiguille et fil Thread - needle selection table Thread Needles Where Application All purpose overlock thread 120/2 70-90 Needles and looper threads For all overlock- and cover stitch work. (polyester) Polyester-continuous filaments Loopers only... -
Page 25: Largo Del Punto
2.3. Adjustments and Settings / 2.3. Regulación y manejo 2.3. Einstellen und Bedienen / 2.3. Réglage et utilisation Stitch length Stichlänge It can be adjusted while sewing. Die S tichlänge kan n stufenlos und The stitch length is infinitely variable w äh rend des N äh ens eingestellt werden. -
Page 26: Mtc - Control Fino Del Hilo
2.3. Adjustments and Settings / 2.3. Regulación y manejo 2.3. Einstellen und Bedienen / 2.3. Réglage et utilisation Micro Thread Control (mtc) This machine is equipped with a patented fine tuning feature called mtc. This will help you to get easier control of your seam quality, with less effort. For threading the machine to any stitch configuration always adjust mtc to the neutral position (N). -
Page 27: Manejo Del Transporte Diferencial
2.3. Adjustments and Settings / 2.3. Regulación y manejo 2.3. Einstellen und Bedienen / 2.3. Réglage et utilisation Differential Feed Setting There are two feed dogs one front (C) and one rear (D). The two feed dogs move independently and the distance each feed dog travels during one complete movement can be adjusted. -
Page 28: Regulación Del Transporte Diferencial
2.3. Adjustments and Settings / 2.3. Regulación y manejo 2.3. Einstellen und Bedienen / 2.3. Réglage et utilisation Differential Feed Adjustment Simply turn the dial in the direction desired for fully variable adjustment while sewing. Test sew. Effect Fabric Wave-free seams (G) Thick wool knits, hand knitted articles, very stretchy fabrics Wave-free seams (H) Cotton, silk, synthetic jersey, sweatshirt fabrics and fine knits... -
Page 29: Lcd Indication
2.3. Adjustments and Settings / 2.3. Regulación y manejo 2.3. Einstellen und Bedienen / 2.3. Réglage et utilisation LCD indication Needle position overlock Needle position Chain looper thread tension dial LCD indication button cover/chainstitch Thread tension dial Stitch No. LCD Contrast Darker Lighter Upper looper release... - Page 30 2.3. Adjustments and Settings / 2.3. Regulación y manejo 2.3. Einstellen und Bedienen / 2.3. Réglage et utilisation 3. Adjust user's settings Operation Indication Remarks Indication of User's Setting Push Select item from User's Setting for Repeatedly press change until the value you want to modify is displayed inverted.
-
Page 31: Indicación Lcd
2.3. Adjustments and Settings / 2.3. Regulación y manejo 2.3. Einstellen und Bedienen / 2.3. Réglage et utilisation Indicación LCD Aguja punto de overlock Positión de la aguja punto Tensión del hilo para la lanzadera de de cobertura / cadeneta Tecla indicacón LCD cadeneta Tensión del hilo... - Page 32 2.3. Adjustments and Settings / 2.3. Regulación y manejo 2.3. Einstellen und Bedienen / 2.3. Réglage et utilisation 3. Regulación de los valores de la utilizadora Función Indicación Observaciones Indica la regulación de la / del uti- lizador / utilizadora Pulsar la tecla Selección del valor que se desea Pulsar nuevamente...
-
Page 33: Lcd Anzeige
2.3. Adjustments and Settings / 2.3. Regulación y manejo 2.3. Einstellen und Bedienen / 2.3. Réglage et utilisation LCD Anzeige Nadel position Overlock Nadel position Fadenspannung für Kettengreifer Cover/Kettenstich LCD Anzeigetaste Fadenspannung Stich No. LCD Kontrast einstellung Heller Dunkler Obergreifer Ausschalthebel Stichlänge Position des Obermessers LCD Funktionstaste... - Page 34 2.3. Adjustments and Settings / 2.3. Regulación y manejo 2.3. Einstellen und Bedienen / 2.3. Réglage et utilisation 3. Benutzerdefinierte Anzeigewerte einstellen Funktion Anzeige Bemerkung Zeigt Benutzer Werte an Taste drücken Anwahl des Wertes der vom Be- Wiederholt drücken, bis der nutzer verändert werden möchte gewünschte Wert invertiert dargestellt wird.
-
Page 35: Indication Lcd
2.3. Adjustments and Settings / 2.3. Regulación y manejo 2.3. Einstellen und Bedienen / 2.3. Réglage et utilisation Indication LCD Position de l’aiguille point surjeteuse Position de l’aiguille point Tension du fil pour boucleur de chaînette enveloppant/chaînette Touche l’indication LCD Tension du fil No. - Page 36 2.3. Adjustments and Settings / 2.3. Regulación y manejo 2.3. Einstellen und Bedienen / 2.3. Réglage et utilisation 3. Réglage des valeurs d’affichage définies par l’utilisateur Action Indication Remarque Indication des valeurs basiques Appuyer sur la touche Sélectionner la valeur à modifier Appuyez plusieurs fois sur jusqu’à...
-
Page 37: Preparación Para El Enhebrado
2.4. Threading - General Information / 2.4. Enhebrado - información general 2.4. Einfädeln - Allgemeine Informationen / 2.4. Enfilage - Informations générales Threading Preparation Vorbereitung zum Einfädeln • Switch the machine off (power switch "0") • Maschine ausschalten, Hauptschalter auf „O“ stellen. •... -
Page 38: Enhebra-Agujas
2.4. Threading - General Information / 2.4. Enhebrado - información general 2.4. Einfädeln - Allgemeine Informationen / 2.4. Enfilage - Informations générales Needle threader Holder / Soporte Halter / Support Hook / Ganchito The needle threader is located in a compartement inside of the looper cover. Haken / Boucleur It consists of a holder with a spring loaded nose and a metal hook. -
Page 39: Stitch Formation Overview
2.5. Stitch Formation Overview Needle position Thread tension & Colour Cover / Chain Chain looper Left needle Center needle Overlock Left needle Right needle Stitch Stitch type Stitch formation bottom purple yellow green 4-thread overlock with — — — integrated safety seam 3-thread super stretch —... - Page 40 Thread tension & Colour Right needle Lower looper Roll Upper Upper Hemm Upper knife Cutting Stitch Difrential Exten- looper Selection looper Upper looper Lower looper position width length feed sion plate release Lever converter blue 1 - 3 1 - 3 1 - 3 1 - 3 1 - 3...
-
Page 41: 2.5. Vista General De Los Puntos
2.5. Vista general de los puntos Posición Aguja Tensión del hilo y color Aguja Lanzadera para Aguja central Cobertura / Cadeneta punto de cadenata izquierda Aguja Aguja derecha Overlock izquierda Tipo punto punto Punto arriba abajo Lila Amarillo Verde Overlock de 4 hilos con costura —... - Page 42 Tensión del hilo y color Palanca Transfor- Palanca Lanzadera Aguja derecha selectora mador reguladora inferior Largo Posión para lanzadera para Lanzadera Lanzadera Anchura Tranporte cuchilla dobladillo ciega Placa de lanzadera superior inferior de corte punto diferecial superior enrollado superior extensión superior Azul Rojo...
-
Page 43: Stichübersicht
2.5. Stichübersicht Nadeln position Fadenspannung & Farbe Cover / Kettenst Kettengreifer Linke Nadel Mittlere Nadel Overlock Linke Nadel Rechte Nadel Stich Stich oben unten Violett Gelb Grün 4-Faden Overlock mit — — — integrierter Sicherheitsnaht 3-Faden Super Stretch — — —... - Page 44 Fadenspannung & Farbe Rechte Nadel Unter Greifer Obergreifer Ober- Messer Rollsaum- Differen- Abdeck- Ausschal- Obergreifer Unter Greifer Obergreifer- messer position Wahlhebel Stichlänge tial thebel abdeckung Blau 1 - 3 1 - 3 1 - 3 1 - 3 1 - 3 1 - 3 1 - 3 1 - 3...
-
Page 45: Aperçu Sur Les Points
2.5. Aperçu sur les points Position de Aiguille Tension du fil & Couleurs Point enveloppant / Aiguille Boucleur point Aiguille gauche de chaînette chaînette médiane Pour point surjeteuse Aiguille gauche Aiguille droite Famille Point points Point en haut en bas Violet Jaune Vert... - Page 46 Tension du fil & Couleurs Levier de Recou- Levier de Boucleur Aiguille droite sélection vrement déclenche- inférieur Position pour les Plaque de ment du Boucleur Boucleur ourlets Longeur boucleur reccuvre- boucleur Couteau supérieur inférieur supérieur couteau roulés de point Différentiel supérieur ment supérieur...
-
Page 47: Hilo De La Lanzadera Superior, Marcas Azules
3.1. Threading 4/3 Thread OL (Stitch No 1-8) 3.1. Enhebrado de overlock de 4/3 hilos (punto N°.1-8) 3.1. Einfädeln 4/3 Faden OL (Stich No.1-8) 3.1. Enfilage du point de surjet à 4/3 fils (point no.1-8) 1. Upper looper thread, blue markings Turn the handwheel in the normal direction (as indicated by the arrow) until the red stop mark is completely centered in the window. -
Page 48: Hilo De La Lanzadera Superior, Marcas Rojas
3.1. Threading 4/3 Thread OL (Stitch No 1-8) 3.1. Enhebrado de overlock de 4/3 hilos (punto N°.1-8) 3.1. Einfädeln 4/3 Faden OL (Stich No.1-8) 3.1. Enfilage du point de surjet à 4/3 fils (point no.1-8) 2. Lower looper thread, red markings Turn the handwheel in the normal direction (as indicated by the arrow) until the red stop mark is completely centered in the window. -
Page 49: Aguja Derecha, Marcas Verdes
3.1. Threading 4/3 Thread OL (Stitch No 1-8) 3.1. Enhebrado de overlock de 4/3 hilos (punto N°.1-8) 3.1. Einfädeln 4/3 Faden OL (Stich No.1-8) 3.1. Enfilage du point de surjet à 4/3 fils (point no.1-8) 3. Right-hand needle, green markings Turn the handwheel in the normal direction (as indicated by the arrow) until the red stop mark is completely centered in the window. -
Page 50: Aguja Izquierda, Marcas Amarillas
3.1. Threading 4/3 Thread OL (Stitch No 1-8) 3.1. Enhebrado de overlock de 4/3 hilos (punto N°.1-8) 3.1. Einfädeln 4/3 Faden OL (Stich No.1-8) 3.1. Enfilage du point de surjet à 4/3 fils (point no.1-8) 4. Left-hand needle, yellow markings Turn the handwheel in the normal direction (as indicated by the arrow) until the red stop mark is completely centered in the window. -
Page 51: Enhebrado De Overlock De 2 Hilos (Punto N° 9-15)
3.2. Threading 2 Thread OL (Stitch No 9-15) 3.2. Enhebrado de overlock de 2 hilos (punto N° 9-15) 3.2. Einfädeln 2 Faden OL (Stich No. 9-15) 3.2. Enfilage du point de surjet à 2 fils (point no. 9-15) Upper Looper Converter 2 Thread serger / OL stitch formations are achieved by following the threading instructions for the 3 / 4 thread configuration, but without the thread for the upper looper (blue markings). -
Page 52: Dobladillo Enrollado (Punto N° 7, 8 & 13)
3.3. Roll Hemming (Stitch No 7, 8 & 13) 3.3. Dobladillo enrollado (punto N° 7, 8 & 13) 3.3. Rollsäumen (Stich No. 7, 8 & 13) 3.3. Ourlets roulés (point no. 7, 8, 13) Roll hemming By disengaging the stitch tongue in the stitch plate (move the Rollhem Selection Lever towards you) and increasing the lower looper tension a roll hem is achieved. -
Page 53: 3.4. Costura De Prueba - Overlock
3.4. Trial Sewing - Serger / Overlock Mode 3.4. Costura de prueba - Overlock 3.4. Nähprobe - Overlock 3.4. Essai de couture - surjet Sewing test After threading make a trial run. Always use a double layer of fabric to check the stitch formation and thread tension properly. -
Page 54: 3.6. Costura Práctica - Overlock
3.6. Practical Sewing - Serger / OL Mode 3.6. Costura práctica - Overlock 3.6. Praktisches Nähen - Overlock 3.6. Couture - surjet Sewing in the thread chain - seam begin • Sew to form a 3-4 cm (2") chain. • Position fabric and sew one stitch. •... -
Page 55: Sobrecoser La Cadena De Hilo Al Final De La Costura
3.6. Practical Sewing - Serger / OL Mode 3.6. Costura práctica - Overlock 3.6. Praktisches Nähen - Overlock 3.6. Couture - surjet Sewing in the thread chain - seam end • Sew to the end of the seam. • Raise the needles. •... -
Page 56: Fruncido
3.6. Practical Sewing - Serger / OL Mode 3.6. Costura práctica - Overlock 3.6. Praktisches Nähen - Overlock 3.6. Couture - surjet Gathering Einreihen Using the differential feed, a single layer of fabric Der Differentialtransport ermöglicht das Einreihen einer can be gathered before sewing it to the garment. einzelnen feinen Stofflage. -
Page 57: El Hilo Se Rompe Durante La Costura
3.6. Practical Sewing - Serger / OL Mode 3.6. Costura práctica - Overlock 3.6. Praktisches Nähen - Overlock 3.6. Couture - surjet Thread breakage during sewing Sew off immediately at an angle and remove the work. Re-thread. If the lower looper thread has broken, cut off both needle threads at the needles and remove surplus thread from below. -
Page 58: Pie Prénsatelas Para Punto Invisible
3.6. Practical Sewing - Serger / OL Mode 3.6. Costura práctica - Overlock 3.6. Praktisches Nähen - Overlock 3.6. Couture - surjet Blind stitch foot 1. Attach the blind stitch presser foot (A) (See page 17 changing the presser foot ). 2. -
Page 59: Pie Prénsatelas Para Coser Cintas Elásticas
3.6. Practical Sewing - Serger / OL Mode 3.6. Costura práctica - Overlock 3.6. Praktisches Nähen - Overlock 3.6. Couture - surjet Elasticator foot Gummibandeinnähfuss Use a 3- or 4-thread overlock. Use 3-thread Es können Gummibänder von 5-12 mm overlock and the right-hand needle for 5-7 mm eingegnäht werden. -
Page 60: Enhebrado Punto De Cadeneta Y Overlock
4.1. Threading Chain and OL (Stitch No. 16-20) 4.1. Enhebrado punto de cadeneta y Overlock (punto núm. 16-20) 4.1. Einfädeln Kettenstich und OL (Stich No. 16-20) 4.1. Enfilage du point de chaînette et de surjet (points no. 16-20) Overview of Chain and OL Stitches A chain stitch can be added to several serger / OL Stitches, making them so called Safety Stiches. - Page 61 4.1. Threading Chain and OL (Stitch No. 16-20) 4.1. Enhebrado punto de cadeneta y Overlock (punto núm. 16-20) 4.1. Einfädeln Kettenstich und OL (Stich No. 16-20) 4.1. Enfilage du point de chaînette et de surjet (points no. 16-20) 18. 3-thread overlock (right needle) + 18.
-
Page 62: Lanzadera De Punto De Cadeneta, Marcas Lilas
4.1. Threading Chain and OL (Stitch No. 16-20) 4.1. Enhebrado punto de cadeneta y Overlock (punto núm. 16-20) 4.1. Einfädeln Kettenstich und OL (Stich No. 16-20) 4.1. Enfilage du point de chaînette et de surjet (points no. 16-20) Chain Stitch Looper, purple markings Place the spool on the spool holder pin as illustrated. -
Page 63: Aguja Para Punto De Cadeneta, Marcas Amarillas
4.1. Threading Chain and OL (Stitch No. 16-20) 4.1. Enhebrado punto de cadeneta y Overlock (punto núm. 16-20) 4.1. Einfädeln Kettenstich und OL (Stich No. 16-20) 4.1. Enfilage du point de chaînette et de surjet (points no. 16-20) Chain Needle, yellow markings Place the spool on the spool holder pin as illustrated. -
Page 64: 4.2. Costura De Prueba - Punto De Cadeneta Y Overlock
4.2. Trial Sewing - Chain and OL 4.2. Costura de prueba - punto de cadeneta y Overlock 4.2. Nähprobe - Kettenstich und OL 4.2. Essai de couture - point de chaînette et de surjet Sewing test After threading make a trial run. Always use a double layer of fabric to check the stitch formation and thread tension properly. -
Page 65: Regulación Fina De Las Tensiones De Los Hilos
4.3. Adjusting Thread Tension - Chain and OL Mode 4.3. Regulación fina de las tensiones de los hilos - puntos de cadeneta y Overlock 4.3. Feineinstellen Fadenspannungen - Ketten- & OL Stiche 4.3. Réglage fin de la tension du fil – point de chaînette et de surjet Check your trial run Nähprobe prüfen Chainstitch and OL (Stitch No.16-20) -
Page 66: Adaptar De La Tensión Del Hilo
4.3. Adjusting Thread Tension - Chain and OL Mode 4.3. Regulación fina de las tensiones de los hilos - puntos de cadeneta y Overlock 4.3. Feineinstellen Fadenspannungen - Ketten- & OL Stiche 4.3. Réglage fin de la tension du fil – point de chaînette et de surjet Adjusting the thread tension Turn the tension dials by only half or one number, then test sew again and check the result. -
Page 67: Funciones Del Punto De Cobertura
5.1. Cover Stitch Functions / 5.1. Funciones del punto de cobertura 5.1. Cover Stich Funktionen / 5.1. Fonctions du point enveloppant Cover stitch The 5 mm wide cover stitch is formed with two or three needle threads and one looper thread. -
Page 68: Palanca Para Desconectar La Lanzadera Superior
5.2. Preparation for Cover Stitch / 5.2. Preparación para los puntos de cobertura 5.2. Vorbereitung für Cover Stiche / 5.2. Préparation pour les points enveloppants Upper looper release Obergreifer Ausschalthebel For cover stitches the upper looper must be Für Cover Stiche muss der Obergeifer disengaged. -
Page 69: Brazo De La Cuchilla Superior
5.2. Preparation for Cover Stitch / 5.2. Preparación para los puntos de cobertura 5.2. Vorbereitung für Cover Stiche / 5.2. Préparation pour les points enveloppants Upper knife arm Obermesser-Arm The knives are not used for cover and chain B e i m N ä h e n v o n C o v e r - / K e t t e n s t i c h stitch and the upper knife arm is raised to pro- wird das Messer nicht benutzt. -
Page 70: Enhebrado Del Punto De Cobertura De 4 Hilos (Punto Núm. 21) ▪ Lanzadera De Cobertura, Marca Lila
5.3. Threading 4 Thread Cover (Stitch No. 21) 5.3. Enhebrado del punto de cobertura de 4 hilos (punto núm. 21) 5.3. 4-Faden Cover Stich einfädeln (Stich No. 21) 5.3. Enfilage du point enveloppant à 4 fils (Point No. 21) 1.Cover Stitch Looper, purple markings Place the spool on the spool holder pin as illustrated. -
Page 71: Aguja Para Punto De Cadeneta, Marca Azul
5.3. Threading 4 Thread Cover (Stitch No. 21) 5.3. Enhebrado del punto de cobertura de 4 hilos (punto núm. 21) 5.3. 4-Faden Cover Stich einfädeln (Stich No. 21) 5.3. Enfilage du point enveloppant à 4 fils (Point No. 21) 2. Right Cover Stitch Needle, blue markings Place the spool on the spool holder pin as illustrated. -
Page 72: Aguja Central Para Punto De Cadeneta, Marca Verde
5.3. Threading 4 Thread Cover (Stitch No. 21) 5.3. Enhebrado del punto de cobertura de 4 hilos (punto núm. 21) 5.3. 4-Faden Cover Stich einfädeln (Stich No. 21) 5.3. Enfilage du point enveloppant à 4 fils (Point No. 21) 3. Center Cover Stitch Needle, green markings Place the spool on the spool holder pin as illustrated. -
Page 73: Aguja Izquierda Para Punto De Cadeneta, Marca Amarilla
5.3. Threading 4 Thread Cover (Stitch No. 21) 5.3. Enhebrado del punto de cobertura de 4 hilos (punto núm. 21) 5.3. 4-Faden Cover Stich einfädeln (Stich No. 21) 5.3. Enfilage du point enveloppant à 4 fils (Point No. 21) 4. Left Cover Stitch Needle, yellow markings Place the spool on the spool holder pin as illustrated. -
Page 74: Enhebrado Del Punto De Cobertura De 3 Hilos (Punto Núm. 22 - 24) ▪ Punto De Cobertura De 3 Hilos, Ancho
5.4. Threading 3 Thread Cover (Stitch No. 22-24) 5.4. Enhebrado del punto de cobertura de 3 hilos (punto núm. 22-24) 5.4. 4-Faden Cover Stich einfädeln (Stich No. 22-24) 5.4. Point enveloppant à 3 fils (points no. 22-24) 3 Thread Cover Stitch Wide 1. -
Page 75: Punto De Cobertura De 3 Hilos, Estrecho
5.4. Threading 3 Thread Cover (Stitch No. 22-24) 5.4. Enhebrado del punto de cobertura de 3 hilos (punto núm. 22-24) 5.4. 4-Faden Cover Stich einfädeln (Stich No. 22-24) 5.4. Point enveloppant à 3 fils (points no. 22-24) 3 Thread Cover Stitch Narrow 1. -
Page 76: Costura De Prueba - Cobertura
5.5. Trial Sewing - Cover / 5.5. Costura de prueba - cobertura 5.5. Nähprobe - Cover / 5.5. Essai de couture - point enveloppant Sewing Test Cover Stich Nähprobe und Sticheinstellung After threading make a sewing test on a double layer of fabric to check the stitch Nach dem Einfädeln eine Nähprobe auf formation and the thread tension. -
Page 77: Regulación Fina De Las Tensiones De Los Hilos - Cobertura
5.6. Adjusting Thread Tension - Cover 5.6. Regulación fina de las tensiones de los hilos - cobertura 5.6. Feineinstellung Fadenspannungen - Cover 5.6. Réglage fin de la tension du fil - point enveloppant Tension adjustments Cover F a d e n s p a n n u n g a n p a s s e n stitch Cover-Stich The right needle thread forms loops on... -
Page 78: Costura Práctica - Cobertura ▪ Remate Del Fin De Costura
5.7. Practical Sewing - Cover / 5.7. Costura práctica - cobertura 5.7. Praktisches Nähen - Cover / 5.7. Couture - point enveloppant Securing the seam end After removing your work turn it over to the wrong side. Secure the seam by pulling the loop (1) towards the left. If the looper thread is subsequently pulled to the upper side, the needle thread loops (2) are visible in the stitch formation and can also be pulled through to the wrong side and knotted. -
Page 79: Dobladillo Sencillo
5.7. Practical Sewing - Cover / 5.7. Costura práctica - cobertura 5.7. Praktisches Nähen - Cover / 5.7. Couture - point enveloppant Simple hem Einfacher Saum Stitch length: 3-4 Stichlänge: 3-4 Differential: N-2 (depending on fabric) Differential: N-2 (je nach Material) - Mark hem depth and fold or press. -
Page 80: Dobladillo Con Cinta Elástica Incorporada
5.7. Practical Sewing - Cover / 5.7. Costura práctica - cobertura 5.7. Praktisches Nähen - Cover / 5.7. Couture - point enveloppant Edges with elastic Saum mit eingenähtem Elast Stitch length: 3-4 Stichlänge: 3-4 Differential: 0.7-N Differential: 0.7-N - Sew on elastic with 4-thread overlock. - Elast mit 4-Faden Overlock einnähen. -
Page 81: Pespunte De Costura / Puños / Ribete
5.7. Practical Sewing - Cover / 5.7. Costura práctica - cobertura 5.7. Praktisches Nähen - Cover / 5.7. Couture - point enveloppant Top stitching seams / ribbing / yokes Stitch length :3-4 Differential: 0.7-N - Fold or press seam to one side. - Edge stitch (or at distance desired) from the right. -
Page 82: Fruncido Con Punto De Cadeneta
5.7. Practical Sewing - Cover / 5.7. Costura práctica - cobertura 5.7. Praktisches Nähen - Cover / 5.7. Couture - point enveloppant Gathering with chain stitch Single layers of fabric can be gathered with chain stitch and differential feed: Differential feed: 2 Stitch length: 4 Basic tension. -
Page 83: Cambio De La Cuchilla Superior
Changing the upper knife The upper knife (moving knife) is made from special hardened material. Should it get damaged, it can be replaced by your local BERNINA dealer. Changing the lower knife Main switch on "0" Disconnect machine from electricity supply. -
Page 84: Cambio De La Bombilla
Durante la costura y el corte se va acumulando polvo, hilos y pelusilla en la máquina. Quitar estos residuos regularmente. La máquina overlock BERNINA requiere muy poco engrase porque la mayoría de las piezas son de un material especial. Después de haberla utilizado bastante tiempo engrasar solamente los puntos marcados. -
Page 85: Troubleshooting Guide
6.4. Troubleshooting Guide Problem Cause Solution Page The machine does not • Looper or cloth plate cover is open. • Close the looper or the cloth plate cover. sew: • The main switch is not on. • Switch machine on. (Main switch to “I”) •... -
Page 86: Ayuda En Caso De Averías
6.4. Ayuda en caso de averías Problema: Causa: Solución: Página La máquina no • La tapa de la lanzadera o la tapa de la mesa de • Cerrar la tapa de la lanzadera o la tapa de la cose: trabajo está abierta. mesa de trabajo. -
Page 87: Hilfe Bei Störungen
6.4. Hilfe bei Störungen Problem: Ursache: Lösung: Seite Die Maschine näht • Der Greiferdeckel oder der Stoffauflagedeckel ist • Greiferdeckel oder Stoffauflagedeckel nicht: geöffnet. schliessen. • Der Hauptschalter ist nicht eingeschaltet. • Maschine einschalten, Hauptschalter auf „I“. • Die Maschine ist nicht angeschlossen. •... -
Page 88: 6.4. Comment Éliminer Soi-Même Les Pannes
6.4. Comment éliminer soi-même les pannes Défaut: Cause: Remède: Page La machine ne coud • Le couvercle du boucleur ou celui du plateau de • Refermer le couvercle du boucleur ou celui du pas: travail est ouvert. plateau de travail. •... -
Page 89: Datos Téchnicos
6.5. Technical Data / 6.5. Datos téchnicos Technical data Stitch choice Cover stitch 3 needles, 1 looper: 5 mm 2 needles, 1 looper: 5 mm 2 needles, 1 looper: 2.5 mm Chain stitch 1 needle, 1 looper:2 thread chainstitch 2 needles, 3 loopers: chain stitch + 3 thread overlock Over lock 2 needles, 2 loopers: 4 thread overlock with integrated safety seam 1 needle, 2 loopers: 3 thread overlock, flatlock roll hem... -
Page 90: Technische Daten
6.5. Technische Daten / 6.5. Spécifications techniques (voir additif) Technische Daten Stichmöglichkeiten: Cover Stich 3 Nadeln 1 Greifer: 5mm 2 Nadeln 1 Greifer: 5mm 2 Nadeln 1 Greifer: 2,5mm Kettenstich 1 Nadel 1 Greifer: 2 Faden Kettenstich 2 Nadeln 3 Greifer: 2 Faden Kettenstich + 3 Faden Overlock Overlock 2 Nadeln 2 Greifer: 4-Faden Overlock mit integr. -
Page 91: Accesorio Especial
7. Optional Accessories / 7. Accesorio especial 7. Sonderzubehör / 7. Accessoires spéciaux Cording foot Gathering attachment Prensatelas para coser Guía de fruncimiento cordones Kräuselführung Schnureinnähfuss Dispositif de fronçage Pied à cordon Multi-Purpose foot for Seam guide piping, beads and pearls Regla guía para la costura-derecha Prensatelas para ribetear,... -
Page 92: Instruction Manual
Instruction Manual Bedienungsanleitung Manual de instrucciones Manuel d'instructions 1300MDC © Copyright 2005 by Fritz Gegauf AG CH-0000 Steckborn No. A915013M00A GB/E/D/F 2006.01 5020107021...