Nokia 3600 User Manual
Nokia cell phone user's guide
Hide thumbs
Also See for 3600:
- User manual (217 pages) ,
- Service manual (128 pages) ,
- Guía del usuario (63 pages)
Table of Contents
Advertisement
Quick Links
Download this manual
See also:
Service Manual
Advertisement
Table of Contents

Related Manuals for Nokia 3600


Summary of Contents for Nokia 3600
- Page 1 User Guide...
- Page 2 Nokia 3600 series User Guide...
-
Page 3: Legal Information
Includes RSA BSAFE cryptographic or security protocol software from RSA Security. Java is a trademark of Sun Microsystems, Inc. The information in this user guide was written for Nokia 3600 series phones. Nokia operates a policy of ongoing development. Nokia reserves the right to make changes and improvements to any of the products described in this document without prior notice. -
Page 4: Table Of Contents
Contents 1. For your safety ......1 Network Services ......3 2. - Page 5 Options when viewing a contact card ....49 Manage contact groups....... . 53 6.
- Page 6 11. Favorites ....... . 103 Add shortcuts ........103 Shortcut options.
- Page 7 Internet or to send or receive faxes ....141 18. PC Suite for Nokia 3600 series ....142 Software and hardware requirements .
-
Page 8: For Your Safety
1 For your safety The use of mobile phones and their accessories may be prohibited or restricted in certain areas. Obey applicable law regarding mobile phone usage. Read these simple guidelines. Breaking the rules may be dangerous or illegal. Further detailed information is given in this User Guide. Do not switch the phone on when wireless phone use is prohibited or when it may cause interference or danger. - Page 9 QUALIFIED SERVICE Only qualified personnel may install or repair phone equipment. ACCESSORIES AND BATTERIES Use only approved accessories and batteries. Do not connect incompatible products. WATER-RESISTANCE Your phone is not water-resistant. Keep it dry. BACKUP COPIES Remember to make backup copies of all important data. CONNECTING TO OTHER DEVICES When connecting to any other device, read its user's guide for detailed safety instructions.
-
Page 10: Network Services
Network Services The wireless phone described in this guide is approved for use on the GSM 900, GSM 1800, and GSM 1900 networks. A number of features included in this guide are called Network Services. These are special services that you arrange through your wireless service provider. -
Page 11: Contacting Nokia
Contacting Nokia To help Nokia promptly answer your questions, please have your phone’s model number, IMEI number, and your postal code ready when you call Customer Care. The IMEI and model number are on the back of your phone under the battery. If you are calling about an accessory, please have it available for reference. -
Page 12: General Information
IR port. For more information on connectivity, refer to the PC Connectivity Guide. The PC Connectivity guide, Nokia PC Suite, and all related software can be downloaded from the Download Software section of www.nokia.ca. -
Page 13: Charge The Battery
2 Find the SIM card slot (3). Place the SIM card carefully into the slot. Make sure that the beveled corner on the SIM card faces the bottom of the phone and that the golden contact area on the card faces downward. 4 Load the battery (5): Align the golden contacts of the battery with the... -
Page 14: Switch The Phone On Or Off
4 When the battery is fully charged, the bar stops scrolling. Disconnect the charger from the AC outlet and then from the phone. See also “Battery statements” on page 154 in the User Guide. Note: Remove the battery only when the phone is switched off. Switch the phone on or off Press and hold the power key WARNING! Do not switch on the... -
Page 15: Use The Scroll Key
FIRST SETTINGS Use the number keys the date. Press Use the Scroll key Press the scroll key on the top , left and right arrows 1 to 4) to move in the Menu. Scroll to an application or a folder and press the scroll key in the middle arrow 5) to open it. -
Page 16: Phone Memory
Copy names and numbers from a SIM card to the phone memory If you have stored names and phone numbers on a SIM card, you can copy them to the phone memory. 1 Press to open the main Menu. 2 Use the scroll key to move to Contacts. 3 Press to open Contacts. -
Page 17: Other Shortcuts
• To change the profile, press • Press mailbox” on page 20. Shortcuts in editors • Press to open a list of commands related to writing and editing text. Press to switch between predictive, traditional text input and number mode (Predictive text→ Predictive text on, Alpha mode, Number mode). - Page 18 Shows an analog or a digital clock. Also see settings for “Date and time” on page 40 and settings for Standby mode→ Background image, on on page 30. Indicates which cellular system the phone is currently using. D Shows the battery charge level. The higher the bar, the more power left in the battery.
- Page 19 - Indicates when Ringing options has been set to Silent and Message alert tone to Off in the currently active profile. See “Profiles” on page 101. - Indicates that the phone’s keypad is locked. - Indicates that you have an active alarm. See “Clock” on page 115. - Indicates that Bluetooth is active.
-
Page 20: Menu
• MENU Press (Menu key) to open the main Menu. In the Menu, you can access all the applications in your phone. Options in the Menu are: Open, List view / Grid view, Move, Move to folder, New folder, Help, and Exit. Moving in the Menu Press the scroll key on the top move in the Menu. -
Page 21: Options Lists
Online help Your Nokia 3600 series phone also has a help function which you can access from any application or view showing the Options selection corresponding to the (Menu key). -
Page 22: Move The Navigation Bar Horizontally
• MOVE THE NAVIGATION BAR HORIZONTALLY In the navigation bar, you can see: • small arrows or tabs which tell you if there are more views, folders, or files you can move to. • editing indicators, see “Write text” on page 72. •... -
Page 23: Search For Items
• Mark multiple items - Press and hold the scroll key down or up. As the selection moves, a check mark is placed next to the items. To end the selection, stop the scrolling with the scroll key and then release After you have selected all the items you want, you can move or delete them by selecting Options→... -
Page 24: Volume Control
General information • VOLUME CONTROL When you have an active call or are listening to a sound, press to increase or decrease the volume level, respectively. Loudspeaker Your phone has a loudspeaker for handsfree use. The loudspeaker allows you to speak and listen to the phone from a short distance without having to hold the phone to your ear. -
Page 25: Shared Memory
• SHARED MEMORY The following features in your phone use shared memory: contacts, text, text messages, multimedia messages, images and ringing tones, video recorder and player, calendar and to-do notes, and downloaded applications. Using any of these features leaves less memory for other features. This is especially true with heavy use of any of the features. -
Page 26: Your Phone
3 Your phone • MAKE A CALL 1 Key in the phone number, including the area code. Press move the cursor. Press For international calls, press character replaces the international access code) and then key in the country code, the area code without 0, and the phone number. Tip: To adjust the volume during a call, press decrease the volume level. -
Page 27: Call Your Voice Mailbox
Call your voice mailbox The voice mailbox (system service) is an answering machine where callers who are unable to reach you can leave you voice messages. • To call your voice mailbox, press • If the phone asks for the voice mailbox number, key it in and press OK. You can obtain this number from your service provider. -
Page 28: Answer A Call
1 Make a call to the first participant. 2 To make a call to a new participant, select Options→ New call. Key in or search the memory for the phone number of the participant and press OK. The first call is automatically put on hold. 3 When the new call has been answered, join the first participant in the conference call. -
Page 29: Options During A Call
Tip: If you have activated the Call forward→ If busy function to forward calls, for example, to your voice mailbox, rejecting an incoming call will also forward the call. See “Settings for call forwarding” on page 23. When a call comes in, press Mute to quickly mute the ringing tone. Tip: To adjust the phone tones for different environments and events, for example, when you want your phone to be silent, see “Profiles”... - Page 30 Transfer is used to connect an incoming call or a call on hold with an active call and to disconnect yourself from both calls. Send touch tones is used to send touch tone strings, for example, passwords or bank account numbers. 1 Key in the digits with tone, which is transmitted while the call is active.
-
Page 31: Log - Call Log And General Log
Note: You cannot have rejection of incoming calls and call forwarding active at the same time. See “Call restriction (System service)” on page 45. • LOG - CALL LOG AND GENERAL LOG Go to Menu→ Log. In the log you can monitor phone calls, text messages, packet data connections, and fax and data calls registered by the phone. -
Page 32: Call Duration
Missed calls and received calls To view a list of the last 20 phone numbers from which somebody has tried to call you without success (system service), go to Log→ Recent calls→ Missed calls. When you see a note in standby mode about missed calls, press Show to access the list of missed calls. - Page 33 Call costs (system service) Go to Log→ Call costs. Call costs allows you to check the cost of the last call or all calls. The call costs are displayed separately for each SIM card. The actual invoice for calls and services from your service provider may vary, depending upon system features, rounding-off for billing, taxes and so forth.
-
Page 34: Gprs Data Counter
SET A CALL COST LIMIT FOR YOURSELF 1 Select Options→ Settings→ Call cost limit→ On. 2 The phone requests you to enter the limit in units. For this you may need the PIN2 code. Depending on the Show costs in setting, enter either the amount of charging units or currency. -
Page 35: Sim Folder
Packet data counter and connection timer To view how much data, measured in kilobytes, has been transferred and how long a certain GPRS connection has lasted, scroll to an Incoming or Outgoing event with the access point icon Log settings Select Options→... -
Page 36: Settings
4 Settings • CHANGE GENERAL SETTINGS Go to Menu→ Tools→ Settings. 1 Scroll to a setting group and press open it. 2 Scroll to a setting you want to change and press • switch between options if there are only two (On/Off). •... -
Page 37: Standby Mode
• Writing language - You can change the writing language of your phone permanently. Changing the language affects • the characters available when you press any key ( • the predictive text dictionary used, and • the special characters that are available when you press the keys. -
Page 38: Call Settings
• Left selection key and Right selection key - You can change the shortcuts that appear over the left in standby mode. In addition to the applications, you can have the shortcut point to a function, for example, New message. Note: You cannot have a shortcut to an application that you have installed. -
Page 39: Automatic Redial
Call waiting: (system service) The system will notify you of a new incoming call while you have a call in progress. Select Activate to request the system to activate call waiting, Cancel to request the system to deactivate call waiting, or Check status, to check if the function is active or not. -
Page 40: Connection Settings
Voice message indicators: , or • CONNECTION SETTINGS General information about data connections and access points To define settings for access points, go to Settings→ Connection settings→ Access points. A data connection is required to connect to an access point. Your phone supports three kinds of data connections: •... - Page 41 Tip: The Settings wizard program included in the PC Suite for Nokia 3650 or PC Suite for Nokia 3600 can help you to configure access point and mailbox settings. You can also copy existing settings, for example, from your computer to your phone.
- Page 42 Options in the Access points list are: Edit, New access point, Delete, Help, and Exit. You may have preset access point settings in your Nokia 3600 series mobile phone. Or, you may receive access point settings in a smart message from a service provider.
-
Page 43: Access Points
Edit an access point When you open Access points, the list of already available access points opens. Scroll to the access point you want to edit, and press Delete an access point In the list of access points, scroll to the access point you want to remove and select Options→... - Page 44 • Dial-up number (for GSM data and high speed data only) - The modem telephone number of the access point. • User name - Write a user name if required by the service provider. The user name may be needed to make a data connection, and is usually provided by the service provider.
- Page 45 During the connection, the operating speed may be less, depending on system conditions. Glossary: DNS - Domain Name Service. An Internet service that translates domain names such as www.nokia.com into IP addresses like 192.100.124.195. Options→ Advanced settings •...
- Page 46 Note: Charges may apply for certain types of received calls, such as roaming and high speed data calls. Contact your GSM service provider for more information. Note: The phone expects the callback call to use the same data call settings that were used in the callback-requesting call.
-
Page 47: Date And Time
GPRS connection - If you select When available and you are in a system that supports packet data, the phone registers to the GPRS system and sending text messages will be done via GPRS. Also, starting an active packet data connection, for example, to send and receive e-mail, is quicker. -
Page 48: Phone And Sim
Phone and SIM Explanations for the different security codes that may be needed: • PIN code (4 to 8 digits) - The PIN (Personal Identification Number) code protects your SIM card against unauthorized use. The PIN code is usually supplied with the SIM card. After three consecutive incorrect PIN code entries, the PIN code is blocked. - Page 49 Autolock period - You can set an autolock period, a time-out after which the phone is automatically locked and can be used only if the correct lock code is entered. Key in a number for the time-out in minutes or select None to turn off the autolock period.
- Page 50 Confirm SIM services - To set the phone to display confirmation messages when you are using a SIM card service. Certif. management Menu→ Tools→ Settings→ Security→ Cert. management In the Certificate management main view, you can see a list of authority certificates that have been stored in your phone.
- Page 51 Viewing certificate details - checking authenticity You can only be sure of the correct identity of a browser gateway or a server when the signature and the period of validity of a browser gateway or server certificate have been checked. You will be notified on the phone’s display •...
-
Page 52: Call Restriction (System Service)
Important: Before changing these settings, you must make sure that you really trust the owner of the certificate and that the certificate really belongs to the listed owner. • CALL RESTRICTION (SYSTEM SERVICE) Call restriction allows you to restrict the making and receiving of calls with your phone. -
Page 53: Accessory Settings
Glossary: Roaming agreement - An agreement between two or more system service providers to enable the users of one service provider to use the services of other service providers. Cell info display Select On to set the phone to indicate when it is used in a cellular system based on Micro Cellular Network (MCN) technology and to activate cell info reception. -
Page 54: Contacts
5 Contacts To open Contacts, press go to Menu→ Contacts. In Contacts, you can store and manage contact information, such as names, phone numbers, and addresses. Contacts use shared memory. See “Shared memory” on page 18. You can also add a personal ringing tone, voice tag, or a thumbnail image to a contact card. -
Page 55: Edit Contact Cards
• EDIT CONTACT CARDS Options in the Contacts directory are: Open, Call, Create message, New contact, Edit, Delete, Duplicate, Add to group, Belongs to groups, Mark/Unmark, Send, Contacts info, Help, and Exit. Options when editing a contact card are: Add thumbnail / Remove thumbnail, Add detail, Delete detail, Edit label, Help, and Exit. -
Page 56: Options When Viewing A Contact Card
Insert a picture in a contact card There are two different types of pictures you can add to a contact card. See “Camera and Images” on page 55 for more information on how to take and store pictures. • To attach a small thumbnail image to a contact card, open a contact card, select Options→... -
Page 57: Voice Dialing
Example: Scroll to Phone number and press Assign. A list of phone numbers in the selected contact card is shown. Scroll to the one you want to have as the default and press to the contact card view, you can see the default number underlined. Voice dialing You can make a phone call by saying a voice tag that has been added to a contact card. - Page 58 3 The text Press Start, then speak after tone is displayed. When recording, hold the phone at a short distance away from your mouth. After the starting tone, say clearly the word(s) you want to record as a voice tag. •...
- Page 59 REPLAY, ERASE, OR CHANGE A VOICE TAG To replay, erase, or change a voice tag, open a contact card and scroll to the number that has a voice tag (indicated by Voice tag→ then either • Playback - to listen to the voice tag again, or •...
-
Page 60: Manage Contact Groups
1 Press to open a contact card or go to the Groups list and select a contact group. 2 Select Options→ Ringing tone. A list of ringing tones opens. 3 Use the scroll key to select the ringing tone you wish to use for the contact or group and press Select. -
Page 61: Create Contact Groups
You can create contact groups, which can, for example, be used as distribution lists for sending text messages and e-mail. See also “Add a ringing tone for a contact card or group” on page 52. Create contact groups 1 In the Contacts directory, press 2 Select Options→... -
Page 62: Camera And Images
6 Camera and Images With the camera you can take pictures of people or events while on the move. The pictures are automatically saved in the Images application, where you can rename them and organize them in folders. You can also send photos to your friends in a multimedia message, as an e-mail attachment, or via a Bluetooth or infrared connection. - Page 63 Note: Do not move the phone before the Camera application starts to save the photo. The photos are saved automatically in the Images application. The Camera goes into battery saving mode within a minute if there have been no key presses. To continue taking pictures, press After the image has been saved: •...
- Page 64 CAMERA MODE AFFECTS IMAGE SIZE AND ORIENTATION With the different Camera modes, you can affect the size and orientation of the picture to be taken. When you are taking a picture, press to change between the different modes. Choose: • Standard when you want to take normal landscape pictures, •...
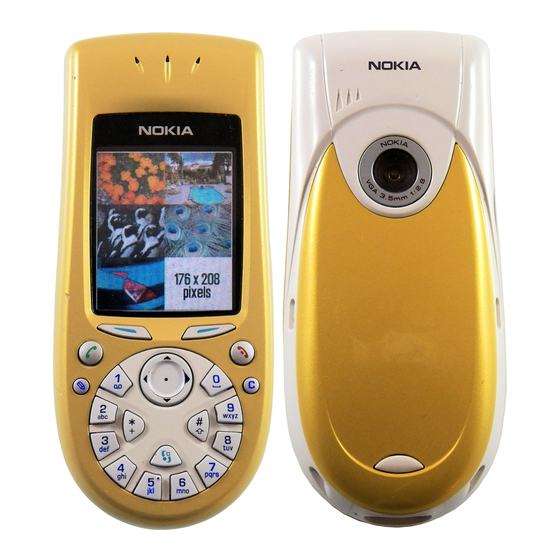
- Page 65 • When you are viewing images, they are scaled to fit the display, which has 176x208 pixels. This means that Standard and Night mode pictures will appear more detailed when viewed on a higher resolution screen, for example, a computer or when zoomed in Images. Glossary: Resolution - A measure for the sharpness and clarity of an image.
-
Page 66: Store Pictures In Images
• STORE PICTURES IN IMAGES Go to Menu→ Images. Note: Your phone must be switched on to use this function. Do not switch the phone on when wireless phone use is prohibited or when it may cause interference or danger. Images allows you to view, organize, delete, and send photos and pictures stored in your phone. -
Page 67: View Images
View images Note: When you open Images and you use a memory card, the starting tab is determined by which memory is selected as the Memory in use. 1 Press to move from one memory tab to another. 2 To browse the images, press 3 Press , to open an image. - Page 68 Move the focal point When you are zooming or viewing an image in full screen mode, use the scroll key to move the focal point to the left, right, up, or down, so that you can take a closer look at one part of the picture, for example, its upper right corner.
-
Page 69: Picture Messages Folder
• To rename an image or a folder, scroll to the image or folder you want to rename and select Options→ Rename. Write the new name and press See “Actions common to all applications” on page 15 for further information on how to create folders and mark and move items to folders. -
Page 70: Video Recorder
7 Video recorder Go to Menu→ Video recorder. Note: Obey all local laws governing the taking of videos. Do not use this feature illegally. Your phone must be switched on to use the Video recorder. Do not switch the phone on when wireless phone use is prohibited or when it may cause interference or danger. -
Page 71: Watch A Video Clip
• WATCH A VIDEO CLIP To watch a video clip from the Video recorder video clip list: 1 Open the Video recorder. 2 Scroll to a video clip and select Options→ Play. Once a video clip is playing, you have similar options available to you as when playing a video clip in ‘RealOne Player™’... -
Page 72: Realone Player
8 RealOne Player™ Go to Menu→ RealOne Player. With the RealOne Player you can play media files stored in the phone’s memory or on a memory card, or play music and video files and stream live content from the internet. Options in list view are: Play, Open, Rename, Delete, New folder, Move to folder, Mark/Unmark, Send, Add to Favorites, Settings, About product... -
Page 73: Send Media Files
To play a media file directly, or stream live content from the internet: 1 Select Options→ Open→ URL address. 2 Enter the URL of the site you want to play or stream content from. Before your media file or stream begins playing, your phone will connect to the site and load the file. -
Page 74: Change The Settings
• CHANGE THE SETTINGS Menu→ RealOne Player→ Options→ Settings To change the Video settings, select Video to open the following list of settings: • Video quality - Choose Sharp images to have better picture quality, but slower framerate, or High framerate for faster framerate, but lower picture quality. - Page 75 Tip: When you select one of the settings a tab view is opened. Press to move between the different setting tabs. The following icons indicate which setting you are in: for Video for Playback for Network, and for Proxy. [ 68 ]...
-
Page 76: Messaging
9 Messaging Note: Your phone must be switched on to use the functions in the Messaging folder. Do not switch the phone on when wireless phone use is prohibited or when it may cause interference or danger. Go to Menu→ Messaging Options in the Messaging main view: Create message, Connect (shown if you have defined settings for the mailbox), or Disconnect (shown if there is an active connection to mailbox), SIM messages, Cell broadcast, Service... -
Page 77: Messaging - General Information
Mailbox - When you open this folder, you can either connect to your remote mailbox to retrieve your new e-mail messages or view your previously retrieved e-mail messages offline. See page 88 for further information on online and offline modes. After you have defined settings for a new mailbox, the name given to that mailbox will replace Mailbox in the main view. -
Page 78: Sending Options
Open a received message When you receive a message, standby mode. Press Show to open the message. If you have more than one new message, press Show to open the Inbox to see the message headings. To open a message in Inbox, scroll to it and press Add a recipient to a message When you create a message, there are several ways to add a recipient:... -
Page 79: Write Text
• WRITE TEXT You can key in text in two different ways, using the method traditionally used in mobile phones or another method called predictive text input. Icons: means that the first letter in the message, or the first letter of the next word, is written in upper case, and all other letters are written in lower case. -
Page 80: Use Predictive Text Input
Note: Do not pay attention to what appears on the display. The word match is evolving. Wait until you have keyed in the whole word before you check the result. For example, to write ‘Nokia’ when English dictionary is selected, press for N, for o, As you can see, the word suggestion changes after each key press. - Page 81 • To remove the ? and clear characters one by one from the word, press TIPS ON USING PREDICTIVE TEXT INPUT • To erase a character, press one character. • To change between the different character cases Abc, abc, and ABC, press .
-
Page 82: Editing Options
Write compound words Write the first half of a compound word and confirm it by pressing Write the last part of the compound word and complete the compound word by pressing to add a space. Turn off predictive text Press and select Predictive text→... -
Page 83: Create And Send New Messages
4 To insert the text into a document, press and hold Or, press once and select Paste. • CREATE AND SEND NEW MESSAGES Note: When sending messages, your phone may display the words Message Sent. This is an indication that the message has been sent by your phone to the message center programmed into your phone. - Page 84 In the navigation bar, you can see the message length indicator counting backwards from 160. For example, 10 (2) means that you can still add 10 characters for the text to be sent as two messages. 4 To send the message, select Options→ Send or press SEND SMART MESSAGES Options in the text message editor are: Send, Add recipient, Insert, Delete, Message details, Sending options, Help, and Exit.
-
Page 85: Multimedia Messages
To send a picture message: 1 There are two possibilities, either: • Go to Images→ Picture msgs. and select a picture to be sent. Select Options→ Send, or • Select Messaging→ New message→ Create:→ Text message and select Insert→ Picture. 2 Enter recipient information and add text. - Page 86 Note: When you are sending a multimedia message to any phone other than the Nokia 3650, Nokia 3600 or Nokia 7650, it is recommended to use a smaller image size and a sound clip that is no longer than 15 seconds.
- Page 87 Multimedia message or select Options→ Sending options when you are creating a multimedia message. When you are sending a multimedia message to an e-mail address or another Nokia 3650, Nokia 3600 or Nokia 7650, select Options→ Sending Options→ Image size→ Large when you are creating a multimedia message.
- Page 88 4 To send the message, select Options→ Send or press PREVIEW A MULTIMEDIA MESSAGE To see what the multimedia message will look like, select Options→ Preview message. REMOVE AN OBJECT FROM A MULTIMEDIA MESSAGE To remove a multimedia object, select Options→ Remove→...
- Page 89 2 Press to select the recipient(s) from the Contacts directory or write the e-mail address of the recipient in the To: field. Add a semicolon (;) to separate each recipient. If you want to send a copy of your e-mail to someone, write the address in the Cc: field.
-
Page 90: Inbox - Receive Messages
• To remove an attachment, scroll to the attachment and select Options→ Remove. • INBOX - RECEIVE MESSAGES Options in Inbox are: Open, Create message, Delete, Message details, Move to folder, Move to phone memory (shown if you have defined the memory card as the messaging store), Move to memory card (shown if you have defined the phone’s memory as the messaging store), Mark/Unmark, Help, and Exit. - Page 91 • Save picture - saves the picture to Images→ Picture msgs. • Reply - copies the address of the sender to the To: field. Select Reply→ To all - to copy the address of the sender and Cc. field recipients to the new message.
- Page 92 MULTIMEDIA MESSAGE OBJECTS Options in the Objects view are: Open, Save, Send, Call, and Exit. To see what kinds of media objects have been included in the multimedia message, open the message and select Options→ Objects. In the Objects view you can view files that have been included in the multimedia message. You can choose to save the file in your phone or to send it, for example, via infrared to another device.
- Page 93 Note: If certificates or sound files are attached to business cards, they will not be saved. • Ringing tone - to save the ringing tone to Composer, select Options→ Save. • Operator logo - to save the logo, select Options→ Save. The operator logo can now be seen in standby mode instead of the service provider’s own identification.
-
Page 94: My Folders
Service messages Options when viewing service message are: Download message, Move to folder, Message details, Help, and Exit. You can order service messages (pushed messages) from service providers. Service messages are notifications of, for example, news headlines and they may contain a text message or address of a browser service. For availability and subscription, contact your service provider. -
Page 95: Remote Mailbox
Tip: The Settings wizard program included in the PC Suite for Nokia 3650 or PC Suite for Nokia 3600 can help you configure access point and mailbox settings. You can also copy existing settings, for example, from your computer to your phone. - Page 96 Options when viewing e-mail headings are: Open, New message, Connect /Disconnect, Retrieve, Delete, Message details, Copy, Mark/Unmark, Help, and Exit. VIEW E-MAIL MESSAGES WHEN OFFLINE When you view e-mail messages offline, your phone is not connected to the remote mailbox. This mode may help you to save on connection costs. See “Call costs (system service)”...
- Page 97 1 When you have an open connection to a remote mailbox, select Options→ Retrieve→ • New - to retrieve all new e-mail messages to your phone. • Selected - to retrieve only the e-mail messages that have been selected. Use the Mark/ Unmark→...
- Page 98 2 Press Back to return to the e-mail viewer. Tip: Supported image formats are listed on page 55. To see a list of other file formats supported by the Nokia 3600 series, see the product information at www.nokia.ca. and select Options→...
-
Page 99: Outbox
SAVE ATTACHMENTS SEPARATELY To save an attachment, select Options→ Save in the Attachments view. The attachment is saved in the corresponding application. For example, sounds can be saved in Recorder and text files (.TXT) in Notes. Attachments such as images can be saved on a memory card, if one is used. Delete e-mail messages To delete an e-mail from the phone while still retaining it in the remote mailbox, select Options→... -
Page 100: View Messages On A Sim Card
• Waiting/Queued - For example, if there are two similar types of messages in Outbox, one of them is waiting until the first one is sent. • Resend at (time) - Sending has failed. The phone will try to send the message again after a time-out period. -
Page 101: Service Command Editor
• the status of the topic: for new, unsubscribed messages. • the topic number, topic name, and whether it has been flagged ( ) for follow-up. You will be notified when messages belonging to a flagged topic have arrived. Note: A packet data (GPRS) connection may prevent cell broadcast reception. - Page 102 • Msg. center in use (Message center in use)- Defines which message center is used for delivering text messages and smart messages such as picture messages. • Receive report (delivery report)- When this system service is set to Yes, the status of the sent message (Pending, Failed, Delivered) is shown in the Log.
-
Page 103: Settings For Multimedia Messages
Settings for multimedia messages Go to Messaging and select Options→ Settings→ Multimedia message to open the following list of settings: • Preferred connection (Must be defined) - Select which access point is used as the preferred connection for the multimedia message center. See “Settings for multimedia messages”... - Page 104 • On receiving msg. - Select: Retr. immediately - if you want the phone to retrieve multimedia messages instantly. If there are messages with Deferred status, they will be retrieved as well. Defer retrieval - if you want the multimedia messaging center to save the message to be retrieved later.
- Page 105 Options when editing e-mail settings are: Editing options, New mailbox, Delete, Call, and Exit. Open Mailbox in use to select which mailbox you want to use. SETTINGS FOR MAILBOXES Select Mailboxes to open a list of mailboxes that have been defined. If no mailboxes have been defined, you will be prompted to do so.
-
Page 106: Settings For Service Messages
Note: This setting can be selected only once and cannot be changed if you have saved or exited from the mailbox settings. • Security - Used with the POP3, IMAP4, and SMTP protocols to secure the connection to the remote mailbox. •... -
Page 107: Wireless Village
You can send and receive messages with Wireless Village. Check with your service provider for availability. Wireless Village is different from SMS or e-mail because you can have a true, two-way conversation with other users. For more information on Wireless Village, see www.nokia.ca. [ 100 ]... -
Page 108: Profiles
10 Profiles Go to Menu→ Profiles. In Profiles, you can adjust and customize the phone tones for different events, environments, or caller groups. There are five preset profiles: Normal, Silent, Meeting, Outdoor, and Pager, which you can customize to meet your needs. You can see the currently selected profile at the top of the display in standby mode. - Page 109 • Ringing tone - To set the ringing tone for voice calls, choose a ringing tone from the list. When you scroll through the list, you can stop on a tone to listen to it before you make your selection. Press any key to stop the sound.
-
Page 110: Favorites
11 Favorites Go to Menu→ Favorites. Note: Your phone must be switched on to use this function. Do not switch the phone on when wireless phone use is prohibited or when it may cause interference or danger. You can use Favorites to store shortcuts, links to your favorite photos, video clips, notes, Recorder sound files, browser bookmarks, and saved browser pages. -
Page 111: Shortcut Options
• SHORTCUT OPTIONS • To open a shortcut, scroll to the icon and press in the corresponding application. • To delete a shortcut, scroll to the shortcut you want to remove and select Options→ Delete shortcut. Removing a shortcut does not affect the file it is referring to. -
Page 112: Calendar And To-Do
12 Calendar and To-do Go to Menu→ Calendar Note: Your phone must be switched on to use this function. Do not switch the phone on when wireless phone use is prohibited or when it may cause interference or danger. Options in the different calendar views are: Open, New entry, Week view/Month view, Delete, Go to date, Send, Settings, Help, and Exit. -
Page 113: Delete Calendar Entries
• If you are editing a repeated entry, choose how you want the changes to take effect: All occurrences - all repeated entries are changed / This entry only - only the current entry will be changed. Delete calendar entries •... -
Page 114: Calendar Views
Calendar views MONTH VIEW In the Month view, one row equals one week. The current date is underlined. Dates that have calendar entries are marked with a small triangle at the right bottom corner. There is a frame around the currently selected date. •... -
Page 115: Set Calendar Alarms
WEEK VIEW In the Week view, the calendar entries for the selected week are shown in seven day boxes. The current day of the week is underlined. Memos and Anniversaries are placed before 8 o’clock. Meeting entries are marked with colored bars according to starting and ending times. To view or edit an entry, scroll to the cell that has an entry and press to open the Day view, then scroll to the entry and press Options in the different calendar views are: Open, New entry,... -
Page 116: Send Calendar Entries
2 Scroll to Alarm and press the Alarm time and Alarm date fields. 3 Set the alarm time and date. 4 Press Done. An alarm indicator Day view. Stop a calendar alarm The alarm duration is one minute. When the alarm time expires, press Stop to end the calendar alarm. - Page 117 Note: If you remove all characters and press Done, the previously saved note will be deleted. • To open a to-do note, scroll to it and press • To delete a to-do note, scroll to it and select Options→ Delete or press •...
-
Page 118: Extras
13 Extras • CALCULATOR Note: Your phone must be switched on to use this function. Do not switch the phone on when wireless phone use is prohibited or when it may cause interference or danger. Go to Menu→ Extras→ Calculator Options in Calculator are: Last result, Memory, Clear screen, Help, and Exit. -
Page 119: Composer
• COMPOSER Go to Menu→ Extras→ Composer. Options in the Composer main view are: Open, New tone, Delete, Mark/ Unmark, Rename, Duplicate, Help, and Exit. Composer allows you to create your own, customized ringing tones. Note that it is not possible to edit a default ringing tone. 1 Select Options→... -
Page 120: Converter
Options when composing are: Play, Insert symbol, Style, Tempo, Volume, Help and Exit. Note Key and function Shortens the duration of the selected note(s)/rest(s) in steps. Lengthens the duration of the selected note(s)/rest(s) in steps. Inserts a rest. Press to open a list of notes and rests. Switches octaves, all selected note(s) or rest(s) is/are moved to the next octave. -
Page 121: Set A Base Currency And Exchange Rates
2 Scroll to the first Unit field and press units. Select the unit from which you want to convert and press OK. Scroll to the next Unit field and select the unit to which you want to convert. 3 Scroll to the first Amount field and key in the value you want to convert. -
Page 122: Notes
• NOTES Go to Menu→ Extras→ Notes. You can link notes to Favorites and send them to other devices. Plain text files (TXT format) you receive can be saved to Notes. Press any key press ( Press Done to save. •... -
Page 123: Recorder
Important: Keep all memory cards out of the reach of small children. Note: Details of how you can use the memory card with other features and applications of your Nokia 3600 series phone are given in the sections describing these features and applications. -
Page 124: Insert The Memory Card
Insert the memory card 1 Make sure the phone is switched off. 2 With the back of the phone facing you, slide open the cover and remove the battery, see Quick start ‘Insert the SIM card’ for instructions on removing the cover. 3 Position the memory card in its slot. -
Page 125: Format The Memory Card
Important: If you are installing an application to the memory card and need to reboot the phone, do not remove the card until the reboot is complete. Otherwise the application files may be lost. Format the memory card You must format the memory card before you can use it for the first time. Select Options→... -
Page 126: Services (Xhtml)
14 Services (XHTML) Go to Menu→ Services or press and hold Note: Your phone must be switched on to use this function. Do not switch the phone on when wireless phone use is prohibited or when it may cause interference or danger. Glossary: XHTML browser supports pages written in the Hypertext Markup Language (XHTML) and the Wireless Markup Language (WML). -
Page 127: Phone Browser Service Settings
• PHONE BROWSER SERVICE SETTINGS Receiving settings in a smart message Tip: Settings may be available, for example, on the site of a network operator or service provider. You may receive service settings in a special text message, a so-called smart message, from the network operator or service provider that offers the service. -
Page 128: Connection Security
Note: Your phone may have some pre-installed bookmarks for sites not affiliated with Nokia. Nokia does not warrant or endorse these sites. If you choose to access them, you should take the same precautions, for security or content, as you would with any site. -
Page 129: Browsing
Options when browsing are: Open, Service options, Bookmarks, History, Go to URL address, View images, Read service msgs., Save as bookmark, Send bookmark, Reload, Disconnect, Show images, Clear cache, Save page, Find, Details, Session, Security, Settings, Help, and Exit. Add bookmarks manually 1 In the Bookmarks view, select Options→... -
Page 130: Viewing Saved
• To check boxes and make selections, press • To retrieve the latest content from the server, select Options→ Reload. • To open a sublist of commands or actions for the currently open web page, select Options→ Service options. • Press to disconnect from a web service and to quit browsing. -
Page 131: Download Through The Browser
If you regularly browse pages containing information which does not change very often, for example a train timetable, you can save and then browse them when offline. If you have a memory card, you can save web pages on it instead of the phone’s memory. •... -
Page 132: End A Connection
Purchase an item Glossary: Digital Rights Management (DRM) is a system for protecting the copyright of digital content that is distributed online. Note: Copyright protections may prevent some images, ringtones and other content from being copied, modified, transferred or forwarded. To download the item: •... -
Page 133: Browser Settings
Glossary: A cache is a buffer memory that is used to store data temporarily. • BROWSER SETTINGS • Default access point - If you want to change the default access point, press to open a list of available access points. The current default access point is highlighted. -
Page 134: Applications (Java™)
15 Applications (Java™) Note: Your phone must be switched on to use this function. Do not switch the phone on when wireless phone use is prohibited or when it may cause interference or danger. Go to Menu→ Applications Options in the Applications main view are: Open, View details, Settings, Remove, Go to URL address, Update, Help, and Exit. -
Page 135: Install A Java Application
Bluetooth, or via infrared. If you are using PC Suite for Nokia 3650 or PC Suite for Nokia 3600 to transfer the file, place it in the c:\nokia\installs folder in your phone. -
Page 136: Java Application Settings
During installation, the phone checks the integrity of the package to be installed. The phone shows information about the checks being carried out, and you are given options whether to continue with or cancel the installation. Once the phone has checked the integrity of the software package, the application is installed on your phone. -
Page 137: Manager
16 Manager • INSTALL APPLICATIONS AND SOFTWARE Note: Your phone must be switched on to use the functions in the Tools folder. Do not switch the phone on when wireless phone use is prohibited or when it may cause interference or danger. Go to Menu→... -
Page 138: Install Software
Bluetooth, or via infrared. If you are using PC Suite for Nokia 3650 or PC Suite for 3600 to transfer the file, place it in the c:\nokia\installs folder on your phone. -
Page 139: Remove Software
If you are installing software without a digital signature or a certificate, the phone warns you of the risks of installing software. Continue installation only if you are absolutely sure of the origin and contents of the software package. During installation, the phone checks the integrity of the package to be installed. - Page 140 When you open either of the memory views, the phone calculates the amount of free memory for storing data and installing new software. In the memory views, you can view the memory consumption of the different data groups: Calendar, Contacts, Documents, Messages, Images, Sound files, Video clips, Applications, Mem.
-
Page 141: Connectivity
17 Connectivity Note: Your phone must be switched on to use the functions in the Connectivity folder. Do not switch the phone on when wireless phone use is prohibited or when it may cause interference or danger. You can transfer data from your phone to another compatible device, for example, a phone or a computer, via Bluetooth or infrared. -
Page 142: Bluetooth Settings
All, your phone and this name can be seen by other Bluetooth device users. Write a name (max. 30 letters) or use the default name ‘Nokia 3650’ or ‘Nokia 3600’ . If you send data via Bluetooth before you have given an individual Bluetooth name to your phone, the default name will be used. -
Page 143: Send Data Via Bluetooth
Send data via Bluetooth Note: There can be only one active Bluetooth connection at a time. 1 Open an application where the item you wish to send is stored. For example, to send a photo to another device, open the Images application. -
Page 144: Paired Devices View
• Create your own passcode (1-16 characters long, numeric) and agree with the owner of the other Bluetooth device to use the same code. This passcode is used only once and you do not have to memorize it. • After pairing, the device is saved to the Paired devices view. 6 When the connection has been successfully established, the note Sending data is shown. - Page 145 PAIR WITH A DEVICE 1 Select Options→ New paired device in the Paired devices view. The phone starts to search for devices within range. Or, if you have searched for Bluetooth devices earlier, a list of the devices that were found previously is shown first.
-
Page 146: Infrared Connection
Connectivity SET A DEVICE TO BE AUTHORIZED OR UNAUTHORIZED After you have paired with a device, you can set it to be authorized or unauthorized: Unauthorized (default) - Connection requests from this device need to be accepted separately every time. Authorized - Connections between your phone and this device can be made without your knowledge. - Page 147 Options→ Send→ via infrared. Note: Windows 2000: To be able to use infrared to transfer files between your Nokia 3600 series phone and a compatible computer, go to “Control Panel” and select “Wireless Link”. In the “Wireless Link” “File Transfer”...
-
Page 148: Connect Your Phone To A Computer
Nokia 3650 or PC Suite for 3600, see the Installation Guide for PC Suite on the CD-ROM in the ‘Software for PC’ section. For further information on how to use the PC Suite for Nokia 3650 or PC Suite for 3600, see the PC suite online help. -
Page 149: Pc Suite For Nokia 3600 Series
PC Suite. For more detailed information on the use of PC Suite, please refer to the online help of the PC Suite applications. With PC Suite for Nokia 3650 or PC Suite for Nokia 3600 you can: •... -
Page 150: Install Pc Suite
• INSTALL PC SUITE PC Suite for Nokia 3600 series is in the “Install” section of the CD-ROM included in the PC Suite for Nokia 3600 series package. The CD-ROM should launch automatically after you have inserted it into the CD-ROM drive of your PC. -
Page 151: Connect Your Phone To The Pc
3 Follow the instructions on the screen. • CONNECT YOUR PHONE TO THE PC When you use PC Suite for the first time, you must connect your Nokia 3600 series phone to the PC. Thereafter, you can use PC Suite whether or not your phone is connected to your PC. - Page 152 Connectivity folder, and select Infrared. Use a Bluetooth connection Note: Before you can connect your Nokia 3600 series phone to the PC via Bluetooth for the first time, you must have provided a name for your phone to be used in a Bluetooth connection. For instructions on giving a name to your phone, see “Activate the Bluetooth application...
- Page 153 The Bluetooth connection does not close automatically. You must close it from the Bluetooth software on your PC. Close the Bluetooth connection when you stop using PC Suite for Nokia 3650 or PC Suite for Nokia 3600 in online mode.
-
Page 154: Start To Use Pc Suite
You can start PC Suite from the Start menu: click the Start button, select Programs and point to PC Suite for Nokia 3650 or PC Suite for Nokia 3600, and then click PC Suite for Nokia 3650 or PC Suite for Nokia 3600. -
Page 155: Online And Offline Modes
• ONLINE AND OFFLINE MODES You can use PC Suite either in online mode or in offline mode. You have the following options: • Work online - Connect your phone to the PC and let PC Suite identify it. In online mode your phone is connected to your compatible PC, and you can work with the information stored on the phone. -
Page 156: Main Window Information
The main window of PC Suite displays the following information and controls: toolbar shortcuts for menu commands information about the selected application bar command PC Suite for Nokia 3600 series menu commands the name of the application that is currently open the name of the connected phone [ 149 ]... -
Page 157: Pc Suite Applications
Note: Operator logos, ringing tones (polyphonic ringing tones (MIDI) and single tones) and Java-applications that you have installed on your Nokia 3600 series phone after you first started using it are not saved during backup. Therefore these items cannot be restored. -
Page 158: Data Import
With File Transfer, you can copy files between your phone and your PC, as well as delete and rename selected files. With the Multimedia converters, video and audio format files that you copy from the PC to your Nokia 3600 series phone are automatically converted to the video and audio format used by the phone. -
Page 159: Remove Pc Suite From Your Pc
PC Suite. For further information, see the Viewing and removing details of a Nokia 3650 or Viewing and removing details of a Nokia 3600 online help topics. -
Page 160: Important Safety Notes
Control Panel. 2 Double-click Add/Remove Programs. 3 Select PC Suite for Nokia 3650 or PC Suite for 3600 from the list of installed programs. Click Add/Remove. A confirmation dialog box opens. 4 After confirming that you want to remove PC Suite from your PC, the uninstall program removes the program files and informs you that you need to restart your PC to complete the uninstall process. -
Page 161: Reference Information
19 Reference information • BATTERY STATEMENTS Charging and Discharging Your phone is powered by a rechargeable battery. Note that a new battery's full performance is achieved only after two or three complete charge and discharge cycles! The battery can be charged and discharged hundreds of times but it will eventually wear out. -
Page 162: Use Proper Care And Maintenance
Dispose of batteries according to local regulations (e.g. recycling). Do not dispose as household waste. Remove the battery only when the phone is switched off. • USE PROPER CARE AND MAINTENANCE Your phone is a product of superior design and craftsmanship and should be treated with care. -
Page 163: Understand Important Safety Information
All of the above suggestions apply equally to your phone, battery, charger or any accessory. If any of them is not working properly, take it to your nearest qualified service facility. The personnel there will assist you and, if necessary, arrange for service. -
Page 164: Other Medical Devices
• Should always keep the phone more than 20 cm (8 inches) from their pacemaker when the phone is switched on; • Should not carry the phone in a breast pocket; • Should use the ear opposite the pacemaker to minimize the potential for interference. -
Page 165: Potentially Explosive Atmospheres
Potentially explosive atmospheres Switch off your phone when in any area with a potentially explosive atmosphere and obey all signs and instructions. Sparks in such areas could cause an explosion or fire resulting in bodily injury or even death. Users are advised to switch off the phone when at a refueling point (service station). -
Page 166: Emergency Calls
Failure to observe these instructions may lead to suspension or denial of telephone services to the offender, or legal action or both. Emergency calls Important: This phone, like any wireless phone, operates using radio signals, wireless, and landline networks as well as user-programed functions. -
Page 167: Certification Information (Sar)
Canadian Standard must be shown. The following values are the highest SAR values for these phone models when tested for use at the ear and worn on the body, as described in this user guide: Phone model FCC ID# Nokia 3600 QFXNHM-10 Nokia 3650 QFXNHL-8 (Body-worn measurements differ among phone models, depending upon available accessories and Industry Canada requirements). - Page 168 SAR values may vary depending on national reporting requirements and the network band. For SAR information in other regions please look under product information at www.nokia.com. [ 161 ]...
-
Page 169: Use Accessories Safely
Nokia dealer nearest you. Operations and some features are network dependent. Nokia enhancements enable the best possible operation of your Nokia 3600 series mobile phone in various conditions. Variation in operation times will occur depending on SIM card, network and usage settings, usage style and environments. - Page 170 Reference information Audio accessories WIRELESS HEADSET HDW-2 The Nokia Wireless Headset HDW-2 is designed with Bluetooth technology and is compatible with Nokia 3600 series phones and phones supporting the Bluetooth 1.1 specification and Headset or Handsfree profiles. The compact headset gives hands-free control of your phone without cables or wires.
- Page 171 Your Nokia 3600 series phone uses the ACP-12U standard charger and mobile chargers LCH-9 and LCH-12. The LCH-12 Cigarette Lighter charger can be used with 12 Vdc or 24 Vdc. The 3600 series ACP-12U phone is also compatible with the ACP-8U travel charger.
-
Page 172: Car Accessories
Reference information Car accessories WIRELESS CAR KIT CARK-112 The wireless car kit supports Bluetooth 1.1 specification and offers a convenient handsfree option in a car, with a remote control button. The kit includes the Remote Control Button CUW-2, Handsfree Unit HFW-1, Microphone HFM-8, HF Speaker HFS-12, and power cable PCU-4. -
Page 173: Glossary
• GLOSSARY Business card A business card is the same as an entry in the phone book. It may contain a name, phone number, and text entry. It can also be sent to other devices. Call forwarding A network services feature you use to forward incoming calls to another number. - Page 174 Profile A group of settings you can use to customize the way your phone works. Quick save A fast method for saving a number. Ringing tone The sound your phone makes when you receive a call. Ringing tones can be ringing sounds or short tunes. Scroll bar A bar that appears on the right side of the screen when you scroll through the main menus.
-
Page 175: Technical Information
• TECHNICAL INFORMATION Feature Weight Size Frequency Range 3650 Frequency Range 3600 Transmitter Output Power Battery Voltage Operating Temperature -10°C to + 55°C Number of Channels 3650 Number of Channels 3600 Specification 4.5 oz. (130 g) with 850 mAh Li-lon battery... -
Page 176: Troubleshooting
• TROUBLESHOOTING Memory low When following notes are shown, the phone memory is low and you must start to delete some data: Not enough memory to perform operation. Delete some data first. or Memory low. Delete some data. In the event follow the instructions below: •... -
Page 177: Frequently Asked Questions (Faq)
Different ways to store data: • use PC Suite for Nokia 3650 or PC Suite for Nokia 3600 to take a backup copy of all data to your computer • send images to your e-mail address and then save the images to your computer, or •... - Page 178 Q. Why can’t I find my friend’s Bluetooth enabled device. A. Check that both have activated Bluetooth. Check that the distance between the two devices is not over 10 meters or that there are no walls or other obstructions between the devices. Check that the other device is not in ‘Hidden’...
- Page 179 • Select On receiving msg.→ Defer retrieval if you want the multimedia messaging center to save the message to be retrieved later, for example, after you have checked the settings. After this change, the phone still needs to send information notes to the network.
- Page 180 Q. Why do I have problems in connecting the phone to my PC? A. Make sure that PC Suite for Nokia 3650 or PC Suite for Nokia 3600 is installed and running on your PC. See the Installation guide for PC Suite on the CD-ROM in the ‘Install’...
-
Page 181: Nokia One-Year Limited Warranty
Nokia will void the warranty; 2 This warranty covers normal consumer use and does not cover defects or damage to any product which, in the sole opinion of Nokia, has been subject to: improper storage, exposure to moisture or dampness, exposure to fire, sand, dirt, windstorm, lightning, or earthquake;... - Page 182 In order to obtain warranty performance, return the defective unit to the Nokia Service Centre with transportation charges prepaid (Shipping of the repaired unit may be paid by Nokia, in which case Nokia shall have risk of loss or damage during this shipment).
- Page 183 For products being returned to Nokia or its authorized service centres, the service provider/retailer/dealer shall prepay shipping charges, taxes, duties, insurance. Nokia shall have no risk for loss or damage during this shipment. NOTE: As warranty is automatically registered, no further action is required by the consumer.
-
Page 184: Index
Index Numerics 1-touch dialing 52 Making calls 20 Access codes 40 Access points 33 Settings 36 Settings, Advanced 38 Access points, glossary explanation 33 Service provider, glossary explanation 33 Accessories Settings 46 Activating loudspeaker Alarm clock 115 Snooze 115 Animations 60 Answering a call 21 Automatic 46 Applications 127... - Page 185 Calendar entry fields 106 Deleting many entries simultaneously 169 Sending entries 109 Settings 108 Stopping alarms 109 Symbols 107 Views 107 Call cost limit Resetting the counter 27 Set by a service provider 26 Call register See Log Call restrictions 45 Calling 19 Calls 1-touch dialing 20...
- Page 186 Contact groups 53 Adding many members at the same time 54 Adding ringing tones 52 Removing members 54 Converter 113 Adding exchange rates 114 Converting currencies 114 Converting units 113 Copying Contacts between the SIM card and phone memory 47 Text 75 Creating Contact cards 47...
- Page 187 Handsfree See Loudspeaker Headset 17 High speed data, glossary explanation 34 HSCSD See High speed data Idle state See Standby mode Image modes 57 Images 59 Formats 61 Full screen 60 Keyboard shortcuts when viewing images 61 Memory consumption 58 Moving the focal point 61 Organizing 61 Picture messages folder 62...
- Page 188 Memory low Troubleshooting 169 Viewing memory consumption 118, 132 Menu 13 Menu key 13 Rearranging the main Menu 14 Messaging Delivery reports 70 General settings 100 Inbox 83 Main view 69 Messages on the SIM card 93 Multimedia messages 78 My folders 87 Picture messages 77 Saving picture message...
- Page 189 Streaming 66 Volume control 66 Received calls 24 Receiving Data via Bluetooth 139 Data via infrared 140 Ringing tones, Operator logos, and settings, see Smart messages Recent calls log 24 Call charging units 26 Call cost limit 26 Call costs 26 Call duration 25 Dialed numbers 25 Erasing call lists 25...
- Page 190 General settings for Messaging 100 Info service 99 Lock code 41 Log 28 Messaging 94 PIN code 41 RealOne Player 67 Security 40 Service messages 99 Sounds 101 Text messages 94 Video recorder 64 Shortcuts in Favorites 103 in Images 61 SIM card Copying names and numbers 47 Messages 93...
- Page 191 Video recorder 63 Memory card 64 Saving video clips 63 Sending video clips 64 Settings 64 Video clips 64 Viewing GIF animations 60 Images 60 Voice dialing 50 Voice mailbox Changing the number 20 Forwarding calls to voice mailbox 23 Voice recorder 116 Voice tags 50 Adding 50...
- Page 192 NOTES [ 185 ]...
- Page 193 NOTES [ 186 ] 04/03...