Table of Contents
Advertisement
Quick Links
Advertisement
Table of Contents

Related Manuals for Neopost HD-MF14DN


Summary of Contents for Neopost HD-MF14DN
- Page 1 User’s Guide...
-
Page 2: Preface
REFACE Every effort has been made to ensure that the information in this document is complete, accurate, and up-to-date. The manufacturer assumes no responsibility for the results of errors beyond its control. The manufacturer also cannot guarantee that changes in software and equipment made by other manufacturers and referred to in this manual will not affect the applicability of the information in it. -
Page 3: Emergency First Aid
Seek medical attention. Spillages should be treated with cold water and soap to help reduce risk of staining skin or clothing. ANUFACTURER Neopost Digital Print Group 910 E. Main Street, Suite 200, Norristown, PA 19401-4010 U.S.A www.neopost.com... -
Page 4: For Your Safety
For Your Safety Read the User's Manual (this manual) for your safety before using the product. Cautions related to safety Indicates additional information which, if ignored or failed to follow the guidelines, may result in WARNING personal fatal injury or death. CAUTION Indicates additional information which, if ignored, may result in personal injury. - Page 5 CAUTION Do not come closer to the paper's exit area when Do not touch a damaged liquid-crystal display. the power is turned on while printing. If liquid (liquid crystal) leaked from the liquid- Doing so may result in personal injury. crystal display gets into the eyes or mouth, flush with large amount of water.
-
Page 6: Table Of Contents
Table of Contents Preface ..........2 Emergency first aid . - Page 7 Table of Contents Specifying Sender Information ......... 44 PBX Connecting.
- Page 8 Table of Contents Configuring Fax Settings ........83 Changing Scan Size (Scan Size) .
- Page 9 Table of Contents Setup to use the WSD Scan........101 Installation procedure .
- Page 10 Table of Contents Troubleshooting ....... . 126 Paper Jams ..........126 Checking Error Messages .
-
Page 11: Manual Composition
Manual Composition The following manual is attached to this product. Quick Start Guide Quick Start guide describes the initial setup to use each function. The basic operation of each function is also described. User's Manual (Basic) ---- This document In order to understand this machine, the basic operation is described. - Page 12 Legends used in this manual In this document, it may have written as follows. PostScript3 Emulation PSE, POSTSCRIPT3 Emulation, POSTSCRIPT3 EMULATION Microsoft Windows 7 64-bit Edition operating system Windows 7 (64bit version) ® ® Microsoft Windows Vista 64-bit Edition operating system...
-
Page 13: Setup
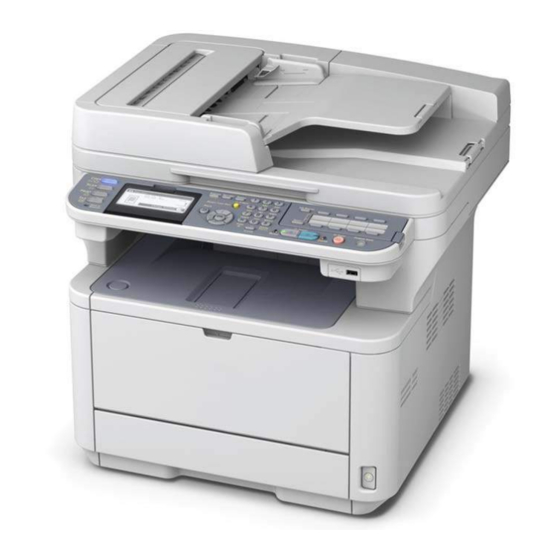
1. Setup In this chapter, the basic operations of this machine and the setup are described before using each function. Overview of Machine This section describes the overview of the machine. AC cord Contents of the Package Telephone connector cover The Telephone Connector Cover is installed to the Check that you have everything shown below. -
Page 14: Available Options
Overview of Machine Available Options Installation Requirements The following options are available for your Installation Environment machine: Second tray unit (tray 2) Your machine must be installed in the following environment: Reference For details on how to install the options, refer to "Installing Options"... -
Page 15: Names Of Components
Overview of Machine Installation Space Names of Components Install your machine on a flat surface that is wide enough to locate the machine. Allow for enough room around your machine according to the images below. Top view (193cm) 20cm (83cm) 50cm Name... - Page 16 Overview of Machine Internal part of the connector cover Name Name USB interface connection Fuser unit SD memory card slot (not all models) Starter toner cartridge Network interface connection Image drum LED head Power Switch LINE TEL Name Faceup stacker AC power socket Air vents LINE connection...
-
Page 17: Installing Your Machine
Installing Your Machine Installing Your Machine This section explains how to unpack your machine and how to turn it on and off. Remove the protection tapes (2) at the Unpacking Your Machine top and sides of your machine to take out cushioning materials (3). - Page 18 Installing Your Machine Open the document glass cover. Press the top cover open button (8) and open the top cover. Remove the protection tapes (6). Open the ADF and remove packing tapes. Lift the image drum from printer. Close the document glass cover. Now, you can open or close the scanner.
-
Page 19: Turning On And Off Your Machine
Installing Your Machine Reinstall the image drum in the Note printer:lower it into place in the printer If the power supply is unstable, use a voltage regulator. locating the pegs (1) at each end into The maximum power consumption of this machine is their slots in the sides of the printer 950W. -
Page 20: Power Save Mode
Installing Your Machine Turning On Your Machine Hold down the power switch for about a second. Plug the AC cable into the AC power socket of your machine. Note Press the power switch for less than 5 seconds. The message [Shutdown in progress. Plug the AC cable into the electric socket. -
Page 21: Sleep Mode
Installing Your Machine POWER SAVE The < > key lights up while in the mode. Disable Enable When your machine is not used for a certain period of time, it turns off the power automatically. Auto Config The machine will not turn off the power automatically under the conditions listed below. -
Page 22: Installing Options
Installing Options Installing Options This section explains how to install options on your machine. The following options are available: Second tray unit Note Be sure to hold down the power switch for about a second to turn off the power and unplug the AC cable and Ethernet or USB cable before installing options. -
Page 23: Printer Driver Configuration
Installing Options Printer Driver Configuration For Windows PS Driver Click [Start] > [Devices and Printers]. Note Right-click the [MFP XXXX(PS)] icon You must be logged in as an administrator to complete this and then select [Printer properties]. procedure. (If you have installed multiple printer ... - Page 24 Installing Options If the optional tray is already mounted, click [Second Tray], and then click [OK]. For Mac OS X PCL/PS Driver (Mac OS X 10.4.0 to 10.4.11) Memo The following procedure uses Mac OS X 10.4.11 as an example.
-
Page 25: Operator Panel
Operator Panel Operator Panel This section explains the names and functions of components on the operator panel and how to enter text. Name Function Display screen Displays operating instructions and the status of the machine. Main function keys Switches functions. The selected key lights up in blue. <COPY>... -
Page 26: Default Screen
Operator Panel Name Function <RIGHT> key Proceeds to the next screen. Shifts the highlighted selection to the right while an item is selected or characters are entered. <OK> key Confirms the highlighted item. Selects an item to be checked. <BACK>... - Page 27 Operator Panel Entering Text Using the Ten-key Pad You can also use the ten-key pad to enter alphanumeric characters and symbols in the Press to select the character entry screen. you want, and then press You can enter the numbers labeled on each key, as well as the other characters by pressing the keys repeatedly.
- Page 28 Operator Panel Using QWERTY Keyboard Deleting the Entered Text You can also use the QWERTY keyboard to enter alphanumeric characters and symbols in the You can delete text in the text field in the entry screen. following ways. Pressing the <CLEAR> key Press the <CLEAR>...
-
Page 29: Loading Paper And Documents
Loading Paper and Documents Loading Paper and Documents This section explains the specifications for paper and document, and how to load them. Paper Supported Paper Types For high-quality printing and to avoid printing problems, be sure to use the supported paper types. Please use digital photo print paper. - Page 30 Loading Paper and Documents Paper Type Paper Size mm (inch) Paper Weight Envelope Monarch 98.4 x 190.5 Envelopes should be 88 g/m (24lb) (3.875 x 7.5) paper, and flap parts of envelopes should be folded Com-9 98.4 x 225.4 (3.875 x 8.875) Com-10 104.8 x 241.3 (4.125 x 9.5)
-
Page 31: Paper Recommendations
Loading Paper and Documents Paper Recommendations Storing Paper Your MFP will handle a variety of print media, Store paper in the following conditions to including a range of paper weights and sizes. maintain quality: This section provides general advice on choice of ... -
Page 32: Loading Paper
Loading Paper and Documents Loading Paper Your machine has two built-in trays (tray 1 and the MP tray) and an optional tray (tray 2).Refer to the list below to check the supported paper and capacities of each tray. Note Duplex printing can not be performed on paper indicated by an "*". Supported paper Tray Paper capacity... -
Page 33: Paper Capacity
Loading Paper and Documents Supported paper Tray Paper capacity Paper weight size MP Tray A4 100 sheets Light A5 (when paper weight is 60 to 63 g/m (16 to 17 lb) B5 80 g/m Medium Light ... - Page 34 Loading Paper and Documents Loading Paper on the MP Tray Flex paper back and forth, and then fan it. Straighten the edges of the paper The following procedure explains how to load paper on the MP tray. stack on a level surface. Open the MP tray.
- Page 35 Loading Paper and Documents Loading Paper on the Manual Insert the paper with the print side face up until its edge touches the paper feed Feeder entrance. The following procedure explains how to load paper on the Manual Feeder. Note ...
- Page 36 Loading Paper and Documents Configuring the Tray Settings Registering Custom Sizes After you load paper in tray 1, tray 2 (optional), To load custom size paper, you need to register or the MP tray, you need to register the loaded the width and length of the paper before printing.
-
Page 37: Paper Output
Loading Paper and Documents Paper Output Pull the faceup stacker on the rear side of the machine and open it toward you. Your machine outputs to the facedown or faceup stacker. Paper types that can be outputted to each stacker are as follows. Output Supported Paper output... -
Page 38: Scannable Area
Loading Paper and Documents Scannable Area Loading Documents on the ADF Load your documents face up on the ADF. The text or images on the shaded area shown If your documents are portrait, load them with the below are not scanned. top edge of the documents in first. - Page 39 Loading Paper and Documents If your document is landscape, align its right edge to the upper-left corner of the glass. Close the document glass cover gently. Reference [Document Direction] setting according to the direction of your document to get the output you want. The factory default is [Portrait].
-
Page 40: Basic Settings For Faxing
Basic Settings for Faxing Basic Settings for Faxing This section explains basic settings for faxing. Be sure to configure the following settings before you transmit faxes. Repeat step a until all characters Setting for Country Code required are entered. Press the to select [Enter] and press... -
Page 41: Connecting A Telephone Line
Basic Settings for Faxing Connecting to the Public Line Connecting a Telephone Line (Connecting for Fax and Telephone) Depending on your environment, a method to connect a telephone line is different. Based on Plug one end of the [Telephone cable] the following figures, connect the line for your into the [LINE connection] of your environment. -
Page 42: Other Cases
Basic Settings for Faxing Connecting to IP Telephone - When you send fax or receive, the fax picture may be broken or communication error may occur by picking up the telephone. - The fax transfer function is not able to work from the Plug the [Telephone cable] connected to the IP external telephone. -
Page 43: Settings For Each Dialing Type
Basic Settings for Faxing Connecting PBX, Home Telephone or Connecting as an Internal Telephone Business Phone Plug the [Telephone cable] connected to a control device including PBX, etc. into the [LINE Plug the [Telephone cable] connected to the connection] of your machine. [Public Line (Analog)] into the [LINE connection] of your machine. -
Page 44: Setup Of Date/Time
Basic Settings for Faxing When the setup menu screen is displayed, Press , select Dial Type, and then press press to complete the setup. Press the until the top screen is displayed. Setup of Date/Time Setup of Date/Time of your region. Specifying Sender Information Reference ... -
Page 45: Pbx Connecting
Basic Settings for Faxing When the setup menu screen is displayed, Specifying Reception Mode press to complete the setup. Depending on your environment of the machine, the optimal reception mode is different. Check with the following description. Fax Ready Mode This mode is recommended when you use the machine as a fax machine. -
Page 46: Connecting To A Computer
Connecting to a Computer Connecting to a Computer This section explains how to connect your machine to a computer and install a printer and fax driver. Connecting method You can select either of the following connection methods: "Network Connection" P. 47 ... -
Page 47: Network Connection
Connecting to a Computer Install a Printer and Fax Driver Network Connection (for Windows) Do the following procedure to connect your To complete the network connection with a machine to a computer via network. Windows computer, first set IP addresses for the machine, and then install a printer and fax driver Connecting an Ethernet Cable on the computer. - Page 48 Connecting to a Computer Next, install the printer and fax driver into the Enter the administrator password. computer. The factory default password is "aaaaaa". Note Select [Complete], and press To complete this procedure, you must be logged in as an administrator.
- Page 49 Connecting to a Computer Select the checkbox of the printer driver, fax driver or both you want to install, and click the Install bunch button. Memo By factory default, [PCL driver], [Scanner driver], and [ActKey] are selected. All of drivers and software packages are installed by the collective installation if their boxes are checked.
- Page 50 Connecting to a Computer Installing a Printer Driver Next, install the driver in the computer. (For Mac OS X) Insert the "Software DVD-ROM" into the computer. To complete the network connection with a Mac operating system, install a printer driver on the Double-click the [DVD] icon on the computer and set your machine as a network desktop.
-
Page 51: Using Ethertalk
Connecting to a Computer Using EtherTalk Select the name of your machine and then check that [MFP XXXX(PS)] is (For Mac OS X 10.4.0 to 10.4.11) displayed in [Print Using]. When connecting to the network with EtherTalk, it is necessary to enable EtherTalk in the machine. - Page 52 Connecting to a Computer Click [Add]. Select [Network Port Configurations] from [Show], and then check that [Built-in Ethernet] is selected. If the [You have no printers available] dialog box appears, click [Add]. Select the name of your machine whose [Connection] is [AppleTalk], and then check that [MFP XXXX(PS)] is Select [Built-in Ethernet] from [Show] displayed in [Print Using].
-
Page 53: Using Bonjour
Connecting to a Computer Click [OK]. Click [Default]. Remove "Software DVD-ROM" from the computer. The installation is complete. Using Bonjour (For Mac OS X 10.5 to 10.7) Then, install the driver in the computer and set the machine as a network printer. Install the driver in the computer. - Page 54 Connecting to a Computer Double-click [Driver] folder > [PS] or Note [PCL] folder [Installer for Mac OSX]. If [MFP XXXX(PS)] or [MFP XXXX(PCL)] is not correctly displayed in [Kind], click [-] to remove your Enter the administrator's password, and machine from [Print &...
-
Page 55: Usb Connection
Connecting to a Computer Hold down the power switch for about a Check that the name of your machine is second to turn on the power and the displayed in [Printer List], and then computer. close the window. Reference "Turning Off Your Machine" P. 20 ... - Page 56 Connecting to a Computer Installing a Printer and Fax Driver Select the checkbox of the printer driver, (For Windows) fax driver or both you want to install, and click the Install bunch button. Memo Note By factory default, [PCL driver], [Scanner driver], ...
- Page 57 Connecting to a Computer Click [+]. Click the [Exit] button. Remove "Software DVD-ROM" from the computer. The installation is complete. Print a test page to check that the printer driver is successfully installed on the computer. Click [Start] > [Devices and Printers]. Right-click the MFP XXXX icon and select [Printer properties] (>...
- Page 58 Connecting to a Computer Close [Print & Scan](Mac OS X 10.5 Select the name of your machine whose and 10.6:[Print & Fax]). [Connection] is [USB], and then check that [MFP XXXX(PS)] or [MFP Remove "Software DVD-ROM" from the XXXX(PCL)] is displayed in [Print computer.
-
Page 59: Configuring The Network Settings
Configuring the Network Settings Configuring the Network Settings This section describes the setup required for using Scan To E-mail, Scan To Network PC, Scan To Fax Server, Internet Fax functions. The above functions enable you to send scanned data to a computer via the network connection. To use them, you need to set up your machine and the computer to which you want to send scanned data. -
Page 60: Checking The Common Setup Information
Configuring the Network Settings Checking the Common Setup Setting Up Scan To E-mail and Information Internet Fax Check the common setup information for Scan To The Scan To E-mail, Scan To Fax Server and E-mail, Scan To Network PC, Scan To Fax Server Internet Fax functions enable you to send and Internet Fax, and fill in the corresponding scanned images as an attached file of an e-mail... - Page 61 Configuring the Network Settings Setting the E-mail Address for Your On the [General] tab, enter the contents of [Name] and [E-mail address] in B-9 Machine and B-10 of the Setup Information Form. When sending data scanned from the machine by an e-mail, the e-mail address for the machine is necessary.According to the following procedure, set the e-mail address of the machine and enter...
-
Page 62: Setting Up Scan To Network Pc
Configuring the Network Settings Select [Enter] and then press When the setup menu screen is displayed, press Press the and then enter the information in B-1. Select [Enter] and then press Press the and then select a protocol for receiving e-mail for the machine, and The setup for Scan To E-mail, Scan To Fax Server then press and Internet Fax is complete. - Page 63 Configuring the Network Settings Select [See the name of this Memo computer] under [System]. If the computer name is over 16 characters, for Mac OS X 10.4.11 enter the first 15 characters in C-1. For Mac OS X Enter the name in [Computer name] in 10.5-10.6, select the network service you are using from C-1 of the Setup Information Form.
- Page 64 Configuring the Network Settings Enter the information in C-2 in the text Select the [Sharing] tab and then click box. [Share]. Select the user account created in step 5 from the drop down box, and then click Ensure that [Standard user] is [Add].
-
Page 65: For Windows Xp
Configuring the Network Settings Click [Add]. Select [Limited] and click [Create Account]. Enter the value in C-2 in the entry field and then click [OK]. Click the icon of the user account created in step 5. Select [Create a password]. Enter the value of C-3 in [Type a new Select the user added in step 13 and password] and [Type the new... - Page 66 Configuring the Network Settings Click [If you understand the security Click [Add]. risks but want to share files without running the wizard, click here.]. Enter the value in C-2 in the entry field and click [OK]. If the screen below appears, select [Share this folder] and click [Permissions].
- Page 67 Configuring the Network Settings For Windows Server 2003 Select [Share this folder] and then click [Permissions]. Memo The items here may differ depending on the edition you are using. Click [Start] > [Administrative Tools] > [Computer Management]. In the right window, double-click [System Tools] >...
- Page 68 Configuring the Network Settings For Mac OS X 10.5 to 10.7 Check that an account is added to [Other Users] (for Mac OS X 10.5 and From the Apple menu, select [System 10.6: [Other Accounts]) with the name Preferences]. of C-2, and close [Users &...
- Page 69 Configuring the Network Settings For Mac OS X 10.4.0 to 10.4.11 Select the account created in the step 8 and click [Select]. Memo The following procedure uses Mac OS X 10.4.11 as an example. Depending on an OS, the description may be different.
- Page 70 Configuring the Network Settings Check that an account is added to Close [Sharing]. [Other Accounts] with the name of C-2, Proceed to "Creating a Profile for Scan To Network and close [Accounts]. PC". Creating a Profile for Scan To Network PC Register the information on the Information form on the computer as a profile.
-
Page 71: Managing Profiles
Configuring the Network Settings Modifying a Profile Enter the information in C-2. Note Press the <SETTING> key on the If domain management is done, enter "C-2@domain name". operator panel. When carrying out domain management, if you cannot Press the to select [Profile] and then connect even after entering "C-2@Domainname", delete "@Domainname". -
Page 72: Printing Configuration
Printing Configuration Printing Configuration This section explains how to print the Configuration on which you can check the detailed information of your machine, such as the settings and status of your machine. Printing Procedure Press the <SETTING> key on the operator panel. -
Page 73: Copying
2. Copying This chapter explains the basic operation and settings for your machine's copy function. Basic Operation This section explains how to start and cancel copy job. Starting a Copy Job Canceling a Copy Job in Progress Press the <COPY> key on the operator panel to open the copy standby screen. -
Page 74: Configuring Copy Settings
Configuring Copy Settings Configuring Copy Settings You can change the copy settings to alter the output to suit your needs. Each setting can be configured from the [Change Settings] menu on the copy standby screen. Perform the following procedures at step 3 of "Starting a Copy Job"... -
Page 75: Changing Image Orientation Of Document (Direction)
Configuring Copy Settings Press the until the start screen is Changing Image Orientation displayed. of Document (Direction) Memo Setting the [Paper Tray] to [Automatic] will You can select [Portrait] or [Landscape] for the automatically set [Enlarge/Reduce] to [100%]. When document's orientation. -
Page 76: Enabling Continuous Scan Mode (Continuous Scan)
Configuring Copy Settings When the [Please set next document] Enter the zoom ratio from 25 to 400% screen is displayed, place the next document using the ten-key pad and then press in the ADF or on the document glass. - You can set the ratio in 1% increments. - If you have entered an incorrect value, press the <CLEAR>... -
Page 77: Making Duplex Copies (Duplex Copy)
Configuring Copy Settings Short-Edge Binding Press the to select the desired density and then press Copies your document to be bound along the short edge of the paper. Settable Density Values: *indicates the factory default. Memo [0] is the standard value. To darken the document image, select [+1], [+2] or [+3] (most dense). -
Page 78: Adjusting The Background Removal
Configuring Copy Settings Press the to select the desired Adjusting the Background value and then press Removal Settable Resolution: You can turn off the background erasing for High Speed* Normal High Quality documents or adjust the background density *indicates the factory default. from 6 levels. -
Page 79: Resetting Copy Settings
Configuring Copy Settings - 79 -... -
Page 80: Faxing
3. Faxing This chapter explains basic settings and operations for faxing, scanning to fax server and internet faxing and operations on managing the phone book. Basic Procedure for Faxing This section explains basic operations for transmitting faxes. You need to configure the initial settings before using the fax function. -
Page 81: Specifying A Destination
Basic Procedure for Faxing Enter "Pause" and "#" by pressing <#> on the Specifying a Destination ten-key pad. When you press <#>, you toggle between "P" and "#". You can specify a destination in the following six Pause ways: Pauses a few seconds when dialing. -
Page 82: Deleting Specified Destinations
Basic Procedure for Faxing Using Transmission and Reception Deleting Specified Destinations History Select the specified destination on the You can select a destination from the 50 most fax start screen by pressing and then recent transmissions or receptions. press Press the to select [Tx History] or [Rx History] and then press Press the... -
Page 83: Configuring Fax Settings
Configuring Fax Settings Configuring Fax Settings You can configure the fax settings to alter the output to suit your needs. Each setting can be configured from the [Fax Functions] menu on the fax start screen. Perform the following procedures at step 6 of "Sending a Fax"... -
Page 84: Checking And Canceling Fax Transmission
Checking and Canceling Fax Transmission Checking and Canceling Fax Transmission This section explains how to check or cancel fax jobs. Checking Transmission and Canceling Fax Transmission Reception History You can cancel a job that is being transmitted as long as the message indicating the job has been You can check transmission and reception history completed has not appeared. -
Page 85: Machine Behavior In Fax Reception
Machine Behavior in Fax Reception Machine Behavior in Fax Reception This section explains how your machine behaves when receiving and printing faxes. Reception Behavior Memo If you often receive calls, it is recommended that you activate [Tel Priority Mode]. For more detailed The machine behavior differs depending on the information on [Tel Priority Mode], please refer to User's specified reception mode. - Page 86 Machine Behavior in Fax Reception When using two numbers with distinct rings(DRD) This mode is programmed for the fax to answer only on a distinctive ring. You can have a signal phone line to have two numbers with distinct rings, one for regular phone calls and one for fax. If the phone line is in use, and there is an incoming fax, the sender will receive a busy signal.
-
Page 87: Printing Received Faxes
Machine Behavior in Fax Reception When Unable to Print Received Printing Received Faxes Faxes The machine automatically prints out the received When the machine cannot print received faxes fax. You can specify the paper tray to use. due to a lack of paper or paper jams, it stores the received fax data temporarily in memory. -
Page 88: Phone Book
Phone Book Phone Book This section explains how to register fax numbers in the phone book, and how to edit or delete registered numbers. In the phone book, you can set frequently used numbers to speed dial and also create groups of numbers to which you can broadcast faxes. -
Page 89: Deleting
Phone Book Press the to select a group number Repeat steps 4 to 11 in "Registering and and then press Editing" P. The fax number is automatically entered. You do not have to enter it manually. Deleting Press the <SETTING> key on the Check that [Register] is selected and operator panel. -
Page 90: One-Touch Key Pad
Phone Book Importing Addresses from a File. Press the to select [Delete] and then press Select from which device to import, from [Registered Device Table]. Press the to select [Yes] and Select the [User Setting] tab. then press Click on [Speed Dial Manager]. Memo ... -
Page 91: Basic Procedure For Scan To Fax Server
Basic Procedure for Scan To Fax Server Basic Procedure for Scan To Fax Server This section explains basic operations for data transmission to the fax server. The FaxServer function allows you to transmit fax data as a file attached to an e-mail. A document is scanned and converted to a TIFF file. -
Page 92: Deleting The Specified Destination
Basic Procedure for Scan To Fax Server The box is checked. You can select multiple entries. When you have selected all the destinations, press the Check that [Complete] is selected, and then press Direct Input This is the same as the fax function. Using the Tx History You can select a destination from the recently called 50 recipients listed on the transmission... -
Page 93: Basic Procedure For Internet Faxing
Basic Procedure for Internet Faxing Basic Procedure for Internet Faxing This section explains basic operations for transmitting internet faxes. The internet fax function allows you to transmit fax data as a file attached to an e-mail. A document is scanned and converted to a TIFF file. -
Page 94: Specifying A Destination
Basic Procedure for Internet Faxing Using the Transmission History Specifying a Destination You can select a destination from transmission You can specify a destination in the following five histories. ways: Using the address book Note Using a group ... -
Page 95: Checking, Deleting, And Changing Destinations
Basic Procedure for Internet Faxing Using LDAP Search Check that [Search Method] is selected and press You can search for a destination that is on the Select either [OR] or [AND] and press LDAP server. You can select either [Simple Search] or Press , select [User name], and then [Advanced Search] for the method of... -
Page 96: Canceling Transmission
Basic Procedure for Internet Faxing Check that [Close the list] is selected Press the to select the destination you and then press want to change and then press The check box is selected. You can select multiple Deleting a Destination addresses. -
Page 97: Scanning
4. Scanning This chapter explains the basic operation and settings for your machine's scanning functions. Installing Scanner Drivers (TWAIN/WIA/ICA Driver) This section explains the procedure to install the scanner driver. Before using scan function, install the scanner driver. You can install TWAIN driver and WIA (Windows only) driver at the same time. Install the TWAIN driver and ICA driver (dedicate to the Mac OS X) separately. -
Page 98: For Mac Os X
Installing Scanner Drivers (TWAIN/WIA/ICA Driver) Check the checkbox of [Network Enter the host name, IP address and port scanner] and click [Next]. number and then click [Configure]. Click [Next]. Select [IP Address] or [Search MFP] check box to enter the address of the machine and then click [Next]. - Page 99 Installing Scanner Drivers (TWAIN/WIA/ICA Driver) Click [Continue]. Click [Install]. To change the installation location of the driver, click [Change Install Location]. Click [Continue]. Enter the administrator's name and password, and click [OK]. Click [Continue Installation]. Check the display and click [Continue] if Click [Restart].
-
Page 100: Using Actkey Software
Installing Scanner Drivers (TWAIN/WIA/ICA Driver) Using ActKey Software Using the ActKey, you can start a scan job in specified settings with a click a button. Memo ActKey does not support Mac OS X. Using WSD Scanning, Actkey does not work. ... -
Page 101: Setup To Use The Wsd Scan
Setup to use the WSD Scan Setup to use the WSD Scan The following explains how to set up the PC to use the WSD Scan function. In order to use the WDS Scan function, install this device on the PC. WSD Scan can be used from Scan To Local PC and Scan To Remote PC via Network. -
Page 102: Scanning Methods
Scanning Methods Scanning Methods This section explains the basic operation of the scan function. In scan mode, you can use five scan functions, scan to e-mail, scan to USB memory, scan to network computer, scan to local computer and PC scan. -
Page 103: Direct Input
Scanning Methods When you have selected all the When you have selected all the destinations, press the destinations, press the Check that [Complete] is selected and Check that [Complete] is selected and then press then press Press the to return to start screen. Press the to return to start screen. -
Page 104: Scan To Network Pc
Scanning Methods Scan to Network PC Scan to USB Memory You can send a scanned document to a server on You can save the scanned document in a USB the network. memory. The document is scanned and converted to a PDF, JPEG, TIFF. -
Page 105: Scan To Local Pc
Scanning Methods Press the to select [Local PC] and Scan to Local PC then press You can save the scanned data into your local computer. If the Network TWAIN setting is set to [Disable], proceed to the step 6. When you press the , the scan OLOR job starts and the ActKey utility and the TWAIN... -
Page 106: Scan To Remote Pc
Scanning Methods Press the to select [Select An Scan to Remote PC Application] and then press This function launches the Scanner driver from a Press the to select where to send the utility installed on a PC (ActKey, PaperPort, Image,Adobe Photoshop CS3, etc.) and starts scanned document and then press scanning. - Page 107 Scanning Methods Simple Scan Mode - If you select [MFP XXXX Network] and the network scan is the second or more scanning, proceed to the step 10. For Windows For the first network scan, the dialog box indicating that the tool of connection Press the <SCAN>...
- Page 108 Scanning Methods For Mac OS X Secure Scan Mode (For USB Connection) Press the <SCAN> key on the operator panel. For Windows Place your document with text face up in the ADF or face down on the document Press the <SCAN>...
-
Page 109: Canceling The Current Scan Job
Scanning Methods Click a scan button. Scanning starts. Select [Quit Photoshop] from [Photoshop]. WSD Scan (For Network Connection) For Windows Press the <SCAN> key on the Operation Panel. Place the original on the automatic document feeder or on the scanner glass. Press the to select [Remote PC] and then press... -
Page 110: Registering Address Book
Registering Address Book Registering Address Book This section explains how to register and deleted the address book and group list. You can register e-mails to the address book and create groups for broadcasting messages. The Address Book and the Group List can be used to specify the destination in Scan to e-mail and internet fax functions. -
Page 111: Group List
Registering Address Book Press the to select [E-mail Group] Group List and then press You can create up to 20 groups of e-mail addresses. Press the to select a group number Registering and Editing and then press Press the to select [Delete] and then Reference press ... -
Page 112: Registering Network Scan Destinations
Registering Network Scan Destinations Registering Network Scan Destinations This section explains how to register a PC connected to the Network. You can register locations on a network to which you can scan documents. Memo You can also register network-connected PCs with ActKey in Network Configuration. You can register or delete network- connected PCs with Network Configuration, however, you cannot edit them. -
Page 113: Using As A Printer
5. Using as a Printer This chapter describes how to print documents from a computer or USB memory. Printing from a Computer This section explains how to print from a computer. Memo This section uses Wordpad in Windows and TextEdit in Mac OS X as examples. The display and procedure may differ according to the operating system, the applications, and the version of the printer driver you are using. - Page 114 Printing from a Computer For Mac OS X PS Printer Driver Select the [Paper/Quality] tab. Select a tray from [Paper Source]. From the [File] menu, select [Page Setup]. Select the printer you want to use from [Format For]. Click [Advanced]. Select a paper size from [Paper Size] Click [Paper Size] and select a paper and then click [OK].
-
Page 115: Canceling A Print Job
Printing from a Computer Click [Print]. Click [Print]. Memo For Mac OS X PCL Printer Driver For general use, [Printer Setting] suffices for a paper weight. When you select [Printer Setting], the paper weight setting configured on the equipment setting menu From the [File] menu, select [Page Setup]. -
Page 116: Printing From Usb Memory
Printing From USB Memory Printing From USB Memory This section explains how to print from the USB memory. Inserting the USB memory into the machine, you can print the document stored in it directly. Note Not all USB memory products are guaranteed to work. (USB memory with security functions is not supported.) ... -
Page 117: Configuring Print Settings
Printing From USB Memory Doing Duplex Printing (Duplex) Remove the USB memory from the port after a message is displayed indicating that it is OK to remove the USB memory. You can make 1-sided (simplex) or 2-sided (duplex) printouts. Configuring Print Settings Note ... -
Page 118: Canceling A Print Job
Printing From USB Memory Press the to select [Fit] and then press Press the to select [ON] for matching the paper size or [OFF] for not resizing the page size and then press Press the to return to the start screen. Canceling a Print Job You can cancel a print job from the USB memory by pressing the <STOP>... -
Page 119: User Authentication And Access Control
6. User Authentication and Access Control This chapter explains the user authentication and access control functions. About User Authentication and Access Control The user authentication and access control functions allow you to limit the functions available to each user. If the access control is enabled, the user authentication is required before using the machine. If the authentication succeeds, functions specified in advanced can be only used. -
Page 120: Authentication By Pin
Authentication by PIN Authentication by PIN This section explains how to enable the access control using the authentication by PIN and how to operate when the access control is enabled. Registering a PIN Operation When PIN Authentication Is Enabled Before enabling the user authentication and access control, be sure to register a PIN for each user. - Page 121 Authentication by PIN Press the on the confirmation screen to select [Yes] and then press Memo After a certain period of time, the machine automatically logs out users. - 121 -...
- Page 122 Authentication by PIN - 122 -...
-
Page 123: Authentication By User Name And Password
Authentication by User Name and Password Authentication by User Name and Password This section explains how to enable the access control using the authentication by the user name and password and how to operate when the access control is enabled. Press the until the message of "Access Registering User Name and... - Page 124 Authentication by User Name and Password Enter the user name in [Username] and Press the on the confirmation the password in [Password] respectively. screen to select [Yes] and then press Clicking [Use Windows Login] automatically enters your login name on Windows. Memo ...
-
Page 125: Faxing From A Computer
Authentication by User Name and Password Faxing From a Computer (For Windows Only) Memo This procedure uses NotePad as an example. The procedures and menus may differ depending on the OS you use. Open the file you want to fax. From the [File] menu, select [Print]. -
Page 126: Troubleshooting
7. Troubleshooting This chapter provides solutions to the problems you may encounter while operating your machine. Paper Jams This section explains how to clear paper jams. Reference For details on the location of each component of the machine, refer to "Cleaning Your Machine"... - Page 127 Paper Jams Carefully lift out the image drum, complete Insert rear projections , locating close with the toner cartridge. Be careful not to to both handles of the transcription unit, touch or scratch the green drum surface. into both mounting holes of the printer. Remove the Image Drum as described in Secure the transcription unit to the step 3, then, remove the Duplex unit (1)
-
Page 128: Error Code
Paper Jams Error Code 380, 381, 382, 389 If neither the top or bottom end of paper (Paper feed jam) is visible, move the jammed paper in the arrow direction as shown. Hold the top end of paper by your hands and carefully Remove any documents from the pull out the paper. -
Page 129: Multipurpose Tray
Paper Jams and pull out the paper carefully. If you cannot remove the paper by following Steps (A)1 and (A)2, pull out the paper by following Steps (B). (A)1 (A)2 Close the top cover. Close the scanner unit. (B)1 (B)2 Error Code 390 (Paper feed jam (Multipurpose tray)) Remove any documents from the... - Page 130 Paper Jams Error Code 391, 392 (Paper feed jam) If neither the top or bottom end of paper is visible, move the jammed paper in the arrow direction as shown. Hold the top Error Code 391 indicates an error in Tray1 and end of paper by your hands and carefully Error Code 392 indicates a paper jam in Tray2.
- Page 131 Paper Jams Document Jam Occurred Hold jammed document by the top edge, and gently pull it out. When you can see the document In the Duplex Paper Path Open the ADF cover, and pull out the document upward. If the edge of the document can been seen under the paper guide (1), lift the paper guide and then pull out the document.
-
Page 132: Error Messages
Error Messages Error Messages This section explains the causes and remedies for the error messages displayed on the display screen and the function of the <STATUS> key. Error Messages Displayed on the Screen Memo In the following lists: - "%COLOR%"... - Page 133 Error Messages Error <Status> Message Cause/Remedy code %COLOR% Toner cartridge not Blinks The toner cartridge of the indicated color is not installed. : %ERRCODE% properly installed. Reinstall it properly. 613 : K Please see Help for details. %COLOR% Toner cartridge not installed. Lights up The toner cartridge of the indicated color is not properly installed.
- Page 134 Error Messages Error <Status> Message Cause/Remedy code Please check %COLOR% Toner Cartridge. Lights up Something is wrong with the toner sensor of the indicated color during printing. Check that the toner cartridge of the indicated color is installed properly. Please see Help for details. Please check %COLOR% Toner Cartridge.
-
Page 135: Code Key
Error Messages Error <Status> Message Cause/Remedy code Lamp Error. Please call service. Blinks Indicates that the lamp error is occurred. <%CODE%> This message is displayed because of the light intensity of lamp is weaker. Contact your dealer. Please see Help for details. %TRAY% missing. - Page 136 Error Messages Error <Status> Message Cause/Remedy code Please install new Image Drum Unit. Blinks The Image Drum Unit is at the end of its life. Please see Help for details. Decode error occurred. Lights up An error occurred during analysis of image data Please check image data.
- Page 137 Error Messages Error <Status> Message Cause/Remedy code Telephone Lights up The telephone is being used. Wait for the call on the telephone lines to end. Please see Help for details. Memory Overflow. Blinks The memory overflowed while receiving PC fax data.
- Page 138 Error Messages Error <Status> Message Cause/Remedy code USB Memory disconnected. Blinks USB memory is not connected to the machine and the machine cannot store data. Be sure that the USB memory is connected to Please see Help for details. the machine properly. to close Connect to PC failed.
- Page 139 Error Messages Error <Status> Message Cause/Remedy code Please check DNS settings. Blinks An error occurred while connecting to a DNS server, or the machine failed to obtain IP address. Please see Help for details. Check the network configuration, cable connection and status, and the server status.
- Page 140 Error Messages Error <Status> Message Cause/Remedy code Device communication protocol not Blinks The machine does not support the specified supported. server. If using NAS to save data with Scan to Network PC, in rare cases there are machines that cannot Please see Help for details.
- Page 141 Error Messages Error <Status> Message Cause/Remedy code Invalid Password Lights up This is a PDF file with the encryption function enabled. When printing an encrypted PDF file, open it in your computer and then print it. to close This document restricts printing to a Lights up This is a PDF file with the encryption function valid owner password.
- Page 142 Error Messages Error <Status> Message Cause/Remedy code Preparing. Lights up The printer unit is not prepared for printing. Wait until this message disappears. Access Limitation Error Lights up Notifies users that jobs have been cancelled Deleted unauthorized user data. because they are not permitted for printing. (Related to JobAccount).
-
Page 143: Checking The Machine's Status From The
Error Messages Checking the Machine's Status From the <STATUS> Key From the <STATUS> key on the operator panel, you can check the status of your machine. Checking the Trouble Status The <STATUS> key blinks or lights up when any trouble is occurring in your machine. Press it to check the trouble status.Key -
Page 144: Other Issues
Other Issues Other Issues This section explains the issues you may encounter while operating your machine and how to solve them. Unable to Print from a Computer Memo If the following information does not solve the trouble, contact your dealer. ... -
Page 145: Network Connection Problems
Other Issues Cause Remedy Reference The Job Type of "Secure Print", "Store to For Windows PCL Driver Advanced HDD" and "Encrypted Secure Print" are 1.Click [Start] > [Devices and Printers]. unselectable on supported models. 2.Right-click the [MFP XXXX(PCL)] icon and select [Printer properties]. -
Page 146: Unable To Install A Printer Driver Successfully
Other Issues For Windows Cause Remedy Reference The machine is off line. Right-click the MFP XXXX icon and then select [See print jobs] (> [MFP XXXX(*)] when multiple drivers are installed). In the dialog box, select the [Printer] menu and then clear the check of [Use Printer Offline]. * Select the type of driver you want. -
Page 147: Restrictions On Each Os
Other Issues Restrictions on Each OS Restrictions on Windows 7/Windows Vista/Windows Server 2008 R2/ Windows Server 2008 Item Symptom Cause/Remedy Printer drivers [Help] is not displayed. The [Help] function is not supported on PS printer drivers. The [User Account Control] When you launch an installer or utility, the [User Account dialog appears. - Page 148 Other Issues Restrictions on Windows Server 2003 Service Pack 1 and Windows XP Service Pack 2 Restrictions on Windows Firewall On Windows Server 2003 Service Pack 1 and Windows XP Service Pack 2, the Windows firewall functionality is enhanced. The following restrictions may apply to printer drivers and utilities. Memo ...
- Page 149 Other Issues Restrictions on Mac OS X 10.4 Item Symptom Cause/Remedy TWAIN driver Unable to scan by image capture In the image capture, if the computer is con- nected to the network, display the user inter- face of the TWAIN driver before using. To display the user interface of the TWAIN driver, after starting the image capture, select [Browse Devices] from the [Devices] menu...
-
Page 150: Copying Issues
Other Issues Copying Issues Memo If the following information does not solve your trouble, contact your dealer. Unable To Copy Symptom Point to check Remedy Reference Unable to copy. Is the machine turned on? Hold down the power switch for P.20 about a second to turn on the power. -
Page 151: The Copied Output Is Different From The Original Document
Other Issues Symptom Point to check Remedy Reference Unable to copy. Is the Continuous Scan mode on? Select [Scan completed] on the P.76 display screen. Is the machine off line? Press the <PRINT> key on the operator panel, and then select [On-Line/Off-Line]. -
Page 152: Faxing Issues
Other Issues Faxing Issues Memo If the following information does not solve the trouble, contact your dealer. Unable to Send a Fax Symptom Point to check Remedy Reference Unable to send a fax. Did you perform the correct Check the appropriate procedure P.80 procedure? and try again. -
Page 153: Scanning Issues
Other Issues Unable to Send or Receive a Fax Symptom Point to check Remedy Reference Unable to send or Is it rightness about connection of Check the connection of the P.41 receive a fax. the telephone cable? telephone cable. Did you install an IP phone on the Press the <SETTING>... -
Page 154: Image Quality Issues
Other Issues Image Quality Issues Memo If the following information does not solve your trouble, contact your dealer. Symptom Point to check Remedy Reference Vertical white lines The LED heads are dirty. Wipe the LED heads with a soft P.167 appear. - Page 155 Other Issues Symptom Point to check Remedy Reference Horizontal lines and If the interval of lines or spots is Lightly wipe the image drum with P.163 spots appear about 94 mm (3.7 inches), the soft tissue paper. periodically. image drum (the green tube) is Replace the image drum if it is damaged or dirty.
-
Page 156: Feeding Issues
Other Issues Symptom Point to check Remedy Reference Nothing is printed. Two or more sheets of paper are Fan the paper well and load it P.32 fed simultaneously. again. The machine may be Contact your dealer. malfunctioning. The back side of the document is Load the document properly. - Page 157 Other Issues Symptom Point to check Remedy Reference The paper often jams. The machine is inclined. Place the machine on a flat surface. Multiple sheets are fed The paper is too light or too heavy. Use the appropriate paper for the P.29 at once.
-
Page 158: Machine Issues
Other Issues Machine Issues Memo If the following information does not solve the trouble, contact your dealer. Symptom Point to check Remedy Reference Turned on the machine, The AC cable is unplugged. Hold down the power switch for but it stays "Off-Line". about a second to turn on the power and then plug in the AC cable firmly. - Page 159 Other Issues Symptom Point to check Remedy Reference There is an abnormal The machine is inclined. Place the machine on a flat sound. surface. There is a piece of paper or Check the inside of the machine unknown object inside the and remove any objects.
-
Page 160: When The Power Goes Out
Other Issues When the Power Goes Out Machine Behavior When the power goes out, the machine behaves in the following way: Machine's Status Behavior During a call You can continue talking. During transmitting a fax The communication stops. When the electricity supply is restored, ... -
Page 161: Maintenance
8. Maintenance This chapter explains how to replace consumables, clean the machine, and move or transport the machine. Replacing Consumable Items This section explains how to replace consumable items. WARNING Do not throw the toner or Do not keep the toner Do not vacuum spilled toner toner cartridge into the fire. -
Page 162: Replacing Toner Cartridges
Replacing Consumable Items Replacing Toner Cartridges Protrusion of image drum Procedure for Replacement Open the top cover and remove the used Insert the toner cartridge, while matching its º toner cartridge. left side with the protrusion on the left side of the image drum. -
Page 163: Replacing The Image Drum
Replacing Consumable Items If the image drum is removed, the toner Note cartridge is also removed. Do not use solvents, such as methyl alcohol or thinners. They damage the LED head. Close the top cover. Close the scanner unit. Memo ... -
Page 164: Close The Top Cover
Replacing Consumable Items Align both guide posts of the image drum with · their guide grooves on the printer, and gently set the image drum into the printer. Guide Post Guide Post Guide Grooves Remove the toner cover (orange) from the ¸... -
Page 165: Cleaning Your Machine
Cleaning Your Machine Cleaning Your Machine This section explains how to clean each part of your machine. moistened with neutral detergent, and then wipe it again Cleaning the Surface of the with a soft cloth lightly moistened with water. Machine Cleaning Document Feeding Rollers in the ADF... -
Page 166: Cleaning Paper Feed Rollers
Cleaning Your Machine For MP Tray Cleaning Paper Feed Rollers Open the MP tray. Clean the paper feed rollers if paper jams occur frequently. For Tray 1 and Tray 2 Memo The following images use tray 1 as an example, but the same procedure applies to tray 2. -
Page 167: Cleaning Led Heads
Cleaning Your Machine Lightly wipe the lenses (2) of the LED Cleaning LED Heads heads with soft tissue paper. Clean the LED heads if vertical white lines appear, images are fading vertically, or the periphery of letters is smudged in the printouts. Dirt on the LED heads may also cause paper jams. -
Page 168: Moving Your Machine
Moving Your Machine Moving Your Machine This section explains how to move or transport your machine. Press the top cover open button (1) and Moving Your Machine open the top cover. Hold down the power switch for about a second to turn on the power. - Page 169 Moving Your Machine Protect your machine with packing materials. Lift your machine and put it in a box. Note Use the packing materials attached to your machine when purchased. Remove the vinyl tape to secure the image drum and toner cartridges after transporting or when reinstalling.
-
Page 170: Appendix
This chapter explains the specifications of your machine and information on consumables and optional components. Specifications MFP Model Model Number HD-MF14dn N22208A General Specifications Neopost HD-MF14dn Printer controller PowerPC405 , 330 MHz Scanner controller ARM9 max 266 MHz Memory Resident Printer controller 256 MB ... -
Page 171: Copier Specifications
Specifications Neopost HD-MF14dn Supported OS Windows 7, Windows Vista, Windows Server 2008 R2, Windows Server 2008, Windows XP, Windows Server 2003 Mac OS X 10.4.0-10.7 Please refer to "Product Requirements" (P. 43) Copier Specifications Neopost HD-MF14dn Document... -
Page 172: Scanner Specifications
Specifications Internet Fax Specifications Neopost HD-MF14dn Communication SMTP, POP3, MIME protocol File format TIFF Scanner Specifications Neopost HD-MF14dn Scanner type Document Glass with ADF function Image sensor Color CIS Light source Document 60 to 105 g/m (16 to 28 lb) -
Page 173: Printing Specifications
Specifications Scan To USB Memory Specifications Neopost HD-MF14dn Connectivity interface USB2.0 Host IF Storage device USB memory (Up to 32 GB) Not all USB memory products are guaranteed to work. Supported file system FAT12, FAT (FAT16), FAT32 File format... -
Page 174: Network Specifications
Specifications Neopost HD-MF14dn Paper loading capacity Tray 1 250 sheets of Standard paper /80 g/m , total thickness 25mm or lower. MP tray 100 sheets of Standard paper /80 g/m and total thick- ness 10mm or lower, 10 envelopes/ weight of 85 g/m ... -
Page 175: Basic Steps In Windows
Basic steps in Windows Basic steps in Windows These are the steps for displaying the driver setting window from [Printer] / [Printer and FAX] folder for Windows OS used for examples in this manual other than Windows 7. Memo ... - Page 176 Index Symbols Country Code ....40 CS Tuner .......42 -(Hyphone) ....81 Group Dial ....89 Custom Size ....36 *(Asterisk) ....81 Group List ..81, 94, 102, 111 #(Hash Symbol) .... 81 DATA IN MEMORY Indicator ..26, 85 HELP Key ....25, 132 Access Control .....
-
Page 177: Index
Index START (COLOR) Key ..25, 102, 104, 105, 106, 107, 108 Network Configuration ..97 Receiving Calls ....85 START (MONO) Key Network Scan Receiving Faxs ....85 ..25, 73, 80, 102, Destinations ..112 Reception History ..84, 88 104, 105, 106, 107, 108 Reception Mode ....45 STATUS Key ..25, 126, 132, 143... - Page 180 Neopost Digital Print Group 910 E. Main Street, Suite 200 Norristown, PA 19401-4010 www.neopost.com HD-MF14 UGB Rev1...
Need help?
Do you have a question about the HD-MF14DN and is the answer not in the manual?
Questions and answers