Table of Contents
Advertisement
Available languages
Available languages
Operating instructions
FR
EN
English,1
Français, 14
FA
42 ،فارسی
LFB 5B010
Contents
AR
Product Fiche, 2
28 ،العربية
Precautions and advice 3
General safety
Disposal
Saving energy and respecting the environment
Installation and Assistance, 4-5
Positioning and levelling
Connecting the water and electricity supplies
Advice regarding the first wash cycle
Technical data
Assistance
Description of the appliance, 6
Overall view
Control panel
Loading the racks, 7-8
Lower rack
Cutlery basket
Upper rack
Start-up and use, 9
Starting the dishwasher
Measuring out the detergent
Wash cycles, 10
Table of wash cycles
Rinse aid and refined salt, 11
Measuring out the rinse aid
Measuring out the refined salt
Care and maintenance, 12
Shutting off the water and electricity supplies
Cleaning the dishwasher
Preventing unpleasant odours
Cleaning the sprayer arms
Cleaning the water inlet filter
Cleaning the filters
Leaving the machine unused for extended periods
Troubleshooting, 13
DISHWASHER
Advertisement
Table of Contents

Subscribe to Our Youtube Channel
Related Manuals for Ariston LFB 5B010


Summary of Contents for Ariston LFB 5B010
-
Page 1: Operating Instructions
Installation and Assistance, 4-5 Positioning and levelling Connecting the water and electricity supplies Advice regarding the first wash cycle Technical data Assistance Description of the appliance, 6 LFB 5B010 Overall view Control panel Loading the racks, 7-8 Lower rack Cutlery basket Upper rack... -
Page 2: Product Fiche
Product Fiche Product Fiche ARISTON Brand LFB 5B010 Model Rated capacity in standard place settings (1) Energy efficiency class on a scale from A+++ (low consumption) to D (high consumption) 295.0 Energy consumption per year in kWh (2) 1.04 Energy consumption of the standard cleaning cycle in kWh... -
Page 3: Precautions And Advice
Precautions and advice Disposal This appliance was designed and manufactured • Disposal of packaging material: observe local in compliance with international safety standards legislation so that the packaging may be reused. The following information has been provided for • The European Directive 2012/19/EU relating safety reasons and should therefore be read to Waste Electrical and Electronic Equipment carefully. -
Page 4: Installation And Assistance
Installation and Assistance The hose should not be bent or compressed. If the appliance must be moved at any time, keep it in an upright position; if absolutely necessary, it may be tilted onto its Connecting the water outlet hose back. -
Page 5: Advice Regarding The First Wash Cycle
Anti-condensation strip (depending on the The machine has a buzzer/set of tones After installing the dishwasher, open the door and stick the dishwasher model ) to inform the user that a command has adhesive transparent strip under the wooden shelf in order been implemented: power on, cycle end etc. -
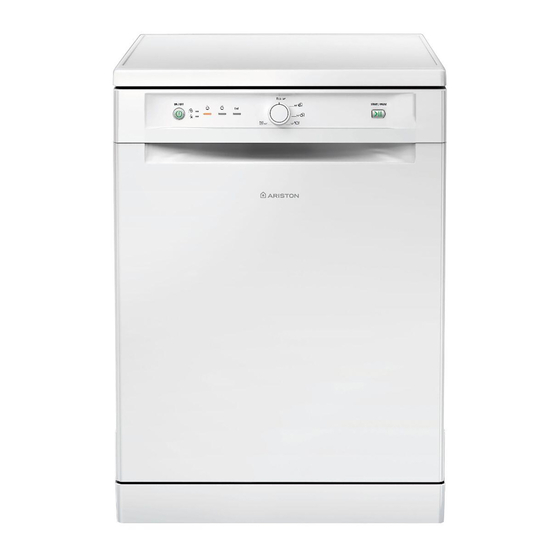
Page 6: Description Of The Appliance
Description of the appliance Overall view Upper rack Upper sprayer arm Tip-up dispensers Rack height adjuster Lower rack Lower sprayer arm Washing filter Salt dispenser Detergent dispenser, rinse-aid dispenser and Active Oxygen device Data plate Control panel Control panel Indicator light Low Salt Button and Button and Cycle selection knob... -
Page 7: Loading The Racks
Loading the racks Tips Several dishwasher models are fitted with tip-up sectors Before loading the racks, remove all food residues from the They can be used in a vertical position when arranging dishes crockery and empty liquids from glasses and containers. No or in a horizontal position (lower) to load pans and salad bowls preventive rinsing is needed under running water. -
Page 8: Lower Rack
Tip-up compartments with adjustable position The upper rack can be adjusted for height based on requirements: high position to place bulky crockery in the lower rack and low The side tip-up compartments can be positioned at three position to make the most of the tip-up compartments/sectors different heights to optimize the arrangement of crockery inside by creating more space upwards. the rack. Wine glasses can be placed safely in the tip-up compartments by inserting the stem of each glass into the corresponding slots. Adjusting the height of the upper rack In order to make it easier to arrange the crockery, the upper rack may be moved to a higher or lower position. -
Page 9: Loading The Racks
Start-up and use Measuring out the detergent Starting the dishwasher A good wash result also depends on the correct 1. Turn the water tap on. amount of detergent being used. Exceeding the stated 2. Press the ON/OFF button: all the indicator lights on the control amount does not result in a more effective wash and increases environmental pollution. panel will light up for a few seconds. -
Page 10: Wash Cycles
Wash cycles Wash-cycle data is measured under laboratory conditions according to European Standard EN 50242. Based on the different conditions of use, the wash-cycle duration and data can change. The number and type of wash cycles and options may vary depending on the dishwasher model. Wash cycle Approximate Water Energy which Wash cycle Options duration of wash consumption... -
Page 11: Rinse Aid And Refined Salt
Rinse aid and refined salt with water. Only use products which have been specifically designed - Switch the dishwasher on and off using the ON/OFF button. for dishwashers. Hold down the Start/Pause button for min. 3 seconds; switch Do not use table/industrial salt or washing-up liquid. on the machine using the ON/OFF button and access the Follow the instructions given on the packaging. -
Page 12: Care And Maintenance
Care and maintenance Cleaning the filters The filter assembly consists of three filters which remove food residues from the washing water and then recirculate the water. They should be cleaned if you wish to achieve the best results in every wash. Clean the filters regularly. -
Page 13: Troubleshooting
Troubleshooting Whenever the appliance fails to work, check for a solution from the following list before calling for Assistance. Problem: Possible causes / Solutions: The dishwasher does not start or • Switch off the appliance by pressing the ON/OFF button, switch it back on after cannot be controlled approximately one minute and reset the program. • The appliance has not been plugged in properly. •... -
Page 14: Table Of Contents
Mise en place et mise à niveau Raccordements eau et électricité Caractéristiques techniques Conseils pour le premier lavage Assistance Description de l’appareil, 19 LFB 5B010 Vue d’ensemble Tableau de bord Charger les paniers, 20-21 Panier inférieur Panier supérieur Panier à couverts Plateau range-couverts Réglage du panier supérieur... -
Page 15: Fiche De Produit
Fiche de produit Fiche de produit ARISTON Marque LFB 5B010 Modèle Capacité nominale dans un environnement standard (1) Classe énergétique sur une échelle de A+++ (faible consommation) à D (consommation élevée) 295.0 Consommation d''énergie par année en kWh (2) 1.04 Consommation d''énergie du cycle de lavage standard en kWh... -
Page 16: Précautions Et Conseils
Précautions et conseils Mise au rebut Cet appareil a été conçu et fabriqué conformément • Mise au rebut du matériel d’emballage : se aux normes internationales de sécurité. Ces consignes conformer aux réglementations locales de manière sont fournies pour des raisons de sécurité, il faut les à ce que les emballages puissent être recyclés. -
Page 17: Installation Et Assistance
Installation et Assistance Raccord du tuyau d’amenée de l’eau Conserver ce mode d’emploi pour pouvoir le consulter à • A une prise d’eau froide: bien visser le tuyau d’amenée à tout moment. En cas de vente, de cession ou de déménagement, un robinet à embout fileté 3/4 gaz; avant de visser, faire s’assurer qu’il accompagne bien l’appareil. -
Page 18: Caractéristiques Techniques
Raccordement électrique Ruban anti-condensation Avant de brancher la fiche dans la prise de courant, s’assurer Après avoir encastré le lave-vaisselle, ouvrir la porte et coller le que: ruban adhésif transparent sous le plan en bois pour le protéger contre la formation de condensation. • la prise dispose de mise à la terre et est conforme aux normes; • la prise est bien apte à supporter la puissance maximale Conseils pour le premier lavage de l’appareil reportée sur la plaque signalétique fixée à... -
Page 19: Description De L'appareil
Description de l’appareil Vue d’ensemble Panier supérieur Bras de lavage supérieur Clayettes rabattables Réglage hauteur du panier Panier inférieur Bras de lavage inférieur Filtre lavage Réservoir à sel Bacs à produit de lavage, réservoir à produit de rinçage et dispositif Oxygène Actif Plaque signalétique Bandeau de commandes Tableau de bord Voyant sel Touche et voyants... -
Page 20: Charger Les Paniers
Charger les paniers Conseils Certains modèles de lave-vaisselle sont pourvus de secteurs Avant de charger les paniers, débarrasser la vaisselle des rabattables , qui peuvent être utilisés en position verticale pour déchets plus importants et vider les verres et autres récipients. accueillir les assiettes ou en position horizontale (abaissés) pour Pas besoin de rincer préalablement à l'eau courante. pouvoir charger plus facilement les casseroles et les saladiers. -
Page 21: Plateau Range-Couverts
Clayettes rabattables à inclinaison variable Le panier supérieur est réglable en hauteur selon les besoins : en Les clayettes latérales peuvent être placées à trois hauteurs position haute, il permet de ranger de la vaisselle encombrante différentes afin d’optimiser la disposition de la vaisselle dans dans le panier inférieur ; en position basse, il permet d'exploiter le panier. -
Page 22: Mise En Marche Et Utilisation
Mise en marche et utilisation Mettre en marche le lave-vaisselle Charger le produit de lavage Un bon résultat de lavage dépend aussi d’un bon 1. Ouvrir l’arrivée d’eau. dosage du produit de lavage. Un excès de produit de 2. Appuyer sur la touche ON-OFF : tous les voyants du bandeau lavage ne lave pas mieux et pollue l’environnement. de commande s’allument pendant quelques secondes. -
Page 23: Programmes
Programmes Les données des programmes sont mesurées dans des conditions de laboratoire selon la norme européenne EN 50242. Selon les différentes conditions d’utilisation, la durée et les données des programmes peuvent être différentes. Le nombre ainsi que les types de programmes et d’options varient selon le modèle de lave-vaisselle. Consommation Consomation Durée du Programme Séchage Options d’eau (litre/ d’énergie (KWh/ programme... -
Page 24: Produit De Rinçage Et Sel Régénérant
Produit de rinçage et sel régénérant de l’eau. Se renseigner auprès de l’organisme distributeur de N’utiliser que des produits de lavage spéciaux lave- l’eau. vaisselle. Appuyer sur la touche ON/OFF pour allumer et éteindre le lave- Ne pas utiliser de sel alimentaire ou industriel ni de produits vaisselle pour lavage à la main. vaisselle. Appuyez et maintenez enfoncé le bouton Marche/Arret Se conformer aux instructions reportées sur l’emballage. -
Page 25: Entretien Et Soin
Entretien et soin Nettoyer les filtres Les trois filtres qui composent le groupe filtrant débarrassent l’eau de lavage des résidus d’aliments avant de la remettre en circulation : pour obtenir de bons résultats de lavage, il faut les nettoyer. Nettoyer les filtres régulièrement. Ne pas utiliser le lave-vaisselle sans filtres ou avec filtre mal fixé. -
Page 26: Anomalies Et Remèdes
Anomalies et remèdes Si l’appareil présente des anomalies de fonctionnement, procéder aux contrôles suivants avant de prendre contact avec le service d’assistance technique. Anomalies : Causes / Solutions possibles : Le lave-vaisselle ne démarre pas ou • Eteindre l’appareil à l'aide de la touche ON-OFF, rallumer au bout d’une n’obéit pas aux commandes minute environ et resélectionner le programme. •... - Page 28 وصل إمدادات الكهرباء والماء نصيحة متعلقة بدورة الغسل األولى البيانات التقنية 33 ،وصف الجهاز نظرة عامة لوحة التحكم 35تركيب الرفوف، 43 و LFB 5B010 الرف السفلي سلة السكاكين الرف العلوي حجرات قابلة للطي وموضع قابل للضبط صينية السكاكين ضبط الرف العلوي...
- Page 29 وسائل حذر ونصائح التخلص .تم تصميم هذا الجهاز وتصنيعه طبقا لمواصفات األمان العالمية • التخلص من مواد التعبئة: تق ي ّد بالقوانين المحلية حيث يمكن لمواد يتم تزويد المعلومات التالية لألغراض الوقائية ولذلك يجب قراءتها .التعبئة أن يعاد تصنيعها .بعناية /69/2102 المتعلقة...
- Page 30 الخدمة مواد التنظيف الخالية من الفوسفات والكلورين تحتوي على إنزيمات • نحن نوصي بشدة باستخدام مواد التنظيف التي ال تحتوي على .الفوسفات أو الكلورين، ألنها منتجات تلحق الضرر بالبيئة :قبل االتصال بالمساعدة • توفر اإلنزيمات أداء فعاال ً بشكل خاص في درجات حرارة تعادل •...
- Page 31 التركيب 4 وصل خرطوم إخراج الماء (من دون ثنيه) بأنبوب تصريف بقطر يصل إلى إذا توج ّ ب نقل الجهاز في أي وقت، احتفظ به بشكل عامودي؛ إذا كان األمر .سم بحد أدنى .ضروريا جدا، يمكن إمالته على الجهة الخلفية منه يجب...
- Page 32 تحتوي الماكينة على جرس/مجموعة من األصوات (باالعتماد على موديل ماكينة شريط مقاومة التكثيف غسيل األطباق ) إلشعار المستخدم بأن األمر تم تنفيذه: سواء توصيل الطاقة أو بعد تركيب ماكينة غسل األطباق، افتح الباب والصق الشريط الشفاف الالصق تحت .إنهاء الدورة أو غيرها .الرف...
- Page 33 وصف الجهاز نظرة عامة الرف العلوي ذراع الرشاش العلوي الحجرات القابلة للطي ضابط ارتفاع الرف الرف السفلي ذراع الرشاش السفلي فلتر الغسل حاوية الملح درج مواد التنظيف، ودرج مادة الشطف المساعدة، وجهاز األوكسجين النشط لوحة البيانات لوحة التحكم لوحة التحكم مصباح...
- Page 34 تحميل الرفوف نصائح .الماء في هذا الجزء تكون أكثر قوة، وتسمح بأداء أفضل للتنظيف العديد من موديالت ماكينات غسيل األطباق تكون مجهزة بأجزاء قابلة قبل تحميل الرفوف، أزل كل فضالت الطعام عن األواني وقم بتفريغ السوائل للطي من األكواب واألواني. ليست هناك حاجة للشطف االحتياطي باستخدام الماء )ويمكن...
- Page 35 حجرات قابلة للطي وموضع قابل للضبط يمكن ضبط الرف العلوي على االرتفاع المطلوب حسب الحاجة: وضع مرتفع لوضع األواني الضخمة في الرف السفلي، ووضع منخفض الستخدام معظم الحجرات واألجزاء يمكن وضع الحجرات الجانبية القابلة للطي على ثالثة ارتفاعات مختلفة، وذلك للتحكم .القابلة...
- Page 36 بدء التشغيل واالستخدام قياس مواد التنظيف تشغيل ماكينة غسل األطباق تعتمد نتائج الغسيل الجيدة أيضا على استخدام الكمية الصحيحة من مواد .1. افتح حنفية الماء التنظيف. إن تجاوز الكمية المشار إليها ال يؤدي غسيل أكثر فعالية، كما .2. قم بتشغيل الجهاز بواسطة الضغط على زر بدء/إيقاف التشغيل .أنه...
- Page 37 دورات الغسيل .EN 50242 يتم تحليل بيانات دورة الغسيل في ظل ظروف المختبرات، وبما يتوافق مع المعيار القياسي األوروبي .تتغير مدة وبيانات دورة الغسيل بناء على ظروف االستخدام المختلفة .يمكن لرقم ونوع دورة الغسل وكذلك الخيارات أن تتغير وفقا لطراز ماكينة غسل األطباق استهالك...
- Page 38 ملح التكرير ومادة الشطف المساعدة - قم بتشغيل ماكينة غسل األطباق باستخدام زر التشغيل/اإليقاف، وانتظر لثوان معدودة .استخدم المنتجات المصنعة خصيصا لماكنات غسل األطباق فقط ثم قم بإيقاف تشغيلها باستخدام زر التشغيل/اإليقاف. اضغط مع االستمرار على الزر .ال تستخدم ملح السفرة أو الملح الصناعي، أو سائل الغسل /بدء/إيقاف...
- Page 39 العناية والصيانة تنظيف الفالتر مجموعة الفالتر مكونة من ثالثة فالتر معدة إلزالة األطعمة المتبقية من ماء الغسل ثم تعيد تدوير الماء. يجب تنظيفها إذا أردت الحصول على أفضل النتائج .في كل غسلة .نظف الفالتر بانتظام يجب عدم استخدام ماكينة غسل األطباق من دون فالتر، أو إذا كان الفلتر .محررا...
- Page 40 استكشاف المشاكل وحلها .إذا لم يعمل الجهاز، وقبل استدعائك للمساعدة ابحث عن حل في القائمة التالية :األسباب المحتملة/ الحلول :المشكلة ً • قم بإطفاء الجهاز بواسطة الضغط على زر تشغيل/إيقاف تشغيل. أعد تشغيل الماكينة بعد دقيقة واحدة تقريبا ماكينة غسل األطباق ال يمكن بدء تشغيلها أو .وأعد...
- Page 42 راهنمایی در خصوص اولین برنامه شستشو اطالعات فنی 47 ،معرفی دستگاه نمای کلی صفحه کنترل 49-48 ،قرار دادن ظروف در قفسه ها LFB 5B010 قفسه پایین سبد مخصوص کارد و چنگال قفسه باال محفظه های متحرک با موقعیت قابل تنظیم سبد مخصوص کارد و چنگال...
- Page 43 نکات احتیاطی و راهنمایی .نگه دارید این ماشین ظرف شویی بر اساس استانداردهای بین المللی در • کودکان نباید از مواد بسته بندی بعنوان اسباب بازی زمینه ایمنی طراحی و ساخته شده است. اطالعات زیر به منظور .استفاده کنند .حفظ ایمنی ارائه شده و می بایست با دقت مطالعه شوند این...
- Page 44 سرویس شوینده های آنزیم دار عاری از فسفات و کلر • قویا ً توصیه می کنیم از مواد شوینده ای استفاده کنید که حاوی فسفات یا کلر نیستند، چون این مواد برای محیط زیست خطرناک :قبل از تماس با بخش کمک رسانی .هستند...
- Page 45 نصب .شلنگ نباید خم شده یا تحت فشار باشد اگر قرار است ماشین ظرف شویی را جابجا کنید، آنرا در وضعیت ایستاده نگه .دارید؛ اگر واقعا ً ضرورت دارد، می توانید آنرا به سمت عقب خم کنید وصل کردن شلنگ آب خروجی قرار...
- Page 46 ) دستگاه زنگ/مجموعه ای از صداهای مختلف دارد (بسته به مدل ماشین ظرف شویی نوار آب بندی بعد از اینکه ماشین ظرف شویی را نصب کردید، در آنرا باز کرده و نوار چسب * تا کاربر را از اجرای فرامین مطلع سازد: روشن شدن، پایان برنامه و غیره .شفاف...
- Page 47 معرفی دستگاه نمای کلی قفسه باال بازوی آب پاش باال محفظه های متحرک تنظیم کننده ارتفاع قفسه قفسه پایین بازوی آب پاش پایین فیلتر شستشو مخزن نمک مخزن مواد شوینده، مخزن مواد کمک شستشو و وسیله اکسیژن فعال پالک دستگاه صفحه...
- Page 48 قرار دادن ظروف در قفسه ها نکات چندین مدل از ماشین های ظرف شویی دارای قسمت های متحرک هستند قبل از قرار دادن ظروف در قفسه ها، باقیمانده مواد غذایی را از ظروف پاک کرده )از آنها در وضعیت عمودی برای مرتب کردن بشقاب ها و یا در وضعیت افقی (پایینی و...
- Page 49 محفظه های متحرک با موقعیت قابل تنظیم ارتفاع قفسه باالیی بسته به نیاز قابل تنظیم است: وضعیت ارتفاع باال برای قرار دادن اقالم درشت در قفسه پایین و وضعیت ارتفاع پایین برای استفاده هرچه بیشتر برای راحتی قرار دادن کارد و چنگال ها در قفسه، می توان محفظه های متحرک .از...
- Page 50 راه اندازی و استفاده اندازه گیری مایع شستشو راه اندازی ماشین ظرفشویی کسب نتیجه خوب از شستشو به استفاده از میزان صحیح ماده شوینده نیز .1. شیر آب را باز کنید بستگی دارد. فراتر رفتن از مقادیر درج شده باعث بهبود شستشو نشده و ....
- Page 51 برنامه های شستشو . سنجیده شده اندEN 50242 اطالعات برنامه شستشو بر اساس شرایط استاندارد اروپایی .مدت زمان و مشخصات برنامه شستشو ممکن است بسته به شرایط مختلف استفاده متفاوت باشند .ممکن است تعداد و نوع برنامه شستشو و گزینه ها بسته به مدل ماشین ظرف شویی متفاوت باشد مصرف...
- Page 52 کمک آبکشی و نمک تصفیه شده (شروع/مکث) را برای حداقل 3 ثانیه نگهStart/Pause و خاموش کنید. دکمه .فقط از شوینده های مخصوص ماشین ظرف شویی استفاده کنید (روشن/خاموش) روشن کرده وON/OFF دارید؛ دستگاه را با استفاده از دکمه .از...
- Page 53 نگهداری و مراقبت تمیز کردن فیلترها مجموعه فیلترها از سه فیلتر تشکیل شده که ذرات غذا را از آب شستشو جدا کرده و آب را دوباره می گرداند. اگر می خواهید در هر شستشو نتیجه خوبی بدست آورید .باید آنها را تمیز کنید .فیلترها...
- Page 54 عیب یابی .اگر ماشین ظرف شویی کار نمی کند، ابتدا و قبل از تلفن کردن به بخش کمک رسانی سعی کنید راه حل را از فهرست زیر بیابید :دالیل احتمالی / راه حل ها :مشکل (روشن/خاموش) دستگاه را خاموش کرده. بعد از حدودا ً یک دقیقه دوباره آنرا روشنON/OFF • با فشار دادن دکمه ماشین...
- Page 56 195118858.00 11/2013 jk - Xerox Fabriano...
Need help?
Do you have a question about the LFB 5B010 and is the answer not in the manual?
Questions and answers