Table of Contents
Advertisement
Available languages
Available languages
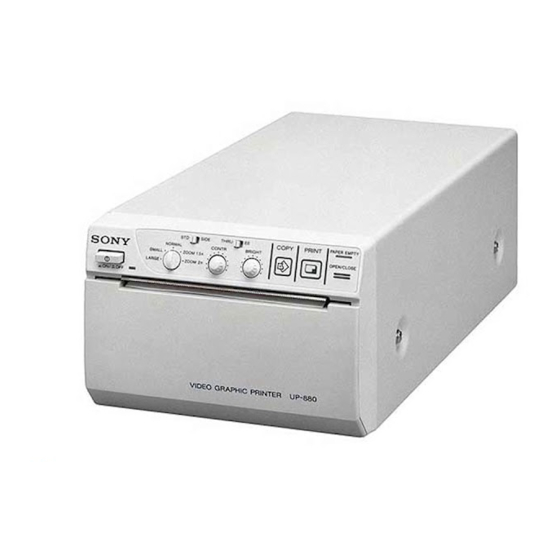
Video Graphic
Printer
Instructions for Use
Before operating this unit, please read this manual thoroughly
and retain it for future reference.
Mode d'emploi
Avant la mise en service de cet appareil, prière de lire
attentivement ce mode d'emploi que l'on conservera pour toute
référence ultérieure.
Gebrauchsanweisung
Bevor Sie dieses Gerät verwenden, lesen Sie diese Anleitung
bitte sorgfältig durch, und bewahren Sie sie für später zum
Nachschlagen auf.
Manual de instrucciones
Antes de utilizar la unidad, lea este manual detenidamente y
consérvelo para futuras referencias.
Istruzioni per l'uso
Prima di usare l'apparecchio, leggete con attenzione questo
manuale e conservatelo per riferimenti futuri.
UP-880/890CE/890MD
© 1994 by Sony Corporation
Page 2
Page 24
Seite 46
página 68
pagina 90
3-798-008-15 (1)
Advertisement
Chapters
Table of Contents

Related Manuals for Sony UP-880


Summary of Contents for Sony UP-880
- Page 1 68 Antes de utilizar la unidad, lea este manual detenidamente y consérvelo para futuras referencias. Istruzioni per l’uso pagina 90 Prima di usare l’apparecchio, leggete con attenzione questo manuale e conservatelo per riferimenti futuri. UP-880/890CE/890MD © 1994 by Sony Corporation...
- Page 2 Refer to these numbers whenever you call upon your interference to other equipment. If this unit causes Sony dealer regarding this product. interference (which can be determined by unplugging the power cord from the unit), try these measures: Model No.
-
Page 3: Table Of Contents
Table of Contents Introduction Overview Preparation Connection Before Printing Setting the Type of Paper Setting the DIP Switches Loading Paper Operation Printing Making Print-outs Selecting the Printing Direction Selecting the Printing Size Adjusting the Contrast and Brightness Precautions Others Maintenance On the Type of Paper Specifications Troubleshooting... -
Page 4: Introduction Overview
Introduction Overview The UP-880/890CE/890MD is a black and white video graphic printer that can be used to print images displayed on video monitor. Clear, consistent print quality • High definition, 10.2 dots/mm printing using a thermal head with high-speed drive IC. -
Page 5: Preparation Connection
Preparation Connection Notes • Turn off the power to each device before making connection. • Connect the AC power cord last. RM-91 remote Color/black and white video monitor commander* Video equipment to video output Connecting cable connector (not supplied) to video input Supplied coaxial ˜... -
Page 6: Before Printing
Before Printing Setting the Type of Paper Set the PAPER TYPE selector to the type of paper to be used. The use of paper other than Sony may result in reduced printer performance and poor print quality. Type of paper... -
Page 7: Setting The Dip Switches
Setting the DIP Switches Set the DIP switches according to the required print mode. Before setting the DIP switches, turn the power off. Change the settings using a small pointed tool such as a small screwdriver. The factory settings are as follows. DIP SW PAPER REMOTE GAMMA... - Page 8 Before Printing (continued) ASPECT 4:3/1:1 switch Normally keep this switch set to 4:3. When the aspect ratio of the video signal is 1:1, set to 1:1. The print-out will be longer than a print-out made at 4:3. 1 3 5 7 7 5 3 1 5 4 3 1 3 5 7...
- Page 9 SCAN NORM/WIDE 1/WIDE 2 switch Sets the print-out range. The print-out range is widened in the NORM, WIDE 1, and WIDE 2 order. To print only the image displayed on the standard screen size of the video monitor, set the SCAN switch to NORM (OFF).
-
Page 10: Loading Paper
Loading Paper Notes • Do not fold the paper or touch the printing surface. Dust on the printing surface will result in poor print quality. • After loading the paper roll, pull out and cut off the first 15 to 20 cm (6 to 7 ⁄... - Page 11 Pull out the first 15 to 20 cm (6 to 7 ⁄ inches) of the paper to remove any slack in the roll. Press the OPEN/CLOSE button to close the paper lid. You can also close the paper lid simply by pushing it. CAUTION Keep fingers clear of paper lid assembly and paper cutting blade when paper lid is closing.
-
Page 12: Operation Printing
Operation Printing Before making print-outs • Are the connections correct? (p. 5) • Is the paper roll loaded properly? (p. 10). • Is the paper type set correctly? (p. 6). • Are the DIP switches set correctly? (p. 7 – 9) •... -
Page 13: Selecting The Printing Direction
Selecting the printing direction You can select the vertical or horizontal direction using the STD/SIDE selector. To print in the vertical direction, set to STD. To print in the horizontal direction, set to SIDE. SIDE SIDE Selecting the printing size NORMAL You can print in small or large size. - Page 14 Printing (continued) To print in SMALL mode Press the PRINT button twice. When you press the PRINT button once, the buzzer sounds. The printer starts printing after the PRINT button is pressed twice. Stopping printing midway Press the OPEN/CLOSE button while printing or while copying. The printer stops printing.
-
Page 15: Adjusting The Contrast And Brightness
Adjusting the Contrast and Brightness You can adjust the contrast and brightness of the print-out. Set the THRU/EE selector to EE. You can check the adjusted picture on the video monitor. SIDE THRU COPY PRINT PAPER EMPTY NORMAL CONTR BRIGHT SMALL ZOOM 1 . -
Page 16: Others Precautions
Others Precautions On the safety • Check the operating voltage before operation. Operate the unit only with a power source specified in “Specifications”. • Stop operation immediately if any liquid or solid object falls into the cabinet. Unplug the unit and have it checked by qualified personnel. •... -
Page 17: Maintenance
Maintenance Cleaning the cabinet Do not use strong solvents to clean the printer. Thinner or abrasive cleansers will damage the cabinet. Cleaning the thermal head If the print-out is dirty or white stripes appear on the print-outs, clean the thermal head using the supplied cleaning sheet. - Page 18 Precautions (continued) Insert the cleaning sheet, with the black surface facing down, into the groove in the paper lid. Insert into groove. Cleaning sheet (supplied) Press the OPEN/CLOSE button and keep it pressed. The paper lid closes and the printer starts cleaning the head. When the buzzer sounds and the printer starts ejecting the cleaning sheet, release the OPEN/CLOSE button.
-
Page 19: On The Type Of Paper
On the Type of Paper Type of paper • Use only the Sony UPP-110 series paper. The use of other paper may result in reduced printer performance and poor print quality. • The following types of paper are available. Printing density... -
Page 20: Specifications
Specifications Thermal head Power requirements and consumption Thin-film thermal head (with built-in drive UP-880: 120 V AC, 50/60 Hz, 1.8 A IC) 1024-dot drive UP-890CE/890MD: Gradation 120 V AC, 50/60 Hz, 1.5 A 220 to 240 V AC, 50/60 Hz, 0.8 A... -
Page 21: Troubleshooting
Troubleshooting Symptom Cause/remedy White specks on first few When printing with a newly inserted roll of paper, print-outs. dust on the surface of the paper may cause white specks on the print-outs. Feed the paper by pressing the OPEN/CLOSE button until clean paper appears. •... -
Page 22: Location And Function Of Parts
Location and Function of Parts For details, refer to the pages indicated in parentheses. Front SIDE THRU COPY PRINT PAPER EMPTY NORMAL CONTR BRIGHT SMALL ZOOM 1 . 5x OPEN / CLOSE LARGE ZOOM 2x Power ON/OFF switch and indicator BRIGHT (brightness) control (15) Turns the power on. -
Page 23: Back
Back PAPER REMOTE GAMMA TYPE DIP SW I II III I II IV VIDEO AC IN REMOTE connector (5) VIDEO OUT (output) connector (BNC Connect the RM-91 remote commander for type) (5) controlling print operation from a distance. Connect to the video input connector of the The RM-91 remote commander is supplied video monitor. - Page 24 Français AVERTISSEMENT Instructions de sécurité importantes en vue d’une utilisation dans un environnement médical Afin d’éviter tout risque d’électrocution, ne pas exposer cet appareil à la pluie ou à l’humidité. 1. Tous les équipements raccordés à cet appareil doivent être agréés suivant les normes IEC601-1, IEC950, IEC65 ou les autres normes IEC/ISO Afin d’écarter tout risque d’électrocution, garder le coffret applicables à...
- Page 25 Table des matières Introduction Vue d’ensemble du système Préparation Raccordement Avant l’impression Sélection du type de papier Réglage des microcommutateurs Chargement du papier Opérations Impression Réalisation de tirages 34 Sélection du sens d’impression Sélection du format d’impression Réglage du contraste et de la luminosité Précautions Autres Entretien 39...
-
Page 26: Introduction
Introduction Vue d’ensemble du système L’UP-880/890CE/890MD est une imprimante graphique vidéo noir et blanc pouvant être utilisée pour imprimer des images affichées sur un moniteur vidéo. Qualité d’impression claire et homogène • Impression haute définition 10,2 points/mm grâce à l’utilisation d’une tête thermique à... -
Page 27: Préparation
Préparation Raccordement Remarques • Mettez tous les appareils hors tension avant de procéder au raccordement. • Branchez le cordon d’alimentation en dernier lieu. Télécommande Moniteur vidéo couleur/noir et blanc RM-91* Equipement vidéo vers le connecteur de Câble de connexion sortie vidéo (non fourni) Cable de connexion ˜... -
Page 28: Avant L'impression
Sélection du type de papier Réglez le sélecteur PAPER TYPE suivant le type de papier que vous utilisez. L’utilisation d’un papier d’une marque autre que Sony peut entraîner une altération des performances de l’imprimante et de la qualité d’impression. Type de papier Position du sélecteur PAPER TYPE... -
Page 29: Réglage Des Microcommutateurs
Réglage des microcommutateurs Réglez les microcommutateurs suivant le mode d’impression requis. Avant de procéder au réglage des microcommutateurs, mettez le système hors tension. Modifiez les réglages en vous aidant d’un outil finement pointu comme un tournevis à lame étroite. Les microcommutateurs sont réglés par défaut comme suit : DIP SW PAPER REMOTE GAMMA... - Page 30 Avant l’impression (suite) Commutateur de rapport d’image (ASPECT 4:3/1:1) En principe, réglez ce commutateur sur 4:3. Si le rapport hauteur/largeur du signal vidéo est de 1:1, réglez-le sur 1:1. Le tirage sera plus long qu’un tirage en 4:3. 1 3 5 7 7 5 3 1 5 4 3 1 3 5 7...
- Page 31 Commutateur de balayage (SCAN NORM/WIDE 1/WIDE 2) Ce commutateur définit la plage d’impression. La plage d’impression est élargie selon la séquence suivante : NORM, WIDE 1 et WIDE 2. Pour imprimer uniquement l’image affichée sur le format d’écran standard du moniteur vidéo, réglez le commutateur SCAN sur NORM (OFF).
-
Page 32: Chargement Du Papier
Chargement du papier Remarques • Ne pliez pas le papier et ne touchez pas la surface d’impression. La présence de poussière sur la surface d’impression entraînera une altération de la qualité d’impression. • Après avoir chargé le rouleau de papier, faites sortir et coupez une bande de 15 à 20 cm de manière à... - Page 33 Faites sortir une bande de 15 à 20 cm (6 à 7 ⁄ pouces) de manière à tendre le rouleau de papier. Appuyez sur la touche OPEN/CLOSE pour refermer la réserve à papier. Vous pouvez simplement refermer la réserve à papier en appuyant dessus. ATTENTION Lorsque la réserve de papier se referme, écartez les doigts de la réserve de papier et de la lame du coupe-papier.
-
Page 34: Opérations
Opérations Impression Avant de réaliser des tirages • Les connexions ont-elles été correctement réalisées ? (p. 27) • Le rouleau de papier est-il correctement chargé ? (p. 32). • Le type de papier est-il réglé correctement? (p. 28). • Les microcommutateurs sont-il réglés correctement ? (p. 29–31) •... -
Page 35: Sélection Du Sens D'impression
Sélection du sens d’impression Vous pouvez sélectionner le sens vertical ou horizontal à l’aide du sélecteur STD/ SIDE. Pour imprimer suivant le sens vertical, réglez-le sur STD. Pour imprimer suivant le sens horizontal, réglez-le sur SIDE. SIDE SIDE Sélection du format d’impression NORMAL Vous avez le choix entre un petit et un grand ZOOM 1 . - Page 36 Impression (suite) Pour imprimer en format réduit (mode SMALL) Appuyez deux fois sur la touche PRINT. Lorsque vous appuyé sur la touche PRINT une foirs, l’alarme retentit. L’imprimante lance l’impression après que vous avez appuyé deux fois sur la touche PRINT. Interruption du cycle d’impression Appuyez sur la touche OPEN/CLOSE pendant le cycle d’impression ou de copie.
-
Page 37: Réglage Du Contraste Et De La Luminosité
Réglage du contraste et de la luminosité Vous pouvez régler contraste et la luminosité des tirages. Réglez le sélecteur THRU/EE sur EE. Vous pouvez vérifier le réglage de l’image sur le moniteur vidéo. SIDE THRU COPY PRINT PAPER EMPTY NORMAL CONTR BRIGHT SMALL... -
Page 38: Autres
Autres Précautions Sécurité • Vérifiez la tension secteur avant toute utilisation. Faites uniquement fonctionner l’appareil avec l’une des sources d’alimentation spécifiées dans les “Spécifications”. • Interrompez immédiatement le fonctionnement de l’imprimante si un liquide ou un solide tombe à l’intérieur du châssis. Débranchez l’appareil et faites-le vérifier par un personnel qualifié. -
Page 39: Entretien
Entretien Nettoyage du châssis de l’imprimante N’utilisez pas de solvants puissants pour nettoyer le châssis de l’imprimante. Le diluant et les nettoyants abrasifs risquent d’altérer le fini du châssis. Nettoyage de la tête thermique Si les tirages présentent des souillures ou si des bandes blanches apparaissent sur les tirages, nettoyez la tête thermique à... - Page 40 Précautions (suite) Introduisez la feuille de nettoyage avec la face noire vers le bas dans la rainure de la réserve à papier. Introduisez dans la rainure. Feuille de nettoyage (fournie) Appuyez sur la touche OPEN/CLOSE et maintenez-la enfoncée. La réserve à papier se referme et l’imprimante entame le nettoyage de la tête thermique.
-
Page 41: A Propos Du Type De Papier
A propos du type de papier Type de papier • Utilisez uniquement le papier Sony UPP-110. L’utilisation d’un autre type de papier peut entraîner une altération des performances de l’imprimante et de la qualité d’impression. • Les types de papier suivants sont disponibles. -
Page 42: Spécifications
Tête thermique Puissance de raccordement et consummation Tête thermique à couche mince (avec CI électrique d’entraînement intégré) UP-880: CA 120 V, 50/60 Hz, 1,8 A Entraînement de 1024 points UP-890CE/890MD: Nuances CA 120 V, 50/60 Hz, 1,5 A CA 220 à 240 V, 50/60 Hz, 0,8 A Résolution (en mode WIDE 1) -
Page 43: Dépannage
Dépannage Symptôme Causes/remèdes Lors de l’impression avec un nouveau rouleau de Petites tâches sur les papier, de la poussière à la surface du papier risque de premiers tirages. donner de petites taches blanches sur le tirage. Avancez le papier en appuyant sur la touche OPEN/ CLOSE jusqu’à... -
Page 44: Localisation Et Fonction Des Composants
Localisation et fonction des composants Pour plus de détails, reportez-vous aux pages indiquées entre parenthèses. Avant SIDE THRU COPY PRINT PAPER EMPTY NORMAL CONTR BRIGHT SMALL ZOOM 1 . 5x OPEN / CLOSE LARGE ZOOM 2x Interrupteur et témoin d’alimentation Touche de copie COPY (36) Imprime une copie supplémentaire du tirage ON/OFF... -
Page 45: Arrière
Arrière PAPER REMOTE GAMMA TYPE DIP SW I II III I II IV VIDEO AC IN Connecteur de commande à distance Connecteur de sortie VIDEO OUT REMOTE (27) (type BNC) (27) Raccordez la télécommande RM-91 pour Raccordez-le au connecteur d’entrée du commander l’imprimante à... - Page 46 Deutsch VORSICHT Wichtige Sicherheitshinweise für den Gebrauch in medizinischen Umgebungen 1. Alle Geräte, die an diese Einheit angeschlossen sind, Um Feuergefahr und die Gefahr eines elektrischen Schlages zu vemeiden, darf das Gerät weder Regen müssen den Standards IEC601–1, IEC950 und IEC65 noch Feuchtigkeit ausgesetzt werden.
- Page 47 Inhalt Einführung Übersicht Vorbereitungen Anschließen des Geräts Vor dem Drucken Einstellen des Papiertyps Einstellen der DIP-Schalter Einlegen von Papier Bedienung Drucken Ausdrucken von Bildern Auswählen der Druckrichtung Auswählen der Druckgröße Einstellen von Kontrast und Helligkeit Sicherheitsmaßnahmen Weitere Informationen Wartung und Pflege Hinweis zum Papiertyp Technische Daten Störungsbehebung...
-
Page 48: Einführung
Einführung Übersicht Der UP-880/890CE/890MD ist ein Schwarzweiß-Videografikdrucker, mit dem Bilder, die auf dem Videomonitor angezeigt werden, ausgedruckt werden können. Konsistent hohe Druckqualität • Hohe Auflösung von 10,2 Punkt/mm bei einem Thermokopf mit Hochgeschwindigkeitsansteuer-IC • 256 Schwarzweißabstufungen Schnelles Drucken • Für einen Einzelausdruck benötigt der Drucker etwa 3,9 Sekunden im Modus STD und NORM. -
Page 49: Vorbereitungen
Vorbereitungen Anschließen des Geräts Hinweise • Bevor Sie irgendwelche Anschlüsse vornehmen, schalten Sie zunächst alle Geräte aus. • Schließen Sie das Netzkabel zuletzt an. Videomonitor (Farbe/ Fernbedienung Schwarzweiß) RM-91* Videogerät an Videoausgangs- Verbindungskabel anschluß (nicht mitgeliefert) mitgeliefertes ˜ Videoeingangsanschluß Koaxialverbindungskabel (BNC BNC) an REMOTE... -
Page 50: Vor Dem Drucken
Einstellen des Papiertyps Stellen Sie mit dem Schalter PAPER TYPE den Papiertyp ein, den Sie benutzen wollen. Wenn Sie anderes Papier als das von Sony verwenden, können sich die Leistung des Druckers und die Druckqualität verschlechtern. Papiertyp Position des Schalters PAPER TYPE... -
Page 51: Einstellen Der Dip-Schalter
Einstellen der DIP-Schalter Die DIP-Schalter müssen auf den gewünschten Druckmodus eingestellt werden. Bevor Sie sie einstellen, schalten Sie das Gerät aus. Ändern Sie dann die Schalterstellungen mit Hilfe eines kleinen, spitzen Gegenstands, zum Beispiel eines kleinen Schraubenziehers. Werkseitig sind folgende Schalterpositionen voreingestellt. - Page 52 Vor dem Drucken (Fortsetzung) Schalter BILDSEITENVERHÄLTNIS (ASPECT) 4:3/1:1 Im Normalfall sollte dieser Schalter auf 4:3 stehen. Ist das Bildseitenverhältnis des Videobildes aber 1:1, stellen Sie ihn auf 1:1. Ein solcher Ausdruck ist länger als ein Ausdruck, der mit dem Verhältnis 4:3 erstellt wurde.
- Page 53 Schalter SCAN NORM/BREIT 1/BREIT 2 (SCAN NORM/ WIDE 1/WIDE 2) Stellt den auszudruckenden Bildbereich ein. Dieser ist bei NORM am schmalsten, bei WIDE 2 am breitesten, und WIDE 1 ist der Mittelwert. Soll nur das Bild ausgedruckt werden, das der Standardanzeigegröße des Videobildschirms entspricht, stellen Sie den Schalter SCAN auf NORM (OFF).
-
Page 54: Einlegen Von Papier
Einlegen von Papier Hinweise • Falten Sie das Papier nicht, und berühren Sie nicht die Druckoberfläche. Staub auf der Druckoberfläche führt zu schlechten Druckergebnissen. • Nach dem Einlegen der Papierrolle ziehen Sie die ersten 15 bis 20 cm Papier heraus, so daß das Papier im Drucker gespannt ist und nicht durchhängt, und schneiden das Papier ab. - Page 55 Ziehen Sie die ersten 15 bis 20 cm Papier heraus, so daß das Papier im Drucker gespannt ist und nicht durchhängt. Schließen Sie mit der Taste OPEN (ÖFFNEN)/CLOSE (SCHLIESSEN) den Papierfachdeckel. Sie können den Papierfachdeckel auch schließen, indem Sie ihn einfach zudrücken.
-
Page 56: Bedienung
Bedienung Drucken Checkliste vor dem Drucken • Ist das Gerät korrekt angeschlossen? (S. 49) • Ist die Papierrolle korrekt eingelegt? (S. 54). • Ist der Papiertyp korrekt eingestellt? (S. 50). • Sind die DIP-Schalter korrekt eingestellt? (S. 51–53) • Wird die richtige Bildquelle eingespeist? Ausdrucken von Bildern Schalten Sie den Drucker am Netzschalter ein. -
Page 57: Auswählen Der Druckrichtung
Auswählen der Druckrichtung Sie können mit dem Wählschalter STD/SIDE als Druckrichtung vertikal oder horizontal einstellen. Um vertikal zu wählen, stellen Sie den Schalter auf STD. Um horizontal zu wählen, stellen Sie den Schalter auf SIDE. SIDE SIDE Auswählen der Druckgröße NORMAL Sie können ein Bild klein oder groß... - Page 58 Drucken (Fortsetzung) So drucken Sie im Modus SMALL (klein) Drücken Sie zweimal die Taste PRINT (DRUCKEN). Wenn Sie einmal die Taste PRINT drücken, ertönt ein Alarmsignal. Der Drucker beginnt zu drucken. Abbrechen eines Druckvorgangs Drücken Sie während eines Druck- oder Kopiervorgangs die Taste OPEN (ÖFFNEN)/CLOSE (SCHLIESSEN).
-
Page 59: Einstellen Von Kontrast Und Helligkeit
Einstellen von Kontrast und Helligkeit Sie können Kontrast und Helligkeit Ihrer Ausdrucke einstellen. Stellen Sie den Wählschalter THRU (DURCH)/EE auf EE. Sie können das Ergebnis der Einstellung auf dem Videomonitor überprüfen. SIDE THRU COPY PRINT PAPER EMPTY NORMAL CONTR BRIGHT SMALL ZOOM 1 . -
Page 60: Sicherheitsmaßnahmen
Weitere Informationen Sicherheitsmaßnahmen Sicherheit • Überprüfen Sie vor Inbetriebnahme des Geräts die Betriebsspannung. Betreiben Sie das Gerät nur an einer der unter “Technische Daten” angegebenen Stromquellen. • Wenn eine Flüssigkeit oder ein Fremdkörper in das Gerät gelangt, trennen Sie es sofort von der Stromversorgung, und lassen Sie es von qualifiziertem Fachpersonal überprüfen. -
Page 61: Wartung Und Pflege
Wartung und Pflege Reinigen des Gehäuses Verwenden Sie zum Reinigen des Geräts keine starken Lösungsmittel. Verdünner oder Scheuermittel können die Oberfläche angreifen. Reinigen des Thermokopfs Sind die Ausdrucke verschmutzt oder erscheinen weiße Streifen darauf, reinigen Sie den Thermokopf mit dem mitgelieferten Reinigungsblatt. Schalten Sie den Drucker am Netzschalter ein. - Page 62 Sicherheitsmaßnahmen (Fortsetzung) Führen Sie das Reinigungsblatt mit der schwarzen Seite nach unten in den Schlitz des Papierfachdeckels ein. In den Schlitz einführen Reinigungsblatt (mitgeliefert) Drücken Sie die Taste OPEN (ÖFFNEN)/CLOSE (SCHLIESSEN), und halten Sie sie gedrückt. Der Papierfachdeckel schließt sich, und der Drucker beginnt mit der Reinigung des Thermokopfs.
-
Page 63: Hinweis Zum Papiertyp
Hinweis zum Papiertyp Papiertyp • Verwenden Sie nur Papier der Serie UPP-110 von Sony. Anderes Papier kann zu schlechten Druckergebnissen und Fehlfunktionen führen. • Folgende Papiertypen sind erhältlich. Auflösung Papiertyp TYPE I (Normal) UPP-110S TYPE II (Hohe Auflösung) UPP-110HD TYPE IV (Sehr hohe Auflösung) -
Page 64: Technische Daten
Technische Daten Thermokopf Betriebsspannung und Leistungsaufnahme Dünnfilmthermokopf mit integriertem UP-880: 120 V Wechselstrom, 50/60 Hz, Ansteuer-IC, 1024-Punkt-Ansteuerung 1,8 A Gradation UP-890CE/890MD: 120 V Wechselstrom, 50/60 Hz, 1,5 A Auflösung (Modus WIDE 1) 220 bis 240 V Wechselstrom, 50/60 Hz, EIA: 970 x 490 Punkt... -
Page 65: Störungsbehebung
Störungsbehebung Symptom Ursache/Abhilfemaßnahme Weiße Flecken erscheinen Bei einer neu eingelegten Papierrolle können wegen Staubs auf dem Papier die ersten Ausdrucke weiße auf den ersten Ausdrucken. Flecken aufweisen. Transportieren Sie das Papier durch Drücken der Taste OPEN/CLOSE weiter, bis der saubere Papierbereich beginnt. -
Page 66: Lage Und Funktion Der Teile Und Bedienelemente
Lage und Funktion der Teile und Bedienelemente Nähere Erläuterungen finden Sie auf den in Klammern angegebenen Seiten. Vorderseite SIDE THRU COPY PRINT PAPER EMPTY NORMAL CONTR BRIGHT SMALL ZOOM 1 . 5x OPEN / CLOSE LARGE ZOOM 2x Netzschalter und Netzanzeige Regler BRIGHT (HELLIGKEIT) (59) Zum Ein- und Ausschalten des Geräts. -
Page 67: Rückseite
Rückseite PAPER REMOTE GAMMA TYPE DIP SW I II III I II IV VIDEO AC IN Anschluß REMOTE (49) BNC-Eingangsanschluß VIDEO IN (49) Zum Anschließen der Fernbedienung RM-91. Zum Anschluß an den Damit können Sie den Druckvorgang Videoausgangsanschluß des Videogeräts. fernsteuern. - Page 68 Español ADVERTENCIA Normas/avisos de seguridad importantes para utilización en ambientes médicos 1. Todos los equipos conectados a esta unidad deberán Para evitar incendios o el riesgo de electrocución, no exponga la unidad a la lluvia ni a la humedad. estar certificados de acuerdo con la Norma 601-1, 950, o 65 de la IEC, u otras Normas de la IEC/ISO aplicables a los equipos.
- Page 69 Índice Introducción Descripción general Preparativos Conexiones Antes de imprimir Ajuste del tipo de papel Ajuste de los interruptores DIP Inserción del papel de impresión Operación Impresión Impresión de una imagen Selección del sentido de impresión Selección del tamaño de la impresión Ajuste del contraste y el brillo Precauciones Otros...
-
Page 70: Descripción General
Introducción Descripción general El UP-880/890CE/890MD es un videoimpresor gráfico en blanco y negro que puede emplearse para imprimir las imágenes visualizadas en un videomonitor. Impresión clara y consistente • Impresión de gran definición, 10,2 puntos/mm, empleando una cabeza térmica con un circuito integrado excitador de alta velocidad •... -
Page 71: Conexiones
Preparativos Conexiones Notas • Antes de realizar las conexiones, desconecte la alimentación de todos los dispositivos empleados. • Conecte el cable de alimentación de CA en último lugar. Telemando Videomonitor en color/ RM-91* blanco y negro Equipo de vídeo al conector de Cable conector (no salida de vídeo suministrado) -
Page 72: Antes De Imprimir
Ajuste del tipo de papel Ajuste el selector PAPER TYPE al tipo de papel que vaya a utilizar. Si utiliza papel que no sea Sony puede disminuir el rendimiento del videoimpresor y resultar en una impresión de mala calidad. Tipo de papel Posición del selector PAPER TYPE... -
Page 73: Ajuste De Los Interruptores Dip
Ajuste de los interruptores DIP Ajuste los interruptores DIP de acuerdo con el modo de impresión requerido. Antes de ajustar los interruptores DIP, desconecte la alimentación. Cambie los ajustes empleando una herramienta puntiaguda pequeña, como un destornillador pequeño. Los ajustes de fábrica son los siguientes. DIP SW PAPER REMOTE GAMMA... - Page 74 Antes de imprimir (continuación) Interruptor de formato 4:3/1:1 (ASPECT 4:3/1:1) Normalmente deje este interruptor en 4:3. Cuando el formato de la señal de vídeo sea 1:1, póngalo en 1:1. La impresión será más larga que en 4:3. 1 3 5 7 7 5 3 1 5 4 3 1 3 5 7...
- Page 75 Interruptor de exploración normal/amplia 1/amplia 2 (SCAN NORM/WIDE 1/WIDE 2) Establece el área de impresión. El área de impresión puede ampliarse en el orden de NORM, WIDE 1 y WIDE 2. Para imprimir solamente la imagen visualizada en el tamaño de pantalla estándar del videomonitor, ponga el interruptor SCAN en NORM (OFF).
-
Page 76: Inserción Del Papel De Impresión
Inserción del papel de impresión Notas • No doble el papel ni toque la superficie de impresión. El polvo en esta superficie resultará en una impresión de mala calidad. • Después de insertar el papel, ténselo tirando de él hacia afuera y corte los primeros 15 a 20 cm. - Page 77 Tire hacia afuera del papel unos 15 a 20 cm para tensarlo. Presione la tecla OPEN/CLOSE para cerrar la tapa del rollo de papel. Usted también podrá cerrar la tapa del rollo de papel empujándola simplemente. PRECAUCION Mantenga alejados los dedos de la junta de la tapa del rollo de papel y de la cuchilla de corte al cerrar la tapa del rollo de papel.
-
Page 78: Impresión
Operación Impresión Antes de imprimir • ¿Están realizadas correctamente las conexiones? (pág.71) • ¿Está correctamente insertado el rollo de papel de impresión? (pág.76). • ¿Está correctamente ajustado el tipo de papel? (pág.72). • ¿Están correctamente ajustados los interruptores DIP? (pág.73–75) •... -
Page 79: Selección Del Sentido De Impresión
Selección del sentido de impresión Usted podrá seleccionar el sentido de impresión vertical u horizontal con el selector STD/SIDE. Para imprimir en sentido vertical, póngalo en STD. Para imprimir en sentido horizontal, póngalo en SIDE. SIDE SIDE Selección del tamaño de la impresión NORMAL La impresión podrá... - Page 80 Impresión (continuación) Para imprimir en el modo SMALL Presione dos veces la tecla PRINT. Si presiona una vez la tacla PRINT, sonará un zumbador. El videoimpresor comenzará a imprimir al presionar dos veces la tecla PRINT. Parada de la impresión que se está llevando a cabo Presione la tecla OPEN/CLOSE durante la impresión o la copia.
-
Page 81: Ajuste Del Contraste Y El Brillo
Ajuste del contraste y el brillo Usted podrá ajustar el contraste y el brillo de impresión. Ponga el selector THRU/EE en EE. Usted podrá comprobar la imagen ajustada en el videomonitor. SIDE THRU COPY PRINT PAPER EMPTY NORMAL CONTR BRIGHT SMALL ZOOM 1 . -
Page 82: Precauciones
Otros Precauciones Seguridad • Antes de utilizar el videoimpresor, verifique la tensión de operación. Alimente la unidad solamente con la fuente de alimentación indicada en “Especificaciones”. • Si dentro de la unidad cae algún objeto sólido o un líquido, detenga inmediatamente la operación. -
Page 83: Mantenimiento
Mantenimiento Limpieza del exterior Para limpiar el videoimpresor, no emplee disolventes fuertes. Un diluidor de pintura o los limpiadores abrasivos dañarán la caja. Limpieza de la cabeza térmica Cuando la impresión resulte sucia o aparezcan bandas blancas en la impresión, emplee la hoja limpiadora que se suministra para limpiar la cabeza térmica. - Page 84 Precauciones (continuación) Inserte la hoja limpiadora de la cabeza térmica, con la superficie negra hacia abajo, en la ranura de la tapa del rollo de papel. Inserte en la ranura. Hoja limpiadora (suministrada) Mantenga presionada la tecla OPEN/CLOSE. La tapa del rollo de papel se cerrará y el videoimpresor comenzará a limpiar la cabeza térmica.
-
Page 85: Acerca Del Tipo De Papel
Acerca del tipo de papel Tipo de papel • Utilice solamente papel de la serie UPP-110 Sony. Si utiliza otro papel puede disminuir el rendimiento del videoimpresor y resultar en una impresión de mala calidad. • Se encuentran disponibles los siguientes tipos de papel. -
Page 86: Especificaciones
Especificaciones Cabeza térmica Alimentación y consumo Cabeza térmica de película fina (con IC UP-880: 120 V CA, 50/60 Hz, 1,8 A excitador incorporado), excitación de 1024 UP-890CE/890MD: puntos 120 V CA, 50/60 Hz, 1,5 A Gradación 220 a 240 V CA, 50/60 Hz, 0,8 A Dimensiones Definición (en el modo WIDE 1) -
Page 87: Solución De Problemas
Solución de problemas Síntoma Causa/solución Al imprimir un rollo de papel recién insertado, el polvo En las primeras de la superficie del papel puede causar manchas impresiones aparecen blancas en las impresiones. manchas blancas. Haga que el papel avance hasta que salga limpio presionando la tecla OPEN/CLOSE. -
Page 88: Ubicación Y Función De Las Partes
Ubicación y función de las partes Con respecto a los detalles, consulte las páginas indicadas entre paréntesis. Panel frontal SIDE THRU COPY PRINT PAPER EMPTY NORMAL CONTR BRIGHT SMALL ZOOM 1 . 5x OPEN / CLOSE ZOOM 2x LARGE Interruptor e indicador de Control de brillo (BRIGHT) (81) Ajusta el brillo de las impresiones. -
Page 89: Panel Posterior
Panel posterior PAPER REMOTE GAMMA TYPE DIP SW I II III I II IV VIDEO AC IN Conector para control remoto Conector de entrada de vídeo (VIDEO (REMOTE) (71) IN) (Tipo BNC) (71) Conéctele el telemando RM-91 para controlar Conéctelo al conector de salida de vídeo del a distancia la operación de impresión. - Page 90 Italiano ATTENZIONE Importanti avvertenze per l’uso in ambienti medicali 1. Tutte le apparecchiature collegate a questo apparecchio devono essere certificate conformi agli Per evitare il pericolo di incendi o scosse elettriche, non standard CEI601-1, CEI950, CEI65 o ad altri standard esporre l’apparecchio alla pioggia o all’umidità.
- Page 91 Indice Introduzione Presentazione 92 Preparazione Collegamenti Prima di stampare Impostazione del tipo di carta Regolazione degli interruttori DIP 95 Inserimento della carta Funzionamento Stampa Stampa di un’immagine Selezione dell’orientamento di stampa Selezione del formato di stampa Regolazione del contrasto e della luminosità Precauzioni Varie Manutenzione...
-
Page 92: Presentazione
Introduzione Presentazione L’UP-880/890CE/890MD è una stampante grafica video in bianco e nero che può essere usata per stampare immagini da apparecchi video. Qualità di stampa chiara e stabile • Stampa ad alta definizione di 10,2 punti/mm grazie alla testina termica con circuiti integrati di pilotaggio ad alta velocità. -
Page 93: Collegamenti
Preparazione Collegamenti Note • Spegnere tutti gli apparecchi prima di eseguire i collegamenti. • Collegare il cavo di alimentazione CA per ultimo. Telecomando Monitor a colori/ bianco e nero RM-91* Apparecchio video al connettore di Cavo di collegamento uscita video (non in dotazione) Cavo di collegamento al connettore di... -
Page 94: Prima Di Stampare
Impostazione del tipo di carta Impostare l’interruttore del tipo di carta (PAPER TYPE) sul tipo di carta da usare. L’uso di carta per stampa diversa dalla carta per stampa Sony può causare prestazioni di stampa ridotte e qualità di stampa scadente. -
Page 95: Regolazione Degli Interruttori Dip
Regolazione degli interruttori DIP Regolare gli interruttori DIP a seconda del modo di stampa desiderato. Prima di regolare gli interruttori DIP, spegnere la stampante. Quindi eseguire la regolazione servendosi di un oggetto piccolo e appuntito, come un piccolo cacciavite. Le regolazioni eseguite in fabbrica sono come segue. - Page 96 Prima di stampare (continua) Interruttore di formato (ASPECT 4:3/1:1) Normalmente, lasciare questo interruttore su 4:3. Se il rapporto di formato del segnale video è 1:1, regolare questo interruttore su 1:1. Lo stampato risulterà più lungo di quello ottenuto col rapporto 4:3. 1 3 5 7 7 5 3 1 5 4 3...
- Page 97 Interruttori di modo di scansione (SCAN NORM/WIDE 1/WIDE Usare questi interruttori per regolare il campo di stampa. Il campo di stampa viene esteso nell’ordine NORM, WIDE 1 e WIDE 2. Per stampare solo l’immagine visualizzata sul formato schermo standard del monitor, regolare l’interruttore SCAN su NORM (OFF).
-
Page 98: Inserimento Della Carta
Inserimento della carta Note • Non piegare la carta e non toccare la superficie di stampa della carta. Tracce di sporco sulla superficie di stampa possono causare una scarsa qualità di stampa. • Quando si inserisce il rotolo di carta, eliminare eventuali allentamenti tirando fuori e tagliando via i primi 15-20 cm di carta. - Page 99 Tirare fuori i primi 15-20 cm di carta per eliminare eventuali allentamenti del rotolo. Premere il tasto OPEN/CLOSE per chiudere il coperchio del comparto carta. E’ anche possibile chiudere il coperchio premendolo con la mano. ATTENZIONE Nel chiudere il coperchio del comparto carta, tenere le dita lontano dal coperchio stesso e dalla lama tagliacarta.
-
Page 100: Stampa
Funzionamento Stampa Prima di stampare • Assicurarsi che i collegamenti siano corretti (vedere pag. 93) • Controllare che il rotolo di carta sia inserito correttamente (vedere pag. 98). • Assicurarsi che il tipo di carta sia corretto (vedere pag. 94). •... -
Page 101: Selezione Dell'orientamento Di Stampa
Selezione dell’orientamento di stampa E’ possibile selezionare il tipo di orientamento, verticale o orizzontale, tramite il selettore STD/SIDE. Per stampare con orientamento verticale, regolare questo selettore su STD. Per stampare con orientamento orizzontale, regolare questo selettore su SIDE. SIDE SIDE Selezione del formato di stampa NORMAL E’... - Page 102 Stampa (continua) Stampa in modo SMALL Premere due volte il tasto PRINT. Se si preme il tasto PRINT una volta, suona il cicalino. L’operazione di stampa viene avviata dopo aver premuto due volte il tasto PRINT. Interruzione della stampa a metà Premere il tasto OPEN/CLOSE durante la stampa o la copia.
-
Page 103: Regolazione Del Contrasto E Della Luminosità
Regolazione del contrasto e della luminosità E’ possibile regolare il contrasto e la luminosità degli stampati. Regolare il selettore THRU/EE su EE. E’ possibile controllare l’immagine modificata sul video. SIDE THRU COPY PRINT PAPER EMPTY NORMAL CONTR BRIGHT SMALL ZOOM 1 . 5x THRU OPEN / CLOSE LARGE... -
Page 104: Precauzioni
Varie Precauzioni Sicurezza • Controllare la tensione operativa prima dell’uso. Alimentare l’apparecchio solo con la fonte di alimentazione specificata in “Caratteristiche tecniche”. • Interrompere immediatamente il funzionamento in caso di penetrazione di liquidi o di oggetti all’interno dell’apparecchio. Scollegare l’apparecchio dalla presa di corrente e farlo controllare da personale qualificato. -
Page 105: Manutenzione
Manutenzione Pulizia del rivestimento Non usare forti solventi per pulire la stampante. Acquaragia o detergenti abrasivi possono danneggiare il rivestimento. Pulizia della testina termica Se gli stampati sono sporchi o contrassegnati da strisce, pulire la testina di stampa con il foglio di pulizia in dotazione. Premere l’interruttore ON/OFF per accendere la stampante. - Page 106 Precauzioni (continua) Inserire il foglio di pulizia con la superficie nera rivolta verso il basso, nella fessura sul coperchio del comparto carta. Inserire nella fessura. Foglio di pulizia (in dotazione) Tenere premuto il tasto di apertura/chiusura (OPEN/CLOSE). Il coperchio del comparto carta si chiude e la stampante inizia a pulire la testina.
-
Page 107: Carta Per La Stampante
Tipo di carta • Usare solo carta della serie UPP-110. L’uso di carta per stampa diversa dalla carta per stampa Sony può causare prestazioni di stampa ridotte e qualità di stampa scadente. • Sono disponibili i seguenti tipi di carta. -
Page 108: Caratteristiche Tecniche
Caratteristiche tecniche Testina termica Alimentazione e consumo Testina termica di spessore ridotto (con UP-880: 120 V CA, 50/60 Hz, 1,8 A circuito integrato pilotato incorporato) UP-890CE/890MD: pilotata a 1024 punti 120 V CA, 50/60 Hz, 1,5 A Gradazioni 220-240 V CA, 50/60 Hz, 0,8 A... -
Page 109: Soluzione Dei Problemi
Soluzione dei problemi Sintomo Causa/rimedio Sulle prime pagine appaiono Quando si stampa con un rotolo di carta appena delle macchioline bianche. inserito, la presenza di polvere sulla superficie della carta può causare delle macchioline bianche sulle stampe. Fornire la carta premendo il tasto di apertura/ chiusura (OPEN/CLOSE) finché... -
Page 110: Posizione E Funzione Delle Parti E Dei Comandi
Posizione e funzione dei componenti e dei comandi Per i dettagli, fare riferimento alle pagine indicate tra parentesi. Pannello anteriore SIDE THRU COPY PRINT PAPER EMPTY NORMAL CONTR BRIGHT SMALL ZOOM 1 . 5x OPEN / CLOSE LARGE ZOOM 2x Interruttore di alimentazione ON/OFF Comando di luminosità... -
Page 111: Pannello Posteriore
Pannello posteriore PAPER REMOTE GAMMA TYPE DIP SW I II III I II IV VIDEO AC IN Connettore di comando a distanza Connettore di ingresso video (VIDEO REMOTE (93) IN) (tipo BNC) (93) Collegare il telecomando RM-91 per il Collegarlo al connettore di uscita video controllo a distanza dell’operazione di dell’apparecchio video. - Page 112 If you have any questions about this unit, contact your authorized Sony dealer or the following: Sollten Sie weitere Fragen haben, wenden Sie sich bitte an Ihren Sony-Händler oder an folgende Adresse: BROADCAST and PROFESSIONAL Europe (BPE) Sony Europa G. m. b. H.