Table of Contents

Subscribe to Our Youtube Channel
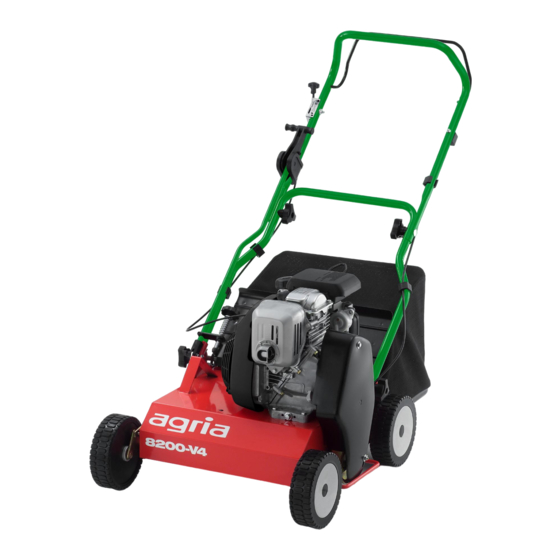
Related Manuals for Agria 8200-V4


Summary of Contents for Agria 8200-V4
- Page 1 Horticultural Machinery Operating Instructions for agria ® Verticutter 8200-V4 40 cm 4190 & Before commissioning the machine, read operating instructions and observe warnings and safety instructions. Operating Instructions No. 998 748 09.98...
- Page 2 B/6. Please state these data when order- ing spare parts to avoid wrong deliver- Fast ies. Only use original agria spare parts! Slow Specifications, figures and dimensions stated in these instructions are not binding. No claims can be derived from them.
-
Page 3: Designation Of Parts
Designation of Parts Edition 09.98 Verticutter 8200-V4... - Page 4 6 Engine type no. 7 Fuel tank cap 8 Engine oil filling plug (oil dip-stick) 9 Engine oil drain plug 10 Fuel tank 11 Fuel filter 12 Spark plug / spark plug connector 13 Fuel line Verticutter 8200-V4 Edition 09.98...
-
Page 5: Table Of Contents
Conformity Declaration ..39 Setting the Slitting Depth ....15 Fast Height Adjustment ....15 Steering Handle ......16 Collection System ......17 Note fold-out pages! Figs. A and B ......5 Figs. C and D ......5 Edition 09.98 Verticutter 8200-V4... -
Page 6: Recommendations
(do not apply on painted external covers). Oil can be brushed or sprayed Maintenance and Repair: Anti-corrosive agents are environmen- The trained mechanics of your agria tally friendly and degrade fast. workshop carry out expert maintenance and repair. Using ecologically safe Bio-lubricants... -
Page 7: Amount Of Delivery, Assembly
2 Top part of steering handle 3 Bottom part of steering handle 4 Base plate 5 Hex head bolt 6 Hex nut 7 Hex head bolt 8 Oval washer 9 Knurled nut 10 Cable tie Tool kit Manual Edition 09.98 Verticutter 8200-V4... -
Page 8: Safety Instructions
Beware of coasting tools. Before you start working on them wait until they have come to a complete stop. Verticutter 8200-V4 Edition 09.98... - Page 9 Ensure that all guards are fitted and it repaired. positioned to provide protection. If steering causes problems, immediately bring the verticutter to a halt and turn it off. Have the malfunction removed without delay. Edition 09.98 Verticutter 8200-V4...
- Page 10 Only use original agria spare parts. All other conventional spare parts must Grass Collection System correspond to quality and technical re- If the grass collection system is not quirements specified by agria.
-
Page 11: Safety Instructions
Empty them in machine without ventilated places safe from spark forma- guards! Move guards tion or flames. If necessary, dispose of in place before you tins in hazardous waste deposits. take up operation. Edition 09.98 Verticutter 8200-V4... -
Page 12: Specifications
Idling speed: .... 1,250–1,550 rpm Length ........1,370 mm Width ........580 mm Engine oil: Height ........1000 mm Filling quantity ....approx. 0.58 l Multi-grade oil SAE 10 W-40 SG, SF or higher quality grade Verticutter 8200-V4 Edition 09.98... -
Page 13: Devices And Operating Elements Engine
3. Devices and Operating Elements The verticutter agria type 8200-V4 is Ignition System suited for usual operation in horticulture The engine is equipped with a mainte- and turf care. nance-free, contactless electronic ignition system. We recommend to have Engine necessary check-ups done by an expert only. -
Page 14: Choke
(knive shaft is rotating) Do not actuate the handle at high engine speed because this will quickly ruin the V-belt. Ensure the V-belt is adjusted properly. Knife Shaft 13 knives are arranged around the shaft. Verticutter 8200-V4 Edition 09.98... -
Page 15: Setting The Slitting Depth
Pull the grip (A/8) all the way out to a stop. l Push up the steering handle. l Release the grip and continue push- ing up the steering handle until fast height adjustment system locks into working position. Edition 09.98 Verticutter 8200-V4... -
Page 16: Steering Handle
Steering handle height adjustment To adjust the handle height, attach the bottom part of the steering handle to the plates on the base machine which pro- vides a choice of three settings (for in- structions see page 7). Verticutter 8200-V4 Edition 09.98... -
Page 17: Collection System
To remove the bag reverse the above order. Collection bag Only a clean bag which permits ventila- tion will give adequate performance. To this end, clean the bag’s texture with a brush or spray it with water from time to time. Edition 09.98 Verticutter 8200-V4... -
Page 18: Commissioning And Operation Commissioning The Machine
If fuel is spilled on the ground, level mark “max”. ensure the area is absolutely dry and the Ensure the oil fill plug is tightly screwed vapours have evaporated before you start into the filler neck during engine opera- the engine. tion. Verticutter 8200-V4 Edition 09.98... -
Page 19: Starting The Engine
After the engine is started, set the speed control lever to the desired engine speed P Starter rope handle l If the CHOKE was operated, move it back to “open” position as soon as the engine is warm and running smoothly. Edition 09.98 Verticutter 8200-V4... -
Page 20: Shutting Off The Engine
The speed control lever also serves as engine dead stop le- ver to shut off the engine in an emergency. When necessary, move the speed control lever to STOP to stop the engine immediately. Verticutter 8200-V4 Edition 09.98... -
Page 21: Verticutter Operation
This is to allow the knife shaft to pick up full speed (V-belt slip) Before moving off check the immediate surroundings for children and animals. Edition 09.98 Verticutter 8200-V4... -
Page 22: General Comments On
This will result in short and delicate roots, weak haulms and a pale green. The lawn will loose its groomed appearance. This, however, can be restored by the slitting action of a verticutter. Verticutter 8200-V4 Edition 09.98... -
Page 23: Maintenance
Screw oil dip stick back in and tighten. l Screw oil dip stick back in and tighten. Only change oil while the engine is still warm, but not hot – danger of burns! Edition 09.98 Verticutter 8200-V4... - Page 24 Replace the filter element l Attach the cover and snap the latches (4) into place. 1 Air filter cover 2 Snap mechanism Do not wash the paper element 3 Filter element (tap it or blow it out) 4 Latches Verticutter 8200-V4 Edition 09.98...
-
Page 25: Fuel System
Clean the fuel tank at 100-hour inter- vals. For this purpose, contact your profes- sional agria workshop. l Replace the fuel filter (B/11) at 100 operating hour intervals. To do this, drain all fuel into a suitable container. -
Page 26: Spark Plug
Turn wrench at 90° or at a surfaces at 100-hour intervals as a mini- torque of 20…30 Nm. mum (earlier in very dusty and trashy conditions). For this purpose, contact your profes- sional agria workshop. Verticutter 8200-V4 Edition 09.98... - Page 27 Only let the engine run with the air filter and air filter cover mounted. For any adjustments of the carbure- 1 Idle speed set screw tor, contact your professional agria 2 Throttle stop screw workshop! 3 Drain plug Edition 09.98...
-
Page 28: Wheels
Then pull the wheel from the axle. Attaching the Wheels 1 Washer To attach the wheels reverse the above 2 Wheel order. 3 Locking washer 4 Hub Verticutter 8200-V4 Edition 09.98... -
Page 29: Knife Shaft Drive
Tighten the locking nut (2). Do not use conventional V- l Attach the belt guard belts but special agria clutch belts! Pulleys Ensure the pulleys are exactly aligned. If they are not, remove both grub screws (C/10 with hexagon socket) from the pul- ley that drives the crank shaft (C/1). -
Page 30: Idler Pulley Bearing
9 Ball bearing 6004 2RS 15 V-belt 10 Bearing seat 16 Pulley 11 Allen screw M8 x 16 17 Roll pin 6 x 36 12 Washer 20 x 28 x 0.2 18 Roll pin 3.5 x 36 Verticutter 8200-V4 Edition 09.98... -
Page 31: General
(e.g. speed control lever, hand lever damaged. bearing, etc.) with Bio-lubrication grease For this purpose, contact your profes- and Bio-lubrication oil. sional agria workshop. Cleaning After each cleaning (washing with water, especially with pressure washer) lubricate all lubrication points, oil the machine, and let the verticutter run for a short time to press the water out. -
Page 32: Storage
This may result in gine run until it comes to stop due to lack starting problems and carbonization. of fuel or add fuel stabilizer (agria No. 673 l Only store the verticutter with the knife 50). drive disengaged (position “0”) because... -
Page 33: Lubricants, Varnishes, Wear Parts
759 99 Spark plug Bosch WR7 DC ; NGK BPR GES 670 82 Verticutter knife 200 74 V-belt for knife shaft drive Only use special agria V-belts. Do not use conventional V-belts Spare Parts 997 080 Verticutter 5200/8200 Edition 09.98... -
Page 34: Troubleshooting
6. Troubleshooting Observe safety instructions! Have all serious malfunctions on the machine or engine repaired by your agria workshop. They have the proper tools. Improper repairs can only add to the damage. Problem Possible cause Remedy Page Engine - Spark plug connector not connected... - Page 35 Replace knives Verticutter - Wheel arc is dirty Clean the wheel arc does not run - Wheel axle is not lubricated Clean and lubricate the wheel axle smoothly ¬ = For this purpose contact your agria workshop. Edition 09.98 Verticutter 8200-V4...
-
Page 36: Inspection And Maintenance Chart
B = After each cleaning E = One-time maintenance to be executed by professional workshop K = Checks and maintenance to be executed by operator W = Maintenance to be executed by professional workshop * = after 2 years Verticutter 8200-V4 Edition 09.98... - Page 37 2 Belt guide 3 Belt guide 4 V-belt 5 Idler pulley 6 Idler pulley bearing 7 Pulley driving the knife shaft 8 Belt guide 9 Dowel pin 10 Grub screw M 6 x 8 (2 pieces) Edition 09.98 Verticutter 8200-V4...
- Page 38 Designation of Parts Verticutter 8200-V4 Edition 09.98...
-
Page 39: Conformity Declaration
EC directive machinery 98/37/EC agria-Werke, GmbH D-74215 Möckmühl/Württ. herewith declare in sole responsibility that the product Verticutter, Type 8200-V4 to which this declaration refers, corresponds to the standard fundamental safety and health requirements as stipulated in EC directive machinery 98/37/EC and EMC directive 89/336/EC. - Page 40 Phone +49 6298 39-0 Fax +49 6298 39-111 e-mail: info@agria.de Internet: http://www.agria.de The winning team Power hoe One-wheel hoe Hobby two-wheeler AllShredd Cutterbar mower Lawn mower Verticutter All-purpose machine Contact your authorised agria dealer for service and prompt delivery of spare parts...
Need help?
Do you have a question about the 8200-V4 and is the answer not in the manual?
Questions and answers