Table of Contents
Advertisement
dynadock™
User's Manual
Contents
Introduction ............................................................................ 7
Features .....................................................................................7
Front panel .................................................................................8
Back panel ..................................................................................9
Package contents .....................................................................10
System Requirements ..............................................................10
Assembly.............................................................................. 11
Installation ............................................................................ 12
Installing the Drivers .................................................................12
Connecting the dynadock™ to the Computer ..........................20
Uninstalling ........................................................................... 22
Using the dynadock™ .......................................................... 26
USB 2.0 Ports (Front and Back Panel) .....................................26
Ethernet Port (Back Panel)....................................................... 27
Serial Port (Back Panel) ...........................................................28
Front Panel Audio Port (Microphone) ....................................... 28
Front Panel Audio Port (Headphones or Speakers) ................. 28
Video Port (VGA or DVI)........................................................... 35
to the dynadock™ ....................................................................43
Disconnecting the dynadock™ ............................................. 43
Eject Dock ................................................................................43
Eject Dock and Sleep ...............................................................44
Eject by use of command line .................................................. 45
Changing the dynadock Utility Settings ....................................46
Select Audio Device .................................................................49
Specifications ....................................................................... 50
Advertisement
Table of Contents

Related Manuals for Toshiba dynadock PA3541


Summary of Contents for Toshiba dynadock PA3541
-
Page 1: Table Of Contents
dynadock™ User’s Manual Contents Introduction ................7 Features ..................7 Front panel .................8 Back panel ..................9 Package contents ..............10 System Requirements ..............10 Assembly................11 Installation ................12 Installing the Drivers ..............12 Connecting the dynadock™ to the Computer ......20 Uninstalling ................22 Using the dynadock™... -
Page 2: Regulatory Compliance
• Consult the dealer or an experienced radio/TV technician for help. WARNING: Changes or modifications made to this equipment, not expressly approved by TOSHIBA or parties authorized by TOSHIBA could void the user’s authority to operate the equipment. FCC Conditions This equipment has been tested and found to comply with Part 15 of the FCC Rules. - Page 3 Inc. 9740 Irvine Boulevard Irvine, California 92618-1697 Telephone: (949) 583-3000 EU Declaration of Conformity TOSHIBA declares, this product conforms to the following Standards: Supplementary “This product complies with the requirements Information: of the EMC Directive 89/336/EEC and/or the Low Voltage Directive 73/23/EEC.”...
-
Page 4: Safety Instructions
dynadock™ User’s Manual Safety Instructions Always read the safety instructions carefully: ❖ Keep this User’s Manual for future reference ❖ Keep this equipment away from humidity ❖ If any of the following situations arise, get the equipment checked by a service technician: ❖... - Page 5 XP, Microsoft Windows Vista The Fn + F5 functionality detailed in the electronic User’s Guide for your TOSHIBA computer only controls the internal video controller of your computer. The TOSHIBA dynadock utilizes an advanced video graphics controller to display the video on the external monitor connected to it.
- Page 6 If you want to play these kinds of games in fullscreen, we suggest you disconnect the dynadock. DVD may not play correctly when using Media Center Edition or TOSHIBA DVD player on the external monitor connected to the dynadock. Your desktop background may not be displayed when you reboot or...
-
Page 7: Introduction
User’s Manual Introduction Thank you for purchasing the Toshiba dynadock, the universal docking station that enables you to connect your deskspace peripherals through one USB cable to just about any Windows-based notebook. The dynadock is software upgradable to enable you to keep your dynadock in line with technological advances. -
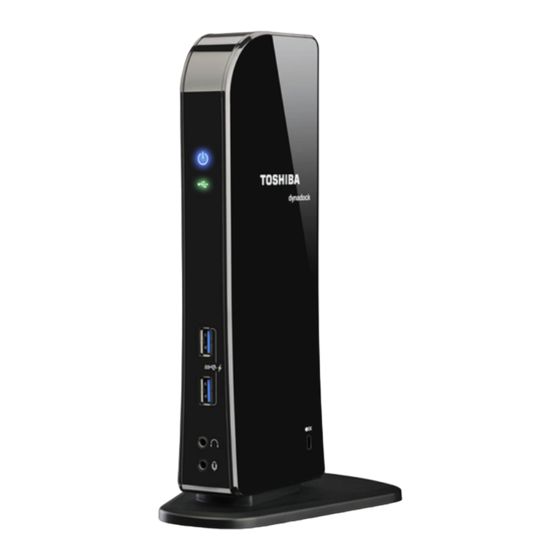
Page 8: Front Panel
dynadock™ User’s Manual Front panel Power LED: Glows blue when the dynadock is powered on. USB Hub LED: Glows green when any of the six USB ports are connected to a USB device and the computer is turned on. 2 USB 2.0 powered ports: For connection to USB peripherals. -
Page 9: Back Panel
dynadock™ User’s Manual Back panel Optical S/PDIF digital out port: Use an optical S/PDIF cable (not provided) to connect to your digital audio equipment, ® e.g., Dolby Digital Surround Sound receiver and speaker system To use this connection, your receiver must have an optical S/PDIF input. -
Page 10: Package Contents
dynadock™ User’s Manual Package contents ❖ dynadock ™ (VGA or DVI video interface) ❖ Base plate ❖ Cable Holder ❖ USB 2.0 Cable ❖ AC Power Adaptor ❖ AC Power Cord/cable ❖ CD (User's Manual, Drivers and Utilities) ❖ Quick Installation Guide ❖... -
Page 11: Assembly
dynadock™ User’s Manual Assembly Remove the base and dynadock from the packaging. You will need to assemble the two pieces. (Sample Illustration) The dynadock and base before assembly Slide the dynadock onto the base as shown below. (Sample Illustration) Assembling the dynadock and base... -
Page 12: Installation
dynadock™ User’s Manual When assembled, the dynadock is a self-standing, easy to place unit. ™ (Sample Illustration) The assembled dynadock Installation Installing the Drivers NOTE ® The following installation steps are for both Windows Vista ® Windows XP operating systems. Although most steps are similar, there are some differences between the two operating systems so please follow the steps for your operating system where indicated. - Page 13 dynadock™ User’s Manual (Sample Image) Initial Screen Click on “Install dynadock Utility & Driver”, the program will begin installing the dynadock Utility and all drivers necessary for the dynadock device. Follow the on-screen directions to finish the utility installation. Step 1: When the welcome screen appears, click Next. (Sample Image) Welcome screen NOTE During the installation, there will be various screens opening and...
- Page 14 dynadock™ User’s Manual Step 2: Select “I Agree” then click Next (Sample Image) License Agreement screen Step 3: Choose the destination folder. (Sample Image) Choose Destination Location screen Step 4: Click Next to start the installation. . (Sample Image) Ready to Install screen...
-
Page 15: Windows Vista
dynadock™ User’s Manual Step 5: Click Close when the “Installation Complete” dialog box shown below appears. (Sample Image) Finish screen ® NOTE There are slight differences in the installation between Windows Vista ® and Windows XP. Please follow the steps for your operating system. ®... - Page 16 dynadock™ User’s Manual NOTE Please wait until the progress bar is near the end before you connect the dynadock. Once the video drivers are installed, the “Audio” driver will be installed automatically. If the dynadock is not detected, the following message will appear. Please connect the dynadock to your computer and click Retry to proceed.
- Page 17 dynadock™ User’s Manual ® NOTE This completes the installation for computers with Microsoft Windows ® Vista operating system. ® Windows XP Operations: After the utility installation is completed, the “Video” driver will be installed automatically. Step 1: Select the language of End User License Agreement and click I Accept.
- Page 18 dynadock™ User’s Manual If you click Cancel, the program will exit the installation of the audio driver. NOTE Installation of the “Audio” driver will fail if the dynadock is not connected to the computer. Install audio drivers. Follow the on-screen directions to finish the audio driver installation.
- Page 19 dynadock™ User’s Manual Step 3: Click Next to start copying the program files to your computer. This step may take a few minutes to install. (Sample Image) Installation files copying screen After finishing the installation, the program will request that you restart the computer.
-
Page 20: Connecting The Dynadock™ To The Computer
dynadock™ User’s Manual be viewed in the Windows Task Manager. The program can detect the insertion and removal of the dynadock. NOTE The utility program does not impact any other programs on your computer. Please do not turn it off. ™... - Page 21 dynadock™ User’s Manual Plug the square end of the USB cable into the USB upstream port on the back of the dynadock. (Sample Illustration) Connecting the USB cable to the dynadock Plug the other end of the USB cable into an available USB 2.0 port on your computer.
-
Page 22: Uninstalling
Utility, the Video driver or the Audio driver. ■ Before starting the steps below, you must eject the dynadock™ from NOTE your computer using the TOSHIBA dynadock™ utility icon on your Notification Area/System Tray. ■ Disconnect the dynadock™ from the computer. Any devices connected to the dynadock™... - Page 23 User’s Manual Uninstalling the Video Driver To remove the Video driver, click Start > Control Panel and then Uninstall a program. Choose "TOSHIBA Video Dock" from the list, and click the Uninstall button. NOTE During the uninstall, other windows will open.You will be prompted to reboot your computer to continue the uninstall process.
- Page 24 User’s Manual Uninstall the Audio Driver To remove the Audio driver, click Start > Control Panel and then Uninstall a program. Choose “TOSHIBA USB Audio” from the list and click the Uninstall/Change button. (Sample Image) Uninstall TOSHIBA USB Audio window Follow the on-screen directions to finish uninstalling.
- Page 25 Uninstalling the Video Driver To remove the Video driver, please click Start > Control Panel and then Add/Remove Programs. Choose “TOSHIBA Video Dock” from the list and click the Change/ Remove button. NOTE During the uninstall, other windows will open.
-
Page 26: Using The Dynadock
Uninstall the Audio Driver To remove the Audio driver, please click Start > Control Panel and then Add/Remove Programs. Choose “TOSHIBA USB Audio” from the list and click the Change/ Remove button. (Sample Image) Remove TOSHIBA USB Audio window Follow the on-screen directions to finish uninstalling. -
Page 27: Ethernet Port (Back Panel)
dynadock™ User’s Manual Ethernet Port (Back Panel) Connect one end of a network cable (not provided) to the Ethernet port (RJ-45) on the dynadock and the other end to your network for high performance network access. To configure the network properties of the Ethernet adapter: ®... -
Page 28: Serial Port (Back Panel)
dynadock™ User’s Manual Serial Port (Back Panel) To connect a serial device, attach the serial cable (not provided) to the serial port on the dynadock and your serial device. Then install the software driver according to the instructions that come with the device. - Page 29 dynadock™ User’s Manual NOTE If the audio software has been properly installed and the icon is not on the system tray, it means the dynadock is connected to a different USB port from the one originally connected for installation. Re-plug the dynadock into the original USB port and the icon will appear again.
- Page 30 dynadock™ User’s Manual (Sample Image) 7.1 Virtual SPEAKER SHIFTER button The button next to DSP Mode string allows you to enter the SHIFTER control window. (Sample Image) DSP button Click on the Virtual Speaker Shifter button to open the Shifter controls.
- Page 31 dynadock™ User’s Manual On the panel, click the 7.1 Virtual SPEAKER SHIFTER button to enable the virtual multi-channel function.The icon will turn blue when selected. (Sample Image) 7.1 Virtual SPEAKER SHIFTER button The button next to DSP Mode string allows you to switch between the SHIFTER control and basic control window.
- Page 32 dynadock™ User’s Manual Using the Virtual Speaker Shifter Controls Volume control Rotate all the virtual speakers clockwise Rotate all the virtual speakers counterclockwise Manually rotate all the virtual speakers Manual shifting function. You can drag a specific virtual speaker to the preferred position to enhance an individual channel output.
- Page 33 dynadock™ User’s Manual ® Using the Basic Controls - Windows XP only To adjust/reset the volume of the left and right channel of your speakers/headphones To test the left and right channel of your speakers/headphones Stops the audio test (Sample Image) Basic controls screen ®...
- Page 34 dynadock™ User’s Manual Make sure your external decoder/AV receiver that connects to ® the dynadock supports Dolby Digital or DTS decoding capability. Turn on the S/PDIF function in the USB 3D 106 Sound Configuration utility. On the Main Setting tab of the utility, click the button next to the S/PDIF Output string and select Digital Audio 48KHz from the drop-down menu.
-
Page 35: Video Port (Vga Or Dvi)
dynadock™ User’s Manual Video Port (VGA or DVI) Connection The dynadock is available in two versions: VGA – for connection to VGA interface monitors DVI – for connection to DVI interface monitors The DVI version of the dynadock includes a DVI to VGA adapter to connect to a VGA monitor. -
Page 36: Mirror Mode
dynadock™ User’s Manual Video Modes The dynadock video output works in two modes: ❖ Mirror Mode ❖ Extended Mode Mirror Mode This mode “mirrors”–creates an identical display – from your computer screen to the external monitor. This is useful, for example, if you want to use a larger desktop monitor rather than the computer screen. - Page 37 User’s Manual (Sample Image) Display Properties screen On the Display Settings screen, click the Monitor tab. In the pull -down menu, select the option containing TOSHIBA Video Dock. Check the Extend the desktop onto this monitor box. Drag the monitor icons (1,2 or 3) in the window at the top of the screen to match the physical arrangement of your computer screen and external monitor.
- Page 38 dynadock™ User’s Manual (Sample Image) Display Properties screen NOTE Monitor “2” will also need to be configured for extended mode in order to use three monitors together in extended mode. Switching from Extended Mode to Mirror Mode Follow these steps to change the video output to Mirror Mode: ®...
- Page 39 Display Settings. The Display Settings screen will pop up. (Sample Image) Display Properties screen On the Display Settings screen, click the Monitor tab. In the pull -down menu, select the option containing TOSHIBA Video Dock. Uncheck the Extend the desktop onto this monitor box.
- Page 40 dynadock™ User’s Manual Click OK to close the Display Properties screen. (Sample Image) Display Properties screen NOTE Monitor “2” will also need to be configured for mirror mode in order to use three monitors in mirror mode. Adjusting Video Settings There are three components that make up the screen mode: Resolution: In common usage, this refers to the number of pixels displayed on the screen horizontally and vertically.
- Page 41 dynadock™ User’s Manual The DVI-component PA3542 Model additionally supports: Resolution/ Color Depth 1600x1200 1680x1050 16 bit 32 bit Note that interlaced modes are not supported and the resolutions listed above may not be supported by your monitor. Additional modes may be offered, depending upon the connected monitor, but these are not currently guaranteed.
- Page 42 dynadock™ User’s Manual Adjusting the Video Settings for the monitor connected to ® the dynadock- Windows Vista Operations: Position the mouse anywhere on your computer desktop, right-click and select Personalize, then click Display Settings. To change the screen resolution or color quality, select those options on the screen.
-
Page 43: How Standby/Sleep Or Hibernate Mode Affects Devices Attached To The Dynadock
™ Disconnecting the dynadock Eject Dock When the dynadock is connected to your computer, the TOSHIBA dynadock Utility can remove all devices with one-click. Please follow these steps: Right-click the icon in the system tray. -
Page 44: Eject Dock And Sleep
Eject Dock and Sleep When the dynadock is connected to your computer, the TOSHIBA dynadock Utility can remove all devices and let the system sleep instantly with one-click. Please follow these steps:... -
Page 45: Eject By Use Of Command Line
Eject by use of command line You can run dynadock Utility by command line, please follow the steps below: Click Run... on Start menu. Input “C:\Program Files\TOSHIBA\dynadock /eject, and run the Utility\TOSUSBSvrCtrl.exe” program. -
Page 46: Changing The Dynadock Utility Settings
Eject Dock and Sleep. Changing the dynadock Utility Settings The TOSHIBA dynadock Utility setting program allows users to change the "Eject Dock" setting. Opening the Setting Dialog box Click “Start” and then click “Control Panel”. Double-click the “TOSHIBA dynadock Utility” icon. - Page 47 dynadock™ User’s Manual Setting Sleep Service The Sleep Service allows users to put the computer in "sleep mode" after undocking the dynadock. ❖ Check the “Eject Dock and Sleep PC Service” box to enable "sleep mode" when undocking: Users can also select the type of sleep mode (depending upon ®...
- Page 48 By default, the boxes are checked. NOTE TOSHIBA recommends that you do not uncheck these boxes. If the boxes are unchecked, there will be no warning messages if the dynadock is improperly ejected/disconnected. (Sample Image) Notify message service screen The following warning message appears when the dynadock is improperly ejected/disconnected.
-
Page 49: Select Audio Device
dynadock™ User’s Manual Select Audio Device Once dynadock™ is installed, the sound on the notebook will be disabled, enabling you to connect external speakers. To re-enable sound through your notebook, please follow these steps: Right-click the icon in the system tray. Select “Select Audio Device”... -
Page 50: Specifications
dynadock™ User’s Manual Update Support Update Support is a menu option in the dynadock utility. This option allows you to access direct internet links to both www.dynadock.com for software updates and the customer support registration website. Registering on the customer support website allows you to receive automatic software update notifications via email. - Page 51 dynadock™ User’s Manual General Specifications Computer Interface USB 2.0 Ports and Connectors 4 USB ports in the back 2 Powered USB ports in front 1 x S/PDIF (optical digital audio output) 1 x Ethernet Port (10/100 Base-T Ethernet RJ-45 connector) 1 x Serial Port VGA x 1 (Analog D-SUB 15pin Female Connector) DVI-I x 1 (Digital 24-pin + Analog5-pin Female...