Black & Decker BDPS400 Instruction Manual
Power paint sprayer
Hide thumbs
Also See for BDPS400:
- Instruction manual (52 pages) ,
- Original instructions manual (21 pages) ,
- Instruction manual (40 pages)
Table of Contents
Advertisement
POWER PAINT SPRAYER
INSTRUCTION MANUAL
Catalog Numbers
BDPS400 & BDPS600
Thank you for choosing Black & Decker! Go to
www.BlackandDecker.com/NewOwner to register your new product.
PLEASE READ BEFORE RETURNING THIS PRODUCT FOR ANY REASON:
If you have a question or experience a problem with your Black & Decker purchase, go to
WWW.BLACKANDDECKER.COM/INSTANTANSWERS for instant answers 24 hours a day.
If you can t find the answer or do not have access to the internet,
call 1-800-544-6986 from 8 a.m. to 5 p.m. EST Mon. - Fri. to speak with an agent.
Please have the catalog number available when you call.
SAVE THIS INSTRUCTION MANUAL FOR FUTURE REFERENCE.
VEA EL ESPAÑOL EN LA CONTRAPORTADA.
INSTRUCTIVO DE OPERACIÓN, CENTROS DE SERVICIO Y PÓLIZA DE GARANTÍA.
ADVERTENCIA: LÉASE ESTE INSTRUCTIVO ANTES DE USAR EL PRODUCTO.
Advertisement
Table of Contents

Related Manuals for Black & Decker BDPS400


Summary of Contents for Black & Decker BDPS400
- Page 1 POWER PAINT SPRAYER INSTRUCTION MANUAL Catalog Numbers BDPS400 & BDPS600 Thank you for choosing Black & Decker! Go to www.BlackandDecker.com/NewOwner to register your new product. PLEASE READ BEFORE RETURNING THIS PRODUCT FOR ANY REASON: If you have a question or experience a problem with your Black & Decker purchase, go to WWW.BLACKANDDECKER.COM/INSTANTANSWERS for instant answers 24 hours a day.
-
Page 2: Table Of Contents
TABLE OF CONTENTS Safety Guidelines - Definitions ...............3 Important Safety Instructions .................3 General Safety Warnings ................4 Grounding Instructions ...................4 Extension Cords.....................5 Components....................6 Set-Up ......................7 Selecting Proper Spray Nozzle ..............7 Attaching Spray Nozzles ................7 Adjusting Fan Spray Nozzle ................7 Liquid Material Preparation .................8 Preparation Tips ..................8 Filling The Canister ..................8 Optional Setup Using Remote Tubing............9... -
Page 3: Safety Guidelines - Definitions
SAFETY GUIDELINES - DEFINITIONS It is important for you to read and understand this manual. The information it contains relates to protecting YOUR SAFETY and PREVENTING PROBLEMS. The symbols below are used to help you recognize this information. Indicates an imminently hazardous situation which, if not avoided, will result in death or serious injury. DANGER: Indicates a potentially hazardous situation which, if not avoided, could result in death or serious injury. -
Page 4: General Safety Warnings
WARNING: ELECTRIC SHOCK HAZARD. May cause severe injury. To avoid these risks, take the following preventions • Keep electrical cord plug and sprayer trigger free from spray material and other liquids. Never hold cord at plug connections to support cord. Failure to observe may result in an electrical shock. •... -
Page 5: Extension Cords
when in doubt as to whether the product is properly grounded. Do not modify the plug provided; if it does not fit the outlet, have the proper outlet installed by a qualified electrician. modify the plug provided; if it does not fit the outlet, have the proper outlet installed by a qualified electrician. -
Page 6: Components
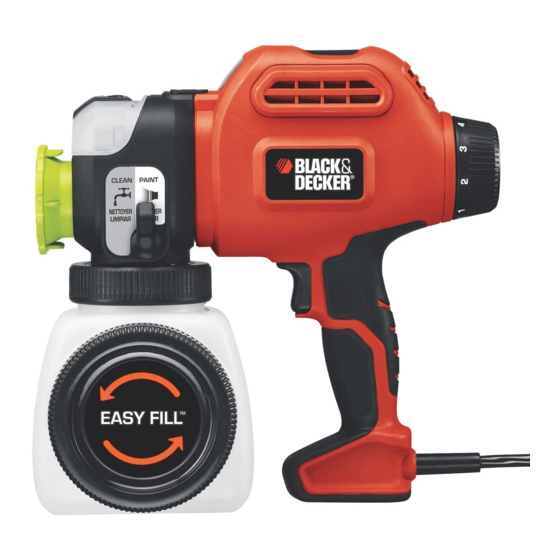
COMPONENTS FUNCTIONAL DESCRIPTION 1.) Paint sprayer 2.) Flow control knob 3.) Speed control switch 4.) Trigger 5.) Side fill canister 6.) O-ring 7.) Pickup tube 8.) Pickup tube filter 9.) Lid 10.) Piston 11.) Piston spring 12.) Valve body assembly 13.) Quick clean knob 14.) Quick clean door 15.) Atomizer valve... -
Page 7: Set-Up
SET-UP Be sure to use appropriate WARNING: protective gear and unplug unit. Make sure area is well WARNING: ventilated and free of flammable vapors. SELECTING THE PROPER SPRAY NOZZLE - (FIGURES B AND B1) The sprayer includes two standard nozzles that are colored coded for ease of identification. -
Page 8: Liquid Material Preparation
LIQUID MATERIAL PREPARATION - (FIGURES E, E1) TIP: Make sure the type of material you use can be cleaned with either mineral spirits or paint thinner (for oil-based paints) or a warm water and soap solution (for water soluble paints like latex). Use drop cloths during pouring, mixing, and viscosity testing of materials to be sprayed to protect your floors and... -
Page 9: Optional Setup Using Remote Tubing
ALIGNING THE PICKUP TUBE - (FIGURES F1 AND F2) The pickup tube can be aligned in the direction that you will be doing the most spraying to help minimize the amount of times that you will have to refill the canister. •... -
Page 10: Speed And Flow Control Settings
SPEED AND FLOW CONTROL SETTINGS TWO SPEED CONTROL SWITCH - (FIGURE H) (MODEL BDPS600 ONLY) Your sprayer has two different speed settings. • To change speeds, press the right side of the switch. An LED indicates setting 1 or 2. •... -
Page 11: Spraying Technique
If you are using the direct to can hose, you will need to prime the sprayer by removing air from the system. To prime: 1. Make sure the sprayer is plugged in, and turn the flow control knob counterclockwise to maximum (figure K). 2. -
Page 12: Cleaning
• Maintain smooth and consistent speed which will help avoid inconsistencies. Begin spraying after the pass has begun and release trigger before stopping the pass. • Avoid spraying too heavily in any one area. Several lighter coats are better than one heavy coat which can lead to running and dripping. -
Page 13: Using Quick Flush System
Third, the quick clean system allows for a faster clean-up when your project is complete. One or two flushes through the quick clean system gives you a head start on cleaning the nozzle, the atomizer, the pump and piston. Please follow recommended cleaning steps in this manual when performing a final clean of the system. -
Page 14: Cleaning Remote Tubing
• Remove the piston and spring (figure P7). • Clean the spray nozzle, pickup tube and filter, atomizer, piston and spring with the cleaning brush in the appropriate cleaning solution (figure P8). • Thoroughly clean the inside of the piston chamber with the cleaning brush (figure P9). -
Page 15: Reassembly
• Unplug the sprayer from the power source. • Remove the tubing from the intake and return ports (figure Q2). • Hold the tubing over the waste container and let any remaining liquid in the hose drain out. REASSEMBLY • Slide the spring onto the front of the piston (figure R). -
Page 16: Troubleshooting
• Thread the canister back onto the sprayer (figure R6) making sure the tabs on the canister align with the tabs on the threaded collar. The side fill lid should always be on the left side of the sprayer. TROUBLESHOOTING Problem Possible Cause Possible Solution... -
Page 17: Maintenance
MAINTENANCE Use only mild soap and damp cloth to clean the power unit. Never let any liquid get inside the power unit; never immerse any part of the power unit into a liquid. IMPORTANT: To assure product SAFETY and RELIABILITY, repairs, maintenance and adjustment (other than those listed in this manual) should be performed by authorized service centers or other qualified service organizations, always using identical replacement parts.