Bernina artista 180 Instruction Manual & Sewing Manual
Hide thumbs
Also See for artista 180:
- Owner's workbook (131 pages) ,
- User manual (40 pages) ,
- Important safety instructions manual (132 pages)

Related Manuals for Bernina artista 180


Summary of Contents for Bernina artista 180
- Page 1 BERNINA* Instruction Manual & Sewing Manual i J T t - v a rtista 180 BERNINA " 1 HO BERNINA Made in Switzerland...
-
Page 2: Safety Instructions
Safety Instructions IMPORTANT SAFETY INSTRUCTIONS W hen using an electrical m ach in e, basic safety 8. Do not pull or push fa b ric w h ile stitch in g . It may precau tion s should alw ays be fo llo w e d , including the d e flect the needle, causing it to break. - Page 3 In ad d itio n , a w id e range of sew in g accesso ries, to g eth e r w ith sew in g pu b licatio ns fu ll o f p ractical and creative ideas, add to the joy of sew ing the BERNINA way.
-
Page 4: Table Of Contents
Contents Safety Instructions Forward 4 - 5 Details of the machine 6 -1 1 Setting up the machine 1 2 -1 4 Stitch Summary Presserfeet 1 6 - 1 7 Practical stitches/buttonholes 1 8 - 2 3 General instructions 2 3 - 2 9 Functions Messages 3 0 - 3 8... -
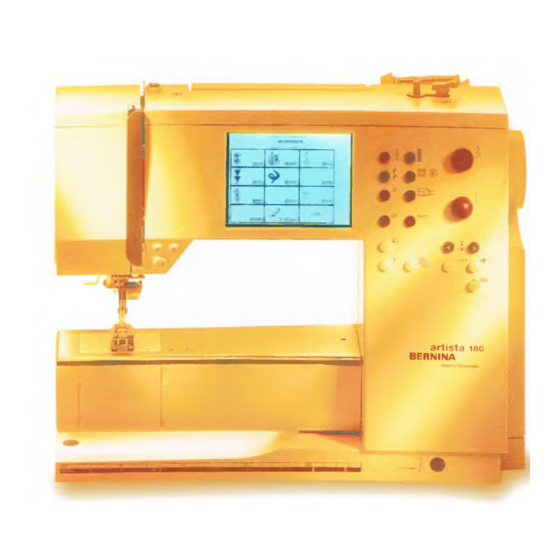
Page 5: Details Of The Machine
Details of the machine Details of the machine Back view... - Page 6 Details of the machine Bobbin cover Stitch plate Attachm ent base for special accessories Darning ring connection Presser foot Needle clamp Thread guide Needle threader Thread take-up cover Thread path Thread take-up Bobbin pre-tension Quick reverse button F (Favorite Function) button Pattern end Screen Bobbin w inder w ith on/off switch and...
-
Page 7: Setting Up The Machine
Setting up the machine Carrying case Carrying case ■ protects from dust and dirt • co m p artm en t fo r accessories Accessories ■ fo o t control ■ in stru ctio n m anual • p o w e r cable •... -
Page 8: Foot Control
Setting up the machine Power cable Important! (USA/Canada only) Power cable the case This sew ing m achine has a p o larized plug ■ the p o w er cable is stored in (one blade w id e r than the o th er). To •... -
Page 9: Bobbin Case
Setting up the machine W inding the bobbin Thread cutter Winding the bobbin Threading the bobbin ■ cu t the thread on the ■ turn po w er sw itch on ■ fo llo w in g the directio n of the a rro w take thread through thread cu tter the rear guide and round the pre-tension stud ■... -
Page 10: Changing The Needle
Setting up the machine Changing the needle Removing the needle raise the needle turn p o w er sw itch to " 0 " lo w er the presser fo o t loosen the needle clam p pull the needle dow n to remove Inserting the needle •... -
Page 11: Threading The Upper Thread
Setting up the machine — a a B M B a a a M M M B M — — — Threading the upper thread Attaching the thread spool ■ raise the needle and presser foot ■ turn the p o w er sw itch to " 0 " •... -
Page 12: Thread Cutter
Setting up the machine Thread cutter Thread cutter on head frame • pull both th read s from fro n t to back over the cutter. • the th reads release as soon as the first stitch is sew n Stitch Plate Stitch plate markings the lines help to guide the fab ric fo r... -
Page 13: Stitch Summary
Stitch Summary Buttonholes Practical stitches 1 — G" VII 01 GD 0-9 ^ 9 mm/40 mm decorative stitches ^11 6 ^^1 1 ? ^l l S ^l 1 9 C7 IG S« o A * G'2 0 1 & % fe ■Sfe fife /m / l £... -
Page 14: Directional Sewing
Stitch Summary S « G ' 801 - 701 flio* & 40 0A * i * 0 < ± »_/ 3 0 1 3 0 2 8 0 3 3 0 4 3 0 5 & ■ - 3 8 0 7 3 0 8 3 1 0 8 0 3... - Page 15 Stitch Summary 1 I I I I I I I M ^ U " Si 0 " » a ( ' " ) [ ] \ - I = & : " 0 - 9 a " < 9 L 8 ' <...
-
Page 16: Presserfeet
BERNINA specialty presser fee t fo r sp ecific sew ing tasks such as q u iltin g , heirloom sew in g , home d eco ratin g , tailo rin g , etc. - Page 17 Practical stitches Practical stitches 11 Super stretch 1 Straight stitch Open seam in all super-stretch fa b rics, All n on-stretch fa b rics. All straig ht such as Lycra. stitch w o rk . Zig-zag 12 Gathering stitch M ost fab ric types. All sim ple zig-zag M ost types of fa b ric.
- Page 18 "IT For specific instructions on using various 23 Reinforced darning program practical stitches, refer to the artista 180 A u to m atic darning in heavy w e ig h t .+H+ Cm j. Sewing Manual, pages 2-20.
- Page 19 • appears fo r ap p ro xim ately 3 seconds • can be om itted in the Setup program artista 180 Sewing & Embroidery System Made in Switzerland ©Fritz Gegauf Ltd./BERNINA Sewing Machine Company CH - 8266 Steckborn / Switzerland www.bernina.com Practical stitch screen F - needle position •...
- Page 20 General instructions On-screen stitch selection/stitch display/functions Stitch Selection • touch the stitch of you r choice • the stitch is highlighted • every stitch is displayed w ith its num ber Altering the stitch width • turn the upper knob altered w id th is show n on the stitch •...
-
Page 21: Stitch Selection
General instructions Presser foot indicator • the recom m ended presser fo o t is displayed by num ber Return to basic settings • press the extern al clr button • the stitch w ill revert to its basic se t tings Needle stop adjustm ent press needle stop button again -... -
Page 22: Practical Stitches/Buttonholes
General instructions Confirm and go to next screen Back to previous screen • touch OK to co nfirm • touch esc • the screen displays the selected • the previous screen appears stitch • if the selection w a s not co nfirm ed •... - Page 23 Genera! instructions Alphabet button • the alp h ab et menu appears • touch to select the alp h ab e t of your choice 9mm I 20mm (3 15mm (3) q uilt stitch es Quilt stitches/Directional sewing < ■ button •...
- Page 24 General instructions / Functions TTC (Thread tension/Tutorial/Creative eco (ecology) button Consultant) • press the eco button • press the button • energy use by the m achine is cut by • three m enus appear on the screen 5 0 % •...
-
Page 25: General Functions
Functions General functions The fo llo w in g fu n ctio n s are found on vario us screens and co n sisten tly used in the sam e m anner fo r sp ecific tasks program s of the a rtista sew ing m ach in e. They are w h en accessing and moving betw een d iffe re n t program s. - Page 26 Fu fictions Motor speed %, 1 / 2 , 3 / 4 f 4 /4 Vertical mirror image • touch sym bol one or more tim es to • touch symbol select speed • m achine sew s selected stitch in vertical m irror im age (up/dow n - •...
- Page 27 Functions Clear All Balance • clears all settings th at w ere • touch symbol to open balance changed those th a t w ere screen e x c e p t changed using the Setup program • co rrect fo rw a rd s and reverse •...
- Page 28 Functions Functions in Memory The fo llo w in g fu n ctio n s becom e availab le along the lo w er portion of the screen w hen the extern al mem ory button is pressed to access the m em ory fe a tu re . Store Check •...
- Page 29 Functions Vertical mirror image Letter size • touch symbol • touch one or more tim es ..• m achine sew s selected stitch in • one h alf of field is highlighted vertical m irror im age £ • the gray section visu ally indicates •...
-
Page 30: Messages
Functions/Messages Alphabet program functions One of the fo llo w in g fu n ctio n s w ill appear in the low er norm al fu n ctio n s show n on the to o lb ar by one, causing it left co rn er of the screen w hen a letter of an alph abet or to be hidden. -
Page 31: Buttonholes
The artista 180 provides a very versatile selectio n . • 59 straig h t stitch buttonhole Buttonholes/Button sew ing on •... - Page 32 For buttonhole example, refer to the (optional accessory) sm ooth surface fo r the fo ot and help artista 180 Sewing Manual, page 25. W hen sew ing a bu tton ho le using m ake a perfect bu tto nho le.
-
Page 33: Direct Entry Length
Buttonholes Autom atic buttonhole (all types) Direct entry length If the desired length of a butto nho le W hen using the A u to m atic butto n hole fo o t No. 3A fo r stitching is kno w n , it can be directly entered into the m achine (in m illim eters). - Page 34 • the bu tto n ho le is now program m ed • all su bsequ en t bu tto n ho les w ill be For buttonhole example, refer to the sew n as program m ed artista 180 Sewing Manual, page 27.
-
Page 35: Buttonhole In Long Term Memory
For additional information about • balance affe cts both beads and the buttonholes, refer to the artista 180 Sewing Manual, pages 21-28. Buttonhole in Long Term Memory Once the length of the b u tton ho le is One bu tto n ho le of each type may be... - Page 36 For buttonhole examples, refer to Step symbols • step sym bols appears on the screen the artista 180 Sewing Manual, page 28. fo r the bu tto n ho le selected • the a rro w in the circle is on " 0 "...
- Page 37 Buttonholes Sew ing a Four-step Buttonhole (round and keyhole) Sewing a 4-step buttonhole • b artack, keyhole, and securing JjT 3 mam lal stitch es are preprogram m ed • touch " 1" ■ sew the 1 st bead • use an aw l to punch the keyhole •...
- Page 38 • w ind thread ends around the thread • w ind thread ends around the thread under the button to create a thread under the button to create a thread shank shank For button sew-on example, refer to the artista 180 Sewing Manual, page 29.
-
Page 39: Alphabets/Numbers
For eyelet examples, refer to the Eyelets • select eyelet No. 61 (zig -zag) or artista 180 Sewing M anual, page 30. No. 62 (straig h t stitch ) Sewing the eyelet • m achine stops a u to m atically at the... -
Page 40: Memory
| store 0 -9 For alphabet example, refer to the Monogram letters in memory artista 180 Sewing Manual, page 43. • it is possible to com bine m onogram Ate'tfSbg letters in m em ory • the distance b etw een letters is... - Page 41 Memory Open Memory Open Memory the fu n ctio n to o lb ar at the bottom of the screen changes au to m atically • press the external mem button to include those fu n ctio n s ap pro •...
- Page 42 Memory Programming stitches by number Correct Stitches by number • touch del in the upper right corn er • open m em ory to change the stitch num ber • touch fu n ctio n 0 -9 • the cursor moves to the left and •...
- Page 43 Memory Visible functions (in memory bar) Note: sLu* Functions such as Long stitch and • the securing fu n ctio n appears as a fu n ctio n in the m em ory bar Pattern extend can be used w ith ►...
- Page 44 Memory Deleting a stitch/letter w ithin a ! L g " memory • place the cu rsor to the right of the stitch to be deleted • touch del • the stitch to the left of the cu rso r is deleted I edit «...
- Page 45 • the m em ory bank screen appears • the total capacity used by stored stitch p attern s is show n in % in the BERNINA STECKI top row - ► • total cap acity of all m em ory banks...
- Page 46 Quilt stitches/directional sew ing Quilt stitches/16 directions/4 directions quilt stitch es Quilt stitches/ Directional sew ing button • the menu of the 3 catego ries ap pears: • quilt stitch es 16 directio ns • 16-directionaI sew ing • 4-d irection al sew ing •...
- Page 47 Quilt stitches/directional sew ing 16 directional sew ing - straight stitch w ith long stitch function • the long stitch fu n ctio n is now Straight stitch with long stitch function hig hlighted on the to o lb ar at the low er edge of the screen •...
-
Page 48: Sidew Ays Motion Stitches - Outline Designs
Sidew ays motion stitches Sewing direction • the m achine sew s the selected • fo r q uicker sew in g , select the Pattern End 1 -9 fu n ctio n stitch in the direction chosen • fo r applying a patch, the easiest w a y to w o rk is to sew in a square S e w in g •... - Page 49 Sideways motion stitches Templates • the tem p lates provided sh o w the m otifs in th eir stitched fo rm s and sizes • the stitch beginning is m arked w ith a circle • the stitch ending is m arked w ith a cross •...
-
Page 50: Balance
Balance Balance These effe cts can be corrected w ith All stitch es are checked and fu lly adjusted before the m achine leaves the electro n ic balance so th at the stitch fo rm atio n can be adjusted the facto ry. -
Page 51: Help
Balance / Help Program Balance for sidew ays motion stitches Fabric, thread sta b ilizers, and in te r stitch es so co rrecting w ith balance w ill som etim es be necessary. facin g s can affe ct sid ew ays m otion Horizontal corrections Balance •... -
Page 52: Thread Tension
Help Program / Thread tension/Tutorial/Creative ConsyItant «samBSBSKrnsmsgmmssKBsmsxssmmassms!mstsmmsmsmmsmesss^smsmsmmmsm(ssmmsmsssm m m sis^ m m ssssssm is^ m m m m ^ ^ m m Note Help screen/Functions T h e Help prog ram can be o p en ed • the screen o ffers the fo llo w in g Vertical mirror image at a n y tim e w it h o u t a ffe ctin g th e in fo rm atio n :... -
Page 53: Creative Consultant
BERNINA dealer. A fte r entering the type of fab ric and The C reative C o n su lta n t... - Page 54 Consultant Thread tensioo/Tytorial/Creative Menu • the fo llo w in g menu ap pears: • Thread tension • Tutorial • C reative C o n su lta n t • touch C reative C o n su lta n t Thread "...
-
Page 55: Smart Function
Function Smart Smart Function The screen in w h ich you are w o rkin g Som etim es you have to in terru p t a task at hand to com plete an o th er w ith all the settings you made can be saved and easily re-opened. -
Page 56: Setup Program
Setup Program Setup Program All changes made in the Setup pro The Setup program allo w s you to gram w ill be saved, even w h en the p erso n alize the screen to suit your m achine is tu rn ed o ff. own requirem ents and p referen ces. -
Page 57: Personal Program
Set up Program Personal Program W hen inserting stitches into the Per Use the Personal program to design a sonal program , variatio ns (d ifferent screen w ith the stitches you use most stitch w id th s, stitch lengths, and o ften . - Page 58 Setup Program Inserting the second stitch • press the extern al b utto nho le button • touch the round buttonhole (stitch 54) Personal screen • screen changes to personal program • the round b u tto n ho le appears on the screen •...
- Page 59 up Program Deleting stitches from the Personal Program Setup menu Stitch length Personal Functions Stitch width • press the extern al Setup button, Proqrarn §3 Needle position menu appears IT „ T h re a d - • select personal program Beeper Motor speed tension...
- Page 60 Setup Program Programming functions Setup menu Stitch length Personal Stitch width • press the extern al Setup button Functions |Q ~ | Program Needle position • menu appears T h re a d - □ , • touch Functions Beeper Motor speed tension Return to...
- Page 61 Set up Program the program m ed fu n ctio n is displayed on the screen to the right 1 1 M| a: 0“ rs of the needle stop position symbol <5- it can be reprogram m ed in the sam e Pers.
- Page 62 Setup Program • bobbin w in d er Audio signals • em broidery end • audio signals can be applied to the audio signals can be turned on and fo llo w in g : Feed dog Stitch pattern Functions •...
- Page 63 Set up Program Changing the basic thread tension setting changed again, even if the m achine is The basic tension setting of the artista turned off. m achine applies to all stitches of the C hanging the tension setting in the m achine.
-
Page 64: Basic Setting
• the start screen can be tu rn ed on or • the start screen w ill appear every tim e the m achine is turned on, o ff artista 180 • touch o ff fo llo w ed au to m atically by the practical stitch menu •... -
Page 65: Sewing Light
Set up Program Sewing light Setup menu Stitch length Personal Functions Stitch width • press the extern al Setup button, Program Needle position menu appears Thread- 1 1 * Beeper c£|:~ Motor speed • select Sew ing Light tension Return to Start screen Sewing light basic setting... -
Page 66: Screen Calibration
Setup Program Version information • the version of so ftw are in the sew ing m achine and in the em b ro i • version screen appears • sh o w s the version of so ftw are dery m odule m ust be the sam e for optim um results loaded into the artista sew ing •... - Page 67 Setup Program Embroidery hoop adjustm ent This ad ju stm en t calibrates the needle activated if the em broidery m odule is attached to the cen ter of the em broidery hoop. The hoop ad justm ent can only be Setup menu Stitch length Personal...
-
Page 68: Eco (Ecological) Function
Setup Program / eco function Screen contrast The co n trast of the screen can be adjusted fo r easier v ie w in g . Setup menu Stitch length Personal Stitch width • press the externa! Setup bu tto n , Program Needle position menu appears... -
Page 69: Special Accessories
The CPS program allo w s you to personalize your sew ing m achine to suit your preferences and sew ing requirem ents. And you can do it as often as you w a n t. A sk your BERNINA dealer fo r fu rth er details! -
Page 70: Embroidery Cards
Special Accessories Em broidery module sele cted , they ap pear on the screen Embroidery module (special accessory) and can be sew n im m ediately. You can position, m irror im age, The em broidery m odule is a w o n d e r ful addition to your sew ing m ach in e, e nlarge and reduce the m otifs. - Page 71 (optional accessory) The fin ish ed creation s are tran sferred BERNINA Em broidery S o ftw are w h ich allo w s you to co m b ine, m irror im age, directly via a connecting cable (9-pin resize and em bellish existin g m otifs.
- Page 72 Important facts about sew ing machine needles Sewing machine, needle and thread Needle/ Your Bernina uses needle system 130/705H . 110-120 thread table Needle and thread The m ost com m only sold needles are nos. 7 0 - 1 2 0 . The Darning thread fin e r the needle, the low er the num ber.
-
Page 73: Needles, Thread, Fabric Feed
Needle, thread, fabric feed Important facts about sew ing machine needles Special m aterials are easier to sew if the ap pro priate needle is used. Special needles are availab le at your BERNINA dealer. Needle table Description N eedlepoint... - Page 74 bread, Needle* t fabric feed Feed-dog and fabric feed Feed-dog and stitch length are short. The fabric moves under the foo t quite slowly, even at full sewing speed. Buttonholes, satin stitch and W ith each stitch the feed-dog moves forw ard by one step The length of this step is determ ined by the stitch length some decorative stitches are sewn w ith a very short stitch selected.
-
Page 75: Cleaning And Maintenance
Cleaning, Maintenance, T r o u b l e s h o o t i n g Cleaning If the m achine is stored in a cold room , it should be brought to a w arm room about hour before use. Cleaning Cleaning the hook Lubricating... -
Page 76: Troubleshooting
For m odels w ith this n ew C FL-se w in g -lig h t, the light • the needle is blunt or bent. can ONLY be replaced by an authorized BERNINA Dealer. Skipped stitches • w ron g needles used - use only 130/705H system •... -
Page 77: Glossary Of Terms
Glossary of terms m m m m m m eam m m m m m m m m m m m m m m m m m m m am m m m m m M m m m m m m m m m m m m m m m m m m m m m m m m m m m m m m m KBBm gm m m m m m m m m m m m Glossary of term s to preview the co n ten ts of a m em ory bank check... - Page 78 Index • securing end of stitch • sub-division • tension Accessory box 69-70 Alphabets/numbers 38-39 Embroidery cards Embroidery module • alte r size 21-22 • m onogram sizes External stitch buttons • alphabet button • program m ing Alphabet programming functions •...
- Page 79 Index 59-60 • Functio ns, program m ing • Functio ns in Setup M aintenance, cleaning • M otor speed 39-44 • Needle position Memory 56-58 • C o rre ctio n s in m em ory 4 2 -4 3 •...