Table of Contents
Advertisement
Quick Links
Advertisement
Table of Contents

Related Manuals for Insportline Stratosphere


Summary of Contents for Insportline Stratosphere
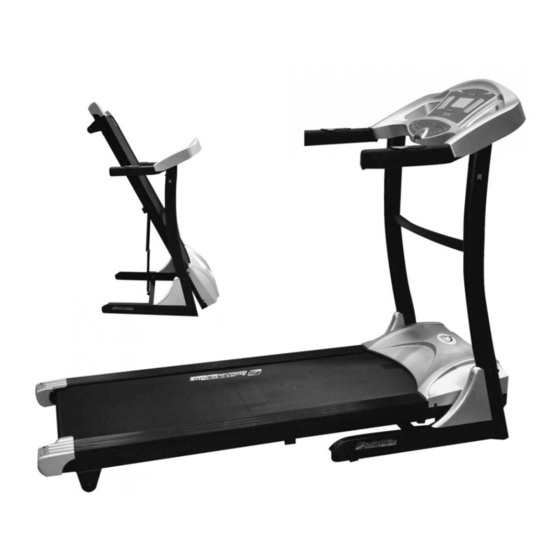
- Page 1 USER MANUAL – EN IN 3880 Treadmill inSPORTline Stratosphere...
-
Page 2: Table Of Contents
CONTENTS GENERAL SAFETY INSTRUCTIONS ........................ 3 SPECIAL SAFETY PRECAUTIONS ........................4 POWER SOURCE .............................. 4 ASSEMBLY ............................... 4 CONTENTS OF THE PACKAGE ......................... 5 HARDWARE KIT .............................. 5 EXPLODED VIEW ..............................6 PARTS LIST ................................7 ASSEMBLY DIAGRAM ............................9 ASSEMBLY INSTRUCTIONS .......................... -
Page 3: Thank You
THANK YOU Thanks for purchasing this product. The product will help you exercise your muscles in the correct way and to improve your fitness – and all this in a familiar environment. GENERAL SAFETY INSTRUCTIONS A great deal of emphasis was placed on safety in the design and manufacture of this fitness device. Still, it is very important that you strictly adhere to the following safety instructions. -
Page 4: Special Safety Precautions
SPECIAL SAFETY PRECAUTIONS POWER SOURCE Choose a place within reach of a socket when placing the treadmill. Always connect the appliance to a socket with a grounded circuit and no other appliances connected to it. It is recommended not to use any extension cords. ... -
Page 5: Contents Of The Package
NOTE: Each step in the assembly instructions tells you what you will be doing. Read and understand all instructions thoroughly before assembling the treadmill. CONTENTS OF THE PACKAGE UNPACK AND VERIFY THE CONTENTS OF THE BOX Lift up and remove the box that surrounds the Treadmill. ... -
Page 6: Exploded View
EXPLODED VIEW Most of the displayed parts in this diagram are shipped pre-assembled. For spare parts, please do always specify parts numbers used on this diagram or in the following parts list. -
Page 7: Parts List
PARTS LIST ITEM DESCRIPTION Adjustable pad Screw M4*15 Spring slice Base frame Front wheel set Hex head bolt M14*120 Washer 14 Nut M14 Allen bolt M8*20 Washer 8 Nut M8 Incline frame Allen bolt M8*30 Allen bolt M8*50 Air shock Allen bolt M8*45 Moving wheel Left end cover... - Page 8 Allen cap bolt M8*25 Allen cap bolt M8*40 Drive belt Motor Allen bolt M8*35 Allen bolt M10*25 Fixing bracket motor Washer 10 Nut M10 Spring washer Allen bolt M8*20 Fuse Power switch Power cord Right console mast Hex head bolt M10*120 Base frame cover Hex head bolt M10*55 Incline motor...
-
Page 9: Assembly Diagram
ASSEMBLY DIAGRAM 1. Console 2. Handle bar 3. Console crossbar 4. Console mast 5. Main body 6. Rear roller 7. Moving wheel 8. Motor cover ASSEMBLY INSTRUCTIONS STEP 1: Attach the console masts to the base frame A) Put the console wire through the console mast. B) Then attach left/right console mast into main frame with six M8X15mm bolts (57) and washers (56). -
Page 10: Usage Instructions
A) Connect the wire from the console to the wire in the right console mast. B) Assemble the console to the console masts with four M8x15mm bolts (57) and washers (56). (Do not tighten the bolts) ATTENTION: Be careful when you connect the two console–controller wires. There are pins inside connector, the pins must be straight, otherwise it will cause problems. -
Page 11: Training Monitor
NOTE: Make sure that the locking bolt is locked in place correctly. Unfolding: Pull out the locking bolt and put the treadmill slowly and carefully down. TRAINING MONITOR FUNCTIONS Time 00:00-99:59 Min Speed 0.8-16 km/h Incline 0-15 % Distance 0.00-99.9 km Calories 0-999 KCAL Pulse... - Page 12 START/ STOP: Press the START/STOP-KEY to begin your exercise. Press the START/STOP-KEY to pause the training. Press the START/STOP-KEY to continue working. PROG: Press the PROG-KEY you can enter preset training programs selection. SELECT: Use the SELECT key to select training speed and training time.
- Page 13 QUICK INCLINE: Press the incline-key you can quickly set the incline from 0%, 5%, 10%, 15%. DISPLAY INCLINE Shows the current running INCLINE. CALORIES Shows estimated use of calories at the time of display. DISTANCE Shows the completed or remaining distance in kilometres. TIME Shows minutes and seconds of the elapsed or remaining time.
-
Page 14: Maintenance
5. Press FAST/ SLOW or UP/ DOWN to set time. MAINTENANCE Proper maintenance is very important to ensure a faultless and operational condition of the treadmill. Improper maintenance can cause damage to the treadmill or shorten the life of the product. All parts of the treadmill must be checked and tightened regularly. -
Page 15: Lubrication
4. Be careful not to tighten the running belt tension too much as you can create excessive pressure on the front and rear roller bearings. An excessively tightened running belt may damage the roller bearings that would result in bearing noise from the front and rear rollers. TO DECREASE THE TENSION ON THE RUNNING BELT, TURN BOTH BOLTS COUNTER- CLOCKWISE THE SAME NUMBER OF TURNS. -
Page 16: Storage
Warning: The treadmill must be turned off to avoid electrical shocks. The power cord must be pulled out of the socket, before starting the cleaning or maintenance. After each training: Wipe the console and other surfaces with a clean soft and damp cloth to remove sweat residues. -
Page 17: General Fitness Tips
PROBLEM: The treadmill circuit breaker trips during a workout. SOLUTION: Verify that the treadmill is plugged into a dedicated 20amp circuit. *Note: No extension cord. PROBLEM: The treadmill shuts off when elevating. SOLUTION: Verify that there is enough slack in the power cord to reach to the wall outlet during elevation. PROBLEM: The running belt does not stay centre during a workout. -
Page 18: Warm-Up / Stretching Exercises
WARM-UP / STRETCHING EXERCISES A successful exercise session begins with warming up exercises and ends with exercises for cooling down and relaxing. These warming up exercises prepare your body for the subsequent demands made upon it. The cooling down / relaxation period after the exercise session ensures that you do not experience any muscular problems. In the following you will find stretching exercise instructions for warming up and cooling down. -
Page 19: Terms And Conditions Of Warranty, Warranty Claims
Sit on the floor and place your feet in such a way that your knees are facing outwards. Pull your feet as close as possible to your groin. Now press your knees carefully downwards. Maintain this position for 30-40 seconds if possible. - Page 20 According to valid legal regulations it depends whether the Buyer is the End Customer or not. “The Buyer who is the End Customer” or simply the “End Customer” is the legal entity that does not conclude and execute the Contract in order to run or promote his own trade or business activities. “The Buyer who is not the End Customer”...
- Page 21 VAT ID: CZ26847264 Phone: +420 556 300 970 E-mail: eshop@insportline.cz reklamace@insportline.cz servis@insportline.cz Web: www.insportline.cz INSPORTLINE s.r.o. Headquarters, Warranty & Service centre: Elektricna 6471, 911 01 Trencin, Slovakia CRN: 36311723 VAT ID: SK2020177082 Phone: +421(0)326 526 701 E-mail: objednavky@insportline.sk reklamacie@insportline.sk servis@insportline.sk Web: www.insportline.sk...
Need help?
Do you have a question about the Stratosphere and is the answer not in the manual?
Questions and answers