Viking VCBF036RSS Service Manual
Bottom mount freezer
Hide thumbs
Also See for VCBF036RSS:
- Specifications (5 pages) ,
- Use and care manual (22 pages) ,
- Installation manual (22 pages)
Table of Contents
Troubleshooting

Related Manuals for Viking VCBF036RSS


Summary of Contents for Viking VCBF036RSS
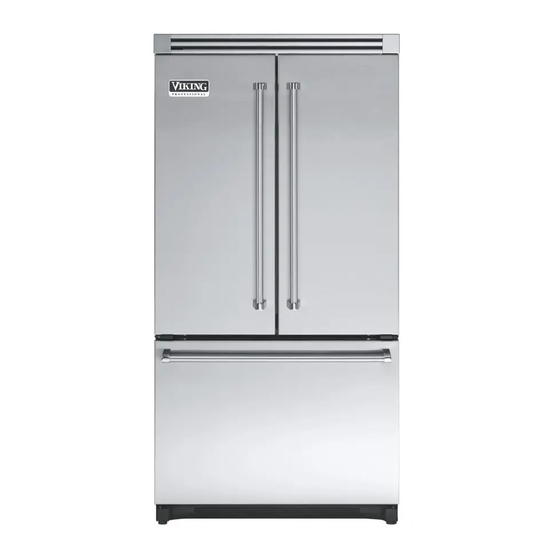
- Page 1 SERVICE MANUAL Bottom Mount Freezer Refrigerators Models VCBF036RSS VCBF036LSS DDBF036RSS DDBF036LSS VCFF036SS DDFF036SS Viking Preferred Service © 2007 1803 Hwy 82 West ● Greenwood, Mississippi ● 38930 (USA) ● 662–455–1200...
-
Page 2: Important Information
CAUTION the word “DANGER”, “WARNING” or “CAUTION”. VIKING will not be responsible for any injury or DANGER property damage from improper service procedures. If performing service on your own product, you must... - Page 3 Freestanding refrigerators/freezers and all of their components and accessories, except as detailed below*, are warranted to be free from defects in material or workmanship under normal household use for a period of two (2) years from the date of original retail purchase. Viking...
-
Page 4: Table Of Contents
Forced Defrost Mode ..........17 Cabinet Air Flow ........... 38 Service Test Mode ..........17 Machine Compartment Air Flow ......39 Fahrenheit or Celsius Mode ........20 Water Dispenser ........... 40 Show Room Mode..........20 Sabbath Mode ............20 Alarm Enable Mode..........20 Component Testing............19 ©2007 Viking Preferred Service... -
Page 5: Viking Preferred Service
Freezer Section Light Socket Removal....44 Door Gasket Removal .......... 49 Freezer Drawer Removal ........45 Door Handle Installation ........49 Freezer Drawer Glides Removal......45 Door and Hinge Removal ........49 Ice Maker Removal ..........45 Appendix A ..............50 ©2007 Viking Preferred Service... -
Page 6: General Information
3. Check with level to verify ¼” tilt to the back for proper recess where the top of the refrigerator door closure. is completely covered, use dimensions 4. If refrigerator is aligned and stable, replace toe grille. from floor to top of hinge cap to verify proper clearance. ©2007 Viking Preferred Service... -
Page 7: Operation
When this happens, an audible alarm will sound every FREEZER TEMP DOWN few seconds until the door is closed OR the DOOR button to turn back on. OPEN ALARM button is pressed to deactivate the feature. ©2007 Viking Preferred Service... -
Page 8: To Access User Preferences Menu
REFRIGERATOR TEMP display. Water Dispenser 2. Use the FREEZER TEMP UP and DOWN buttons to scroll through the features. To Use Dispenser: • Hold container under spout and press dispenser pad. ©2007 Viking Preferred Service... -
Page 9: Care And Cleaning
Dilute mild detergent and use a soft clean cloth or sponge for cleaning. Use a plastic bristle brush to get into crevices. Rinse surfaces with clean warm water. Dry glass and clear items immediately to avoid spots. ©2007 Viking Preferred Service... -
Page 10: Troubleshooting Chart
Ice maker is in the ON position without water connection. Stop sound by raising ice maker arm to OFF position. Compressor can make a high pitched hum while operating. Normal operation Hissing or Defrost heater hisses, sizzles or pops when operational. Normal operation Popping ©2007 Viking Preferred Service... -
Page 11: Troubleshooting
Food has recently been Allow time for recently added food to reach added. refrigerator or freezer temperature. ©2007 Viking Preferred Service... - Page 12 Water pressure is too low. Check water pressure requirements. Water filter is clogged or Change water filter. needs to be changed. ©2007 Viking Preferred Service...
- Page 13 Freezer temperature is too Adjust temperature. high. Refrigerator is leaking Plastic tubing was used to The manufacturer recommends using copper tubing water complete water connection. for installation. Improper water valve was See Connecting the Water Supply. installed. ©2007 Viking Preferred Service...
- Page 14 Level cabinet. Adjust hinges. Replace gasket. Dirty condenser or obstructed Check condenser and grille. Clean. grille Faulty control Test control. Replace if failed. Refrigerant shortage or Check for leak or restriction. Repair, evacuate and restriction recharge system. ©2007 Viking Preferred Service...
- Page 15 Faulty fan motor Check fan motor. Replace if failed. Restricted air flow Check condenser and grille for dirt. Clean. Refrigerant shortage or Check for leak or restriction. Repair, evacuate and restriction recharge system. ©2007 Viking Preferred Service...
- Page 16 Mounting hardware loose or missing Free or loose parts causing or Inspect unit for parts that may have worked free or allowing noise during loose or missing screws. Repair as required. operation ©2007 Viking Preferred Service...
-
Page 17: Control Board
6. Press FREEZER TEMP UP button or FREEZER The Programming Mode can be exited at any time by TEMP DOWN button to toggle through Service Test closing the refrigerator door or will exit if unattended for numbers. four minutes. ©2007 Viking Preferred Service... - Page 19 Service Test – 221 Default Settings Reset Service Test – 152 Freezer Door State Press the REFRIGERATOR TEMP UP button to force to “dEF” (default factory settings). Will show state of freezer door. “OP” (open) “CL” (closed). ©2007 Viking Preferred Service...
-
Page 20: Fahrenheit Or Celsius Mode
“On” or “OFF”. 4. Close door or toggle door switch to activate. NOTE: Showroom will always be off when first powered 6. Press the FREEZER TEMP UP button to confirm setting. The display will flash the selected setting. ©2007 Viking Preferred Service... -
Page 21: Component Testing
4. Touch one lead to compressor body (clean point of compressor will start and run as normal contact) and other probe to each compressor but will consume more energy. terminal. NOTE: If reading is obtained, compressor is grounded and must be replaced. ©2007 Viking Preferred Service... - Page 22 If compressor runs after recovery but would not run when direct wired before recover, a restriction in sealed system is indicated. • If compressor does not run when wired direct after recovery, replace faulty compressor. ©2007 Viking Preferred Service...
- Page 23 Run capacitor is connected to relay terminal 3. L2 side of 120 VAC power is connected to relay terminal 2. Control board See Control Board section for troubleshooting information. Ice Maker See Ice Maker section for service information. ©2007 Viking Preferred Service...
- Page 24 3. Score capillary tube close to drier and break. 4. Reform inlet tube to drier allowing enough space for large tube cutter. 5. Cut circumference of drier 1 ¼" below condenser inlet tube joint to drier. 6. Remove drier. ©2007 Viking Preferred Service...
- Page 25 Protect against a sudden eruption if high pressures are required for leak checking. • Do not use high pressure compressed gases in refrigeration systems without a reliable pressure regulator and pressure relief valve in the lines. ©2007 Viking Preferred Service...
- Page 26 Water Single pole, single throw switch Check resistant across terminals. Dispenser completes circuit for water solenoid when Water button not depressed: Switch button is depressed. “NO” terminals are open Water button depressed: “NO” terminals are closed ©2007 Viking Preferred Service...
-
Page 27: System Diagnosis
It is best to discharge, replace drier, evacuate and recharge with the specified refrigerant charge. ©2007 Viking Preferred Service... -
Page 28: Symptoms Of Refrigeration Shortage
With a shortage of refrigerant the capillary line will not load. have a full column of liquid. As a result, there is a noticeable hissing sound in the evaporator. This should not be mistaken for the regular refrigerant boiling sounds that would be considered normal. ©2007 Viking Preferred Service... -
Page 29: Symptoms Of A Restriction
If the unit performs normally three possibilities exist: 1) refrigerant loss, 2) partially restricted drier filter, and 3) moisture in system. ©2007 Viking Preferred Service... -
Page 30: Service Procedure
(if system is charged), unbraze joint, Process tube adaptor kit • clean all parts, then rebraze. ICI appliance grade HFC134a If leak is detected in tubing, replace tubing. If leak is detected in either coil, replace faulty coil. ©2007 Viking Preferred Service... -
Page 31: Refrigerant Precautions
If motor does not run when wired direct after recovery, replace faulty compressor. • Start lead on test cord attaches to S terminal on compressor. • Run lead on test cord attaches to M terminal on compressor. ©2007 Viking Preferred Service... -
Page 32: Dehydrating Sealed Refrigeration System
Captured or recycled refrigerant voids any compressor manufacturer's warranty. NOTE: Charge system with exact amount of refrigerant. Refer to unit nameplate for correct refrigerant charge. Inaccurately charged system will cause future problems. ©2007 Viking Preferred Service... -
Page 33: Evacuation And Charging
4. Evacuate both simultaneously. With valve “C” and leak checking. With leak detector, check manifold “F” closed, open all other valves and start vacuum connections and system for leaks. After locating pump. leak, capture refrigerant, repair leak, and begin at step 1. ©2007 Viking Preferred Service... -
Page 34: Charging
16. Recheck for refrigerant leaks. Container may explode if heated due to resulting pressure rise. Combustion products are toxic. Disposal procedures Recycle or reclaim. Same ©2007 Viking Preferred Service... -
Page 35: Comparison Of Cfc12 And Hfc134A Properties
SILVER SOLDER (see copper to steel joints). system open to atmosphere for more than 10 minutes. Excessive moisture in HFC134a system will react with compressor oil and generate acid. • Compressor must be replaced when performing low side leak repair. ©2007 Viking Preferred Service... -
Page 36: Replacement Service Compressor
• Suction and head pressures are listed on “Temperature and Relationship Chart”. Normally these are not required for diagnosis but used for confirmation on systems which have been opened. ©2007 Viking Preferred Service... -
Page 37: Refrigerant Flow
Service Procedure Refrigerant Flow Capillary Tube Note: Capillary Tube and Suction Tube are located under Fresh Food floor. Suction Tube Condenser Evaporator Post Condenser Tube Compressor Discharge Tube Drier Process Tube ©2007 Viking Preferred Service... -
Page 38: Cabinet Air Flow
Supply Tunnel To Fresh Food Compartment Control Damper Crisper Air Supply Port Refrigerator Return Air Tunnels Evaporator Fan Assembly Evaporator Freezer Air Supply Grille Evaporator Cover Freezer Return Air Through Louvers At Bottom Of Evaporator Cover ©2007 Viking Preferred Service... -
Page 39: Machine Compartment Air Flow
Service Procedure Machine Compartment Air Flow Condenser Fan Assembly Compressor Condenser ©2007 Viking Preferred Service... -
Page 40: Water Dispenser
Service Procedure Water Dispenser 5/16" O.D. Plastic Tubing Routed Through Conduit Filter Water Water Dispenser Reservoir Plastic Tubing 5/16" O.D. Icemaker 1/4" O.D. Plastic Tubing ©2007 Viking Preferred Service... -
Page 41: Disassembly Procedure
Condition Requirements: Light Bulbs Removed 1. Using a screwdriver, depress two tabs and lower the control panel housing. 2. Disconnect connector from control board. 3. Unclip thermistor from control panel housing. 3. Reverse procedure for installation. ©2007 Viking Preferred Service... -
Page 42: Refrigerator Thermistor Removal
5. Flush air from system by running water continuously for two minutes through dispenser until water runs steady. 4. Unclip damper from unit. 5. Disconnect connectors from damper and remove damper. 6. Reverse procedure for installation. ©2007 Viking Preferred Service... -
Page 43: Access To Machine Compartment
4. After tubing is loose from water valve pull the filter head and tubing out the front of unit. NOTE: Make sure to note tubing end colors when reinstalling new head and tubing assembly. 5. Reverse procedure for installation. ©2007 Viking Preferred Service... -
Page 44: Water Dispenser Switch Removal
Freezer Drawer Opened 1. Remove light shield by pressing the upper right side of the shield and rotating downward. 2. Remove light bulb. 3. Replace with appliance bulb no greater than 40 watts. ©2007 Viking Preferred Service... -
Page 45: Freezer Drawer Removal
3. Remove four screws and evaporator cover. 4. Remove Icemaker connector from back panel. 4. Reverse procedure for installation. 5. Reverse procedure for installation. NOTE: Make sure to get fill tube inserted in to fill cup fully when reassembling. ©2007 Viking Preferred Service... -
Page 46: Evaporator Fan Motor And Fan Blade
Shroud Fan Blade Assembly of evaporator. 4. Release heater clips and remove heater from evaporator coil. Evaporator Fan Motor Evaporator Fan Clip 4. Reverse procedure for installation. 5. Reverse procedure for installation. ©2007 Viking Preferred Service... -
Page 47: Condensate Drain Tube
4. Reverse procedure for installation. Condensate Drain Tube Condition Requirements: Access to Machine Compartment 5. Remove drain tube by pulling down on drain tube. 5. Reverse procedure for installation. 6. Reverse procedure for installation. ©2007 Viking Preferred Service... -
Page 48: Condenser Fan Motor And Blade Removal
NOTE: Condensate drip pan may have water in it. Wipe up all water prior to removal. 1. Bend copper tubing up out of condensate pan to allow removal of condensate pan. 2. Reverse procedure for installation. ©2007 Viking Preferred Service... -
Page 49: Front And Rear Leveling Rollers Removal
3. Screw leveler bolts until they are loose from leveling 3. Remove screws from top hinge. roller. NOTE: Do not remove green ground wire from hinge. 4. Remove top hinge along with door. 5. Remove screw and bottom hinge. 6. Reverse procedure for installation. ©2007 Viking Preferred Service... -
Page 50: Appendix A
Appendix A NOTES ©2007 Viking Preferred Service...