3Com AirConnect 9550 Quick Start Manual
Hide thumbs
Also See for AirConnect 9550:
- User manual (95 pages) ,
- Overview (8 pages) ,
- Product manual (15 pages)
Table of Contents
Advertisement
Available languages
Available languages
Quick Links
Download this manual
See also:
User Manual
3Com
AirConnect
®
11n 2.4+5GHz PoE Access Point
3CRWE955075 / WL-605
®
3Com
AirConnect
11n 2.4GHz PoE Access Point
3CRWE915075 / WL-604
Part Number 10016854 Rev. AA
Published May 2008
Quick Start Guide
9550
®
9150
®
Guide de mise en route...11
Guida introduttiva...21
Guía de inicio rápido...41
Guia de Início Rápido...51
Kurzanleitung...31
Portuguese
Français
Italiano
Deutsch
Español
Advertisement
Table of Contents

Related Manuals for 3Com AirConnect 9550


Summary of Contents for 3Com AirConnect 9550
-
Page 1: Quick Start Guide
Quick Start Guide 3Com AirConnect 9550 ® ® 11n 2.4+5GHz PoE Access Point 3CRWE955075 / WL-605 ® 3Com AirConnect 9150 ® 11n 2.4GHz PoE Access Point 3CRWE915075 / WL-604 Guide de mise en route…11 Français Guida introduttiva…21 Italiano Kurzanleitung…31 Deutsch Guía de inicio rápido…41... - Page 2 3Com Corporation. 3Com Corporation reserves the right to revise this documentation and to make changes in content from time to time without obligation on the part of 3Com Corporation to provide notification of such revision or change.
-
Page 3: About This Guide
9150 11n 2.4GHz PoE Access Point 3CRWE915075 / WL-604 This Quick Start Guide describes the basic steps necessary to install and configure your 3Com AirConnect 9550 11n 2.4+5GHz PoE Access Point and 3Com AirConnect 9150 11n 2.4GHz PoE Access Point. Note: This guide refers to these devices as the Access Point or AP. -
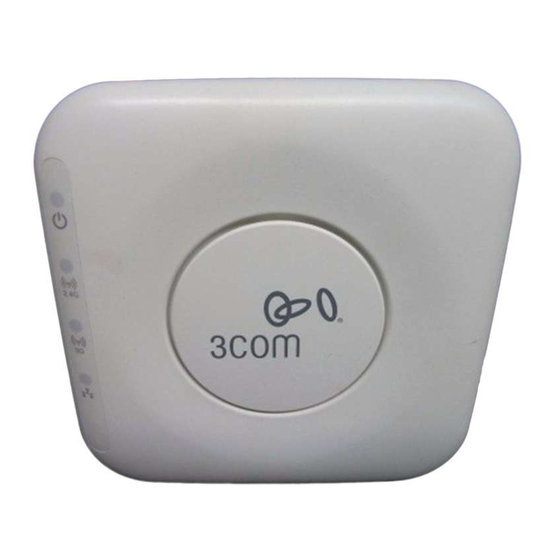
Page 4: Ap Features
AP Features Reset Button Slots for desktop mounting LEDs RJ-45 Console Port Slots for wall mounting Wall Mounting Bracket/ Table Top Stand Ethernet Port Connectors for optional antennas Feature Description Ethernet Port The Ethernet port provides a 10/100/1000 BASE-T Ethernet connection to a switch. -
Page 5: Register Your Product For Services And Repair
To conform to FCC and other country restrictions, your product may be limited in the channels that are available. If other channels are permitted in your country, please visit the 3Com web site for the latest software version:... -
Page 6: Unpacking The Ap
One 3Com Warranty document 2. Preparing for Installation 3Com recommends that you connect and check the Ethernet cable and LEDs before you install the AP in a hard-to-reach location. Also, observe these items before you mount or connect the AP:... -
Page 7: Mounting The Ap
3. Mounting the AP The AP can be mounted on the following types of surfaces: • Wall or electrical box (NEMA enclosure) • Table top Wall or Electrical Box Mounting To install your AP on a wall or electrical box, use the mounting bracket that comes with the device. -
Page 8: Tabletop Mounting
Tabletop Mounting To install the AP on a flat surface such as a table or desktop, follow these steps: Insert the tabs on the table stand into the slots on the side of the AP, as shown in the illustration. Align the cable routing cut out toward the upper part of the stand. Cable routing cut out To lock the stand to the AP, slide the stand back and the AP forward, as shown here: Place the AP and table stand on the table. -
Page 9: Connecting Power
To power the AP using a PoE injector or midspan (not included), follow these steps: Connect the LAN cable from a switch to the Switch port on the PoE injector. 3Com recommends that you use a Gigabit PoE injector such as 3CNJPSE-GIG Connect a LAN cable from the Ethernet port on the AP to the other LAN port on the PoE injector. -
Page 10: Checking The Led Indicators
For example: Start > Run > d:\autorun.exe On the menu, click Install/Uninstall WIDMan. On the next screen, double-click 3Com Wireless Infrastructure Device Manager and then click Install. The installation begins. Follow the instructions on each screen to complete the installation. If prompted, reboot the... -
Page 11: Connecting To The Ap
Click Finish when you are done. For details on using the Wireless Infrastructure Device Manager and configuring your AP, see the 3Com AirConnect 9550 11n 2.4+5GHz PoE Access Point / 3Com AirConnect 9150 11n 2.4GHz PoE Access Point User Guide on our website:... -
Page 12: Troubleshooting
9. Troubleshooting For troubleshooting information please refer to your User's Guide or visit 3Com’s World Wide Web site: http://www.3Com.com. -
Page 13: Guide De Mise En Route
Le présent guide de mise en route indique la procédure à suivre pour installer et configurer le point d'accès PoE 3Com AirConnect 9550 11n 2,4+5 GHz et le point d'accès PoE 3Com AirConnect 9150 11n 2,4 GHz. Remarque :Ce guide se sert du terme PA (Point d'Accès) pour désigner ces dispositifs. - Page 14 Fonctions du PA Bouton de réinitialisation Encoches pour la fixation au bureau Voyants Port pour la console RJ45 Encoches pour la fixation au mur Attache de montage mural/ Socle pour bureau Port Ethernet Connecteurs pour les antennes en option Fonction Description Port Ethernet Le port Ethernet offre une connexion Ethernet 10/100/1000 BASE-T à...
-
Page 15: Enregistrement Du Produit Pour Le Service Après Vente
Soutien technique et réparation par téléphone 3Com offre un accès aux services d'aide technique et de réparation par téléphone, courriel et Internet. Pour accéder à ces services dans votre région, utilisez le numéro de téléphone, l'URL ou l'adresse électronique corrects depuis l'URL suivante : http://csoweb4.3com.com/contactus/... -
Page 16: Canaux Approuvés
En vertu des restrictions du FCC et celles propres à votre pays, il se peut que les canaux disponibles soient limités au niveau de votre produit. Si d'autres canaux sont autorisés dans votre pays, consultez le site Web de 3Com pour obtenir la dernière version du logiciel : www.3Com.com 1. -
Page 17: Fixation Au Mur Ou À Un Coffret De Branchement
3. Montage du PA Vous pouvez installer le PA sur plusieurs types de surface : • Mur ou coffret de branchement normalisé • Dessus de table Fixation au mur ou à un coffret de branchement Pour monter le PA sur un mur ou à coffret de branchement, servez-vous de l'attache fournie avec le dispositif. -
Page 18: Fixation Sur Table
Fixation sur table Pour installer le PA sur une surface plane, comme une table ou un bureau, procédez comme suit : Insérez les pattes du socle dans les encoches situées sur le côté du PA, comme illustré dans la figure. Alignez l'encoche de passage du câble vers la partie supérieure du socle. Encoche de passage du câble Pour fixer le socle au PA, faites glisser le socle vers l'arrière et le PA vers l'avant, comme illustré... -
Page 19: Mise Sous Tension
Pour mettre sous tension le PA au moyen d'un injecteur PoE ou midspan (non fourni), procédez comme suit : Branchez le câble LAN d'un commutateur au port correspondant de l'injecteur PoE. 3Com recommande l'utilisation d'un injecteur PoE gigabit tel que le 3CNJPSE-GIG. -
Page 20: Vérification Des Voyants Lumineux
Lien 1000 BASE-T détecté ; pas d'activité Clignotant Activité au niveau du lien 1000 BASE-T 6. Installation du logiciel L'application suivante figure dans le CD-ROM de l'utilitaire WIDMan de 3Com : • Wireless Infrastructure Device Manager (Utilitaire WIDMan) Pour être en mesure de détecter le PA, vous devez tout d'abord installer le logiciel Wireless Infrastructure Device Manager (WIDMan) sur votre ordinateur. - Page 21 Si votre réseau ne comprend pas de serveur DHCP, le PA utilise une adresse IP par défaut (169.254.2.111). Utilisation de l'utilitaire WIDMan Le logiciel 3Com WIDMan (Wireless Infrastructure Device Manager) vous permet de détecter et de configurer le PA. Suivez la procédure ci-après pour déterminer l'adresse IP du PA à l'aide de WIDMan.
-
Page 22: Dépannage
Pour plus de détails sur l'utilisation du Wireless Infrastructure Device Manager ainsi que sur la configuration du PA, reportez-vous au Guide d'utilisation pour le point d'accès PoE 3Com AirConnect 9550 11n 2.4+5GHz / Guide d'utilisation pur le point d'accès PoE Com AirConnect 9150 11n 2.4GHz figurant sur notre site Web : http://www.3Com.com... -
Page 23: Guida Introduttiva
La presente Guida introduttiva descrive le operazioni di base necessarie per installare e configurare il 9550 AirConnect di 3Com con PoE a 2,4 e 5 GHz compatibile con lo standard 802.11n. Nota : Nel corso della presente guida questi dispositivi vengono indicati come l'AP o Access Point. - Page 24 Funzioni dell'AP Pulsante Reset Fessure per il montaggio sulla scrivania Porta RJ-45 per la console Fessure per il montaggio a parete Supporto per il montaggio a parete/ Supporto per sopra il tavolo Porta Ethernet Connettori per le antenne opzionali Funzione Descrizione Porta Ethernet La porta Ethernet fornisce una connessione Ethernet 10/100/1000...
-
Page 25: Informazioni Sulla Sicurezza
Assistenza tecnica e riparazione via telefono La 3Com offre assistenza tecnica e servizi di riparazione via telefono, e-mail e Internet. Per accedere a questi servizi nella regione di appartenenza, utilizzare il numero di telefono, indirizzo Web (URL) o indirizzo e-mail appropriato, scegliendo dal seguente indirizzo Web: http://csoweb4.3com.com/contactus/... -
Page 26: Preparazione Per L'installazione
Un documento di garanzia 3Com 2. Preparazione per l'installazione 3Com consiglia di collegare e controllare il cavo Ethernet e i LED prima di installare l'AP in una posizione non facilmente raggiungibile. Prestare inoltre attenzione ai seguenti elementi prima di montare o collegare l'AP:... -
Page 27: Montaggio A Parete O In Un Quadro Elettrico
3. Montaggio dell'AP L'AP può essere montato sui seguenti tipi di superfici: • Parete o quadro elettrico (ad es., un contenitore di protezione NEMA) • Sopra il tavolo Montaggio a parete o in un quadro elettrico Per installare l'AP su una parete o in un quadro elettrico, utilizzare il supporto di montaggio fornito con il dispositivo. -
Page 28: Montaggio Sopra Il Tavolo
Montaggio sopra il tavolo Per installare l'AP su una superficie liscia, come un ripiano o una scrivania, procedere come segue: Inserire le tacche del supporto da tavolo nelle fessure di fianco all'AP, come mostrato in figura. Allineare l'incavo per la disposizione del cavo verso la parte superiore del supporto. Incavo per la disposizione del cavo Per fissare in maniera permanente il supporto all'AP, fare scorrere il supporto indietro e l'AP... -
Page 29: Collegamento Dell'alimentazione
Per alimentare l'AP utilizzando un iniettore PoE o un midspan PoE (non fornito con l'AP), procedere come segue: Collegare il cavo LAN proveniente dallo switch alla porta Switch dell'iniettore PoE. 3Com consiglia di utilizzare un iniettore PoE Gigabit come il 3CNJPSE-GIG Collegare un cavo LAN proveniente dalla porta Ethernet dell'AP all'altra porta LAN dell'iniettore PoE. -
Page 30: Controllo Degli Indicatori Led
Attività del collegamento 1000 BASE-T tente 6. Installazione del software Il CD-ROM della Utility WIDMan di 3Com contiene la seguente applicazione: • Wireless Infrastructure Device Manager (Utility WIDMan) Per rilevare e configurare l'AP, è necessario prima installare il software Wireless Infrastructure Device Manager (WIDMan) sul computer. - Page 31 Eseguire le seguenti operazioni per utilizzare WIDMan per determinare l'indirizzo IP dell'AP. Collegare l'AP alla rete. Avviare WIDMan dal menu Start di Windows: Start > Programmi > 3Com Wireless > Wireless Infrastructure Device Manager. La schermata Wireless Network Tree visualizza l'AP, quando questo è stato rilevato.
-
Page 32: Risoluzione Dei Problemi
Per dettagli su come utilizzare il Wireless Infrastructure Device Manager su come configurare l'AP, vedere 3Com AirConnect 9550 11n 2.4+5GHz PoE Access Point / 3Com AirConnect 9150 11n 2.4GHz PoE Access Point User Guide sul sito web di 3Com: http://www.3Com.com 9. -
Page 33: Kurzanleitung
Diese Kurzanleitung beschreibt die grundlegenden Schritte zur Installation und Konfiguration Ihres 3Com AirConnect 9550 11n 2,4+5 GHz PoE Access Point bzw. 3Com AirConnect 9150 11n 2,4GHz PoE Access Point. Hinweis: In dieser Anleitung werden diese Geräte als Access Point oder AP bezeichnet. - Page 34 AP-Funktionen Reset-Taste Schlitze für Tischständer Befestigung LEDs RJ-45-Konsolenanschluss Schlitze für Wandhalterung Befestigung Wandhalterung/ Tischständer Ethernet-Port Anschlüsse für optionale Antennen Funktion Beschreibung Ethernet-Port Der Ethernet-Port ermöglicht die 10/100/1000 BASE-T Ethernet- Verbindung mit einem Switch. Verwenden Sie ein passendes gerades Kabel (Straight Through) der Kategorie 5 mit RJ-45- Standardanschlüssen, um den AP an das Netzwerk anzuschließen.
-
Page 35: Produktregistrierung Für Wartung Und Reparatur
Sie Ihr Produkt zuerst online registrieren: http://eSupport.3com.com/ Technischer Support per Telefon und Reparatur Sie können den technischen Support und den Reparaturdienst von 3Com per Telefon, E-Mail und über das Internet erreichen. Die Telefonnummer, den URL oder die E-Mail-Adresse für Ihre Region finden Sie unter: http://csoweb4.3com.com/contactus/... -
Page 36: Zulässige Kanäle
1. Auspacken des Access Point Stellen Sie sicher, dass die folgenden Komponenten mit dem AP geliefert worden sind: • ein 3Com AirConnect 9550 Access Point bzw. ein 3Com AirConnect 9150 Access Point • die für die Wandbefestigung erforderlichen Teile: •... -
Page 37: Aufstellen/Aufhängen Des Ap
3. Aufstellen/Aufhängen des AP Der AP kann auf den folgenden Oberflächen befestigt bzw. aufgestellt werden: • Wand oder Schaltkasten (NEMA-Gehäuse) • Tischoberfläche Wand oder Schaltkasten Benutzen Sie die im Lieferumfang enthaltene Halterung, um den AP an einer Wand oder in einem Schaltkasten zu befestigen. - Page 38 Tischaufstellung So stellen Sie den AP auf einer ebenen Oberfläche wie einem Tisch oder einem Schreibtisch auf: Schieben Sie die Zungen des Tischständers wie abgebildet in die Schlitze auf der Seite des AP. Richten Sie die Kabelöffnung zum oberen Teil des Ständers hin aus. Kabelöffnung Um den Ständer am AP einrasten zu lassen, schieben Sie den Ständer und den AP wie abgebildet in entgegengesetzte Richtung:...
-
Page 39: Anschluss An Stromquelle
4. Anschluss an Stromquelle Der AP kann auf eine der folgenden Methoden mit Strom versorgt werden: • Durch die Stromversorgung über Ethernet (Power over Ethernet, PoE); hier sorgt das LAN über ein 802.3af PoE-kompatibles Gerät wie ein Switch für die Stromversorgung. •... -
Page 40: Überprüfen Der Led-Anzeigen
Aktivität blinkt 1000 BASE-T-Verbindung; Aktivität 6. Installation der Software Die folgende Anwendung finden Sie auf der beigefügten 3Com WIDMan Utility CD-ROM: • Wireless Infrastructure Device Manager (WIDMan Utility) Sie müssen die WIDMan-Software (Gerätemanager für drahtlose Infrastruktur) zuerst auf Ihrem Computer installieren, bevor Ihr System den AP erkennt und Sie das Gerät konfigurieren können. -
Page 41: Verbindung Herstellen Mit Dem Ap
IP-Adresse (169.254.2.111). Verwenden des Dienstprogramms WIDMan Mit dem Programm 3Com WIDMan (Gerätemanager für drahtlose Infrastruktur) können Sie Ihren AP finden und konfigurieren. So stellen Sie die IP-Adresse des AP mit WIDMan fest: Verbinden Sie den AP mit dem Netzwerk. -
Page 42: Problembehebung
Nähere Einzelheiten zur Verwendung des Wireless Infrastructure Device Manager und zur Konfiguration des AP finden Sie im Benutzerhandbuch für 3Com AirConnect 9550 11n 2.4+5GHz PoE Access Point / 3Com AirConnect 9150 11n 2.4GHz PoE Access Point auf unserer Website: http://www.3Com.com 9. -
Page 43: Guía De Inicio Rápido
Esta Guía de inicio rápido describe los pasos básicos necesarios para instalar y configurar el Punto de acceso PoE 3Com AirConnect 9550 11n 2.4+5GHz y el Punto de acceso PoE 3Com AirConnect 9150 11n 2.4GHz. Nota: Esta guía se refiere a estos dispositivos como Punto de acceso o AP. -
Page 44: Funciones Del Punto De Acceso
Funciones del punto de acceso Botón de reinicio Ranuras para montaje en escritorio Indicadores LED Puerto de consola RJ-45 Ranuras para montaje en la pared Soporte para montaje en la pared/ Soporte para sobremesa Puerto Ethernet Conectores para antenas opcionales Función Descripción Puerto Ethernet... -
Page 45: Registre Su Producto Para Servicios Y Reparación
Soporte técnico y reparaciones por teléfono 3Com ofrece acceso telefónico, por Internet y correo electrónico para soporte técnico y servicios de reparación. Para tener acceso a estos servicios en su región, utilice el número de teléfono correspondiente, dirección URL o de correo electrónico de la siguiente dirección URL. -
Page 46: Desempaque Del Punto De Acceso
Un documento de Garantía de 3Com 2. Preparación para la instalación Antes de instalar el AP en un lugar de difícil acceso, 3Com recomienda que conecte y revise el cable Ethernet y los indicadores LED. Además, observe estos elementos antes de montar o conecte el AP: Función... -
Page 47: Montaje Del Punto De Acceso
3. Montaje del punto de acceso El punto de acceso se puede montar en los siguientes tipos de superficies: • Pared o caja eléctrica (gabinete NEMA) • Sobremesa Montaje en pared o caja eléctrica Para instalar su punto de acceso en una pared o caja eléctrica, use el soporte de montaje que viene con el dispositivo. -
Page 48: Montaje De Sobremesa
Montaje de sobremesa Para instalar el AP sobre una superficie plana como una mesa o escritorio, siga estos pasos: Inserte las pestañas en el soporte para mesa dentro de las ranuras ubicadas al costado del punto de acceso, como se muestra en la ilustración. Alinee el corte de enrutamiento del cable hacia la parte superior del soporte. -
Page 49: Conexión De La Alimentación
Para alimentar el AP utilizando un inyector PoE o Midspan (no incluido), siga estos pasos: Conecte el cable LAN de un conmutador al puerto del conmutador en el inyector PoE. 3Com recomienda el uso de un inyector PoE Gigabit, como 3CNJPSE-GIG Conecte un cable LAN desde el puerto Ethernet del punto de acceso al otro puerto LAN del inyector PoE. -
Page 50: Revisión De Los Indicadores Led
Inicio de Windows. Por ejemplo: Inicio > Ejecutar > d:\autorun.exe En el menú, haga clic en Install/Uninstall WIDMan (Instalar/desinstalar WIDMan). En la siguiente pantalla, haga doble clic en 3Com Wireless Infrastructure Device Manager y luego haga clic en Install (Instalar). Se inicia la instalación. -
Page 51: Configuración Del Ap
AP. Siga estos pasos para utilizar WIDMan para determinar la dirección IP del AP. Conecta el AP a la red. Lance WIDMan desde el menú Inicio de Windows: Inicio > Programas > 3Com Wireless > Wireless Infrastructure Device Manager. La pantalla Wireless Network Tree (Árbol de la red inalámbrica) muestra su AP cuando se detecta. -
Page 52: Solución De Problemas
Para obtener detalles sobre el uso de Wireless Infrastructure Device Manager y la configuración de su punto de acceso, consulte la Guía de usuario del Punto de acceso PoE 3Com AirConnect 9550 11n 2.4+5GHz / Punto de acceso PoE 3Com AirConnect 9150 11n 2.4GHz en nuestro sitio Web: http://www.3Com.com... -
Page 53: Guia De Início Rápido
Este Guia de Início Rápido descreve as etapas básicas necessárias para instalar e configurar o 3Com AirConnect 9550 11n 2.4+5GHz PoE Access Point e o 3Com AirConnect 9150 11n 2.4GHz PoE Access Point. Nota: Este guia refere-se aos dispositivos como o PA ou Ponto de acesso. - Page 54 Recursos do ponto de acesso (PA) Botão de reinicialização Fendas para montagem na mesa LEDs Porta de console RJ-45 Fendas para montagem na parede Suporte para montagem na parede/Base de mesa Porta Ethernet Conectores para antenas opcionais Recurso Descrição Porta Ethernet A porta Ethernet oferece uma conexão 10/100/1000 BASE-T Ethernet para um switch.
-
Page 55: Registre O Produto Para Serviços E Reparos
Para ficar em conformidade com a FCC e outras restrições do país, o produto pode ser limitado aos canais disponíveis. Se outros canais forem permitidos no seu país, visite o site da 3Com para obter a última versão do software:... -
Page 56: Desembalagem Do Ponto De Acesso
Um documento de Garantia da 3Com 2. Preparação da instalação A 3Com recomenda conectar e verificar o funcionamento do cabo de Ethernet e dos LEDs antes de instalar o PA em um local de difícil acesso. Além disso, os seguintes itens devem ser observados... -
Page 57: Montagem Do Ponto De Acesso
3. Montagem do ponto de acesso O PA pode ser montado nos seguintes tipos de superfície: • Parede ou caixa elétrica (invólucro NEMA) • Mesa Montagem em parede ou caixa elétrica Use o suporte de montagem, fornecido com o dispositivo para fazer a instalação do PA na parede ou na caixa elétrica. -
Page 58: Montagem Em Mesa
Montagem em mesa Para instalar o PA em uma superfície plana como uma mesa ou escrivaninha, siga estas etapas: Insira as abas da base de mesa nas fendas laterais do PA, como mostrado na figura. Alinhe o recorte de encaminhamento do cabo voltado para a parte superior da base. Recorte de encaminhamento do cabo Para travar a base no PA, deslize-a para trás e o PA para frente, como mostrado aqui:... -
Page 59: Conexão Da Alimentação
Para alimentar o PA usando um PoE injector ou midspan (não incluído), siga estas etapas: Conecte o cabo LAN de um switch à porta Switch no PoE injector. A 3Com recomenda o uso de um PoE injector Gigabit como o 3CNJPSE-GIG Conecte um cabo LAN da porta Ethernet no PA à... -
Page 60: Verificação Dos Indicadores Led
Link 1000 BASE-T detectado, sem atividade Piscando Link 1000 BASE-T em atividade 6. Instalação do software O aplicativos a seguir está incluído no CD-ROM do Utilitário WIDMan da 3Com: • Utilitário Wireless Infrastructure Device Manager (WIDMan) É necessário instalar o software Wireless Infrastructure Device Manager (WIDMan) no computador para descobrir e configurar o PA. -
Page 61: Conexão Com O Pa
PA. Siga estas etapas para usar o WIDMan para determinar o endereço IP do PA. Conecte o PA à rede. Inicie o WIDMan no menu Iniciar do Windows: Iniciar > Programas > 3Com Wireless > Wireless Infrastructure Device Manager. A tela Wireless Network Tree exibirá o PA quando ele for detectado. -
Page 62: Diagnóstico De Problemas
Para obter detalhes sobre a utilização do Wireless Infrastructure Device Manager e a configuração do PA, consulte o Guia do Usuário do 3Com AirConnect 9550 11n 2.4+5GHz PoE Access Point e do 3Com AirConnect 9150 11n 2.4GHz PoE Access Point no nosso site: http://www.3Com.com... -
Page 63: Regulatory Information
3Com’s warranty and all applicable regulatory certifications and approvals. Only antennas specified for your region by 3Com can be used with this product. The use of external amplifiers or non-3Com antennas may invalidate regulatory certifications and approvals. - Page 64 Interference Handbook. This booklet is available from the U.S. Government Printing Office, Washington, DC 20402. Stock No. 004-000-0034504. 3Com is not responsible for any radio or television interference caused by unauthorized modification of the devices included with this 3Com AirConnect 9550 11n 2.4+5GHz PoE Access Point, Model WL-605 (3CRWE955075) / 3Com AirConnect 9150 11n 2.4GHz PoE Access Point, Model WL-604 (3CRWE915075) or...
- Page 65 NOTE: To ensure product operation is in compliance with local regulations, select the country in which the product is installed. Česky [Czech] 3Com Coporation tímto prohlašuje, že tento RLAN device je ve shodě se základ- ními požadavky a dalšími příslušnými ustanoveními směrnice 1999/5/ES. Dansk [Danish] Undertegnede 3Com Corporation erklærer herved, at følgende udstyr RLAN...
- Page 66 A copy of the signed Declaration of Conformity can be downloaded from the Product Support web page for the 3Com AirConnect 9550 11n 2.4+5GHz PoE Access Point, Model WL-605 (3CRWE955075) / 3Com AirConnect 9150 11n 2.4GHz PoE Access Point, Model WL-604 (3CRWE915075) at http://www.3com.com. Also available at http://support.3com.com/doc/WL-604_WL-605_EU_DOC.pdf...
- Page 67 • In France outdoor operation is only permitted using the 2.4 – 2.454 GHz band: Channels 1 – 7. EU - R 5 GH ESTRICTIONS FOR SE IN THE Z BAND Allowed Frequency Bands Allowed Channel Numbers Countries 5.15–5.35 GHz 36, 40, 44, 48, 52, 56, 60, 64 Czech Republic, France 5.15–5.35 &...