Sign In
Upload
Manuals
Brands
Olivetti Manuals
Printer
d-Color MF282
Olivetti d-Color MF282 Manuals
Manuals and User Guides for Olivetti d-Color MF282. We have
7
Olivetti d-Color MF282 manuals available for free PDF download: Operation Manual, Quick Assist Manual, Operations, Fax Manual, Reference Manual, Maintenance Manual
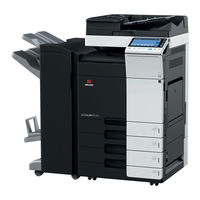
Olivetti d-Color MF282 Operation Manual (501 pages)
Brand:
Olivetti
| Category:
All in One Printer
| Size: 18.2 MB
Table of Contents
Table of Contents
3
1 About the Boxes
15
Box Screen
17
Available Operations with User Box
18
Available Operations with System Box
19
[Secure Print]
19
[Memory RX]
19
[ID & Print]
20
[Bulletin]
20
[Polling TX]
20
[Annotation]
21
[File Re-TX]
21
[Password Encrypted PDF]
21
[External Memory]
22
[Mobile/Pda]
22
[Relay User Box]
22
2 Store Documents as Files in MFP and Use Them Again When Necessary
23
Boxes for Document Storage and Readout (User Box)
25
Available Operations with User Box
25
Type of User Boxes
26
Rules to Use User Boxes
27
Public User Box
27
Personal User Box
27
Group User Box
28
When Using a Combination of Personal User Box and Group User Box
29
Create User Box
30
Save File in a User Box
31
Save (Basic Operation Flow)
31
Save Files in Copy Mode
32
Save File in Fax/Scan Mode
32
Save Files from a PC
32
Save File from a USB Memory
33
Save File from Bluetooth Device
33
Print File in a User Box
34
Print (Basic Operation Flow)
34
Print Multiple Files at the same Time (Combine)
36
Send Files in a User Box
39
Sending (Basic Operation Flow)
39
Set a Destination
41
Select a Destination from the Address Book
41
Searching for Destination
42
Direct Input
43
Select File from the History
43
Search for Mail Address or Fax Number from the LDAP Server
44
Send Multiple Files at the same Time (Combine TX)
45
Specify the Destination (for Combine TX)
47
Select a Destination from the Address Book
47
Searching for Destination
48
Direct Input
49
Select File from the History
49
Search for E-Mail Address from the LDAP Server
50
Organize Files in a User Box
51
Operation Flow
51
Delete a File
52
Rename a File
52
Move File to Another User Box
53
Copy File to Another User Box
53
Edit a Page
54
Save File in a USB Memory
55
Store File as an Overlay Image
56
Check the File Information
57
Operate a User Box from the PC
58
Operate a User Box Via Web Connection
58
Open User Box
58
Print Files in a User Box
59
Send Files in a User Box
61
Download Files in a User Box to the PC
63
Move or Copy Files in a User Box to Another User Box
65
Delete Files from a User Box
66
Operate a User Box Using the Box Operator
67
3 Receive Fax in Memory and Print It Later ([Memory RX])
69
Memory RX]
71
Print Fax from the Memory RX User Box
72
Organize Faxes in a User Box
74
Operation Flow
74
Delete a File
75
Rename a File
76
Check the File Information
76
4 Retransmit Fax if Redialing Has Failed ([File Re-TX])
77
File Re-TX]
79
Send Fax from Fax Transmit User Box
80
Sending (Basic Operation Flow)
80
Set a Destination
82
Select a Destination from the Address Book
82
Searching for Destination
83
Direct Input
84
Select File from the History
84
Print Fax from the Memory RX User Box
85
Organize Faxes in a User Box
87
Operation Flow
87
Delete a File
88
Check the File Information
88
5 Print Classified Documents ([Secure Print])
89
Secure Print]
89
Print Files in a User Box
92
Print (Basic Operation Flow)
92
Print (if [Prohibited Functions When Authentication Error] Is Set to [Mode 2])
94
Organize Files in a User Box
97
Operation Flow
97
Delete a File
98
Rename a File
99
Check the File Information
99
6 Annotate Files ([Annotation])
101
Annotation]
103
Create an Annotation User Box
104
Save File in a User Box
105
Save (Basic Operation Flow)
105
Save Files in Copy Mode
107
Save Files from a PC
107
Print Files in a User Box
108
Send Files in a User Box
110
Sending (Basic Operation Flow)
110
Set a Destination
113
Select a Destination from the Address Book
113
Searching for Destination
114
Direct Input
115
Select File from the History
115
Search for E-Mail Address from the LDAP Server
116
Organize Files in a User Box
117
Operation Flow
117
Delete a File
118
Rename a File
119
Store File as an Overlay Image
119
Check the File Information
121
7 Print an Encrypted PDF ([Password Encrypted PDF])
123
Password Encrypted PDF]
123
Store File in User Box, or Print File from User Box
126
Organize Files in a User Box
128
Operation Flow
128
Delete a File
129
Check the File Information
129
8 Registering a File for Polling ([Polling TX])
131
Polling TX]
131
Print Files in a User Box
134
Organize Files in a User Box
135
Operation Flow
135
Delete a File
136
Store File as an Overlay Image
137
Check the File Information
138
9 Store File for Polling ([Bulletin])
139
Bulletin]
139
Create Bulletin Board User Box
142
Print Files in a User Box
143
Organize Files in a User Box
145
Operation Flow
145
Delete a File
146
Check the File Information
146
10 Use as Fax Transponder ([Relay User Box])
147
Relay User Box]
147
Operations Required to Use this Function
150
Register the Fax Recipients
150
Create a Relay User Box
151
11 Print on MFP under Authentication Control ([ID & Print])
153
ID & Print]
155
Print Files in a User Box
156
Organize Files in a User Box
158
Operation Flow
158
Delete a File
159
Check the File Information
160
12 Use a USB Memory Device ([External Memory])
161
External Memory]
161
Supported USB Memory Devices
164
Print a File from a USB Memory Device
165
Operations Required to Use this Function (for the Administrator)
165
Operation Flow
165
Save Scanned Data on a USB Memory
168
Preparation Required to Use this Function (for the Administrator)
168
Operation Flow
168
Store USB Memory Files in External Memory User Box
170
Preparation Required to Use this Function (for the Administrator)
170
Operation Flow
170
13 Use Bluetooth Devices ([Mobile/Pda])
173
Mobile/Pda]
173
Supported Bluetooth Devices
176
Print File by Bluetooth Communication
177
Operations Required to Use this Function (for the Administrator)
177
Operation Flow
177
Save File by Bluetooth Communication
179
Operations Required to Use this Function (for the Administrator)
179
Operation Flow
179
14 Appendix
183
Optional Settings before File Storage
185
Name a File ([File Name])
185
Scanning a 2-Sided Original ([Simplex/Duplex])
186
Specify the Resolution to Scan the Original ([Resolution])
186
Select the Color Mode to Scan the Original ([Color])
186
Select a File Type to Save the Scanned Original Data ([File Type])
187
Set the Original Size to Scan ([Scan Size])
187
Scan Originals of Different Sizes at One Time ([Mixed Original])
187
Scan an Original Thinner than Normal Paper ([Thin Paper Original])
187
Scan a Folded Original ([Z-Folded Original])
188
Scan a Long Original ([Long Original])
188
Specify the Original Loading Direction ([Original Direction])
189
Specify the Binding Position of the Original ([Binding Position])
189
Scan While Removing Dust in the Slit Glass ([Despeckle])
189
Skip Blank Pages ([Blank
190
Split the Left and Right Pages of a Book or Catalog ([Book Original])
190
Scan a Number of Originals in Several Batches ([Separate Scan])
191
Select the Appropriate Image Quality Level for the Contents of the Original ([Original Type])
192
Specify the Density to Scan the Original ([Density])
192
Adjust the Background Density of the Original ([Bkgd. Removal])
192
Scanning after Erasing Text and Shadows in the Margins of an Original ([Frame Erase])
193
Sharpen the Boarder between Text Etc. ([Sharpness])
193
Optional Settings before Printing
194
Change the Color Mode and Print ([Color])
194
Enlarge or Reduce an Image ([Zoom])
194
Print on both Sides of Paper ([Simplex/Duplex])
194
Printing Multiple Pages on the same Side of a Single Sheet ([Combine])
195
Stapled Sheets ([Staple])
195
Punch the Printed Sheets. ([Punch])
196
Folding/Biding ([Fold/Bind])
196
Outputting by Sets ([Group/Sort])
197
Outputting each Set in Staggered Position ([Offset])
198
Add a Margin to Pages
198
Fine-Tuning the Print Position ([Image Shift])
199
Insert Front and Back Covers ([Cover Sheet])
199
Insert a Different Sheet into the Specified Page ([Insert Sheet])
200
Arrange the First Page of the Chapter on the Front Side ([Chapters])
200
Add the Date and Time ([Date/Time])
201
Add a Page Number
201
Add a Stamp ([Stamp])
201
Add a Stamp on the Entire Page ([Stamp Repeat])
202
Add Information to the Header/Footer ([Header/Footer])
202
Compose Stored Images ([Registered Overlay])
202
Print a Concealed Security Watermark ([Copy Protect])
203
Add Copy Restriction Information ([Copy Guard])
203
Add a Password ([Password Copy])
204
Optional Settings before File Transfer
205
Change the File Resolution ([Resolution])
205
Change the File Color ([Color])
205
Change a File Type ([File Type])
205
Rename a File or a Subject ([E-Mail Settings])
205
Add the Date and Time ([Date/Time])
205
Add a Page Number
206
Add a Stamp ([Stamp])
206
Add Information to the Header/Footer ([Header/Footer])
206
Send and Print at the same Time ([Save & Print])
207
Report the Destination of Transfer File ([URL Dest. Settings])
207
Encrpt an E-Mail ([Mail Encryption])
207
Add Digital Signature to E-Mails ([Digital Signature])
207
Send by Renaming the Sender ([Fax Header Settings])
208
Set a Fax Line Type ([Line Setting])
208
Send a Fax at Preset Time ([Timer TX])
208
Send a Fax with a Password ([Password TX])
209
Send a Fax with F-Code ([F-Code TX])
209
Advertisement
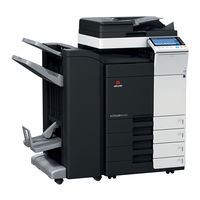
Olivetti d-Color MF282 Operations (289 pages)
d-Color MF552; d-Color MF452; d-Color MF362; d-Color MF282; d-Color MF222
Brand:
Olivetti
| Category:
Printer
| Size: 8.79 MB
Table of Contents
Table of Contents
3
1 Printer Functions
11
Overview
13
System Environment Requirements
14
Cable Connection Locations on this Machine
15
2 Printing in the Windows Environment
17
Preparation for Printing (Network Connection)
19
Overview
19
Before Installing the Printer Driver (for Administrators)
19
Preparation Flow
19
Checking the LAN Cable Connection
20
Checking the Network Settings
20
Configuring the Network Printing Environment
20
Allowing Device Information to be Acquired from the Printer Driver
21
Easy Installation Process of the Printer Driver
21
Installation Flow
21
Checking the Printer Driver Type
21
Checking the Operating Systems Supported by the Printer Driver
21
Installation Procedure
23
Configuring the Default Settings of the Printer Driver
24
Configuring the Optional Environment of this Machine
24
Changing the Default Print Settings
25
Preparation for Printing (USB Connection)
26
Overview
26
Easy Installation Process of the Printer Driver
26
Installation Flow
26
Checking the Printer Driver Type
26
Checking the Operating Systems Supported by the Printer Driver
26
Changing the Installation Settings (Windows 7 or Windows Server 2008 R2)
28
Installation Procedure
29
Configuring the Default Settings of the Printer Driver
30
Configuring the Optional Environment of this Machine
30
Changing the Default Print Settings
31
Printing Procedure
32
Printing Operation Flow
32
Easily Recalling Frequently Used Print Settings
33
Registering Frequently Used Print Settings
33
Customizing the Setting Window
34
Useful Printing Functions
36
Changing the Paper Size or Type
36
Enlarging or Reducing to the Paper Size ([Paper Size])
36
Enlarging or Reducing by the Desired Zoom Ratio ([Zoom])
37
Printing on Custom Size Paper ([Original Size])
38
Specifying the Paper Type ([Paper Type])
39
Specifying the Paper Tray ([Paper Tray])
40
Printing on Postcards
41
Printing on Paper in Multiple Trays ([Carbon Copy])
42
Printing Multiple Sets of Copies
43
Specifying the Number of Copies ([Copies])
43
Printing by Sets ([Collate]/[Offset])
44
Saving the Number of Printed Sheets
45
Printing Multiple Pages on the same Side of a Single Sheet ([Combination])
45
Printing on both Sides of Paper ([2-Sided])
46
Skipping Blank Pages ([Skip Blank
47
Binding Printed Sheets
48
Adding Margin on Pages ([Binding Margin])
48
Staple Papers ([Staple])
49
Binding in the Center of the Paper ([Center Staple and Fold])
50
Punching the Printed Sheets ([Punch])
51
Folding Papers ([Fold])
52
Printing in a Booklet Format ([Booklet])
53
Specifying the Output Tray ([Output Tray])
54
Adjusting the Layout
55
Printing a Poster-Sized Image ([Combination]) (PCL Only)
55
Rotating the Image 180 Degrees ([Rotate 180])
56
Fine-Tuning the Print Position ([Image Shift])
57
Adding Text or an Image to the Original
58
Adding a Watermark ([Watermark])
58
Registering/Editing a Watermark
59
Composing an Overlay Image ([Overlay])
60
Creating an Overlay Image in the Computer
62
Creating an Overlay Image in a Shared Folder
63
Adding the Print Date/Time or Page Number ([Date/Time]
64
Add Information to Header/Footer ([Header/Footer])
66
Deterring Unauthorized Copying
67
Printing a Concealed Security Watermark ([Copy Protect])
67
Printing a Stamp on the Entire Page ([Stamp Repeat])
68
Add Copy Restriction Information ([Copy Guard])
68
Add a Password ([Password Copy])
69
Configuring the Print Settings for Copy Security
70
Inserting Paper into the Original
72
Inserting Front and Back Covers ([Front Cover]/[Back Cover])
72
Inserting Front and Back Covers ([Front Cover from Post Inserter]/[Back Cover from Post Inserter])
73
Inserting Paper between Transparencies ([Transparency Interleave])
74
Inserting Paper between Transparencies ([Transparency Interleave:])
74
Inserting Paper into the Specified Pages ([Per
75
Specifying the Color and Image Quality
77
Selecting Colors for Printing ([Select Color])
77
Selecting Colors for Printing ([Select Color:])
77
Fine-Tuning the Image Quality According to the Original ([Quality Adjustment])
78
Selecting the Optimum Color Representation for the Original ([Color Settings])
79
Selecting the Optimum Color Representation for the Original ([Color Settings:])
79
Specifying the Graphic Pattern Density ([Pattern]) (PCL/XPS Only)
79
Specifying the Compression Ratio of Graphic Images ([Image Compression]) (PCL Only)
80
Making the Image Glossy ([Glossy Mode])
80
Preventing the Generation of White Space Around Images ([Auto Trapping]/[Black over Print]) (PS Only)
81
Saving Toner ([Toner Save])
81
Preventing the Generation of White Space Around Images ([Auto Trapping]/[Black over Print:])
81
Sharpening the Border between Text Etc. ([Edge Enhancement])
82
Specifying Font Processing ([Font Settings]) (PCL/PS Only)
83
Preventing Failure in Printing Thin Lines ([Thin Line Support]) (PCL Only)
84
Convert Colors According to the RGB Values of the Original. ([Convert to Gray Scale]) (PCL Only)
84
Using ICC Profiles (PS Only)
85
Specifying the ICC Profiles for Printing
85
Using ICC Profiles
85
Adding ICC Profiles to the Printer Driver
86
Printing Microsoft Excel/Powerpoint Data
87
Printing Multiple Excel Sheets at One Time (in 32-Bit System Environment Only)
87
Composing and Printing an Image Correctly in Powerpoint (for PCL/XPS in 32-Bit System Environment Only)
88
Previewing the Print Image (XPS Only)
89
Printing Options
90
Making a Trial Printing ([Proof Print])
90
Proof Print
90
How to Print from the Computer
90
Operations on this Machine
91
Printing Highly Confidential Documents ([Secure Print])
92
Secure Print
92
How to Print from the Computer
92
Operations on this Machine
93
Saving Originals in the Box on this Machine ([Save in User Box])
94
Save in User Box
94
Operations Required to Use this Function
94
How to Print from the Computer
94
Using Data Saved in a Box
95
Attaching Authentication Information
96
Printing When Authentication Is Set
96
Operations Required to Use this Function
97
How to Print from the Computer
98
Printing at the same Time as Authentication (ID & Print)
99
Printing at the same Time as Authentication ([ID&Print])
99
ID & Print
99
How to Print from the Computer
100
Operations on this Machine
101
Operations on this Machine (When an Authentication Unit Is Used)
101
Printing in the Single Sign-On Environment of Active Directory
102
Single Sign-On
102
Operations Required to Use this Function
102
Printing Procedure
103
Printing on Banner Paper
104
Printable Paper
104
How to Print on Banner Paper
105
Changing the Encryption Passphrase
107
Encryption Passphrase
107
Operations Required to Use this Function (for Administrators)
108
Setting the Printer Driver
109
Printing Procedure
110
Printing Using the PPD Driver for Applications
110
PPD Driver for Applications
110
Setting Items in the Printer Driver
111
Properties] Window of the Printer Driver
111
How to Display the [Properties] Window
111
Tabs Provided by Windows
111
Available Operations in the [Configure] Tab
112
Available Operations in the [Settings] Tab
113
Printing Preferences] Window of the Printer Driver
115
How to Display the [Printing Preferences] Window
115
Items Common to each Tab
116
Available Operations in [My Tab]
117
Available Operations in the [Basic] Tab
118
Available Operations in the [Layout] Tab
120
Available Operations in the [Finish] Tab
121
Available Operations in the [Cover Mode] Tab
122
Available Operations in [Cover Mode / Transparency Interleave]
123
Available Operations in the [Stamp/Composition] Tab
124
Available Operations in the [Quality] Tab
126
Available Operations in the [Other] Tab
128
Deleting the Printer Driver
129
Deletion Using the Deletion Program
129
Deletion Using the Installer
129
Appendix: Manual Installation Process of the Printer Driver
130
Checking the Connection Method
130
In Windows Vista/7/Server 2008/Server 2008 R2
130
In Windows Xp/Server 2003
131
Installation Using an Lpr/Port 9100 Connection
131
Operations Required to Use this Function (for Administrators)
131
In Windows Vista/7/Server 2008/Server 2008 R2
132
In Windows Xp/Server 2003
134
Installation Using a SMB Connection
135
Operations Required to Use this Function (for Administrators)
135
In Windows Vista/7/Server 2008/Server 2008 R2
135
In Windows Xp/Windows 2003
138
Installation Using an IPP/IPPS Connection
139
Operations Required to Use this Function (for Administrators)
139
In Windows Vista/7/Server 2008/Server 2008 R2
139
In Windows Xp/Server 2003
140
Installation Using a Web Service Connection
141
Web Service
141
Operations Required to Use this Function (for Administrators)
141
Installation Methods
141
Installation Using a USB Connection
143
In Windows Vista/7/Server 2008/Server 2008 R2
143
In Windows Xp/Server 2003
143
Updating the Printer Driver
144
Manually Deleting the Printer Driver
145
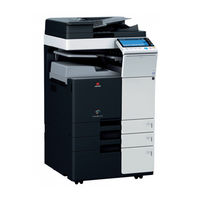
Olivetti d-Color MF282 Fax Manual (203 pages)
Brand:
Olivetti
| Category:
All in One Printer
| Size: 6.31 MB
Table of Contents
Table of Contents
3
1 Fax Functions
13
2 Setting up for Faxing (for the Administrator)
15
Preparation Flow
17
Operations Required to Use Fax Functions
18
Checking the Modular Cable Connection
18
Specifying the Type of Telephone Line
18
Making Preparations for Using the Machine in a Private Branch Exchange (PBX) Environment
18
Selecting a Receiving Method
18
Registering Header Position
18
Setting the Date and Time for the Machine
18
Option Settings
19
Registering Frequently Used Fax Numbers
19
Setting up the Usage of an Additional Line
19
Using an LDAP Server to Specify Addresses
19
3 How to Send a Fax
21
Sending (Basic Operation Flow)
23
Sending after Checking the State on the Recipient Side (Manual Transmission)
25
Manual Transmission
25
Faxing Manually
25
Checking the Finish before Sending
28
Sending a Fax by Recalling a Program
31
Fax/Scan Program
31
Registering a Fax/Scan Program
31
Sending a Fax by Recalling a Fax/Scan Program
33
Specifying a Destination
35
Selecting from Address Book
35
Specifying a Group Destination
36
Searching for a Destination
37
Direct Input
38
Selecting from the History
38
Searching for a Fax Number from the LDAP Server
39
Option Settings for Fax TX
40
Basic Option Settings
40
Scanning a Double-Sided Original ([Simplex/Duplex])
40
Specifying the Resolution to Scan the Original ([Resolution])
40
Specifying the Original Size ([Scan Size])
40
Settings to Scan Various Types of Originals (Application Settings)
41
Scanning Originals of Different Sizes at One Time ([Mixed Original])
41
Scanning an Original Thinner than Normal Paper ([Thin Paper Original])
41
Scanning a Folded Original ([Z-Folded Original])
41
Scanning a Long Original ([Long Original])
42
Specifying the Original Loading Direction ([Original Direction])
42
Specifying the Binding Position of the Original ([Binding Position])
42
Scanning While Removing Dust in the Slit Glass ([Despeckle])
42
Skipping Blank Pages ([Blank
43
Split the Left and Right Pages of a Book and Catalog ([Book Original])
43
Scanning a Number of Originals in Several Batches ([Separate Scan])
44
Adjusting the Image Quality or Density (Application Settings)
45
Selecting the Appropriate Image Quality for the Contents of the Original ([Original Type])
45
Specifying the Density to Scan the Original ([Density])
45
Adjusting the Background Density of the Original ([Bkgd. Removal])
45
Adding a Stamp or Page Number (Application Settings)
46
Add the Date and Time ([Date/Time])
46
Adding a Page Number
46
Adding a Stamp ([Stamp])
47
Adding the Header/Footer ([Header/Footer])
47
Printing TX Stamp on Scanned Originals ([TX Stamp])
48
Other Option Settings (Application Settings)
49
Scanning the Original by Erasing the Frame of the Original by the Specified Width ([Frame Erase])
49
Sharpen the Border between Text Etc. ([Sharpness])
49
Sending and Printing at a Time ([Save & Print])
49
4 Sending Options
51
Sending by Renaming the Sender ([Fax Header Settings])
53
Sender Information
53
Operations Required to Use this Function (for Administrators)
53
Operation Flow
54
Resending a Fax
55
Auto Resending (Auto Redial)
55
Manual Resending
56
Resending a Fax for Which the Fax Number Could Not be Redialed
57
Fax Retransmit
57
Operations Required to Use this Function (for Administrators)
57
Operation Flow
57
Sending a Fax at Preset Time ([Timer TX])
58
Timer TX
58
Operation Flow
58
Checking the Destination Fax Number before Sending a Fax ([Check Dest. and Send])
60
Check Dest. & Send
60
Operation Flow
60
Sending a Fax after Specifying a Relay Station ([F-Code TX])
61
Relay Distribution
61
Operation Flow
62
Sending a Confidential Fax ([F-Code TX])
63
Confidential Communication
63
Operation Flow
64
Sending a Fax Using an Additional Line ([Select Line])
65
Using an Additional Line
65
Operations Required to Use this Function (for Administrators)
65
Operation Flow
66
Sending a Fax after Canceling ECM Mode ([ECM])
67
Ecm
67
Operation Flow
67
Sending a Fax after Canceling the Super G3 Mode ([V.34])
68
V34
68
Operation Flow
68
Sending One Scanned Page at a Time ([Quick Memory Send])
69
Quick Memory TX
69
Operation Flow
69
Faxing Overseas ([Overseas TX])
70
Overseas TX
70
Operation Flow
70
Sending a Fax with a Password ([Password TX])
71
Password TX
71
Operation Flow
71
Registering a File for Polling ([Polling TX])
72
Polling TX
72
Operation Flow
73
Registering a File for Polling on the Bulletin Board ([Polling TX])
74
Polling TX (Bulletin Board)
74
Operations Required to Use Polling TX (Bulletin)
74
Operation Flow
75
5 How to Receive a Fax
77
Receiving Faxes Automatically (Using the Machine Solely for Fax Operations)
79
Auto Reception
79
Operations Required to Use this Function (for Administrators)
79
Manual Reception
80
Operations Required to Use this Function (for Administrators)
80
Operation Flow
81
6 Receiving Options
83
Printing by Adding the Date and Time Received ([Footer Position])
85
Reception Information
85
Operations Required to Use this Function (for Administrators)
85
Saving/Forwarding a Fax Which Cannot be Printed (In-Memory Proxy Reception)
86
In-Memory Proxy Reception
86
Forwarding Fax Received and Stored in the Memory (In-Memory Proxy Reception)
87
Automatically Sorting Incoming Faxes (TSI Routing)
89
TSI Routing
89
Operations Required to Use this Function (for Administrators)
89
Forwarding Received Faxes to Another Destination (Forward TX)
90
Forward TX
90
Operations Required to Use this Function (for Administrators)
90
Enforcing Saving of a Received Fax to a User Box (Memory RX)
91
Memory RX
91
Operations Required to Use this Function (for Administrators)
91
Printing a Received Fax
91
Receiving a Confidential Fax (Confidential RX)
92
Confidential Communication
92
Operations Required to Use Confidential RX
92
Printing a Received Fax
92
Using this Machine as a Relay Station (Relay RX)
93
Relay Distribution
93
Operations Required to Use Relay RX
93
Restricting Communication Peers by Password (Closed Network RX)
94
Closed Network RX
94
Operations Required to Use Closed Network RX
94
Receiving a Fax for Polling (Polling RX)
95
Polling RX
95
Operation Flow
95
Receiving a File Saved on a Bulletin Board (Polling RX)
96
Polling RX (Bulletin)
96
Operation Flow
96
Saving a Received Fax to a Specified User Box (PC-Fax RX)
97
PC-Fax RX
97
Operations Required to Use this Function (for Administrators)
97
Printing a Received Fax
97
Stopping the Fax Print During Lunch Breaks and at Night
98
Printing a Fax on both Sides of Paper ([Duplex Print (RX)])
99
Duplex Print (RX)
99
Operations Required to Use this Function (for Administrators)
99
Configuring the Fax Print Settings (for the Administrator)
100
Default Print Settings ([Print Paper Selection]/[Min. Reduction for RX Print])
100
Fixing the Print Paper Size ([Print Paper Size])
100
Fixing the Print Paper Tray ([Tray Selection for RX Print])
101
Splitting a Custom Size (Portrait) Fax for Printing ([Print Separate Fax
101
7 Printing Fax Reports
103
8 Managing Destinations
107
Registering Frequently Used Destinations (Address Book)
109
Address Book
109
Registering a Fax Destination
109
Registering Multiple Destinations as a Group (Create Group)
111
Group
111
Registering a Group
111
Registering Directly Entered Destinations in Address Book
113
Registering Directly Entered Destinations in Address Book
114
Exporting/Importing Destination Information (for the Administrator)
115
Exporting Destination Information
115
Importing Destination Information
115
Printing a Destination Information List (for the Administrator)
116
Printing a Destination List
116
Printing a Group List
117
Printing a Program List
118
Advertisement
Olivetti d-Color MF282 Quick Assist Manual (315 pages)
Brand:
Olivetti
| Category:
All in One Printer
| Size: 34.11 MB
Table of Contents
Table of Contents
3
1 About this Machine
9
Introduction to User's Guide
11
Quick Start Guide
11
2 Print
13
Q1. Can I Print Data on an Envelope or Postcard
15
Q1. Can I Print Data on an Envelope or Postcard
17
Q2. Although User Authentication Has Been Successful, the Input Screen in the Driver Is Grayed out
18
Q3. Can I Print on Custom Size Paper
19
Select [Bypass Tray] from [Paper Tray]
19
Click [Paper Settings for each Tray]
20
Select the Relevant Paper Type from [Paper Type] then Click [OK]
20
Click [OK]
20
Click [Print]
20
Q4. How Can I Print out Highly Confidential Data Without a Risk of Exposure to Others
21
Q5. Can I Directly Print a File in a USB Memory Device
24
Q6. Characters Become Garbled When I Print. Can I Print Without Garbled Characters Being Produced
26
Q7. How Can I Print out Data as Clearly as Possible
27
Q8. How Can I Change the Paper Size and Type Settings
28
Q9. Can Printing be Restricted by User
29
Q10. Are There any Paper-Saving Printing Methods
32
Q11. Can the Printing Position be Adjusted
33
Q12. What Types Are Available for Printing Finish
36
Operation Procedure
37
Q13. Can I Print the Cover and Chapter Cover on a Different Type of Paper
38
Q14. Can I Print Characters and Images so as to Have Them Overlapped
42
Q15. Can I Customize the Print Settings Window
46
Q16. Can I Print on very Long Sheets of Paper such as a Banner
50
Q17. Is It Possible to Configure so that Black-And-White Printing Is Always Enabled
53
3 Scan
55
Q1. What Types of File Formats Are Available for Scanned Images
57
Q2. Can I Use the Scanning Function by Connecting to the Network with a USB Cable
58
Q3. Can I Send Scanned Data to My PC Without Disabling the Firewall Setting
59
Q4. the FTP TX Function Does Not Work for Sending Data to a Destination
60
Q5. Can Frequently Used Destinations be Registered
61
Q6. How Can I Send Clear Images of Text in a Fine Font or of Photos
64
Q7. Can I Send Data in a Selected File Type or Color Mode
66
Q8. Can I Send Scanned Data with Page Numbers and a Time Stamp
68
Q9. the Back of the Original Can be Seen Through. How Can I Make Adjustment so that the Back May Not Bleed into the Scanned Image
70
Q10. Can I Scan the Original with Its Headers and Punch Holes Erased
71
Q11. Can I Send an E-Mail to a Number of Destinations at One Time
73
Q12. Can I Send Scanned Data by E-Mail
75
Q13. Can I Send Scanned Data to My Computer
76
Q14. Can I Check the Transmission Log for Scanning
77
4 Fax
79
Q1. Can Frequently Used Fax Numbers be Registered
81
Q2. Can I Check Fax Transmission and Reception Logs
84
Q3. Can I Send a Fax to a Number of Destinations at One Time
85
Q4. Can I Register more than One Sender Name to Appear on Faxes so that Different Ones Can be Used in Different Use Cases
87
Q5. How Can I Send Clear Faxes
89
Q6. Can I Send a Fax Upon Request from a Remote Machine
91
Q7. How Can I Cut down on Communications Fees for Sending out Data
92
Q8. Is It Possible to Cut down on the Communications Expenses by Using a Network
94
Q9. How Can I Avoid Printing out Unwanted Faxes
96
Q10. How Can I Send a Confidential or Important Document by Fax
98
Q11. Can I Forward an Incoming Fax
99
Q12. Can I Directly Fax a File on My Computer Without Leaving My Desk
100
Q13. We Are Using Two Fax Lines. Can I Select a Line When Transmitting a Fax
101
Q14. Can I Specify a File Format for Internet Fax or IP Address Fax Transmission
102
5 Copy
103
Q1. Can I Print on Paper of a Custom Size
105
Q2. the Orientation of the Image will Not Match that of the Original
109
Q3. Are There any Paper-Saving Copying Methods
111
Q4. How Can I Handle an Original that Contains too Many Pages to Load in the ADF
113
Q5. Can I Use a Magazine-Like Finish for a Copy Job
115
Q6. Can I Copy the Original with Its Headers and Punch Holes Erased
116
Q7. Is Enlarged or Reduced Copying According to the Paper Size Enabled
118
Q8. Can I Adjust the Copying Position to Make Filing Easier
119
Q9. Can I Erase Marks from Fold Lines When Copying a Book
120
Q10. Can I Copy the Right and Left Pages of Two-Page Spreads Like Books or Catalogs Onto Separate Sheets
121
Q11. Can I Use a Different Paper Type for the Covers
122
Q12. Can I Perform Copying with Stapling or Punching
123
Q13. Can I Use the Offset Function Without Installing a Finisher or Separator on the Machine
125
Q14. Can I Copy on an Envelope or Postcard
126
Q15. Can I Register Frequently Used Settings
130
Q16. Can I Check the Finish before Starting Copying
131
Q17. Can I Interrupt a Printing Job to Execute an Urgent Copy Job for Another Original
133
Q18. What Measures Can I Take against Unauthorized Copying
134
Q19. Can I Arrange so that the Margin Does Not Come out in Black When Copying with the ADF Opened
136
Q20. Can I Save Image Data after Copying Is Completed
137
Q21. Can I Copy with a Text such as "Private" or Date Added
139
Q22. Can I Add the Company Name or Its Logo to a Copy Job
142
6 User Box
145
Q1. Can I Rename a File Saved in a User Box
147
Q2. Can I Use a File Saved in a User Box by Changing the Settings from those Used When Saving It
148
Q3. Can I Save a 2-Sided Document in a User Box
151
Q4. Can a File in a User Box be Deleted Automatically
152
Q5. Can I Select Multiple Files from a User Box and Print or Send Them at a Time
153
Q6. Can I Print a Saved File by Changing Its Finishing
154
Q7. Can I Operate the User Box Functions from My Computer
157
7 Driver
159
Q1. Can more than One Computer Use the same Settings for the Printer Driver
161
Olivetti d-Color MF282 Reference Manual (119 pages)
Brand:
Olivetti
| Category:
Copier
| Size: 7.71 MB
Table of Contents
Table of Contents
3
1 Checking the Name and Function of each Part in this Machine (D-Color MF 552/452)
5
Front Side
7
Rear Side
9
Inside
10
2 Checking the Name and Function of each Part in this Machine (D-Color MF 362/282/222)
13
Front Side
15
Rear Side
16
Inside
17
3 Checking the Name and Function of each Optional Component
19
Checking the List of Optional Components (D-Color MF552/452)
21
Front Side
25
Rear Side
27
Checking the List of Optional Components (D-Color MF362/282/222)
28
Front Side
31
Rear Side
33
Finisher Fs-535/Saddle Stitcher Sd-512/Punch Kit Pk
35
Job Separator JS-602
37
Z Folding Unit zu
38
Post Inserter PI-505
40
Name and Function of each Part
40
Post Inserter Operations
41
Keys on Control Panel
41
Finishing Using Post Inserter
42
Finisher FS-533, Punch Kit PK-519
43
Job Separator JS-506
44
Finisher FS-534/Saddle Stitcher SD-511/Punch Kit PK-520
45
Large Capacity Unit LU-301/LU-204
48
4 Checking the Available Paper Types
49
5 Checking the Specifications of this Machine
53
Type of this Machine
55
Paper
55
Mechanical Specifications
57
Dual Scan Document Feeder (Only for D-Color MF552/452)
57
Operating Environment
58
Common Specifications
58
Copy Function
59
Scanner Functions
60
Printer Function
62
Network Function
65
6 Checking the Specifications of Optional Components
67
Fax Function (Fax Kit FK-511)
69
Reverse Automatic Document Feeder DF-624
70
Dual Scan Document Feeder DF-701
70
Paper Feed Cabinet PC-110
71
Paper Feed Cabinet PC-410
72
Large Capacity Unit LU-301
72
Large Capacity Unit LU-204
73
Finisher FS-535
73
Saddle Stitcher SD-512
76
Punch Kit PK-521
77
Job Separator JS-602
77
Post Inserter PI-505
78
Finisher FS-534
79
Saddle Stitcher SD-511
81
Punch Kit PK-520
82
Finisher FS-533
82
Punch Kit PK-519
84
Job Separator JS-506
84
Olivetti d-Color MF282 Operation Manual (83 pages)
Brand:
Olivetti
| Category:
Multifunction printer
| Size: 2.05 MB
Table of Contents
Table of Contents
3
1 PC-Fax TX
5
Outline of PC-FAX TX Function
7
System Environment Requirements
8
Printer Cable Connection to this Machine
9
2 Preparation for PC-Fax TX (Via Network Connection)
11
Overview
13
Before Installing the Fax Driver (for the Administrator)
14
Preparation Flow
14
Check the LAN Cable Connection
14
Check the Network Settings
14
Set up the PC-Fax TX Environment
15
Enabling Device Information to be Obtained from the Fax Driver
15
Quick Installation of the Fax Driver
16
Installation Flow
16
Check the Operating System (OS) Version that Supports the Fax Driver
16
Installation Procedure
17
Initialize the Fax Driver
18
Set the Optional Operating Environment of this Machine
18
Change the Default Print Settings
18
3 Preparation for PC-Fax TX (Via USB Connection)
19
Overview
21
Quick Installation of the Fax Driver
22
Installation Flow
22
Check the Operating System (OS) Version that Supports the Fax Driver
22
Changing the Installation Settings (Windows 7 or Windows Server 2008 R2)
22
Installation Procedure
23
Initialize the Fax Driver
24
Set the Optional Operating Environment of this Machine
24
Change the Default Print Settings
24
4 PC-Fax TX
25
Transmission Flow
27
The [FAX Transmission Popup] Screen
29
Opening the [FAX Transmission Popup] Screen
29
The [FAX Transmission Popup] Screen Options
30
Select a Recipient from the Phone Book
31
Select a Recipient from the Address Book of this Machine
32
Search for a Recipient from LDAP Server
33
Set the Fax Transmission Functions
35
Add a Cover Sheet
36
Call the Frequently Used Settings
37
Managing the Recipient Information by the PC (Using the Phone Book)
39
Register Recipients in the Phone Book
39
Search for Destination
41
Edit the Recipient Information
43
Change the Recipient Group
43
Changing a Group Name
44
Control the Recipients Using Folders
44
5 Sending Options
45
Send a Fax with a Cover Sheet
47
Sending a Fax at Preset Time (Timer TX)
50
Timer Transmission
50
How to Send
50
Sending a Confidential Fax (Confidential Communication)
51
Confidential Communication
51
How to Send
51
Sending a Fax Via Relay Station (Relay Distribution)
52
Relay Distribution
52
How to Send
52
Send a Fax with Authentication Information
53
Fax Transmission for Authentication Setup
53
Operations Required to Use this Function
53
How to Send
54
Olivetti d-Color MF282 Maintenance Manual (51 pages)
Brand:
Olivetti
| Category:
Printer
| Size: 11.26 MB
Table of Contents
Table of Contents
3
1 Adding Paper
5
Paper Addition Message
7
Adding Paper
7
Confirm the Available Paper Types
8
Adding Paper into Tray1 or Tray4
8
Adding Paper into the LCT (Built-In)
8
Adding Paper into the Bypass Tray
8
Adding Paper into the Large Capacity Unit (D-Color MF552/452)
8
2 Checking Consumables Status
9
Consumables Replacement Message
11
Checking the Consumption Level
13
3 Replacing Consumables
15
Replacing a Toner Cartridge
17
D-Color MF552/452
17
D-Color MF362/282/222
18
Replacing a Waste Toner Box
19
D-Color MF552/452
19
D-Color MF362/282/222
20
Replacing a Drum Unit
22
D-Color MF552/452
22
D-Color MF362/282/222
23
Replacing a Staple Cartridge
25
Finisher FS-535 (Only for D-Color MF552)
25
Saddle Stitcher SD-512 (Only for D-Color MF552)
26
Finisher FS-534
27
Saddle Stitcher SD-511
28
Finisher FS-533
29
Punch Scrap Processing
30
Finisher FS-535 (Only for D-Color MF552)
30
Z Folding Unit ZU-606 (Only for D-Color MF552)
31
Finisher FS-534
32
Finisher FS-533
33
4 Checking Counters
35
Checking Counters
35
Details of Counter
39
Meter Count
39
Copy Counter
40
Print Counter
41
Scan/Fax Counter
42
Other Counters
43
Checking the Total Number of Printed Pages in this Machine
44
5 Cleaning this Machine
45
Cleaning the Slit Scan Glass
47
Cleaning the Slit Scan Glass (Back)
48
Cleaning the Original Glass, Control Panel, Roller, and Output Belt
49
Advertisement
Related Products
Olivetti d-Color MF452
Olivetti d-Color MF362
Olivetti d-Color MF222
Olivetti d-COLORP2230
Olivetti d-Copia4501MF
Olivetti DP N32
Olivetti DP N24
Olivetti DP N40
Olivetti DR N17
Olivetti DP
Olivetti Categories
All in One Printer
Printer
Cash Register
Copier
Fax Machine
More Olivetti Manuals
Login
Sign In
OR
Sign in with Facebook
Sign in with Google
Upload manual
Upload from disk
Upload from URL