Sign In
Upload
Manuals
Brands
Korg Manuals
Voice Recorder
D3200
Korg D3200 Manuals
Manuals and User Guides for Korg D3200. We have
2
Korg D3200 manuals available for free PDF download: Owner's Manual, Easy Start
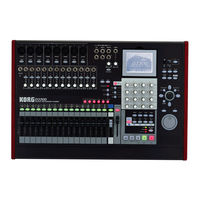
Korg D3200 Owner's Manual (200 pages)
Korg Owner's Manual Digital Recording Studio D3200
Brand:
Korg
| Category:
Recording Equipment
| Size: 7.24 MB
Table of Contents
Important Safety Instructions
2
Handling of the Internal Hard Disk
3
Data Handling
3
Copyright Warning
3
Cautions When Using the CD-R/RW Drive
4
Printing Conventions in this Manual
4
Table of Contents
5
Introduction
11
Included Items
11
Before Using the D3200 for the First Time
11
Power On/Off
11
Setting the Calendar
12
Connection Example
13
Main Features
14
Parts and Their Function
16
Top Panel
16
Rear Panel
21
About the CD-R/RW Drive
22
Items and Functions in the LCD Screen
23
Basic Operation
25
Examples of Operation
27
Quick Start
28
Step 1: Preparations
28
Connections
28
Turn the D3200 on
28
Listen to the Demo Song
29
Step 2: Quick Recording
30
Create a New Song
30
Name the Song
30
Connect Your Audio Sources to the Mixer Inputs
31
Connect Mics and Instruments to the INPUT Jacks
31
Assign the Inputs to Channels
32
Adding EQ and EFFECTS
33
Applying EQ to the Input Sound
33
Applying Effects to the Input Sound
34
Recording
35
Preparations for Recording
35
Start Recording
36
Playback
36
Step 3: Overdubbing
37
Recording
37
Preparations for Recording
37
Start Recording
37
Playback
37
Step 4: Mixdown and Mastering
38
Applying Effects and EQ to Individual Channels
38
Applying Effects to Individual Channels/Tracks (Insert Effect)
38
Applying EQ to each Channel/Track
38
Adjusting the Pan
39
Using the Channel/Track Sends to Apply Effects (Master Effects)
39
Selecting a Master Effect
39
Adjusting the Master Effect 1 Send Amount for each Track
40
Checking and Adjusting the Master Effect
40
Applying Final (or Mastering) Effects and EQ to the Entire Song
41
Set the Meters to Display the Post Fader Levels
41
Applying an Effect to the Master Bus (Final Effect)
41
Applying EQ to the Master Bus (Master
42
Recording the Master Track
43
Writing to a CD
44
Saving Your Song
44
Operation
45
Song, Locate
45
Selecting/Creating a Song
45
Creating a New Song
45
Renaming a Song
46
Using the Name Library
46
Selecting a Song
46
Selecting a Song from Another Song Drive
46
Selecting a Song from the Song List
46
Location
47
Switching the Counter Display
47
Switching the Information Display Area
47
Moving to a Different Location
48
Assigning Locations to the Locate Keys
48
Moving to a Point Earlier in the Song (Rewind)
48
Moving to a Point Later in the Song (Fast-Forward)
48
Moving to the Beginning of the Song
48
Moving to the Beginning/End of the Song
48
Moving to the End of the Song
48
Using the Counter to Move
48
Using the FF and REW Keys to Move
48
Using the Locate Keys to Move
48
Deleting a Mark
49
Moving to the Location Assigned to a Mark
49
Renaming a Mark
49
Using the MARK Keys to Move
49
Finding a Precise Location (SCRUB)
50
Finding a Zero-Cross Point
50
Song Editing
51
Song Editing Procedure
51
Copying a Song
51
Deleting a Song
51
Moving a Song
51
Protect off
52
Protect on
52
Protecting a Song
52
Saving a Song
52
Mixer
52
Inputting Audio to the Mixer
52
Analog Input
52
Inputting Audio from a Guitar
52
Using the Tuner
53
Digital Input
54
Inputting the Digital Audio Signal from a MD or DAT
54
Sub Input
54
Audio Outputs from the Mixer
54
Mixer Settings
55
Adjusting the Volume
55
Adjusting the Overall Volume Level
55
Adjusting the Volume Level of each Channel
55
Inputting a Source at the Maximum Level
55
Adjusting the Pan
55
EQ (Equalizer)
55
Applying EQ to an Audio Input
55
Channel EQ
55
Applying EQ to the Playback
56
Master EQ
56
EQ Library (Storing and Recalling EQ Settings)
56
Recalling EQ Settings
56
Storing EQ Settings
56
Pairing
56
Group Settings
57
CH on Groups
57
Fader Groups
57
Monitor Settings
57
Adjusting the Cue Level
58
Solo Settings
58
Cancelling solo
58
Sending the Soloed Audio from the Master Bus
58
Soloing Just One Channel
58
Soloing more than One Channel
58
Muting a Channel
58
Mixer Setup
59
Recalling a Mixer Setup
59
Storing a Mixer Setup
59
Storing/Recalling a Scene
60
Storing a Scene
60
Recalling a Scene
60
Renaming a Scene
60
Deleting a Scene
60
Editing and Overwriting a Scene
61
Specifying Parameters that will be Disabled for an Individual Scene
61
Specifying Parameters that will be Disabled for All Scenes
61
Controlling Scenes Via MIDI
61
MIDI Input
61
MIDI Output
61
Automation
62
Scene Automation
62
Editing the Location of a Stored Scene
62
Storing a Scene at a Different Location
62
Using Scene Automation
62
Event Automation
62
Recording Mixer Operations
62
Editing Events
63
Playing Back the Events
63
Effects
64
Effect Type and Size
64
How DSP Power Is Allocated to the Effects
64
Using Insert Effects
65
Applying Insert Effects During Recording
65
Applying Insert Effects During Playback
65
Using Master Effects
65
Using the Final Effect
65
Editing the Effects
66
Editing the Effect Parameters
66
For a Master Effect or Final Effect
66
For an Insert Effect
66
Storing an Effect Program
66
Controlling Effects from an External Device
67
Using External Effects
67
Creating a Drum Track for an Entire Song (Pattern Map)
68
Auditioning the Pattern Map
69
Session Drums
68
Listening to Drum Patterns
68
If You've Selected Metronome as the Group
68
Recording with Session Drums
69
Recording Additional Tracks as You Listen to the Drum Track
69
Recording Patterns on a Track
69
Recording Session Drums to a Channel Track
69
Recording Directly to the Master Track
70
Editing a Drum Kit
70
Selecting a Drum Kit
70
Editing the Sound of a Drum Kit
70
Preserving Drum Kit Changes and Drum Sound Edits
70
Pattern Maps
71
Creating a Pattern Map
71
Editing a Pattern Map
72
Deleting an Event
72
Inserting a New Event into the Pattern Map
72
Overwriting a Portion of an Existing Event
72
Replacing an Event
72
Tempo
72
Playing the Entire Song at the same Tempo
72
Changing the Tempo During the Song
73
The Song Guide Function
73
Tempo Track
73
Recording MIDI Clock Data from an External MIDI Sequencer, and Using It as the Tempo Track
73
Tap Tempo
73
Pattern Map Tempo
74
Recorder
74
Recording
74
Bounce Recording
74
Basic Recording
74
Switching Virtual Tracks
75
Overdubbing (Recording Additional Tracks During Playback)
75
Trigger Recording
75
Punch-In Recording (Re-Recording a Specific Area)
76
Auto Punch-In/Out
76
Manual Punch-In/Out
76
Using a Foot Switch for Manual Punch-In/Out
76
Loop Recording
77
Creating a Master Track
77
Playback
78
Normal Playback
78
Loop Playback
78
Playing Back an Album CD Project
79
Track Editing
79
Registering the Edit Region
79
Track Editing Procedures
79
Copy a Track (Copytrk)
79
Copying Tracks Within the same Song
79
Using the Clipboard to Copy Data to Another Song
80
Insert Blank Space (Inserttrk)
81
Delete a Track (Deletetrk)
82
Deleting All Data of a Track
82
Deleting Track Data
82
Erase a Track (Erasetrk)
82
Exchange Tracks (Swaptrk)
83
Reverse a Track (Reversetrk)
83
Expand/Compress a Track (Expcmptrk)
84
Optimizing a Track (Optimizetrk)
84
Copy an Entire Track/Copying to a Virtual Track (Copywholetrk)
85
Copying to a Virtual Track
85
Creating a Fade-In
86
Exchange Two Entire Tracks (Swapwholetrk)
86
Fade-In/Fade-Out (Fadetrk)
86
Swapping Entire Tracks
86
Boosting the Maximum Volume to the Specified Level (Normalize: Normalizetrk)
87
Creating a Fade-Out
87
Eliminating Noise (Noisereduction)
88
Erasing Punch Noise (Erasepunchnoise)
88
Erase a Silent Region (Erasesilence)
89
Naming a Track
89
Track at Once
89
Disc at Once
90
Album CD Project
90
Creating a Live CD
92
Ripping a CD
92
Data
93
Backing up and Restoring
93
Backing up
93
Backing up 1Song
93
Backing up All Data
94
Backing up User Data
94
Restoring Backed-Up Data
95
Audio Files
96
Importing an Audio File
96
Importing an Audio Track into the Beginning of a Track
96
Importing an Audio File into the Middle of a Track
97
Exporting an Audio File
97
Exporting Multiple Audio Files
98
Drive and Data Compatibility with the Digital Recording Studio Series
98
Using D32XD and D16XD Data
98
Using D3200 Data on a Different Model
98
Using Data from a Different Model on the D3200
98
Drive
99
Specifying the Drive Size
99
Partitioning the Hard Drive into Separate Song Drives (Partitions)
99
Specifying the PC Drive Size
99
Renaming a Song Drive
100
Checking the Hard Disk
100
Formatting the Hard Disk
100
Load System
101
Creating a System Recovery CD
101
Drive Capacity
101
To Keep Only the Audio Data that You Are Actually Using
101
To Erase a and B that Remain from the First Take, and Recover Disk Space
102
Deleting the Undo Data
102
Sharing Event Data
102
PC Drive
102
Checking, Renaming, or Deleting Files
102
Usb
103
Saving/Loading
103
Windows Users (Windows Me/2000 or Later)
103
Macintosh Users (Mac OS9.0.4 or Later)
103
MIDI
104
MIDI Connections
104
MIDI Channel Settings
104
MIDI Messages Used by the D3200
104
About the MIDI Implementation Chart
104
Using MIDI
104
Controlling the D3200 from a MIDI Sequencer
104
Synchronizing Two D3200 Units
105
Using MIDI to Control the Mixer
105
Upgrading the System
106
Downloading the Operating System
106
Upgrading Via CD-ROM/R/RW
106
Upgrading Via USB
106
Using a Recovery CD to Recover the System
106
Preserving Non-System Data When You Recover
106
If an Error Appears and the Recovery Is Unsuccessful
106
Clickpoint Calibration
107
Reference
108
Counter
108
Counter Display
108
Rename
109
Editing a Name
109
Meter
109
Meter/Track View
109
Mixer
110
2A. CH Input/Submixer
111
2A-1. Channel Assign
111
2A-2. Sub Mixer 1-4
111
2A-3. Sub Mixer 5-8
111
2A-4. Sub Mixer 9-12
111
2B. PAIR/GROUP
112
2B-1. Channel Pair
112
2B-2. Fader Group
112
2B-3. Channel on Group
112
2C. FADER/PAN/AUTOMATION
113
2C-1. Fader Pan
113
2C-2. Automation
113
2C-3. Event List
114
2C-4. Edit Scene
115
2C-5. Scene Filter
116
2C-6. Mixer View
116
2D. EQ/ATT/PHASE
117
2D-1. EQ/ATT
117
2D-2. EQ Library
117
2D-3. Phase
118
2D-4. Master EQ
118
2E. SEND (EFF/AUX/REC)
119
2E-1. Effect 1 Send
119
2E-2. Effect 2 Send
119
2E-3. Aux1 Send
119
2E-4. Aux2 Send
119
2E-5. Rec Send
120
2F. SOLO/MONITOR
120
2F-1. solo
120
2F-2. Monitor
121
2F-3. Cue Level
121
2G. MIXER SETUP
121
Ch View
122
Channel Routing View
122
Effect
123
Effect Routing
123
Insert EFF
124
Master EFF1
125
6 Eq
126
Master EFF2
126
Final EFF
126
Send
126
Pan
126
Song
127
System/MIDI
129
Control
129
Disk Utility
130
Edit PC File
132
Backup
133
Restore
133
MIDI/MMC
134
Track
136
Virtual Track 1-32
136
Master Track
136
Edit Track
136
Import File
145
Export File
146
11 CD
148
11A. Album CD
148
11B. Track at Once
149
11C. CD PLAYER
150
Undo
151
Tuner
151
Session Drums
152
Drums Track Mixer
153
Pattern Map
154
Tempo Track
155
Store
155
Scene
155
Mark
155
Scrub
156
Loc 1/In
157
MIXER Navigation Tools
157
Rec/Play Mode
157
Rec Mode
157
Play/Stop Mode
159
Transport Keys
159
Effect Parameters
160
Algorithm List
160
Program List
160
About the Effect Algorithms
162
Stereo-Type
162
Category: Reverb&Delay Reverb/Delay-Type Effects
162
Category: Modulation&Pitch Modulation/Pitch-Type Effects
165
Category: Dynamics&Filter Dynamics/Filter-Type Effects
166
Category: Sfx&Etc Sfx/Etc Effects
168
Monaural-Type
169
Category: Reverb&Delay Reverb/Delay-Type Effects
169
Category: Modulation&Pitch Modulation/Pitch-Type Effects
170
Category: Dynamics&Filter Dynamics/Filter-Type Effects
171
Category: Sfx&Etc Sfx/Etc Effects
172
Category: Multi Multi Effect
173
Appendices
174
Troubleshooting
174
Power Does Not Turn on
174
Nothing Appears in the Display
174
Vertical Lines Are Visible in the Display
174
No Sound
174
Faders Don't Work
174
Can't Record
175
Can't Use Digital Input
175
Playback Level Is Lower than the Level During Recording
175
The Input or Recorded Sound Is Noisy or Distorted
175
Effects Do Not Apply
175
Session Drums
176
A Key Does Not Function When Pressed
176
MIDI
176
CD-R/Rw
177
Audio Files
177
Usb
177
Startup
177
Various Messages
178
Confirmation Messages
180
Serious Error Messages
180
More about Drives and Files
181
Drives
181
CD-R/RW Drive
181
PC (USB) Drive
181
Audio Cds and Files
182
Audio Cds
182
Creating an Audio CD
182
Playing an Audio CD
182
Files
182
Writing
182
Loading
183
Specifications
184
Main Sections
184
Principal Specifications
184
Analog/Digital Input and Output Specifications
185
Included Items
185
Separately Sold Options
185
Various Lists
186
Drum Pattern List
186
EQ Library List
187
Name Library List
187
Demo Song List
187
Shortcut Keys
188
Glossary
189
Index
194
Block Diagram
198
MIDI Implementation Chart
199
Advertisement
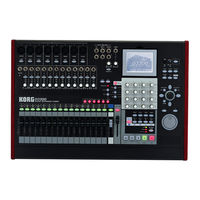
Korg D3200 Easy Start (10 pages)
DIGITAL RECORDING STUDIO
Brand:
Korg
| Category:
Voice Recorder
| Size: 0.15 MB
Table of Contents
D3200 Main Features
1
Contents
1
Getting Started - Connections
2
Getting Around on the D3200
2
A few Words on Clickpoint
2
The Knob Matrix
2
Modes and Features Tour
3
The [CH VIEW] Key
3
The [METER] Key
3
D3200 Automation
4
Scene Automation
4
Event Automation
4
Recording Automation on a Track
4
[EFFECT] & [EQ] Keys
5
The [MIXER] Key
5
The [Session Drums] Key
5
Creating and Working with a New D3200 Song
5
Create a New Song
6
Assign an Input
6
Assign Effects and EQ to the Input
6
Build a Drum Track with Session Drums
7
Record Your Input While Monitoring the Drums
7
Mixdown and Master Your Song
7
Create an Audio CD of Your Song
8
Backup Your Data to Computer Using USB
8
Now to Backup Your “QUICKTOUR” Song
8
D3200 Shortcut Keys
9
Here Are a few Shortcut Keys to Check out
9
Important D3200 Owner’s Manual References
9
Advertisement
Related Products
Korg D4
Korg D1600
Korg D32XD
Korg D16
Korg DS-8
Korg DW-8000
Korg Delta
Korg DSM-1
Korg drumlogue
Korg DS-DAC-100
Korg Categories
Synthesizer
Musical Instrument
Recording Equipment
Tuner
Electronic Keyboard
More Korg Manuals
Login
Sign In
OR
Sign in with Facebook
Sign in with Google
Upload manual
Upload from disk
Upload from URL