Table of Contents
Advertisement
Advertisement
Table of Contents

Related Manuals for Marantz SR4400


Summary of Contents for Marantz SR4400
- Page 1 Model SR4400 User Guide AV Surround Receiver...
- Page 2 L'attestation d'achat est la preuve permanente como referencia cuando tenga que hacer uso del d'un achat de valeur. La conserver en lieu sur pour seguro o se ponga en contacto con Marantz. SVENSKA s'y reporter aux fins d'obtention d'une couverture...
- Page 3 - Blockera inte öppningarna i ytterhöljet under Français toestel is. pågående drift. Le SR4400 est conforme à la directive EMC et à la directive sur les basses tensions. - Stick inte in föremål under enheten. Deutsch Español - Blockera inte ventialtionshålen ovanpå enheten.
-
Page 4: Table Of Contents
CONNECTING VIDEO COMPONENTS ...... 12 requirements that exist in your area. • Be sure to unplug the power cable from the AC SR4400 can be powered by 230 V AC only. outlet or turn off the POWER switch before RDS OPERATION ............28 ADVANCED CONNECTING ........ -
Page 5: Installation
I f t h i s u n i t o r a n o t h e r e l e c t r o n i c d e v i c e incorporating a microcomputer is used at the decoding technology that provides better spatiality Thank you for purchasing the Marantz SR4400 same time with the tuner or television, picture Neo:6 offers several important improvements as and directionality on Dolby Surround program Surround receiver. -
Page 6: Features
limitations of the speakers by full octave. FEATURES SOURCE DIRECT MODE ACCESSORIES SRS Circle Surround II, SRS Dialog, SRS Source Direct mode bypasses, tone controls and TruBass, SRS and symbol are trademarks BUILT-IN 6 CHANNEL POWER AMPLIFIER bass management for purest audio quality. Remote Controler RC5400SR of SRS Labs, Inc. -
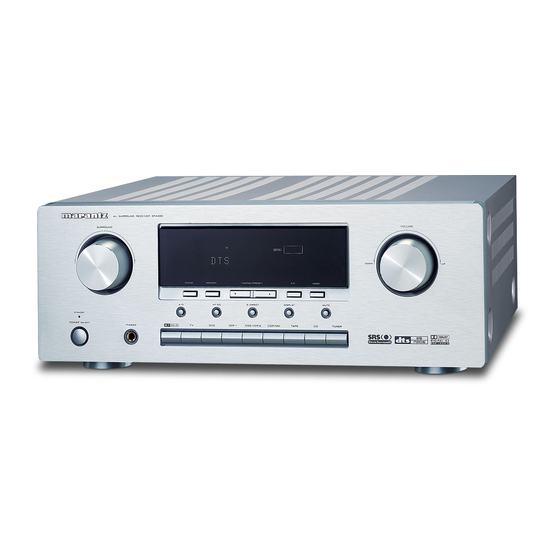
Page 7: Front Panel
PHONES jack for stereo headphones POWER switch and STANDBY indicator TUNING UP / DOWN buttons This jack may be used to listen to the SR4400’s MUTE button Press the button to turn the power ON, and press Press thses buttons to change the frequency or output through a pair of headphones. -
Page 8: Rear Panel
MODEL NO. SR4400 NO. SR4400 This indicator lights up when the 6.1CH-IN has been selected as a input source. ¡5 SERIAL NO. NIGHT mode indicator This indicator lights when the SR4400 is in the DIG.OUT DIG.OUT DIG.OUT DIG.OUT SURROUND SURROUND... -
Page 9: Remote Control Operation
“Y” connector to compact disc, LD, DVD, or other digital source Press to switch the power of the SR4400 ON or OFF the subwoofer output jack and run one cable from The provided remote control unit is a universal re- component. -
Page 10: Programming The Remote Controller
When the input signal is too high and the voice dis- ¤0 S- ( Source) DIRECT button torts even by throttling the SR4400 VOLUME con- • If the indicator did not blink twice, then repeat When this button is pressed, the tone control trol, turn on this function. -
Page 11: Operation Of Remote Control Unit
AUTO TUNER TAPE CDR/MD NIGHT CSII EX/ES TUNER TAPE CDR/MD SR4400 should be less than about 5 meters. If the NIGHT CSII EX/ES DISPLAY M-CH ST STEREO 6.1CH IN transmitter is pointed to a direction other than the DISPLAY M-CH ST STEREO 6.1CH IN... -
Page 12: General Infromation Of Rc5400Sr To Sr4400
THE CONTRABLE FUNCTION TABLE GENERAL INFROMATION OF RC5400SR TO SR4400 To control the SR4400 by your RC5400SR, you have to select the device AMP or TUNER by function POWER selector button. Please refer as below for the deatails in AMP and TUNER mode. -
Page 13: Connections
Surround left and right speakers CONNECTIONS CONNECTING SPEAKERS Place the speakers right beside of the listening position or a little forward. Do not place the speakers backward of the listening position. SPEAKER PLACEMENT Surround back speaker The ideal surround speaker system for this unit is Place the speaker behind of the listening position. -
Page 14: Connecting Audio Components
The output audio signal from the TAPE OUT jack CONNECTING SPEAKER WIRE CONNECTING AUDIO COMPONENTS and the CD-R/MD OUT jack is the sound source Strip away approx. 10 mm of wire insulation. currently selected. TAPE DECK Twist the bared wire ends tight to prevent CD PLAYER Caution: short circuits. -
Page 15: Connecting Video Components
VIDEO, S-VIDEO JACKS CONNECTING VIDEO COMPONENTS There are two types of video jacks on the rear MONITOR panel. VIDEO jack The video signal for the VIDEO jacks is the DVD PLAYER conventional composite video signal. SATELLITE TUNER S-VIDEO jack The video signal is separated into luminance(Y) and color(C) signals for the S-VIDEO jack. -
Page 16: Advanced Connecting
Surround this terminal. Therefore you need to aim the Left Right EXTERNAL INTERNAL remote signal only to the unit. Also, if a Marantz power amplifier (some models excluded) is Surround connected with this terminal, the power amplifier’s Back standby function is synchronized by pressing the... -
Page 17: Connecting The Antenna Terminals
ASSEMBLING THE AM LOOP ANTENNA CONNECTING AN FM OUTDOOR ANTENNA CONNECTING THE ANTENNA TERMINALS Release the vinyl tie and take out the Notes: connection line. • Keep the antenna away from noise sources (neon Bend in the reverse direction. signs, busy roads, etc.). Inserting into the hole to attach the loop •... -
Page 18: Setup
SETUP MENU SYSTEM D-1AUTO CD-R (CD-R/MD) /D3AUTO / D4 AUTO (DigitalAUTO mode) ANALOG The SR4400 incorporates an menu on the front DIG.1 / DIG.2 / DIG3. / DIG4 DIG-2 AUTO DSS (DSS/VCR2) display, which makes various operations possible (Digital Fixed mode) -
Page 19: Simple Setup
• DIG.1 to DIG.4 : Digital FIXED mode 3.0 ch LARGE SMALL NONE NONE NONE 4.0 (ch) The SR4400 chooses a digital input regardless of 2.1 ch LARGE NONE NONE NONE a input signal from the selected source. MAIN 4. 5. -
Page 20: Speaker Setup
This is important for the timing of the acoustics to of size to each speaker. return the SETUP MAIN MENU. create the proper sound space that the SR4400 • Same digital input function cannot be set. In this If you finish these setup, press the and today’s sound systems are able to produce. - Page 21 L&R : SW : SPEAKERS LEVEL Using the cursor buttons, adjust the Set the distance from the front left and right Set the distance from the subwoofer to your volume level of the noise from the center Here you will set the volume for each speaker so speakers to your normal listening position normal listening position between 1 and 30 feet speaker so that it is the same level as the front...
-
Page 22: Preference
• Speakers that you selected “None” for in the each channels. If the front speaker size is set to In this mode, the SR4400 includes three controls Speaker Size Setup menu will not appear. “Large”, subwoofer output is only the LFE signal to fine-tune the sound-field as follow. -
Page 23: Cs Ii (Circle Surround Ii)
Note: TRUBASS: Select “6. 6.1 CH IN” in SETUP MAIN MENU 7. SURROUND Set the TRUBASS level between 0 and 6 level in with cursor button. • When Center speaker is set ”None”, then 1 level interval with cursor button. This sub menu is to adjust channel levels for each C.WIDTH is set “7”. -
Page 24: Basic Operation (Play Back)
To temporarily silence all speaker outputs such as • The volume can be adjusted within the range of – ∞ • As the input is changed, the SR4400 will MAIN MENU Speaker Level. (Page 18) when interrupted by a phone call, press the MUTE to + 18 dB, in steps of 1 dB. -
Page 25: Night Mode
DTS-ES Matrix-encoded program sources from The sleep time will be shown for a few seconds in DVD, etc.. The SR4400 is equipped with many surround the display on the front panel, and it will count Dolby Pro Logic II brings the excitement of DTS-ES Discrete 6.1 features digital discrete... - Page 26 Center = Large, Surround L/R = Large and Circle Surround is designed to enable multi- * Connected DVD-player, laser-disc player or CD- mode knob on SR4400 or the remote control unit. Subwoofer = yes automatically. Tone controls channel surround sound playback of non-encoded player needs to support DTS-digital output.
- Page 27 Output Channel Front information display Surround Mode Input Signal Decoding SB SW Dot matrix display Signal format indicators Channel status AUTO Dolby Surr. EX Dolby Digital EX O O DOLBY D EX 2 DIGITAL, EX L, C, R, SL, SR, S, LFE Dolby D (5.1ch) Dolby Digital 5.1 O DOLBY D...
-
Page 28: Other Function
MEMORY TUNING/PRESET MODE Dolby Pro Logic Mode, or while decoding Dolby HT-EQ S-DIRECT DISPLAY MUTE This jack may be used to listen to the SR4400’s SETUP/ MENU OFF AV SURROUND RECEIVER SR4400 AV SURROUND RECEIVER SR4400 MAIN T.TONE CH-IN CH-IN... -
Page 29: Basic Operation (Tuner)
MANUAL TUNING (FM) TUNING MODE (AUTO STEREO OR MONO) BASIC OPERATION SETUP/ MENU OFF T.TONE S-DIRECT AUTO 2. 1. VCR1 DSS/VCR2 (TUNER) AV SURROUND RECEIVER SR4400 AV SURROUND RECEIVER SR4400 SURROUND NIGHT CSII EX/ES TUNER TAPE CDR/MD DISPLAY M-CH ST STEREO 6.1CH IN... - Page 30 You can remove preset stations from memory button . wait for a few seconds. using the following procedure. If no button is pressed during this period, the AV SURROUND RECEIVER SR4400 AV SURROUND RECEIVER SR4400 SURROUND SURROUND current station is memorized in location Preset...
-
Page 31: Rds Operation
PTY AUTO SEARCH To move back and forth between the RDS OPERATION NUMBER DISPLAY PROGRAMME TYPE characters, press the TUNING button or Your receiver is equipped to automatically search Pop Music Now in use in many countries, RDS (Radio Data press ¢... -
Page 32: Troubleshooting
Surround mode is not EX/ES mode. Set surround mode EX/ES. • In case a power outage occurs or the power The SR4400 is turned on, press and hold the cord is accidentally unplugged, the SR4400 CLEAR and MEMORY buttons simultaneously for Surround back = NONE has been Make the correct setting. -
Page 33: Technical Specifications
TECHNICAL SPECIFICATIONS DIMENSION FM TUNER SECTION VIDEO SECTION Frequency Range ........87.5 - 108.0 MHz Television Format ..........NTSC/PAL Usable Sensitivity ........IHF 1.8 µV/16.4 dBf Input Level/Impedance ........1 Vp-p/ 75 ohms Output Level/Impedance ....... 1 Vp-p/ 75 ohms Signal to Noise Ratio ...... -
Page 34: Setup Codes
Magnavox ........0749, 0751 Magnavox ........0184, 0332 Electroband ........... 0027 Sony ............1517 Memorex ..........0751 Marantz ..0056, 0184, 0207, 1207, 0999, Emerson ..0046, 0181, 0204, 0205, 0206, Yamaha ..........1915 Next Level ..........0896 Mission ..........0184 0207, 0263, 0490, 0650, 0651 Panasonic .......... - Page 35 Audiovox ..........0064 Magnin ..........0267 KEC ............0207 Samsung ..0046, 0057, 0083, 0087, 0205 Beaumark ..........0267 Marantz ......0062, 0108, 1408 KTV ..........0057, 0207 Sansei ........... 0478 Bell & Howell ......... 0131 Marta ............. 0064 Kenwood ........0046, 0057 Sansui ...........
- Page 36 Totevision ........0064, 0267 Kenwood ........0561, 0709 Unitech ..........0267 Magnavox ........0530, 0702 Vector ............ 0072 Marantz ..........0566 Video Concepts ........0072 Mitsubishi ..........0548 Videosonic ..........0267 Onkyo .......... 0530, 0654 Wards ... 0027, 0062, 0069, 0074, 0075, Optimus ..........
- Page 37 You can find your nearest authorized distributor or dealer on our website. JAPAN Marantz Japan, Inc. 35-1 Sagami Ohno 7-Chome, Sagamihara-shi, Kanagawa 228-8505, Japan U.S.A. Marantz America, Inc. 1100 Maplewood Drive, Itasca, IL 60143, U.S.A. EUROPE Marantz Europe B.V.