Samsung MC32J7055C Series User Manual
Hide thumbs
Also See for MC32J7055C Series:
- User manual (84 pages) ,
- User manual (420 pages) ,
- User manual (48 pages)
Table of Contents
Advertisement
Quick Links
Advertisement
Table of Contents

Related Manuals for Samsung MC32J7055C Series


Summary of Contents for Samsung MC32J7055C Series
-
Page 1: Microwave Oven
Microwave oven User manual MC32J7055C* Please be advised that the Samsung warranty does NOT cover service calls to explain product operation, correct improper installation, or perform normal cleaning or maintenance. MC32J7055CT_EU_DE68-04319E-00_EN_150113.indd 1 2015-01-13 8:21:16... -
Page 2: Table Of Contents
Contents Using this user manual The following symbols are used in this User Manual: Safety instructions Important safety instructions Correct Disposal of This Product (Waste Electrical & Electronic Equipment) Installation Accessories Installation site Turntable Maintenance Cleaning Replacement (repair) Care against an extended period of disuse Quick look-up guide Oven features Oven... - Page 3 Power defrost guide Using the auto reheat/cook features Auto reheat/cook guide Using the crusty plate Convection Grilling Choosing the accessories Combining microwaves and grill Combining microwaves and convection Switching the beeper off Using the child lock features Using the turntable on/off features Cookware guide Cooking guide Microwaves...
-
Page 4: Using This User Manual
Using this user manual You have just purchased a SAMSUNG microwave oven. Your Owner’s Instructions contains valuable information on cooking with your microwave oven: Safety precautions • • Suitable accessories and cookware • Useful cooking tips • Cooking tips The following symbols are used in this User Manual: WARNING Hazards or unsafe practices that may result in severe personal injury or death. -
Page 5: Safety Instructions
Safety instructions Important safety instructions READ CAREFULLY AND KEEP FOR FUTURE REFERENCE. MAKE SURE THAT THESE SAFETY PRECAUTIONS ARE OBEYED AT ALL TIMES. BEFORE USING THE OVEN, CONFIRM THAT THE FOLLOWING INSTRUCTIONS ARE FOLLOWED. Microwave function only WARNING: If the door or door seals are damaged, the oven must not be operated until it has been repaired by a competent person. - Page 6 Safety instructions WARNING: This appliance can be used by children aged from 8 years and above and persons with reduced physical, sensory or mental capabilities or lack of experience and knowledge if they have been given supervision or instruction concerning use of the appliance in a safe way and understand the hazards involved.
- Page 7 Failure to maintain the oven in a clean condition could lead to deterioration of the surface that could adversely affect the life of the appliance and possibly result in a hazardous situation. The appliance is not intended for installing in road vehicles, caravans and similar vehicles etc.
- Page 8 Safety instructions Oven function only - Optional WARNING: When the appliance is operated in the combination mode, children should only use the oven under adult supervision due to the temperatures generated. During use the appliance becomes hot. Care should be taken to avoid touching heating elements inside the oven.
-
Page 9: General Safety
The temperature of accessible surfaces may be high when the appliance is operating. The door or the outer surface may get hot when the appliance is operating. Keep the appliance and its cord out of reach of children less than 8 years. - Page 10 Safety instructions Do not use benzene, thinner, alcohol, steam cleaner or high pressure cleaner to clean the appliance. Ensure that the power voltage, frequency and current are the same as those of the product specifications. Plug the power plug into the wall socket firmly. Do not use a multiple plug adapter, an extension cord or an electric transformer.
- Page 11 Reason: Electric arcing or sparking may occur and may damage the oven. Do not use your microwave oven to dry papers or clothes. Use shorter times for smaller amounts of food to prevent overheating and burning food. Do not immerse the power cable or power plug in water and keep the power cable away from heat.
- Page 12 Samsung will charge a repair fee for replacing an accessory or repairing a cosmetic defect if the damage to the unit and/or damage to or loss of the accessory was caused by the customer.
-
Page 13: Correct Disposal Of This Product (Waste Electrical & Electronic Equipment)
Product group definition This product is a Group 2 Class B ISM equipment. The definition of group 2 which contains all ISM equipment in which radio-frequency energy is intentionally generated and/or used in the form of electromagnetic radiation for the treatment of material, and EDM and arc welding equipment. -
Page 14: Important Note
Safety instructions INSTALLATION & WIRING INSTRUCTIONS Important note : The mains lead on this equipment is supplied with a moulded plug incorporating a fuse. The value of the fuse is indicated on the pin face of the plug and, if it requires replacing, a fuse approved to BS1363 of the same rating must be used. -
Page 15: Cooking Instructions On Food Packaging
The manufacturer of this oven will not accept any liability for damage to persons or material for non observance of these requirements. There are no user-serviceable parts inside the oven and if the mains lead of this appliance is damaged, it must only be replaced by qualified service personnel approved by the manufacturer because special tools are required. -
Page 16: Cooking Instructions
Safety instructions COOKING INSTRUCTIONS The IEC Power Output rating is an internationally standardised rating, so all microwave manufacturers now use the same method of measuring power output. If food packaging gives cooking instructions based on IEC Power ratings, set cooking times according to the IEC Power of your oven. -
Page 17: Installation
Installation Accessories Depending on the model that you have purchased, you are supplied with several accessories that can be used in a variety of ways. 01 Roller ring, to be placed in the centre of the oven. Purpose: The roller ring supports the turntable. - Page 18 Installation 04 Crusty plate, see page 48. Purpose: The crusty plate is used to brown food better in the microwave or grill combination cooking modes. It helps keep pastry and pizza dough crisp. CAUTION DO NOT operate the microwave oven without the roller ring and turntable.
-
Page 19: Installation Site
Installation site • Select a flat, level surface 20 cm above 10 cm behind approx. 85 cm above the floor. The surface must support the weight of the oven. • Secure room for ventilation, at least 10 cm from the rear 10 cm on the side wall and both sides, and 20 cm... -
Page 20: Maintenance
Maintenance Cleaning Clean the oven regularly to prevent impurities from building up on or inside the oven. Also pay special attention to the door, door sealing, and turntable and roller ring (applicable models only). If the door won’t open or close smoothly, first check if the door seals have built up impurities. - Page 21 To clean inside swing-heater models To clean the upper area of the cooking chamber, lower the top heating element by 45 ° (A) as shown. This will help clean the upper area. When done, reposition the top heating element. CAUTION •...
-
Page 22: Replacement (Repair)
Samsung cord from the power source, service centre for technical and then contact a local assistance. -
Page 23: Quick Look-Up Guide
Quick look-up guide If you want to cook some food. Place the food in the oven. Press the START/+30s button. Result: Cooking starts. When it has finished. 1) The oven beeps 4 times. 2) The end reminder signal will beep 3 times (once every minute). -
Page 24: Oven Features
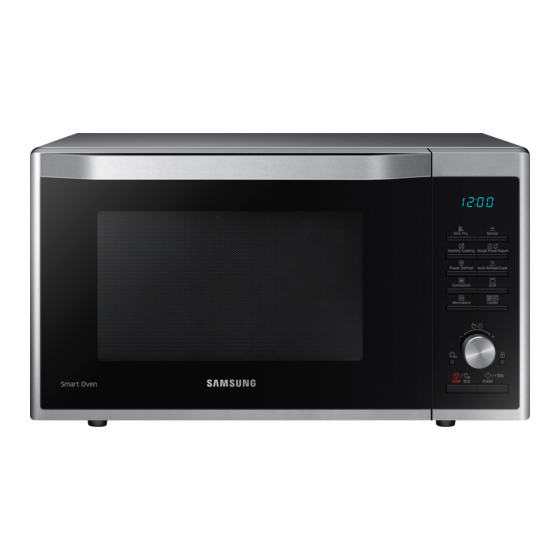
Oven features Oven 01 Safety interlock holes 02 Heating element 03 Ventilation holes 04 Door latches 05 Turntable 06 Coupler 07 Door Handle 08 Roller Ring 09 Door 10 Control Panel 24 English MC32J7055CT_EU_DE68-04319E-00_EN_150113.indd 24 2015-01-13 8:21:21... -
Page 25: Control Panel
Control panel 01 Slim Fry Button 02 Sensor Button 03 Healthy Cooking Button 04 Dough Proof/Yogurt Button 05 Power Defrost Button 06 Auto Reheat/Cook Button 07 Convection Button 08 Grill Button 09 Microwave Button 10 Combi Button 11 Turntable On/Off Button 12 Multi Function Selector Dial 13 Child Lock Button 14 Stop/Eco Button... -
Page 26: Oven Use
Oven use How a microwave oven works Microwaves are high-frequency electromagnetic waves; the energy released enables food to be cooked or reheated without changing either the form or the colour. You can use your microwave oven to: • Defrost • Reheat •... -
Page 27: Checking That Your Oven Is Operating Correctly
Checking that your oven is operating correctly The following simple procedure enables you to check that your oven is working correctly at all times. If you are in doubt, refer to the section entitled “Troubleshooting” on the page 78-83. Open the oven door by pulling the handle NOTE on the upper side of the door. -
Page 28: Cooking/Reheating
Oven use 5. Press the Multi Function Selector Dial. 6. Turn the Multi Function Selector Dial to set the minute. 7. When the right time is displayed, press the Multi Function Selector Dial to start the clock. Result: The time is displayed whenever you are not using the microwave oven. -
Page 29: Power Levels And Time Variations
3. Set the cooking time by turning the Multi Function Selector Dial. Result: The cooking time is displayed. 4. Press the START/+30s button. Result: Cooking starts. When it has finished. 1) The oven beeps 4 times. 2) The end reminder signal will beep 3 times (once every minute). -
Page 30: Adjusting The Cooking Time
Oven use Adjusting the cooking time You can increase the cooking time by pressing the START/+30s button once for each 30 seconds to be added. • Check how cooking is progressing at any time simply by opening the door • Increase the remaining cooking time Method 1 To increase the cooking time of your food... -
Page 31: Setting The Energy Save Mode
Setting the energy save mode The oven has an energy save mode. • Press the STOP/ECO button. Result: Display off. • To remove energy save mode, open the door or press the STOP/ECO button and then display shows current time. The oven is ready for use. -
Page 32: Using The Slim Fry Cook Features
Oven use Using the slim fry cook features The 12 Slim Fry cook features include/provide pre-programmed cooking times. You do not need to set either the cooking times or the power level. You can adjust the slim fry cook category by press the Slim Fry button. First, place the food in the centre of the turntable and close the door. -
Page 33: Slim Fry Guide
Slim fry guide The following table presents the 12 Slim Fry auto programmes for frying. It contains its quantities and appropriate instructions. You will use less oil compared to frying with oil fryer, while you will get tasty results. Programmes are running with a combination of convection, top heater and microwave energy. - Page 34 Oven use Code/Food Serving Size Instructions 100-150 g Rinse and slice courgettes. Brush with 5 g olive oil and Sliced 200-250 g add spices. Put slices evenly on the crusty plate and set Courgettes plate on high rack. Turnover after beep sounds. Press start to continue.
-
Page 35: Using The Sensor Cook Features
Using the sensor cook features The 8 Sensor Cook features include/provide pre-programmed cooking times. You do not need to set either the cooking times or the power level. You can adjust the Sensor Cook category by turning the Multi Function Selector Dial. First, place the food in the centre of the turntable and close the door. -
Page 36: Sensor Cook Guide
Oven use Sensor cook guide The following table presents 8 Sensor Cook programmes. It contains its recommended weight range per item after cooking and appropriate instructions. In the beginning of the programme the display shows the sensor period. After this period the cooking time and power level is calculated automatically and the remaining cooking time will be displayed. - Page 37 Code/Food Serving Size Instructions 200-500 g Rinse and clean fresh vegetables, such as cauliflower Cauliflower florets and prepare florets. Put them evenly into a glass Florets bowl with lid. Add 30-45 ml water (2-3 tbsp). Put bowl in the centre of turntable. Cook covered.
- Page 38 Oven use • Before auto sensor cooking food may be Important seasoned with herbs, spices or browning • After installing the oven and plugging sauces. A word of caution though, salt or into an electrical outlet, do not unplug sugar may cause burn spots on food so the power cord.
-
Page 39: Using The Healthy Cooking Features
Using the healthy cooking features The 15 Healthy Cooking features provide pre-programmed cooking times. You do not need to set either the cooking times or the power level. You can adjust the size of the serving by turning the Multi Function Selector Dial. CAUTION Use only recipients that are microwave-safe. -
Page 40: Healthy Cooking Guide
Oven use Healthy cooking guide The following table presents quantities and appropriate instructions about 15 Healthy Cooking programmes. This is composed of Grain/Pasta(1), Vegetables(2) and Poultry/Fish(3). CAUTION Use oven gloves when taking out food. 1. Grain/Pasta Code/Food Serving Size Instructions 150-200 g Use a large glass ovenware dish with lid. - Page 41 Code/Food Serving Size Instructions 400-450 g Put the fresh potato gratin into a glass pyrex dish. Potatoes 800-850 g Put the dish on the low rack. Stand for 2-3 minutes. Gratin 100-150 g Rinse and slice eggplants. Brush with oil and spices. Grilled 200-250 g Put slices evenly on the high rack.
-
Page 42: Using The Dough Proof/Yogurt Features
Oven use Using the dough proof/yogurt features The 5 Dough Proof/Yogurt features include/provide pre-programmed cooking times. You do not need to set either the cooking times or the power level. You can adjust the dough proof/yogurt category by turning the Multi Function Selector Dial after press the Dough Proof/Yogurt button. -
Page 43: Dough Proof/Yogurt Gide
Dough proof/yogurt gide The following table presents how to use the auto programmes for rising yeast dough or homemade yogurt. 1. Dough Proof Code/Food Serving Size Instructions 300-500 g Put dough in suitable sized bowl and set on the low rack. Pizza Dough Cover with aluminium foil. -
Page 44: Using The Power Defrost Features
Oven use Using the power defrost features The Power Defrost features enable you to defrost meat, poultry, fish, bread, cake and fruit. The defrost time and power level are set automatically. You simply select the programme and the weight. NOTE Use only containers that are microwave- Open the door. -
Page 45: Power Defrost Guide
Power defrost guide The following table presents the various Power Defrost programmes, quantities and appropriate instructions. Remove all kind of package material before defrosting. Place meat, poultry and fish on a flat glass plate or on a ceramic plate, arrange bread, cake and fruit on kitchen paper. -
Page 46: Using The Auto Reheat/Cook Features
Oven use Using the auto reheat/cook features The 6 Auto Reheat/Cook features include/provide pre-programmed cooking times. You do not need to set either the cooking times or the power level. You can adjust the size of the serving by turning the Multi Function Selector Dial. CAUTION Use only recipients that are microwave-safe. -
Page 47: Auto Reheat/Cook Guide
Auto reheat/cook guide The following table presents quantities and appropriate instructions for auto reheat and cook. CAUTION Use oven gloves when taking out food. 1. Auto Reheat Code/Food Serving Size Instructions 300-350 g Put on a ceramic plate and cover with microwave cling Ready Meal 400-450 g film. -
Page 48: Using The Crusty Plate
Oven use Using the crusty plate This crusty plate allows you to brown food not only on the top with the grill, but also the bottom of the food turns crispy and brown due to the high temperature of the crusty plate. Several items which you can prepare on the crusty plate can be found in the chart (see next page). - Page 49 CAUTION NOTE Always use oven gloves to take out the Clean the crusty plate with warm water and crusty plate, as will become very hot. detergent and rinse off with clean water. NOTE NOTE Please note that the crusty plate has a teflon Do not use a scrubbing brush or a hard layer which is not scratch-resistant.
-
Page 50: Convection
Oven use Convection The convection mode enables you to cook food in the same way as in a traditional oven. The microwave mode is not used. You can set the temperature, as required, in a range varying from 40 °C to 200 °C. The maximum cooking time is 60 minutes. •... -
Page 51: Grilling
Grilling The grill enables you to heat and brown food quickly, without using microwaves. • Always use oven gloves when touching the recipients in the oven, as they will be very hot. • You can get better cooking and grilling results, if you use the high rack. 1. -
Page 52: Choosing The Accessories
Oven use Choosing the accessories Traditional convection cooking does require cookware. You should, however, use only cookware that you would use in your normal oven. Microwave-safe containers are not usually suitable for convection cooking; don’t use plastic containers, dishes, paper cups, towels, etc. - Page 53 2. Make the display indicating Cb-1, and then press the Multi Function Selector Dial. Result: The following indications are displayed: (microwave & grill combi mode) 600 W (output power) 3. Select the appropriate power level by turning the Multi Function Selector Dial until the corresponding output power is displayed (600, 450, 300 W).
-
Page 54: Combining Microwaves And Convection
Oven use Combining microwaves and convection Combination cooking uses both microwave energy and convection heating. No preheating is required as the microwave energy is immediately available. Many foods can be cooked in combination mode, particularly: • Roast meats and poultry •... - Page 55 4. Select the appropriate temperature by turning the Multi Function Selector Dial (Temperature : 200~40 °C). At that time, press the Multi Function Selector Dial to set the power level. • If don’t set the temperature within 5 seconds, Automatically changes to the cooking time setting stage.
-
Page 56: Switching The Beeper Off
Oven use Switching the beeper off You can switch the beeper off whenever you want. 1. Press the START/+30s and STOP/ECO button at the same time. Result: The oven does not beep to indicate the end of a function. 2. To switch the beeper back on, press the START/+30s and STOP/ECO button again at the same time. -
Page 57: Using The Turntable On/Off Features
Using the turntable on/off features The Turntable On/Off button enables you to use large dishes which fill the whole oven by stopping the turntable from rotating (only manual cooking mode). CAUTION WARNING The results will be less satisfactory in this Never operate the turntable without food in case as the cooking is less even. -
Page 58: Cookware Guide
Cookware guide To cook food in the microwave oven, the microwaves must be able to penetrate the food, without being reflected or absorbed by the dish used. Care must therefore be taken when choosing the cookware. If the cookware is marked microwave-safe, you do not need to worry. - Page 59 Cookware Microwave-safe Comments Paper • Plates, cups, For short cooking times and warming. Also to ✓ napkins and absorb excess moisture. kitchen paper Recycled paper May cause arcing. • ✗ Plastic • Containers Particularly if heat-resistant thermoplastic. ✓ Some other plastics may warp or discolour at high temperatures.
-
Page 60: Cooking Guide
Cooking guide Cooking guide Microwaves Microwave energy actually penetrates food, The microwaves cause the molecules in the attracted and absorbed by its water, fat and food to move rapidly. The rapid movement sugar content. of these molecules creates friction and the resulting heat cooks the food. - Page 61 Cooking Guide for frozen vegetables Use a suitable glass pyrex bowl with lid. Cook covered for the minimum time – see table. Continue cooking to get the result you prefer. Stir twice during cooking and once after cooking. Add salt, herbs or butter after cooking. Cover during standing time.
- Page 62 Cooking guide Cooking guide for fresh vegetables Use a suitable glass pyrex bowl with lid. Add 30-45 ml cold water (2-3 tbsp) for every 250 g unless another water quantity is recommended – see table. Cook covered for the minimum time –...
- Page 63 Food Serving Size Power Time (min.) Mushrooms 125 g 900 W 1½-2 250 g 2½-3 Instructions Prepare small whole or sliced mushrooms. Do not add any water. Sprinkle with lemon juice. Spice with salt and pepper. Drain before serving. Serve after 3 minutes standing. Onions 250 g 900 W...
- Page 64 Cooking guide Cooking guide for rice and pasta Rice: Use a large glass pyrex bowl with lid - rice doubles in volume during cooking. Cook covered. After the cooking time is over, stir before standing time and salt or add herbs and butter. Remark: the rice may not have absorbed all water after the cooking time is finished.
-
Page 65: Reheating
Reheating Your microwave oven will reheat food in a fraction of the time that conventional ovens hobs normally take. Use the power levels and reheating times in the following chart as a guide. The times in the chart consider liquids with a room temperature of about +18 to +20 °C or a chilled food with a temperature of about +5 to +7 °C. -
Page 66: Reheating Baby Food
Cooking guide Reheating baby food Baby food: Baby milk: Empty into a deep ceramic plate. Cover Pour milk into a sterilised glass bottle. with plastic lid. Stir well after reheating! Reheat uncovered. Never heat a baby’s Let stand for 2-3 minutes before serving. bottle with teat on, as the bottle may Stir again and check the temperature. - Page 67 Food Serving Size Power Time (min.) Soup 250 g 900 W 2½-3 (Chilled) 350 g 3-3½ 450 g 3½-4 550 g 4½-5 Instructions Pour into a deep ceramic plate or deep ceramic bowl. Cover with plastic lid. Stir well after reheating. Stir again before serving. Serve after 2-3 minutes standing.
- Page 68 Cooking guide Reheating baby food and milk Use the power levels and times in this table as guide lines for reheating. Food Serving Size Power Time Baby Food 190 g 600 W 30 sec. (Vegetables + Meat) Instructions Empty into ceramic deep plate. Cook covered. Stir after cooking time.
-
Page 69: Defrosting
Defrosting Microwaves are an excellent way of If smaller and thinner parts of the frozen defrosting frozen food. Microwaves gently food start to warm up, they can be shield by defrost frozen food in a short period of wrapping very small strips of aluminium foil time. - Page 70 Cooking guide Food Serving Size Power Time (min.) Poultry Chicken Pieces 500 g (2 pcs) 180 W 14-15 Whole Chicken 1200 g 180 W 32-34 Instructions First, put chicken pieces first skin-side down, whole chicken first breast-side-down on a flat ceramic plate. Shield the thinner parts like wings and ends with aluminium foil.
-
Page 71: Grill
Grill Food suitable for grilling: The grill-heating element is located underneath the ceiling of the cavity. It Chops, sausages, steaks, hamburgers, bacon operates while the door is closed and and gammon rashers, thin fish portions, the turntable is rotating. The turntable’s sandwiches and all kinds of toast with rotation makes the food brown more evenly. - Page 72 Cooking guide Grill guide for fresh food Preheat the grill with the grill-function for 2-3 minutes. Use the power levels and times in this table as guide lines for grilling. Use oven gloves when taking out. Fresh food Serving Size Power 1 step (min.) 2 step (min.)
- Page 73 Fresh food Serving Size Power 1 step (min.) 2 step (min.) Roast Chicken 1200 g 450 W + Grill 22-23 21-22 Instructions Brush the chicken oil and spices. Put the chicken on the low rack. After grilling stand for 5 minutes. Roast Fish 400-500 g 300 W + Grill...
-
Page 74: Convection
Cooking guide Convection Cooking with convection is the traditional and well known method of cooking food in a traditional oven with hot air. The heating element and the fan position is at the back-wall, so that the hot air is circulating. This mode is supported by the top heating element. - Page 75 Convection guide for fresh and frozen food Preheat the convection with the auto pre-heat function to the desired temperature. Use the power levels and times in this table as guide lines for convection cooking. Use oven gloves when taking out. Fresh food Serving Size Power...
- Page 76 Cooking guide Fresh food Serving Size Power 1 step (min.) 2 step (min.) Bread Fresh Bread Rolls 6 pcs (350 g) 100 W + 180 °C 8-10 Instructions Put bread rolls in a circle on the low rack. Stand for 2-3 minutes. Garlic Bread 200 g (1 pc) 180 W + 200 °C...
-
Page 77: Tips And Tricks
Tips and tricks Melting butter Cooking glaze/icing (for cake and gateaux) Put 50 g butter into a small deep glass dish. Mix instant glaze (approximately 14 g) with Cover with plastic lid. 40 g sugar and 250 ml cold water. Cook Heat for 30-40 seconds using 900 W, until uncovered in a glass pyrex bowl for 3½... -
Page 78: Troubleshooting
Troubleshooting Troubleshooting If you have any of the problems listed below try the solutions given. Problem Cause Action General The buttons cannot Foreign matter may be caught Remove the foreign matter and be pressed properly. between the buttons. try again. For touch models: Moisture is Wipe the moisture from the on the exterior. - Page 79 Problem Cause Action There is a popping Cooking sealed food or using Do not use sealed containers sound during a container with a lid may as they may burst during operation, and the causes popping sounds. cooking due to expansion of the oven doesn't work.
- Page 80 Troubleshooting Problem Cause Action The thaw function The oven may not work, too Put one cup of water in a does not work. much food is being cooked, or microwave-safe container and improper cookware is being run the microwave for 1-2 used.
- Page 81 Problem Cause Action There is steam There may be water or steam Let the oven cool and then wipe through a crack in the in some cases depending on with a dry dish towel. door. the food. This is not an oven malfunction.
- Page 82 Troubleshooting Problem Cause Action Grill Smoke comes out During initial operation, smoke This is not a malfunction, and if during operation. may come from the heating you run the oven 2-3 times, it elements when you first use should stop. the oven.
- Page 83 The model and serial numbers, normally SAMSUNG customer service centre. printed on the rear of the oven • Your warranty details A clear description of the problem • Then contact your local dealer or SAMSUNG aftersales service. English 83 MC32J7055CT_EU_DE68-04319E-00_EN_150113.indd 83 2015-01-13 8:21:33...
-
Page 84: Information Codes
30 seconds and try Temperature sensor is setting again. needed to check. C-20 If it appears again, call your local SAMSUNG Customer Care Centre. Temperature sensor Turn off the microwave oven for cooling the detect higher product and then try setting again. -
Page 85: Technical Specifications
Technical specifications SAMSUNG strives to improve its products at all times. Both the design specifications and these user instructions are thus subject to change without notice. Model MC32J7055C* Power source 230 V ~ 50 Hz AC Power consumption Maximum power... - Page 86 Memo MC32J7055CT_EU_DE68-04319E-00_EN_150113.indd 86 2015-01-13 8:21:34...
- Page 87 Memo MC32J7055CT_EU_DE68-04319E-00_EN_150113.indd 87 2015-01-13 8:21:34...
- Page 88 QUESTIONS OR COMMENTS COUNTRY CALL OR VISIT US ONLINE AT AUSTRIA 0800 - SAMSUNG (0800 - 7267864) www.samsung.com/at/support www.samsung.com/be/support (Dutch) BELGIUM 02-201-24-18 www.samsung.com/be_fr/support (French) DENMARK 70 70 19 70 www.samsung.com/dk/support FINLAND 030-6227 515 www.samsung.com/fi/support FRANCE 01 48 63 00 00 www.samsung.com/fr/support...