Table of Contents
Advertisement
Available languages
Available languages
Quick Links
ISTRUZIONI D'USO
MANUAL DE INSTRUCCIONES
Important:
Read this instruction manual carefully before putting the String Trimmer into operation and strictly observe the safety regulations!
Preserve instruction manual carefully!
Recommandation importante:
Lire soigneusement ce manuel d'instructions avant de mettre la taille-bordures en service et observer rigoureusement les consignes
de sécurité!
Conserver soigneusement ce manuel d'instructions.
Importante:
Leer cuidadosamente este manual de instrucciones antes de poner en marcha la máquina y observar estrictamente las normas de
seguridad.
Conservar este manual de instrucciones con cuidado.
English / Français / Spanish
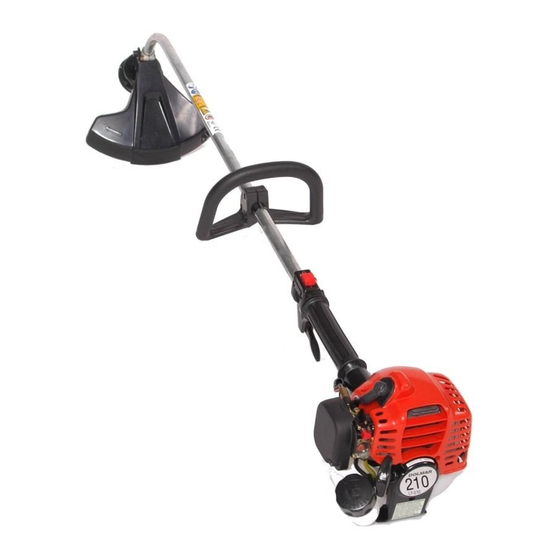
String Trimmer
Taille-bordures
Cortabordes
LT-210
INSTRUCTION MANUAL
MANUEL D'INSTRUCTIONS
MANUAL DE INSTRUCCIONES
LT-210
C
Advertisement
Chapters
Table of Contents

Related Manuals for Dolmar LT-210


Summary of Contents for Dolmar LT-210
- Page 1 ISTRUZIONI D’USO MANUAL DE INSTRUCCIONES Important: Read this instruction manual carefully before putting the String Trimmer into operation and strictly observe the safety regulations! Preserve instruction manual carefully! Recommandation importante: Lire soigneusement ce manuel d’instructions avant de mettre la taille-bordures en service et observer rigoureusement les consignes de sécurité!
-
Page 2: Table Of Contents
English Thank you very much for purchasing the DOLMAR String Trimmer. We are pleased to recommend to you the DOLMAR String Trimmer which is the result of a long development programme and many years of knowledge and experience. Please read this booklet which refers in detail to the various points that will demonstrate its outstanding performance. -
Page 3: Safety Instructions
– It is recommended only to lend the string trimmer to people who have proven to be experienced with string trimmers. Always hand over the instruction manual. - Page 4 – When unloading the String Trimmer from the truck, never drop the Engine to the ground or this may severely damage the fuel tank. – Except in case of emergency, never drop or cast the String Trimmer to the ground or this may severely damage the String Trimmer –...
- Page 5 Method of operation – Only use the string trimmer in good lighting and visibility. During the winter season beware of slippery or wet areas, ice and snow (risk of slipping). Always ensure a safe footing. – Never cut above the waist height.
-
Page 6: Technical Data
Fuel 1) The data is prepared taking equally into account the idling and racing or wide open throttle speed operating modes. * WARNING: MODEL LT-210 must not be used with a metal blade. LT-210 1540 x 210 x 430 (60.6” x 8.3” x 16.9”) mm(in.) -
Page 7: Designation Of Parts
DESIGNATION OF PARTS LT-210 String Trimmer DESIGNATION OF PARTS Fuel Tank Rewind Starter Air Cleaner cover I-O Switch (on/off) Spark Plug Exhaust Muffler Clutch Case Rear Grip Handle Control Lever Control Cable Shaft Protector Head Case Nylon Cutting Head Fuel Filler Cap... -
Page 8: Mounting Of Handle
MOUNTING OF HANDLE CAUTION: Before doing any work on the string trimmer, always switch off the engine and pull the spark plug connector off the spark plug. Always wear protective gloves. CAUTION: Start the string trimmer only after having assembled it completely. -
Page 9: Fuels/Refueling
NOTE: For preparing the fuel-oil mixture first mix the entire oil quantity with half of the fuel required, then add the remaining fuel. Thoroughly shake the mixture before filling it into the String trimmer tank. It is not wise to add more engine oil than specified to ensure safe operation. -
Page 10: Points In Operation And How To Stop
Observe the applicable accident prevention regulations! Starting Move at least 3m away from the place of refuelling. Place the String trimmer on a clean piece of ground taking care that the cutting tool does not come into contact with the ground or any other objects. -
Page 11: Nylon Cutting Head
NYLON CUTTING HEAD The nylon cutting head is a dual string trimmer head capable of both automatic and bump & feed mechanisms. The nylon cutting head will automatically feed out the proper length of nylon cord by the changes in centrifugal force caused by increasing or decreasing RPMS. - Page 12 Replacing the nylon cord – First, stop the engine. – Press on the housing latches inward to lift off the cover, then remove the spool. – Hook the center of new nylon cord into the notch in the center of the spool, with one end of the cord extending about 80mm (3-1/8") more than the other.
-
Page 13: Servicing Instructions
SERVICING INSTRUCTIONS CAUTION: Before doing any work on the string trimmer, always switch off the engine and pull the plug cap off the spark plug (see “check- ing the spark plug”). Always wear protective gloves! To ensure a long service life and to avoid any damage to the equipment, the following servicing operations should be performed at regular intervals. - Page 14 Suction head in the fuel tank – The felt filler (1) of the suction head is used to filler the fuel required by the carburetor. – A periodical visual inspection of the felt filter is to be conducted. For that purpose open the tank cap, use a wire hook and pull out the suction head through the tank opening.
-
Page 15: Storage
STORAGE – When the machine is in storage for a long time, drain fuel from the fuel tank and carburetor, as follows: Drain all fuel from the fuel tank. Dispose of properly and in accordance with all local laws. – Remove the spark plug and a few drops of oil into the spark plug hole. Then, pull the starter gently, so that oil covers the engine inside and tighten the spark plug. -
Page 16: Federal Emission Component Defect Warranty
EPA regulations during its warranty period. For the components listed under PARTS COVERED, Makita Factory Service Center or service center authorized by MAKITA will, at no cost to you, make the necessary diagnosis, repair, or replacement necessary to ensure that the engine complies with applicable U.S. - Page 17 MAKITA recommends that you retain all receipts covering maintenance on your engine, but MAKITA can not deny warranty solely for the lack of receipts or for your failure to ensure the performance of all scheduled maintenance.
- Page 18 THE EFFECTIVENESS OF THE EMISSION CONTROL SYSTEM AND MAY HAVE A BEARING ON THE OUTCOME OF WARRANTY CLAIM. If other than the parts authorized by MAKITA are used for maintenance replacements or for the repair of components affecting emission control, you should assure yourself that such parts are warranted by their manufacturer to be equivalent to the parts authorized by MAKITA in their performance and durability.
-
Page 19: Symboles
Nous vous remercions d’avoir fait l’acquisition de la taille-bordures DOLMAR. Nous sommes heureux de pouvoir vous conseiller la taille-bordures DOLMAR qui représente le résultat d’un long programme de développement et de plusieurs années de recherche et d’expérience. Veuillez lire cette brochure qui fait référence en détail aux différents points témoignant de l’efficacité... -
Page 20: Consignes De Sécurité
CONSIGNES DE SÉCURITÉ Instructions générales – Pour utiliser la machine correctement, I’utilisateur doit lire ce manuel d’instructions afin de se familiariser avec la manipulation de la taille- bordures. Les utilisateurs disposant d’informations insuffisantes risquent de mettre leur propre vie comme celle de ticrs en danger en manipulant la machine de façon incorrecte. - Page 21 Mettre la taille-bordures en marche en appliquant strictement les instructions. Ne pas utiliser d’autres méthodes pour mettre la machine en marche! – Utiliser la taille-bordures et les outils uniquement pour les applications conseillées. – Lancer le moteur de la taille-bordures uniquement une fois le montage intégralement réalisé.
- Page 22 Méthode d’utilisation – Utiliser la taille-bordures uniguement lorsque les conditions de luminosité et de visibilité sont bonnes. En hiver, être conscient des risques engendrés par le verglas, les zones humides, la glace et la neige (dérapage). Toujours garantir une bonnes stabilité. –...
-
Page 23: Caractéristiques Techniques
1) Les caractéristiques prennent en compte tous les modes de fonctionnement: vitesse de marche à vide, emballement et papillon des gaz ouvert à fond. Avertissement: Le modéle LT-210 ne devra pas étre utiliseé avec une lame en métallique. LT-210 1540 x 210 x 430 (60.6” x 8.3” x 16.9”) mm(in.) -
Page 24: Nomenclature Des Pièces
NOMENCLATURE DES PIÈCES LT-210 Taille-bordures Nomenclature des pièces Réservoir de carburant Poulie d'enroulement du câble de démarrage Filtre à air Interrupteur I-O (marche/arrêt) Bougie d'allumage Protection d'échappement Carter d'embrayage Prise arrière Poignée Levier de commande Câble de commande Arbre Dispositif de protection Carter de tête... -
Page 25: Assemblage Du Moteur Et De L'arbre
MONTAGE DE LA POIGNÉE ATTENTION: Toujours couper le moteur et retirer le connecteur de la bougie d’allumage avant de procéder à tout travail au niveau de la taille- bordures. Toujours porter des gants de protection! ATTENTION: Mettre la taille-bordures en marche uniquement après l’avoir assemblée complètement. -
Page 26: Carburant/Ravitaillement
Ajouter une huile pour moteur 2 temps (degré de qualité: TC-3) au carburant pour lubrifier le moteur. Le moteur a été conçu pour fonctionner avec une huile pour moteur 2 temps MAKITA dans un rapport de mélange de seulement 50:1 afin de protéger l'environnement. De plus, ceci garantit une longévité importante et un fonctionnement fiable avec un minimum d'émissions de gaz d'échappement. -
Page 27: Mise En Marche
CONSIGNES DE MISE EN MARCHE ET ARRÊT DE LA MACHINE Respecter les lois applicables en matière de prévention contre les accidents! Démarrage: Déplacer la machine à trois mètres au moins du lieu de ravitaillement. Placer la taille-bordures sur une zone propre en veillant à ce que de la tête de coupe à... -
Page 28: Tête De Coupe À Fil En Nylon
Arrêt – Relâcher complètement le levier de commande (6) et pousser l’interrupteur I- O (1) en position “O” lorsque le régime du moteur s’est abaissé: le moteur s’arrêtera. – Ouverture totale ou à moitié lors de remise en marche immédiatement après arrêt de la marche. - Page 29 Remplacement du fil en nylon – Commencer par couper le moteur. – Appuyer sur les loquets du carter vers l’intérieur pour soulever le couvercle; retirer ensuite la bobine. – Accrocher le centre du nouveau fil en nylon dans l’encoche située au centre de la bobine, une des extrémités du fil étant plus longue de 80 mm (3-1/8") que l’autre.
-
Page 30: Instructions Relatives Aux Réparations
INSTRUCTIONS RELATIVES AUX RÉPARATIONS ATTENTION: Toujours couper le moteur et retirer le capuchon de la bougie d’allumage avant de procéder à tout travail sur la taille-bordures (voir Contrôle de la bougie d’allumage”). Toujours porter des gants de protection! Procéder aux réparations suivantes à intervalles réguliers pour assurer une longévité importante et pour éviter tout endommagement de l’équipement. - Page 31 Tête d’aspiration dans le réservoir de carburant – Le filtre en feutre (1) de la tête d’aspiration est utilisé pour filtrer le carburant requis par le carburateur. – Procéder à une inspection visuelle périodique du filtrer en feutre. Ouvrir le bouchon du réservoir à...
-
Page 32: Remisage
REMISAGE – Lorsque la machine est remisée pendant une durée importante, évacuer le carburant du réservoir et du carburateur de la manière suivante: évacuer la totalité du carburant du réservoir, s’en défaire en respectant les réglementations locales. – Retirer la bougie d’allumage et ajouter quelques gouttes d’huile dans le trou de la bougie d’allumage. -
Page 33: Simbolos
Muchas gracias por comprar la Cortabordes DOLMAR. Nos complace recomendarle el uso de la Cortabordes DOLMAR que es el resultado de un extenso programa de investigación desarrollado tras anõs de estudio y experiencia. Por favor lean el folleto que hace refrencia con detalle a los diversos puntos que demuestran su excelente funcionamiento. -
Page 34: Instrucciones De Seguridad
INSTRUCCIONES DE SEGURIDAD Instrucciones generales – Para asegurar un funcionamiento correcto, el usuario debe leer este manual de instrucciones para hacerse familiar con el funcionamiento de la Cortabordes. Los usuarios que no se informen suficientemente causarán riesgo para ellos mismos y otras personas debido a un funcionamiento inadecuado. - Page 35 – Poner en marcha la Cortabordes sólo de acuerdo con las instrucciones. No utilizar otro procedimiento para poner en marcha el motor. – Utilizar la Cortabordes sólo para las aplicaciones que se especifican. – Poner en marcha el motor unicamente cuando se ha realizado el ensamblaje completo.
- Page 36 Método de trabajo – Sólo utilizar la Cortabordes en buenas condiciones de luz y visibilidad. Durante el invierno, tomar precauciones en áreas resbaladizas o mojadas, hielo o nieve (riesgo de caída). Procurar siempre una posición segura. – Nunca cortar por encima del hombro. –...
-
Page 37: Datos Técnicos
1) Los datos tienen igualmente en cuenta los modos de trabajo de velocidad en vacio, en carrera o en vávula abierta. ADVERTENCIA : La Modelo LT-210 no se debe usar con el la cuchillas metálicas. 1540 x 210 x 430 (60.6” x 8.3” x 16.9”) mm(in) 0.83/7000 min... -
Page 38: Denominación De Partes
DENOMINACIÓN DE PARTES LT-210 Cortabordes DENOMINACION DE PARTES Tanque de Combustible Arrancador Filtro de Aire I-O Interruptor Bujia Silenciador de Salida Caja del Embrague Mango Trasero Manillar Palanca de Control Cable de Control Protector Cabezal Cabezal de Nylon Tapón para llenado de combustible... -
Page 39: Montaje Del Manillar
MONTAJE DEL MANILLAR PRECAUCIÓN : Antes de realizar cualquier trabajo con la Cortabordes, apagar el motor y separar el conector de la bujía. Llevar siempre quantes. PRECAUCIÓN : Arrancar la Cortabordes sólo después de haberlo montado completamente. Para máquinas con manillar en bucle –... -
Page 40: Combustibles/Reabastecimiento
COMBUSTIBLES/REABASTECIMIENTO Manipulación del combustible La máxima atención se requiere cuando se manipule el combustible. El combustible puede contener sustancias similares a los disolventes. Reponer combustible en una habitación bien ventilada o en el exterior, No inhalar vapores de combustible, evitar el contacto del combustible o del aceite con su piel.entra en contacto con setas substancias repedidamente y por un periodo extenso, se resecará. -
Page 41: Puntos Relacionados Con El Manejo Y La Parada
PUNTOS RELACIONADOS CON EL MANEJO Y LA PARADA !Observar las normas de prevención de accidentes aplicables¡ Arranque Situarse a una distancia mínima de 3 metros del lugar de reabastecimiento. Colocar la cortabordes en una zona de terreno limpio, tomando cuidado de que la cabezal de nylon no entre en contacto con el suelo o cualquier otro objeto. Arranque en frio: Máquina con manillar bucle –... -
Page 42: Cabezal De Corte De Nylon
Paro – Soltar la palanca de conrol completamente y cuando las revoluciones del motor desciendan, apretar el interruptor I-O a la posición O. El motor paradá. – Tome nota de que el cabezal de corte no parará inmediatamente sino que lo hará... - Page 43 Sustitución del cabezal de Nylon – Primero, parar el motor. – Apretar los pestillos de la caja hacia el interior para levantar la tapa; quitar el carrete. – Enganchar el centro de la nueva cuerda de Nylon en la muesca del centro del carrete, dejando que uno de los extremos de la cuerda mida unos 80mm (3-1/8") más que el otro.
-
Page 44: Instrucciones De Servicio
INSTRUCCIONES DE SERVICIO PRECAUCIÓN : Antes de realizar cualquier trabajo con la Cortabordes, siempre apagar el motor y sacar la tapa de la bujia (ver “comprobación de la bujia”). Siempre usar guantes protectores. Para asegurar una larga vida y evitar cualquier daño al equipo, las siguientes instrucciones de servicio deben realizarse a intervalos regulares: Comprobación y mantenimiento diarios –... - Page 45 Cabezal de succión en el tanque de combustible – El fitro de fietro (1) del cabezal de succión se utiliza para filtrar el combustible requerido por el carburador. – Una inspección visual periódica de este filtro debe realizarse. Para ese propósito, saque la tapa del tanque y con un alambre en forma de gancho saque el cabezal a través del agujero del tanque.
-
Page 46: Almacenamiento
ALMACENAMIENTO – Cuando se guarde la máquina durante un período largo de tiempo, extraer todo el combustible del tanque y del carburador. Desechar el combustible de acuerdo con la normativa local. – Quitar la bujia y echar unas gotas de aceite en el agujero de la bujia. Tirar del tirador de arranque suavemente, confirmar que la pelicula de aceite cubre el interior del motor y colocar la bujia. - Page 47 WARNING: The Engine Exhaust from this product contains chemicals known to the state of California to cause cancer, birth defects or other reproductive harm. DOLMAR GmbH Postfach 70 04 20 D-22004 Hamburg Germany 6169512100 05.07...