Table of Contents
Advertisement
Advertisement
Table of Contents
Troubleshooting

Related Manuals for Vision Fitness R10


Summary of Contents for Vision Fitness R10
- Page 1 OWNER’S GUIDE R10, U10 Fitness Bikes Ellipticals...
-
Page 3: Table Of Contents
& POWER SUPPLY ............13 SERVICE & TROUBLESHOOTING ......14 CONSOLE CONSOLE DISPLAY OVERVIEW ......16 DISPLAY DESCRIPTIONS .......... 18 USING THE CONSOLE ..........20 PROGRAMS ................ 21 ENGINEERING MODE ..........22 WARRANTY HOME WARRANTY: X10, U10, R10 ..............24... -
Page 4: Safety Instructions
• Do not use outdoors. • To disconnect, turn the switch to the OFF position, then remove plug from outlet. • Only use the power cord provided with your Vision Fitness product. • Never place the power cord under carpeting or place any object on top of the power cord that may pinch and damage it. -
Page 5: Contact Heart Rate
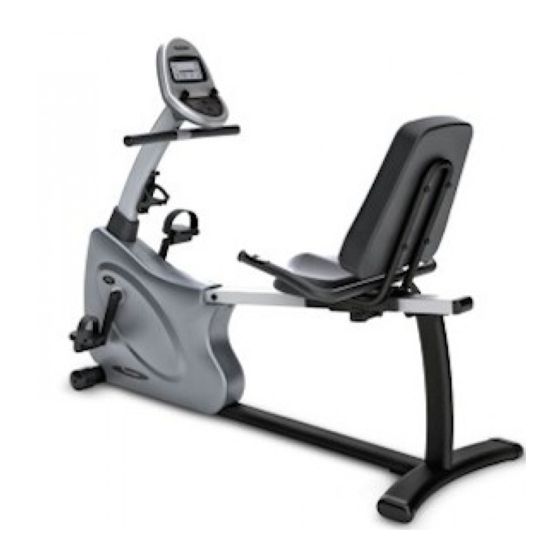
CONTACT HEART RATE HAND PULSE HEART RATE SENSORS The Contact Hand Pulse Sensors are included on each product to monitor your heart rate. To use, grasp the sensors with a comfortable grip during your workout. The console will display your heart rate. Although your signal will be displayed immediately, it may take the system a few seconds to zero in on your actual heart rate. - Page 6 CONSOLE CONSOLE MAST SEAT HANDLEBARS HANDLEBARS CONSOLE MAST SEAT ADJUSTMENT REAR FOOT FRONT FOOT & TRANSPORT WHEELS CONSOLE CONSOLE MAST HANDLEBARS CONSOLE MAST SEAT ADJUSTMENT REAR FOOT FRONT FOOT & TRANSPORT WHEELS...
-
Page 7: Assembly & Moving
If you have any questions regarding any component or function of your Bike, contact your retailer. MOVING Your Vision Fitness Bike has transport wheels included for ease of mobility. To move your semi-recumbent Bike, firmly grasp the rear of the seat rail or the rear of the frame assembly. -
Page 8: Stabilizing & Seat Positioning
STABILIZING THE BIKE After positioning your Bike in its intended location, check its stability by attempting to rock it side to side. Rocking or wobbling indicates that the Bike needs to be leveled. Determine which leveler is not resting completely on the floor. -
Page 9: Seat Adjustment
U10 UPRIGHT SEAT ADJUSTMENT The Upright Bikes feature a locking seat adjustment pin to easily and safely adjust the seat height. To adjust, loosen the adjustment knob by turning it two half turns counter-clockwise. Pull out the knob to unlock the post, and adjust the post up or down to the desired setting. -
Page 10: Pedal Strap Adjustment
Your Bike uses a wall mount external power supply. Use only the power supply provided with your Bike. If you misplace this power supply, please contact your authorized Vision Fitness retailer for an original replacement. Use of the wrong power... -
Page 11: Service & Troubleshooting
SERVICE AND TROUBLESHOOTING PREVENTATIVE MAINTENANCE TIPS • Locate Bike in a cool, dry place. • Clean the top surface of the pedals regularly. • Make sure pedals are kept tight to crank arms. • Keep the display console free from fingerprints and salt build-up caused by sweat. -
Page 12: Troubleshooting
TROUBLESHOOTING Our Bikes are designed to be reliable and easy to use. If, however, you have a problem, these troubleshooting steps may reveal the cause. PROBLEM: The console does not light up. SOLUTION: Check to make sure the power switch located on the backside of the console is turned on. - Page 13 CONSOLE DUAL-ACTION HANDLEBARS FOOT PAD FRONT FOOT & SIDE STABILIZER GUIDE RAIL PEDAL ARM TRANSPORT WHEELS...
-
Page 14: Assembly & Moving
Elliptical Trainer, contact your retailer. MOVING Your Vision Fitness Elliptical Trainer has transport wheels included for ease of mobility. To move, firmly grasp the guide rails at rear of the machine. Slowly lift the machine and... -
Page 15: Power Supply
Use only the power supply provided with your Elliptical Trainer. If you misplace this power supply, please contact your authorized Vision Fitness retailer for an original replacement. Use of the wrong power supply may cause damage to your Elliptical Trainer. -
Page 16: Service & Troubleshooting
SERVICE AND TROUBLESHOOTING PREVENTATIVE MAINTENANCE TIPS • Locate Elliptical Trainer in a cool, dry place. • Make sure all bolts and fasteners are kept tight. • Keep the display console free from fingerprints and salt build-up caused by sweat. • Use a cotton cloth with water and a mild cleaning product to clean the Elliptical Trainer. -
Page 17: Console
TROUBLESHOOTING Our Elliptical Trainers are designed to be reliable and easy to use. If, however, you have a problem, these troubleshooting steps may reveal the cause. PROBLEM: The console does not light up. SOLUTION: Check to make sure the power switch located on the backside of the console is turned on. -
Page 18: Console Display Overview
CONSOLE DISPLAY OVERVIEW The computerized display allows you to select a workout that helps you achieve your fitness goals. It also allows you to monitor the progress and feedback of each workout, so you can track improvements in fitness over time. INSTRUCTIONS WARNING Select PROGRAM using... - Page 19 CONSOLE HARDWARE DESCRIPTIONS POWER SWITCH Turn off power to your console if it will not be used for an extended period of time. MILES/KILOMETER SWITCH Changes your exercise feedback to the English or Metric system. ENTER KEY Use this key in setup mode to select your program, exercise time, and resistance level.
- Page 20 INSTRUCTIONS WARNING Select PROGRAM using Heart rate monitoring arrows, press ENTER systems may be innacurate. Select TIME using Over exercising may result in arrows, press ENTER serious injury or death. If you Select LEVEL using feel faint stop exercising arrows, press ENTER. Resistance immediately.
-
Page 21: Display Descriptions
CONSOLE DISPLAY DESCRIPTIONS A. PROFILE DISPLAY This window provides an 8x12 block profile of your program profile. Each horizontal row of blocks represents your segment time, which is total workout time divided by twelve. Each vertical column of blocks represents the resistance level, which is one block for every two levels. -
Page 22: Using The Console
QUICK START The quickest and easiest way to begin exercising is to simply press START. You will begin exercising in manual INSTRUCTIONS WARNING mode for a default time at the Select PROGRAM using Heart rate monitoring arrows, press ENTER systems may be innacurate. Select TIME using Over exercising may result in arrows, press ENTER... -
Page 23: Programs
PROGRAMS PROGRAM 1 PROGRAM 5 (MANUAL) (ROLLING HILLS) PROGRAM 2 PROGRAM 6 (INTERVAL) (MUSCLE TONER) PROGRAM 3 PROGRAM 7 (INCLINE) (MOUNTAIN) PROGRAM 4 (FAT BURN) -
Page 24: Engineering Mode
ENGINEERING MODE Engineering mode consists of six optional settings. Use the engineering mode to access information and enable certain features or displays on your console. ENTERING AND USING ENGINEERING MODE • Press and hold the UP and DOWN keys for approximately three seconds. - Page 25 OPTIONAL SETTINGS SETTING DESCRIPTION ENG1 – LCD TEST USED BY SERVICE TECHNICIANS TO TEST LCD TEST DISPLAYS ENG2 – TEST USED BY SERVICE TECHNICIANS TO TEST EDDIE HARDWARE CURRENT BRAKE SYSTEM TEST ENG2 – MEASURES TOTAL TIME USED IN HOURS AND ACCUMULATED MEASURES TOTAL DISTANCE USED IN MILES TIME/...
-
Page 26: Warranty
LABOR - ONE YEAR Vision Fitness shall cover the Labor cost for the repair of the device for a period of one year from the date of original purchase, so long as the device remains in the possession of the original owner. - Page 27 • Incidental or consequential damages. The manufacturer is not responsible or liable for indirect, special or consequential damages, economic loss, loss of property, or profits, loss of enjoyment or use, or other consequential damages of whatsoever nature in connection with the purchase, use, repair or maintenance of the equipment.
- Page 30 R10, U10, X10 1600 Landmark Drive • Cottage Grove, WI 53527 toll free 800.335.4348 • fax 608.839.8731 www.visionfitness.com 2012 Vision Fitness. All Rights Reserved. REV 1.2...