Sony MEX-XB100BT Operating Instructions Manual
Bluetooth
audio system
Hide thumbs
Also See for MEX-XB100BT:
- Operating instructions manual (180 pages) ,
- Service manual (68 pages) ,
- Operating instructions manual (40 pages)
Table of Contents
Advertisement
Available languages
Available languages
Bluetooth®
Audio System
For the connection/installation, see page 29.
Para la conexión/instalación, consulte la página 31.
To switch the FM/AM tuning step, see page 7.
To cancel the demonstration (DEMO) display, see page 17.
Para cambiar el paso de sintonización de FM/AM, consulte la
página 7.
Para cancelar la pantalla de demostración (DEMO), consulte la
página 18.
MEX-XB100BT
4-563-800-41(2)
Operating Instructions
Manual de instrucciones
GB
ES
Advertisement
Chapters
Table of Contents

Related Manuals for Sony MEX-XB100BT


Summary of Contents for Sony MEX-XB100BT
- Page 1 To switch the FM/AM tuning step, see page 7. To cancel the demonstration (DEMO) display, see page 17. Para cambiar el paso de sintonización de FM/AM, consulte la página 7. Para cancelar la pantalla de demostración (DEMO), consulte la página 18. MEX-XB100BT...
- Page 2 OFF until the display disappears each time you turn the ignition off. Disclaimer regarding services offered by third parties Services offered by third parties may be changed, suspended, or terminated without prior notice. Sony does not bear any responsibility in these sorts of situations.
- Page 3 Important notice Caution IN NO EVENT SHALL SONY BE LIABLE FOR ANY INCIDENTAL, INDIRECT OR CONSEQUENTIAL DAMAGES OR OTHER DAMAGES INCLUDING, WITHOUT LIMITATION, LOSS OF PROFITS, LOSS OF REVENUE, LOSS OF DATA, LOSS OF USE OF THE PRODUCT OR ANY ASSOCIATED EQUIPMENT, DOWNTIME, AND PURCHASER’S TIME RELATED TO...
-
Page 4: Table Of Contents
Connection/Installation Table of Contents Cautions ....... . . 29 Guide to Parts and Controls ....5 Parts List for Installation . -
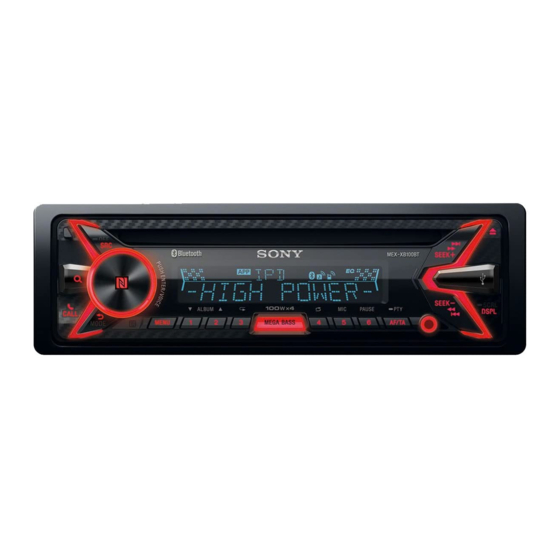
Page 5: Guide To Parts And Controls
Guide to Parts and Controls Main unit Front panel removed (inner panel) N-Mark Touch the control dial with Android phone to make BLUETOOTH connection. Disc slot Display window SEEK +/– Tune in radio stations automatically. Press and hold to tune manually. - Page 6 ALBUM / RM-X231 Remote commander Skip an album for audio device. Press and hold to skip albums continuously. (repeat) (shuffle) MIC (page 14) PAUSE MEGA BASS Press to turn on/off the MEGA BASS function. PTY (program type) Select PTY in RDS. ...
-
Page 7: Getting Started
Resetting the unit Getting Started Before operating the unit for the first time, after replacing the car battery, or changing the Detaching the Front Panel connections, you must reset the unit. Press RESET on the inner panel with a ball-point pen, etc., after You can detach the front panel of this unit to detaching the front panel. -
Page 8: Preparing A Bluetooth Device
IC tags. Thanks to the NFC function, data Select [MEX-XB100BT] shown in the communication can be achieved easily just by display of the BLUETOOTH device. touching the relevant symbol or designated location If your model name does not appear, repeat on NFC compatible devices. - Page 9 To start playback To install the microphone For details, see “Playing a BLUETOOTH Device” For details, see “Installing the microphone” (page 12). (page 32). To cancel pairing Connecting with an iPhone/iPod Perform step 2 to cancel the pairing mode after this unit and the BLUETOOTH device are paired.
-
Page 10: Connecting An Ipod/Usb Device
Connecting an iPod/USB Device Listening to the Radio Turn down the volume on the unit. Listening to the Radio Connect the iPod/USB device to the unit. To connect an iPod/iPhone, use the USB Tuning step setting is required (page 7). connection cable for iPod (not supplied). -
Page 11: Using Radio Data System (Rds)
Using Radio Data System (RDS) Playback Selecting program types (PTY) Playing a Disc Press PTY during FM reception. Insert the disc (label side up). Rotate the control dial until the desired program type appears, then press it. The unit starts to search for a station broadcasting the selected program type. -
Page 12: Playing A Bluetooth Device
To stop playback To match the volume level of the BLUETOOTH Press and hold OFF for 1 second. device to other sources Start playback of the BLUETOOTH audio device at a To remove the device moderate volume, and set your usual listening Stop playback, then remove the device. -
Page 13: Handsfree Calling (Via Bluetooth Only)
Searching by skipping items (Jump mode) Handsfree Calling (via BLUETOOTH only) Press (browse). Press SEEK +. To use a cellular phone, connect it with this unit. For details, see “Preparing a BLUETOOTH Device” Rotate the control dial to select the item. (page 8). -
Page 14: Available Operations During Call
From the call history By voice tags Press CALL, rotate the control dial to You can make a call by saying the voice tag stored in a connected cellular phone that has a voice select [SET RECENT CALL], then press it. dialing function. -
Page 15: Useful Functions
“SongPal” is an app for controlling Sony audio devices which are compatible with “SongPal”, by your iPhone/ Android phone. What you can control with “SongPal” varies depending on the connected device. -
Page 16: Using Siri Eyes Free
Activating voice recognition (Android Using Siri Eyes Free phone only) Siri Eyes Free allows you to use an iPhone By registering applications, you can control an handsfree by simply speaking into the microphone. application by voice command. For details, refer to This function requires you to connect an iPhone to the help of the application. -
Page 17: Settings
CAUT ALARM (caution alarm) Activates the caution alarm: [ON], [OFF] (page 7). Settings (Available only while the source is off and the clock is displayed.) Canceling the DEMO Mode BEEP Activates the beep sound: [ON], [OFF]. You can cancel the demonstration display which appears when the source is off and the clock is AUTO OFF displayed. -
Page 18: Sound Setup (Sound)
[CENTER] – [LEFT-15]. CLEAR AUDIO+ Reproduces sound by optimizing the digital FADER signal with the Sony recommended sound Adjusts the relative level: [FRONT-15] – [CENTER] settings: [ON], [OFF]. (Automatically sets to [OFF] – [REAR-15]. when [EQ10 PRESET] is changed and/or [MEGA BASS] is set to [ON].) -
Page 19: Display Setup (Display)
REARBAS ENH (rear bass enhancer) HPF (high pass filter) Rear Bass Enhancer enhances the bass sound by HPF FREQ (high pass filter frequency) applying a low pass filter setting to the rear Selects the front/rear speaker cut-off frequency: speakers. This function allows the rear speakers [OFF], [50Hz], [60Hz], [80Hz], [100Hz], [120Hz]. -
Page 20: Bluetooth Setup (Bt)
DSPL COLOR (display color) RINGTONE Sets a preset color or customized color for the Selects whether this unit or the connected display. cellular phone outputs the ringtone: [1] (this COLOR unit), [2] (cellular phone). Selects from 15 presets colors, 1 customized AUTO ANSWER color. -
Page 21: Additional Information
CD-DA disc, and following support site: other sessions are not played. Customers in Latin America: Discs that this unit CANNOT play http://esupport.sony.com/ES/LA/ CD-R/CD-RW of poor recording quality. Customers in Asia Pacific: CD-R/CD-RW recorded with an incompatible http://www.sony-asia.com/section/support recording device. -
Page 22: Maintenance
Never touch the connectors directly with your fingers or with any metal device. If you have any questions or problems concerning your unit that are not covered in this manual, consult your nearest Sony dealer. Specifications Maintenance Tuner section... - Page 23 Power amplifier section Tuning range: Output: Speaker outputs 531 – 1,602 kHz (at 9 kHz step) Speaker impedance: 4 – 8 ohms 530 – 1,710 kHz (at 10 kHz step) Maximum power output: 100 W × 4 (at 4 ohms) AM tuning step: 9 kHz/10 kHz switchable General...
-
Page 24: Troubleshooting
SERVICES; LOSS OF USE, DATA, OR PROFITS; OR trademarks owned by Bluetooth SIG, Inc. and any BUSINESS INTERRUPTION) HOWEVER CAUSED AND use of such marks by Sony Corporation is under ON ANY THEORY OF LIABILITY, WHETHER IN license. Other trademarks and trade names are CONTRACT, STRICT LIABILITY, OR TORT (INCLUDING those of their respective owners. -
Page 25: Radio Reception
CD playback Stored stations and correct time are erased. The fuse has blown. The disc does not play. Makes a noise when the position of the ignition Defective or dirty disc. is switched. The CD-R/CD-RW is not for audio use (page 21). ... -
Page 26: Bluetooth Function
BLUETOOTH function The phone sound quality is poor. Phone sound quality depends on reception The connecting device cannot detect this unit. conditions of cellular phone. Before the pairing is made, set this unit to pairing Move your car to a place where you can standby mode. -
Page 27: Error Displays/Messages
Check the connection. If the error message still remains on in the display, consult your nearest Sony dealer. OVERLOAD: The USB device is overloaded. Disconnect the USB device, then press SRC to select another source. The USB device has a fault, or an unsupported... - Page 28 (about 6 seconds) (page 17). If these solutions do not help improve the situation, consult your nearest Sony dealer. If you take the unit to be repaired because of CD playback trouble, bring the disc that was used at...
-
Page 29: Connection/Installation
Parts List for Installation Connection/Installation Cautions Run all ground (earth) leads to a common ground (earth) point. × 2 Do not get the leads trapped under a screw, or caught in moving parts (e.g., seat railing). ... -
Page 30: Connection
Connection Subwoofer* Power amplifier* from a wired remote control (not supplied)* White White/black striped Front speaker* Gray Gray/black striped Green Green/black striped Rear speaker* Purple Purple/black striped Blue/white striped (MAX 0.4A) Orange/white striped Black Yellow For details, see “Making connections”... -
Page 31: Making Connections
*7 Use speakers with 50W RMS or higher power input sure that the wires to be connected to the +12 V and capacity. Using Sony XB series full range speakers is GND terminals of this unit are at least 14-Gauge recommended. -
Page 32: Installation
Installing the microphone Installation To capture your voice during handsfree calling, you need to install the microphone . Removing the protection collar and the bracket Before installing the unit, remove the protection collar and the bracket from the unit. Pinch both edges of the protection collar , then pull it out. -
Page 33: Detaching And Attaching The Front Panel
You may not be able to install this unit in some makes of Japanese cars. In such a case, consult your Fuse replacement Sony dealer. TOYOTA When replacing the fuse, be sure to use one matching the amperage rating stated on the ... - Page 34 Exención de responsabilidad sobre los servicios prestados por otros proveedores Los servicios prestados por otros proveedores están sujetos a cambios, anulaciones o interrupciones sin previo aviso. Sony no asume responsabilidad alguna en estas situaciones.
- Page 35 Aviso importante Precaución SONY NO SERÁ RESPONSABLE DE NINGÚN DAÑO INCIDENTAL, INDIRECTO O DERIVADO NI DE OTROS DAÑOS QUE INCLUYEN, ENTRE OTROS, PÉRDIDA DE GANANCIAS, PÉRDIDA DE INGRESOS, PÉRDIDA DE DATOS, PÉRDIDA DE LA UTILIDAD DEL PRODUCTO O DE CUALQUIER EQUIPO RELACIONADO, TIEMPO DE INACTIVIDAD Y TIEMPO DEL COMPRADOR RELACIONADO CON LA UTILIZACIÓN DE ESTE...
- Page 36 Conexión/Instalación Tabla de contenidos Advertencias ......31 Guía para las partes y los controles... . . 5 Lista de piezas para la instalación .
-
Page 37: Guía Para Las Partes Y Los Controles
Guía para las partes y los controles Unidad principal Retiro del panel frontal (panel interno) Marca N Toque el selector del control con un teléfono Android para establecer conexión BLUETOOTH. Ranura del disco Ventana de visualización SEEK +/– Para sintonizar emisoras de radio en forma automática. - Page 38 Botones numéricos (1 al 6) Control remoto RM-X231 Para recibir las emisoras almacenadas. Manténgalo presionado para almacenarlas en forma manual. Llame a un número almacenado. Manténgalo apretado para guardar un número telefónico. ALBUM / Para saltearse un álbum en el dispositivo de audio.
-
Page 39: Procedimientos Iniciales
Reinicio de la unidad Procedimientos iniciales Antes de operar la unidad por primera vez, luego de remplazar la batería del automóvil o cambiar las Extracción del panel frontal conexiones, debe reiniciar la unidad. Presione RESET en el panel interno con un bolígrafo de punta Es posible extraer el panel frontal de la unidad para redonda, etc., luego de haber extraído el panel evitar que la roben. -
Page 40: Ajuste Del Reloj
Para un smartphone con Android OS 4.0 o inferior Ajuste del reloj instalado, se requiere descargar la aplicación “NFC Easy Connect” disponibles en Google Play™. Es posible que la aplicación no esté disponible para su Presione MENU, gire el selector de descarga en algunos países/regiones. - Page 41 Conexión con un dispositivo dispositivo BLUETOOTH para detectar BLUETOOTH emparejado esta unidad. Para utilizar un dispositivo emparejado, es Seleccione [MEX-XB100BT] que se necesaria la conexión con esta unidad. Algunos muestra en la pantalla del dispositivo de dispositivos emparejados se conectarán BLUETOOTH.
-
Page 42: Conexión De Un Dispositivo Ipod/Usb
Conectar con un iPhone/iPod Conexión de otro dispositivo de (Autoemparejamiento con BLUETOOTH) audio portátil Cuando un iPhone/iPod con iOS5 o superior instalado se conecta al puerto USB, la unidad se Apague el dispositivo de audio portátil. empareja y conecta con el iPhone/iPod Baje el volumen de la unidad. -
Page 43: Escuchar La Radio
Usar el RDS (Sistema de datos Escuchar la radio de radio) Escuchar la radio Selección de tipos de programa (PTY) Se necesita el ajuste del paso de sintonización (página 7). Presione PTY durante la recepción FM. Para escuchar una estación de radio, presione SRC para seleccionar [TUNER]. -
Page 44: Reproducción
Conecte el dispositivo iPod/USB al puerto USB (página 10). Reproducción Se inicia la reproducción. Si ya está conectado un dispositivo, para iniciar la reproducción pulse SRC para seleccionar Reproducción de un disco [USB] ([IPD] aparece en la pantalla cuando se reconoce el iPod). -
Page 45: Reproducción De Un Dispositivo Bluetooth
Búsqueda de una pista por nombre Reproducción de un dispositivo (Quick-BrowZer™) BLUETOOTH Durante la reproducción de los Puede reproducir contenido en un dispositivo dispositivos de audio CD, USB o BT conectado que sea compatible con BLUETOOTH AUDIO* , presione (navegar)* para A2DP (Perfil de distribución de audio avanzado). -
Page 46: Llamada Con Manos Libres (Sólo A Través De Bluetooth)
Desde el historial de llamadas Llamada con manos libres (sólo a Presione CALL, gire el selector de control través de BLUETOOTH) para seleccionar [SET RECENT CALL] y, a continuación, presiónelo. Aparece una lista del historial de llamadas. Para usar un teléfono celular, conéctelo a esta unidad. -
Page 47: Tareas Disponibles Durante La Llamada
Marcación predefinida de números Para cambiar entre el modo manos libres y el modo manual telefónicos Durante una llamada, presione MODE para cambiar Es posible almacenar hasta 6 contactos en la el audio de la llamada telefónica entre la unidad y marcación preajustada. -
Page 48: Funciones Útiles
Facebook/Calendar, etc., ésta es automáticamente controlar dispositivos de audio anunciada a través de los parlantes de la unidad. Sony que son compatibles con “SongPal”, por su teléfono iPhone/Android. Lo que pueda controlar con “SongPal” varía de acuerdo al dispositivo conectado. -
Page 49: Utilizar Siri Eyes Free
Notas El reconocimiento por voz puede no estar disponible Utilizar Siri Eyes Free en ciertos casos. El reconocimiento por voz puede no funcionar Siri Eyes Free le permite utilizar el manos libres de correctamente dependiendo del rendimiento del iPhone al simplemente hablar al micrófono. -
Page 50: Ajustes
Configuración General Ajustes (GENERAL) Cancelación del modo DEMO CLOCK ADJ (ajuste del reloj) (página 8) Puede cancelar la pantalla de muestra que aparece TUNER STEP (página 7) cuando la fuente está apagada y se muestra el (Disponible solamente mientras la fuente esté reloj. -
Page 51: Configuración Del Sonido (Sound)
Reproduce el sonido al optimizar la señal digital Reinicia la configuración del control remoto del con los ajustes de sonido recomendados por volante: [YES], [NO]. Sony: [ON], [OFF]. (Automáticamente se configura en [OFF] cuando [EQ10 PRESET] se Notas cambia o [MEGA BASS] está configurado en ... - Page 52 LPF FREQ (frecuencia de filtro de paso bajo) POSITION (posición de escucha) Selecciona la frecuencia de corte del altavoz potenciador de graves: [50Hz], [60Hz], [80Hz], [100Hz], [120Hz]. LPF SLOPE (pendiente de filtro de paso bajo) Selecciona la pendiente LPF: [1], [2], [3]. SUBW DIRECT (conexión directa al altavoz potenciador de graves) Puede utilizar el altavoz potenciador de graves...
-
Page 53: Configuración De Pantalla (Display)
CUSTOM COLOR HPF (filtro de paso alto) Permite registrar un color personalizado para los HPF FREQ (frecuencia de filtro de paso alto) botones. Permite seleccionar la frecuencia de corte: [OFF], RGB RED, RGB GREEN, RGB BLUE [50Hz], [60Hz], [80Hz], [100Hz], [120Hz]. Gama de colores ajustables: [0] –... -
Page 54: Configuración Bluetooth (Bt)
PHONE BOOK (página 14) Puede actualizar el firmware de esta unidad desde REDIAL (página 14) el siguiente sitio web de soporte técnico: Clientes de Latinoamérica: RECENT CALL (página 14) http://esupport.sony.com/ES/LA/ Clientes en Asia-Pacífico: VOICE DIAL (página 15) http://www.sony-asia.com/section/support DIAL NUMBER (página 14) http://www.sony-asia.com/caraudio/... - Page 55 Esta unidad se diseñó para reproducir discos que Acerca de iPod cumplen con el estándar Compact disc (CD). Los DualDisc y otros discos de música codificados con Puede conectarse a los siguientes modelos de tecnologías de protección de derechos de autor iPod.
-
Page 56: Mantenimiento
Sony más cercano. No toque nunca los conectores directamente con los dedos ni con ningún dispositivo metálico. - Page 57 HFP (Perfil manos libres) 1.6 marcas comerciales registradas y son propiedad de PBAP (Perfil de acceso a la agenda telefónica) Bluetooth SIG, Inc., y Sony Corporation posee SPP (Perfil de puerto serie) licencia para utilizar cualquiera de dichas marcas. MAP (Perfil de acceso a mensajes)
-
Page 58: Solución De Problemas
Las redistribuciones en forma binaria deben La unidad se apaga cuando reproduce sonidos a reproducir la noticia de copyright antes un volumen alto. mencionada, la lista de condiciones y el siguiente Es posible que la energía suministrada por el aviso en el documento u otros materiales cable de alimentación del vehículo no sea provistos con la distribución. - Page 59 Los botones de operación no funcionan. Los archivos MP3/WMA/AAC tardan más tiempo El disco no sale expulsado. en reproducirse que los otros. La conexión no es correcta. El inicio de la reproducción de los siguientes Revise la conexión de la unidad. discos tarda algo más de tiempo.
- Page 60 Mientras se conecta al otro dispositivo La calidad de sonido del teléfono es baja. BLUETOOTH, esta unidad no puede detectarse La calidad del sonido del teléfono depende de las desde otro dispositivo. condiciones de recepción del teléfono celular. ...
- Page 61 Siri Eyes Free no está activado. de error en pantalla, consulte a su distribuidor de Realice el registro de manos libres para un Sony más cercano. iPhone compatible con Siri Eyes Free. Configure la función Siri en el iPhone para OVERLOAD: El dispositivo USB se encuentra sobrecargado.
- Page 62 Si estas soluciones no ayudan a solucionar el problema, póngase en contacto con el distribuidor Sony más cercano. Para la operación SongPal: Si entrega la unidad para su reparación a causa de problemas en la reproducción de CD, lleve el disco APP --------: No se estableció...
-
Page 63: Conexión/Instalación
Lista de piezas para la Conexión/Instalación instalación Advertencias Conecte todos los cables hacia un punto a tierra en común. No deje que los cables queden atrapados debajo de un tornillo o que se enganchen en piezas ×... -
Page 64: Conexión
Conexión Subwoofer* Amplificador de potencia* desde un control remoto conectado (no suministrado)* Blanco Blanco/negro a rayas Altavoz delantero* Gris Gris/negro a rayas Verde Verde/negro a rayas Altavoz trasero* Púrpura Púrpura/negro a rayas Rojo Azul/blanco a rayas (MAX 0.4A) Anaranjado/blanco a rayas Negro Para obtener más información,... - Page 65 Asegúrese de que los cables de la batería de su Sony XB. automóvil conectados a éste (de tierra a chasis)* sean *8 Cuando el índice de amperaje del fusible que se de un calibre por lo menos equivalente al calibre del utiliza en su automóvil es 10 A, realice la conexión...
-
Page 66: Instalación
Conexión para sostener la memoria Instalación Cuando el cable de la fuente de alimentación amarillo está conectado, la alimentación siempre abastecerá al circuito de la memoria incluso cuando Quitar el marco de protección y el el interruptor de encendido se encuentre apagado. soporte Conexión del altavoz Antes de instalar la unidad, quite el marco de... - Page 67 Para obtener más información, consulte “Reinicio de la unidad” (página 7). Tal vez no pueda instalar esta unidad en algunas marcas de autos japoneses. En dicho caso, consulte con su distribuidor Sony. Reemplazo del fusible TOYOTA Cuando reemplace el fusible, asegúrese de utilizar ...
- Page 68 Web: the web site below: Customers in Latin America/Clientes de Latinoamérica: http://esupport.sony.com/ES/LA/ Customers in Asia Pacific/Clientes en Asia-Pacífico: http://www.sony-asia.com/section/support http://www.sony-asia.com/caraudio/ http://www.sony.net/ ©2015 Sony Corporation Printed in Thailand...