Table of Contents
Advertisement
Quick Links
User Manual
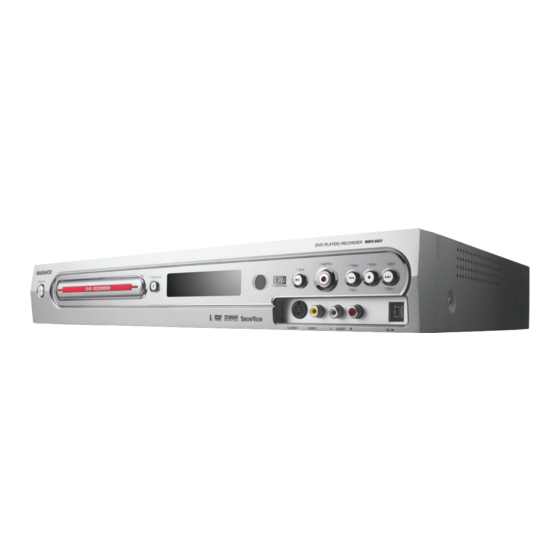
MRV660
DVD RECORDER
Thank you for choosing
Magnavox.
Need help fast?
Make your own DVD
Read your Quick Use Guide and/or
Owner's Manual first for quick tips
that make using your Magnavox product
more enjoyable.
If you have read your instructions
and still need assistance,
you may access our online help at
www.magnavox.com
or call
1-800-705-2000
while with your product.
MRV660_17_Eng40
Magnavox vous remercie de
votre confiance.
Besoin d'une aide
rapide?
Les Guide d'utilisation rapide et Manuel de
l'utilisateur regorgent d'astuces destinées à
simplifier l'utilisation de votre produit Magnavox.
Toutefois, si vous ne parvenez pas à résoudre
votre probléme, vous pouvez accéder à
notre aide en ligne à l'adresse
www.magnavox.com
ou formez le
1-800-661-6162 (Francophone)
1-800-705-2000 (English speaking)
Veillez à avoir votre produit à
portée de main.
1
S M A R T . V E R Y S M A R T .
Gracias por escoger
Necesita ayuda
inmediata?
Lea primero la Guía de uso rápido o el
Manual del usuario, en donde encontrará
consejos que le ayudarán a disfrutar
plenamente de su producto Magnavox.
Si después de leerlo aún necesita ayuda,
consulte nuestro servicio de
asistencia en línea en
www.magnavox.com
o llame al teléfono
1-800-705-2000
y tenga a mano el producto.
9/3/05, 11:46 AM
Magnavox
Advertisement
Table of Contents

Related Manuals for Magnavox MRV660


Summary of Contents for Magnavox MRV660
-
Page 1: Dvd Recorder
Need help fast? Make your own DVD Read your Quick Use Guide and/or Owner's Manual first for quick tips that make using your Magnavox product more enjoyable. If you have read your instructions and still need assistance, you may access our online help at www.magnavox.com... - Page 2 Return your Product Registration Card today to get the very most from your purchase. Registering your model with MAGNAVOX makes you eligible for all of the valuable benefits listed below, so don't miss out. Complete and return your Product Registration Card at once to ensure:...
-
Page 3: Important Safety Instructions
IMPORTANT SAFETY INSTRUCTIONS Read these instructions. Keep these instructions. Heed all warnings. Follow all instructions. Do not use this apparatus near water. Clean only with dry cloth. Do not block any ventilation openings. Install in accordance with the manufacturer´s instructions. Do not install near any heat sources such as radiators, heat registers, stoves, or other apparatus (including amplifiers) that... -
Page 4: Declaration Of Conformity
DANGER - Invisible laser radiation when open. AVOID DIRECT EXPOSURE TO BEAM. For Customer Use: Read carefully the information located at the bottom or rear of your DVD Recorder and enter below the Serial No. Retain this information for future reference. Model No. MRV 660 Serial No. -
Page 5: Special Functions
Your DVD recorder has a number of special functions that will make day-to-day use of your new DVD recorder easier for you. Using the ‘Digital Photo Manager’, you can view and modify JPEG pictures from a Picture CD, DVD, or a CD ROM. -
Page 6: Table Of Contents
Using the alphanumeric keypad to enter the characters ... 22 MRV660_17_Eng40 Front Panel Jacks behind the flap ... 23 Installing the DVD Recorder First Installation ... 24-25 TV channel programming ... 26 Automatic TV channel search ... 26 Setting favorite TV channels ... 26 Selecting the channel input signal ... - Page 7 Recording Discs for recording ... 37 Recording settings ... 37 Recording mode ... 38 Recording language ... 38 Inserting chapter markers ... 38 Filter mode ... 39 Manual recording ... 39-40 Manual recording with automatic turn-off (one touch recording) ... 40 Deleting a recording ...
-
Page 8: Care And Safety Information
Care and Safety Information CAUTION! High voltage! Do not open. You run the risk of getting an electric shock. The machine does not contain any user-serviceable parts. Please leave all maintenance work to qualified personnel. Setup Finding a suitable location –... -
Page 9: General Information
Introduction Your DVD recorder allows you to record the TV programs or duplicate camcorder recordings to a DVD+RW or DVD+R and play pre-recorded DVDs. The recordings you make on the Recorder will play on some DVD players and DVD- ROM drives. The DVD+R discs have to be finalized before they can be played on other DVD players. -
Page 10: Connecting To Tv
RF modulator. If the TV shows a blank screen or distorted picture, it may be due to the DVD recorder’s video output setting does not match with the video connection. You can reset the system as below : Disconnect the DVD recorder’s... -
Page 11: Option 1: Using Y Pb Pr Jacks
Cable Box.) Insert it to the ANTENNA input jack at the back of the DVD recorder. Use the supplied antenna cable to connect the DVD recorder’s TV output jack to the antenna input jack at the back of your TV set. MRV660_17_Eng40... - Page 12 Connecting to TV IMPORTANT! – The progressive scan video quality is only available through Y Pb Pr connection and a progressive TV is required. Turn on the progressive scan feature after complete the first installation (see page 24.) – Before enabling the progressive scan function, you must ensure that your TV progressive scan function is turned on (refer to your TV owner’s...
-
Page 13: Option 2 : Using S-Video (Y/C) Jack
DVD recorder. Use the supplied antenna cable to connect the DVD recorder’s TV input jack to the antenna input jack at the back of your TV set. Use an S-Video (SVHS) cable to connect the DVD recorder’s S-VIDEO (Y/C) -
Page 14: Option 3 : Using Video (Cvbs) Jack
DVD recorder. Use the supplied antenna cable to connect the DVD recorder’s TV output jack to the antenna input jack at the back of your TV set. Use the supplied AV cables (yellow plug) to connect the DVD recorder’s VIDEO... -
Page 15: Option 4 : Using Antenna Jack Only
– To toggle between channel 3 and channel 4, you can press § button at the DVD recorder front panel while plug in the main cord of the DVD recorder to the power supply. (cont’d) 3139 246 XXXXX 9/3/05, 10:24 AM... -
Page 16: Connecting To Additional Devices
11~15 for details. Alternatively, you can connect it to the VIDEO (CVBS) (or S-VIDEO (Y/C)) and AUDIO L/R input jacks at the back of the DVD recorder if your Satellite Receiver/Cable Box has the same output jacks. ➜... -
Page 17: Connecting A Vcr/Dvd Player
DVDs are copy-protected. If you try to copy them, the message 'COPY PRO' appears on the display panel. – Connect the DVD recorder directly to the TV set. If there is a video recorder or an additional device in between, the picture quality may be poor because of the copy protection system built into the DVD recorder. -
Page 18: Connecting A Camcorder To The Front Jacks
It provides the best picture quality. Use an i.LINK 4-pin cable to connect the DVD recorder’s DV IN jack to the appropriate DV output jack on the camcorder. Before you start operating, select ‘CAM 2’... -
Page 19: Using Analog Audio Output Jacks
Using analog audio output jacks STEREO AUDIO IN You can connect the DVD recorder to a two channel stereo system or receiver in order to enjoy the stereo sound system. Use an audio cable to connect AUDIO L/R (OUT 2) (red/white) jacks... -
Page 20: Remote Control
Remote Control STANDBY-ON 2 – Turn on or off the DVD recorder. TUNER – Switch to TUNER mode. MRV660_17_Eng40 Alphanumeric keypad – Enter numbers or letters in appropriate entry fields. – Select a chapter/track number to play. – Select a TV channel while in internal tuner mode. - Page 21 TV/DVD – Switch between the DVD recorder and the antenna signal. This function operates when the DVD recorder is connected to the TV with only an antenna cable. T/C (Title/Chapter) – Select a 'T'(title)/'C'(chapter) directly on the menu bar. STOP 9 –...
-
Page 22: Inserting Batteries
Remote Control Inserting Batteries Open the battery compartment. Insert two batteries type R03 or AAA, following the indications (+-) inside the compartment. Close the cover. Caution! – Remove batteries if they are exhausted or if the remote is not to be used for a long time. -
Page 23: Front Panel
STANDBY-ON 2 – Turn on or off the DVD recorder. Disc tray OPEN/CLOSE ç – Open or close the disc tray. Display panel – Show information about the current status of the DVD recorder. PLAY 2 – Play a disc. -
Page 24: Installing The Dvd Recorder
First Installation The First Installation menu will appear the very first time you turn on the DVD recorder. These settings will help you set up the basic DVD recorder features easily, including TV channels and language options. IMPORTANT! – You have to turn on your TV and select the correct Video In channel to see the First Installation menu. - Page 25 Press RETURN to go back to previous menu item. MRV660_17_Eng40 Installing the DVD Recorder Helpful Hints: – If the DVD recorder cannot find any TV stations, select program number {1} on the TV set or check the cable connection from the antenna jack to the DVD recorder and TV set.
-
Page 26: Tv Channel Programming
Press 4 to select { Auto channel } and press 2 to confirm. ➜ The automatic TV channel search starts. This allows the DVD recorder to save all available TV channels. ➜ This process may take several minutes. Once complete, the total number of channels found appears on the TV. -
Page 27: Selecting The Channel Input Signal
Press 3 4 to select the connection the TV is using. ➜ { Auto } : Select this to enable the DVD recorder to detect the input signal automatically. ➜ { Cable } : Select this if you have connected a cable signal. -
Page 28: Setting The Time And Date
Installing the DVD Recorder Setting the time and date Manual time/date settings If the DVD recorder has not set the time and date correctly, set the clock manually by following the steps below. Manual clock setting overrides automatic clock setting. -
Page 29: Setting The Language
TIPS: Press 1 to go back to previous menu item. Press SYSTEM-MENU to exit the menu. MRV660_17_Eng40 Installing the DVD Recorder Helpful Hint: – For bilingual TV programs, you can switch between stereo (original) and additional language (SAP) for recording. See page 38 “Recording - Recording language.”... -
Page 30: Playback
(CD-Recordable) Audio/ MP3 contents CD-RW (CD-Rewritable) Audio/ MP3 contents Some discs can not be played on this DVD recorder due to the configuration and TIPS: characteristics of the disc, or due to the condition of recording and authoring software. MRV660_17_Eng40 IMPORTANT! –... -
Page 31: Starting Disc Playback
∞ / §. To stop playback, press STOP 9. Some discs can not be played on this DVD recorder due to the configuration and TIPS: characteristics of the disc, or due to the condition of recording and authoring software. -
Page 32: Playing A Dvd+R(W) Disc
TV if included in the ID tag. Some discs can not be played on this DVD recorder due to the configuration and TIPS: characteristics of the disc, or due to the condition of recording and authoring software. -
Page 33: Additional Playback Features
Using Toolbar options Press SYSTEM-MENU on the remote control. ➜ The system menu appears on the TV. At { Toolbar ,} press 2 to select { Options .} Press 3 4 to select the setting you want to adjust. ➜ If the selection in the menu is grayed out, that means the feature is not available or not possible to change at the... -
Page 34: Changing Audio Soundtrack Language
- { SAP } or { Off }, if the additional language is available in the TV programs. Once the DVD recorder is turned off and on again, it will return to the default settings (see page 38.) The operating features described here might not be possible for certain discs. -
Page 35: Changing To Another Title/Chapter/ Track
Additional Playback Features Changing to another title/ chapter/track When a disc contains more than one track, title or chapter, you can change to a different track, title or chapter as follows. During playback, Press § to go to the next title/chapter/ track. -
Page 36: Selecting Various Play Mode
DVD+RW only) on the disc. During playback, press Red button { SCAN } on the remote control. ➜ The DVD recorder skips to the next track after 10 seconds of playback. To exit Scan disc mode, press Red button again. -
Page 37: Recording
Discs for recording Two different formats of DVD recordable discs can be used with this DVD recorder: DVD+RW (DVD ‘plus’ Rewritable) – Discs are re-writable can be used for multiple recordings once existing data is erased. – To prevent accidental loss of recordings, when you starting recording, hold down the RECORD button until ‘SAFE RECORD’... -
Page 38: Recording Mode
Recording (cont’d) Recording mode The recording mode defines the picture quality of recordings and the maximum recording time for a disc. During playback, the correct picture quality will automatically be selected. This function can also be accessed via the REC MODE button on the remote control. -
Page 39: Filter Mode
{0} on the remote control and followed by 4 to select the correct input channel that matches the socket to which you connected to the DVD recorder. ➜ { CAM 2 } : DV IN socket at the front ➜... -
Page 40: Manual Recording With Automatic Turn-Off (One Touch Recording)
To stop the recording, press STOP 9. ➜ ‘MENU UPDATE’ or ‘CREATE MENU’ appears on the display panel to indicate that the DVD recorder is writing the list of contents. Wait until the message disappears before removing the DVD+R(W). If the end of a disc is reached during recording, recording will stop and the DVD recorder will turn off automatically. -
Page 41: Timer Recording
Introduction Use 'Timer Recording’ to automatically start and stop a recording at a later date/ time. The DVD recorder will tune to the right program number and begin recording at the specified time. With this DVD recorder, you can pre- program up to six recordings within a period of 15 days. -
Page 42: Programming Recording From A Satellite Receiver/Cable Box
Insert a DVD+R(W). Press STANDBY-ON to switch off the DVD recorder. ➜ The DVD recorder must be in standby mode in order for the timer recording to occur. If not, a warning message will appear ten minutes before the recording starts. -
Page 43: Changing A Programmed Recording
Changing a programmed recording Turn on the TV power. Select the correct Video In channel at the TV. Press TIMER on the remote control. ➜ The timer overview appears. Press 3 4 to select a timer program which you want to change. Press the matching color coded button on the remote control to select { Change }... -
Page 44: Editing/Finalizing Recording
Editing/Finalizing Recording About editing You can change disc contents and settings for a recorded DVD+RW or unfinalized DVD+R from the edit menu screen. Photo editing is limited to edit the information on a roll or album. These editing changes are available for the DVD recorder, but may not be accessible when you play the disc on other DVD player. -
Page 45: Changing The Disc/Title Name
This function is necessary for a DVD+R in order to be played back on a DVD player. Otherwise, the DVD+R will play only on this DVD recorder. After finalized, no further recording or editing can be made to the disc. -
Page 46: Video Editing
Editing/Finalizing Recording Video editing In the edit video mode, the entire recording will be played back regardless of whether they are hidden or not. Insert a recorded DVD+RW or an unfinalized DVD+R. ➜ The Index Picture screen appears on the TV. Press 3 4 to select a recording. -
Page 47: Editing Chapter (Merge/Split/Hide)
Editing chapter (merge/split/hide) Start playback a recorded DVD+RW or an unfinalized DVD+R. Press EDIT on the remote control. Press the matching color coded button on the remote control to select { Chapter } ➜ The chapter editing menu appears. 00:01:02 00:00 Press the matching color coded button on the remote control to make your... -
Page 48: Deleting Chapter Markers
Editing/Finalising Recording { Append } - for DVD+RW only – Select this to append record to the existing recording from the position of the playback. Continue steps 5~7. For append recording only: Press 3 4 to select the input channel to append : { preset program number }, { EXT1 }, { EXT 2 } or { CAM1 .} Press RECORD 0 to start append... -
Page 49: Using The Browser
You can view and manage possible contents within your discs by using an on-screen console called the Media Browser. Insert a disc into the DVD recorder. ➜ The Index Picture screen or disc content menu appears on the TV. (example of an DVD) -
Page 50: Browsing The Picture Disc
JPEG Photo can handle up to 100 photos in one album on a DVD+RW or DVD+R from this DVD recorder, depends on the JPEG file parameters. The supported functions are shown at the bottom of the disc content menu via the color coded buttons on the remote control. -
Page 51: Changing The Picture Order Within An Album
Changing the picture order within an album You can re-arrange the picture position in the album in order to create the desired order of the slide show. The order of the pictures in the photo roll remains unchanged. Press BROWSER on the remote control. -
Page 52: Changing The Slide Show Settings
Using the Browser Changing the slide show settings You can adjust the various slide show settings to your individual needs. Press BROWSER on the remote control. ➜ The disc content menu appears. Press 1 2 to select photo roll/album menu and press 3 4 to select a desired photo roll/album folder. -
Page 53: System Menu - Preferences
– { Stereo } : To hear sound from the left and right audio channels. Use this setting when the DVD recorder is connected to a stereo – { Surround } : For audio device that is compatible with Dolby Surround. Dolby... -
Page 54: Disc
Allows you to display your demo according to the following options: – { Off } : Turn off dealer mode. – { On } : The DVD recorder’s display panel will show various features offered by the system while in standby mode. -
Page 55: System Menu - Setup
– { On } : Turn on Auto standby mode. – { Off } : Turn off Auto standby mode. { Second RC } Allows you to control the DVD recorder with a second remote control (not supplied.) – { On } : Enable second RC control. -
Page 56: Time-Date
System Menu - Setup { Display } Allows you to change the brightness of the DVD recorder display panel. – { Bright } : Normal brightness. – { Dimmed } : Medium brightness. – { Off } : Turn off the display. -
Page 57: Audio Output
{ Progressive } Allow you to turn on the progressive scan function if the DVD recorder is connected to a TV with progressive scan. – { On } : Select this to enable progressive scan function. – { Off } : Select this to disable the progressive scan function. -
Page 58: Setting Access Control
Setting Access Control About Access Control Access Control limits viewing of discs that exceed the limits you set. We cannot guarantee the availability of Access Control with all discs, and therefore denies any liability associated with unintended watching of discs. Setting or changing the pin code The same pin code (password) is used for... -
Page 59: Activating/Deactivating The Child Lock
Activating/Deactivating the child lock This function can prevent children from viewing discs. This DVD recorder can memorize settings for 50 discs. When in use, a four-digit pin code must be entered in order to play a disc. Press SYSTEM-MENU on the remote control. -
Page 60: Restricting Playback By Parental Control
Setting Access Control Restricting playback by Parental Control Some DVDs may have a parental level assigned to the complete disc or to certain scenes on the disc. This feature lets you set a playback limitation level. The rating levels are from 1 to 8 and are country dependent. -
Page 61: Specifications
Disc types Recording : DVD+RW/+R Playing : DVD-Video, Video CD, SuperVCD,Audio CD, MP3 CD, Picture CD, CD-R/RW, DVD-R, DVD-RW Record modes recording time / picture quality M2: 120 minutes / DVD quality M2x: 150 minutes / DVD quality M3: 180 minutes / S-VHS quality M4: 240 minutes / VHS quality M6: 360 minutes / VHS quality M8: 480 minutes / VHS quality... -
Page 62: Troubleshooting
– The DVD recorder will not operate until you complete the first installation. Read chapter “Installing the DVD Recorder - First Installation” for details. – The DVD recorder may be in Dealer mode, all buttons on the front of the DVD recorder are locked. To deactivate the dealer mode : 1) Disconnect the power cord from the power outlet. - Page 63 In some situations, programs that are broadcast in black and white cannot be recorded. – Do not connect any cables from the DVD recorder to the 'Phono' input of your amplifier. – Do not connect the DVD recorder’s Coaxial DIGITAL AUDIO OUT jack to an analog jack (red/white) on the connecting devices.
- Page 64 – Some DVD players cannot playback DVD+RW recordings. You can solve this problem by using a special function : 1) Press OPEN CLOSE / on the DVD recorder to open the disc tray. 2) Insert the disc but do not close the tray.
- Page 65 – If a recording is made from a video recorder, change the tracking on the video recorder. – The DVD recorder may not be able to recognize the video input signal if this signal is poor or does not comply with relevant standards.
-
Page 66: Display Panel Symbols/Messages
BLOCKED The disc tray cannot be opened or closed due to some mechanical obstruction. MRV660_17_Eng40 COMPATIBLE The DVD Recorder is busy making changes to make the disc DVD-compatible. CLOSING Disc tray is closing. COPY PRO The DVD/video cassette you are trying to copy is copy-protected. - Page 67 Display panel symbols/messages IS THE TV ON? The DVD Recorder is currently in the first installation mode. Turn on your TV and read the section, 'First installation', in the chapter 'Installing the DVD Recorder'. MAX TITLE The maximum number of titles has been reached for the disc.
-
Page 68: Glossary
Glossary Analog: Sound that has not been turned into numbers. Analog sound varies, while digital sound has specific numerical values. These jacks send audio through two channels, the left and right. Aspect ratio: The ratio of vertical and horizontal sizes of a displayed image. The horizontal vs. vertical ratio of conventional TVs. - Page 69 LABOR: For a period of one (1) year from the date of pur- chase, Magnavox will repair or replace the product, at its option, at no charge, or pay the labor charges to the Magnavox authorized repair facility (see warranty service phone numbers in next column).
- Page 70 DVD RECORDER 660 CLASS 1 LASER PRODUCT 3139 246 14762 Printed in China SgpJP-0511-17-1 3139 246 XXXXX MRV660_17_Eng40 9/3/05, 10:26 AM...