Table of Contents
Advertisement
Advertisement
Table of Contents
Troubleshooting

Related Manuals for DeLonghi ECAM22.360


Summary of Contents for DeLonghi ECAM22.360
- Page 1 5713218561/ 09.12...
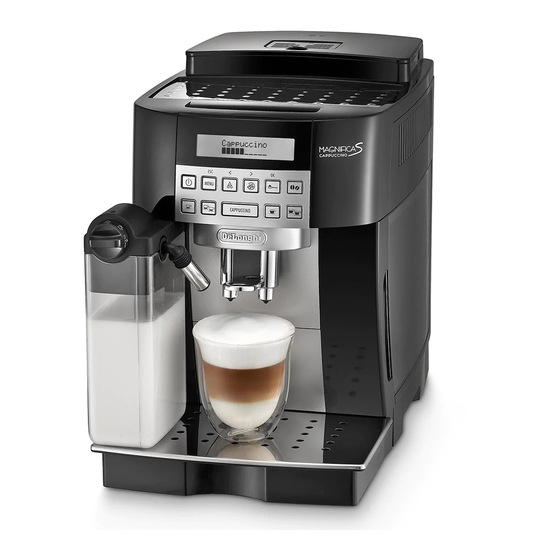
- Page 2 BEAN TO CUP ESPRESSO AND CAPPUCCINO MACHINE Instruction for use ECAM22.360...
- Page 3 Electrical connection (UK only) If your appliance comes fitted with a plug, it will incorporate a 13 Amp fuse. If it does not fit your socket, the plug should be cut off from the mains lead, and an appropriate plug fitted, as below. WARNING: Very carefully dispose of the cut off plug after removing the fuse: do not insert in a 13 Amp socket elsewhere in the house as this could cause a shock hazard.
-
Page 7: Table Of Contents
CONTENTS Tips for a hotter coffee ............11 Making coffee using coffee beans ........... 11 INTRODUCTION ............7 Making coffee using pre-ground coffee ........12 Symbols used in this instruction ..........7 MAKING CAPPUCCINO AND MILK BASED DRINKS ..12 Letters in brackets ..............7 Filling and attaching the milk container ......... -
Page 8: Introduction
INTRODUCTION • Never touch the plug with damp hands. • Make sure the socket used is freely accessible at all times, Thank you for choosing the ECAM 22.360 bean to cup espresso enabling the appliance to be unplugged when necessary. and cappuccino machine. • Unplug directly from the plug only. Never pull the power We hope you enjoy using your new appliance. cable as you could damage it. Take a few minutes to read this instruction. -
Page 9: Description
B10. CAPPUCCINO button: to prepare 1 cup of cappuccino or Please note : frothed milk. Keep this instruction. B11. button : to make 1 cup of long espresso coffee. If the appliance is passed to other persons, they must also be B12. button : to make 2 cups of long espresso coffee. -
Page 10: Setting Up The Appliance
Connect the appliance to an efficiently earthed and correctly Danger of burns! installed socket with a minimum current rating of 10A only. During rinsing, a little hot water comes out of the coffee spouts If the power socket does not match the plug on the appliance, and is collected in the drip tray underneath. Avoid contact with have the socket replaced with a suitable type by a qualified splashes of water. -
Page 11: Auto-Off
Auto-off Energy saving Auto-off can be set so that the appliance goes off after 15 or 30 Use this function to enable or disable energy saving. minutes, or after 1, 2 or 3 hours. When enabled, the function reduces energy consumption in 1. -
Page 12: Statistics Function
which remains as set). release the button; 1. Press the MENU button to enter the menu; when the coffee in the cup reaches the required level, press 2. Press the button until “Default values” is dis- the same button again to memorise the new amount. played;... -
Page 13: Making Coffee Using Pre-Ground Coffee
6. Preparation begins. MAKING CAPPUCCINO AND MILK BASED DRINKS SHORT LONG RISTRETTO LUNGO Please note! 5. Preparation begins and information on the coffee selected • To avoid producing milk with poor froth or large bubbles, is displayed. always clean the milk container lid and hot water nozzle Once the coffee has been made, the appliance is ready to be as described in the section “Cleaning the milk container”... -
Page 14: Making Cappuccino
Making cappuccino eration is shown on the display (fig. 34) and stops auto- 1. Fill the milk container and attach it as described above. matically. 2. Turn the froth adjustment dial on the milk container lid to 4. Turn the dial back to one of the froth selections. the position corresponding to the required froth. -
Page 15: Changing The Quantity Of Water Delivered Automatically
surrounding area. Please note! The drip tray is fitted with a floating level indicator (red) show- If “Energy saving” mode is active, you may have to wait a few ing the level of water it contains. seconds before the hot water is delivered. Before the indicator protrudes from the cup tray, the drip tray must be emptied and cleaned. -
Page 16: Cleaning The Milk Container
Cleaning the milk container 2. Remove the water tank. 3. Open the infuser door (fig. 26) on the right side of the ap- Clean the milk container each time you prepare milk as de- pliance. scribed below: 4. Press the two red release buttons inwards and at the same 1. -
Page 17: Setting Water Hardness
SETTING WATER HARDNESS Important! The “DESCALE” message is displayed after a period of time es- Descaler contains acids which may irritate the skin and eyes. It tablished according to water hardness. is vital to follow the manufacturer’s safety warnings given on The machine is set by default for a hardness value of 4. -
Page 18: Replacing The Filter
The filter lasts about two months if the appliance is used nor- appliance begins hot water delivery and the message mally. If the coffee machine is left unused with the filter in- “Please wait” is displayed. stalled, it will last a maximum of three weeks. 15. -
Page 19: Displayed Message
DISPLAYED MESSAGE DISPLAYED MESSAGE POSSIBLE CAUSE SOLUTION FILL TANK Insufficient water in the tank. Fill the tank with water and/or insert it correctly, pushing it as far as it will go until it clicks into place (fig. 4). EMPTy GROUNDS CONTAINER The grounds container (A14) is full. Empty the grounds container and drip tray, clean and repla- ce (fig. -
Page 20: Troubleshooting
TROUBLESHOOTING Below is a list of some of the possible malfunctions. If the problem cannot be resolved as described, contact customer services. PROBLEM POSSIBLE CAUSE SOLUTION The coffee is not hot. The cups were not preheated. Warm the cups by rinsing them with hot water. (N.B. you can use the hot water function).