Magellan 300 User Manual
Magellan user manual gps receiver triton 200, 300, 400, 500
Hide thumbs
Also See for 300:
- Viitetiedot (100 pages) ,
- Manuel de fonctionnement (90 pages) ,
- Referenzhandbuch (90 pages)
Table of Contents
Advertisement
Quick Links
Download this manual
See also:
Reference Manual
Advertisement
Table of Contents

Related Manuals for Magellan 300


Summary of Contents for Magellan 300
- Page 1 ® Magellan Triton ™ User Manual Magellan Triton 200 Magellan Triton 300 Magellan Triton 400 Magellan Triton 500 Magellan Navigation, Inc. 960 Overland Court, San Dimas, CA 91773...
-
Page 2: Important Safety Warnings
IMPORTANT SAFETY WARNINGS The Magellan Triton is a navigation aid designed to assist you in arriving to your selected destination. When using the Magellan Triton, these safety rules must be followed to prevent accidents that can result in injury or death to yourself or others: IN THE INTEREST OF SAFETY, DO NOT USE THIS NAVIGATION DEVICE WHILE DRIVING A VEHICLE. -
Page 3: Federal Communication Commission Interference Statement
The Magellan Triton must be installed and operated at a distance no closer then 8 inches (20 cm) from the user. This Class B digital apparatus meets all requirements of the Canadian Interference-Causing Equipment Regulations. - Page 4 © 2007 Magellan Navigation, Inc. All rights reserved. The Magellan Logo, Magellan, and Magellan Triton are trademarks of Magellan Navigation, Inc. No part of this user manual may be reproduced or transmitted in any form or by any means, electronic or mechanical, including photocopying and recording, for any purpose other than the purchaser’s personal use, without the prior written permission of Magellan Navigation, Inc.
-
Page 5: Table Of Contents
Creating a Route ... 10 Go To Menu ... 12 Accessing the Go To Menu ... 12 Waypoints ... 12 Go To a Waypoint ... 12 Cancelling a Go To Waypoint Route ... 12 Table of Contents Table of Contents Magellan Triton... - Page 6 Viewing Track Vertical Profile ... 22 Saving a Track as a Trail ... 22 Erasing a Track ... 22 Setting Track Log Options ... 22 Maps ... 22 Viewing Map Information ... 22 Settings ... 23 Table of Contents Magellan Triton...
- Page 7 Memory ... 23 View Memory Usage ... 23 Clearing Memory ... 23 Restoring Factory Settings ... 24 Formatting SD Card (Magellan Triton 400 and 500 only) ... 24 About ... 24 Displaying Information About the Triton Receiver ... 24 Diagnostics ... 24 Testing the receiver ...
-
Page 8: Fundamentals
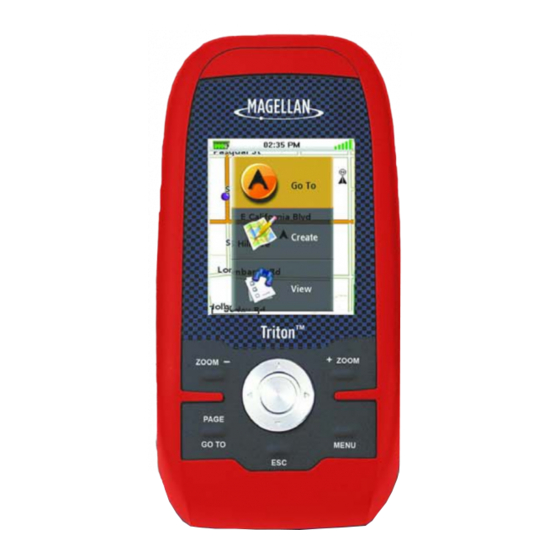
The Magellan Triton is a hand-held GPS receiver that has been designed for the outdoorsman. Simple to use, yet powerful enough to get you through the toughest terrain or returning to that same fishing hotspot, year after year. • Store waypoints that can include images for the complete experience. (Magellan Triton 400 and 500 only.) - Page 9 Backlight Press to step though 3 levels of backlight intensity or off. Power button SD card slot (Magellan Triton 400 and 500 only) ZOOM OUT button ZOOM IN button Enter button and cursor control pad PAGE/GO TO. Press to step through the navigation screens.
-
Page 10: Navigation Screens
The Map Screen will be the most commonly viewed screen while using the Magellan Triton. It has been simplified to provide the best possible outdoor experience while providing access to all of the information needed. Map Screen Overview Battery Level... -
Page 11: Buttons
Buttons While viewing the map screen the keys on the Magellan Triton provide additional input and feature access. Menu Accesses the Main Menu PAGE/GO TO Pages through the Navigation screens. ZOOM IN Zooms in on the map showing less area and more details... -
Page 12: Current Location Screen
Current Location Screen The Current Location Screen provides general information about your current location. Large Data Screen This screen allows you to view four navigation fields in a large type face that is easy to read, even from a distance. Changing a Navigation Field Each navigation field can be customized to display latitude, longitude, heading, bearing, distance to next waypoint, distance to the end of a route,... -
Page 13: Changing A Navigation Field
Changing a Navigation Field Each navigation field can be customized to display latitude, longitude, heading, bearing, distance to next waypoint, distance to the end of a route, time to next waypoint, time to complete the route, time of day, date, destination, cross track error (XTE), elevation, current speed, average speed or maximum speed. -
Page 14: Using The Keypad
The Magellan Triton displays a keypad on the screen whenever data needs to be entered. Understanding the various components of the keypad will make entering data easier. The Keypad The keypad is used to enter names, notes, latitude, longitude or data that the user needs to enter. -
Page 15: Create Menu
The Create Menu is used to access the functions needed to create waypoints, trails, geocaches and routes. Accessing the Create Menu From the Map screen, press the MENU button. Highlight “Create” and press Enter. Waypoints Creating a Waypoint Access the Main Menu, highlight “Create” and press Enter. Highlight “Waypoint”... -
Page 16: Trail
Trail Creating a Trail from Current Track History Access the Main Menu, highlight “Create” and press Enter. Select “Trail” from the Create Menu. Select “Current Track”. Use the keypad to enter a name for the trail. (The default name “TrailXXX” will be used if no name entered.) When the name has been entered, highlight Enter. -
Page 17: Route
The Geocache screen provides the fields needed to identify the waypoint and its location. The fields can be modified to customize the waypoint. Icon: Highlight the icon and press Enter to display all possible icons that can be used to represent the waypoint. Select the desired icon and press Geocache Name: (Default “GCXXX”). - Page 18 The Save Route Screen is displayed. Highlight the Route name (default “RouteXXX”) and press Enter to assign a name to the route. Highlight the alert button to turn alerts for this route on or off. Select “Save” to store the route into memory. Create Menu...
-
Page 19: Go To Menu
The Go To Menu is used to access the functions used to activate Go To’s and saved routes. Accessing the Go To Menu From the Map screen, press the MENU button. Select “Go To” and the Go To Menu will be displayed. Waypoints Go To a Waypoint Access the Main Menu and select “Go To”. -
Page 20: Deleting A Waypoint
Select The Waypoint information screen is displayed. Select the field you want to edit (icon, name, location, elevation or notes) and press Enter. Use the keyboard to enter the information. Select and press Enter. Use the PAGE/GO TO button to access waypoint alarms setting. 10. -
Page 21: Places
Places Creating a Go To to a Place Access the Main Menu and select “Go To”. Select “Place” from the Go To menu. Select the map to be used. (Basemaps contain limited places to select from. Detailed maps include a wide variety of points of interest.) If “Detailed Map”... -
Page 22: Deleting A Trail
Deleting a Trail Access the Main Menu and select “Go To”. Select “Trail”. Select a trail from the list of saved trails and press Enter. Highlight and press Enter. Confirm deleting the waypoint by selecting Duplicating a Trail Access the Main Menu and select “Go To”. Select “Trail”... -
Page 23: Cancelling A Geocache Go To Route
Elevation: Highlight the Elevation field and press Enter to display the keyboard. Enter the elevation and select the green button. Difficulty: Assign a difficulty rating to this cache. Terrain: Indicate the type of terrain the cache is located in. GCType: Geocache type. Hint: Field for including hints about the cache site. -
Page 24: Route
Select “Duplicate Geocache”. Highlight and press Enter. Route Activating a Route Access the Main Menu and select “Go To”. Select “Route” from the Go To menu. Select a saved route. To activate the route, highlight Highlight and press Enter. Cancelling an Active Route From the Map screen, press Enter to display the contextual menu. -
Page 25: Back Track Route
Press the PAGE/GO TO button. Select “Delete Route”. Highlight and press Enter to confirm. Back Track Route Creating a Back Track Route From the Map screen press Enter to access the contextual menu. Select “Back Track”. Select and press Enter to confirm back track route creation. Cancelling a Back Track Route From the Map screen press Enter to access the contextual menu. -
Page 26: View Menu
Local Info The Local Info option provides a way of viewing tide and current information (if a detailed map has been installed with tide and current information), best fishing and hunting times, and sunrise/sunset/ lunar information. Viewing Best Fishing and Hunting Times for Current Location Access the Main Menu and select “View”. -
Page 27: User Profiles
User Profiles You can set user profiles for various operations of the Magellan Triton that can be loaded easily. Activating User Profiles Access the Main Menu and select “View”. Select “Profiles”. Select Hiking, Marine, or Geocaching. Press the PAGE/GO TO button to access the display options. -
Page 28: Alert Options
Place Names Trail Lines Orientation Position Destination Line Alert options GPS Fix Alarm Tone Alarm Volume Beeper Volume Beeper Mode Anchor Off Course Arrival Waypoint Proximity Geocache Proximity Place Proximity Low Battery Sunrise Alarm Sunset Alarm View Menu On or Off Displays names of waypoints stored in the receiver as... -
Page 29: Tracks
Tracks Viewing Track Vertical Profile Access the Main Menu and select “View”. Select Tracks. Select Vertical Profile. With a current track in memory, the vertical profile is displayed. Saving a Track as a Trail Access the Main Menu and select “View”. Select Tracks. -
Page 30: Settings
Settings Navigation Setting Navigation Options Access the Main Menu and select “View”. Select Settings. Select Navigation. Units (of Measure) North Reference Coordinate system Map Datum Volume & Brightness Setting Volume & Brightness Access the Main Menu and select “View”. Select Settings. Select Volume &... -
Page 31: Restoring Factory Settings
Version displays information about the firmware version, application versions and map versions. Copyright displays copyright information for the Magellan Triton. Owner displays information about the owner of the Magellan Triton. You can select any of the fields available to enter your details if desired. Diagnostics Testing the receiver Access the Main Menu and select “View”.