Table of Contents
Advertisement
Quick Links
Advertisement
Table of Contents

Related Manuals for Mace CAM91


Summary of Contents for Mace CAM91
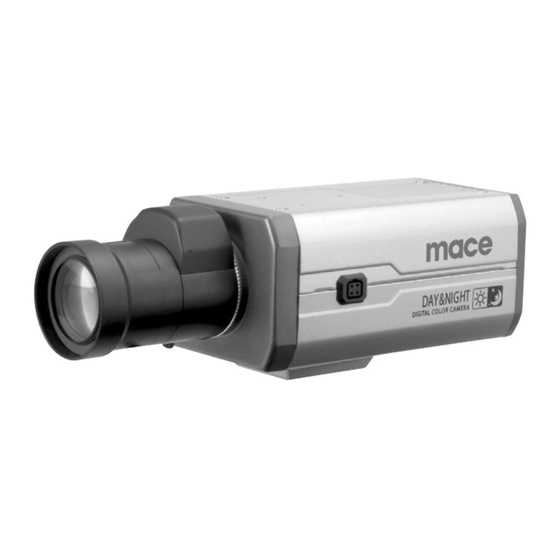
- Page 1 1/3 Day & Night Color CCD Camera Model : CAM91 Instruction Guide MACE Electronic Surveillance Products 3233 SW 2nd Ave. Fort Landerdale, FL 33315 USA toll-free(877)585-MACE local(954)585-6223 fax(954)585-6225 www.mace.com MACE Electronic Surveillance Products...
- Page 2 Warning TO REDUCE THE RISK OF FIRE OR ELECTRIC SHOCK, DO NOT EXPOSE THIS PRODUCT TO RAIN OR MOISTURE Caution CAUTION RISK OF ELECTRIC SHOCK DO NOT OPEN CAUTION:TO REDUCE THE RISK OF ELECTRIC SHOCK, DO NOT REMOVE COVER (OR BACK). NO USER-SERVICEABLE PARTS INSIDE.
- Page 3 Features Day&Night The camera provides automatic mode changeover by sensing day or night conditions. It can change color mode in the day condition for optimal color and BW mode in night condition for clear identification. High Resolution The horizontal resolution of 480TV lines at color mode and 520TV lines at BW mode can be achieved by using a high density Sony CCD (410K pixels), which provides clean, noiseless and reliable pictures.
- Page 4 Precautions Do not install the camera in Do not drop the camera or extreme temperature conditions. subject them to physical shocks. Only use the camera under It can cause malfunctions to occur. conditions where temperatures are between -10 and 50 . Be especially careful to provide ventilation when operating under high temperatures.
-
Page 5: Table Of Contents
Contents Name and Function of Each Part Front Bottom Back Accessories Installation Method Lens Installing Auto lris Lens Installing C/CS Mount Lens Mounting a CS-Mount Lens Mounting a C-Mount Lens Connecting to Monitor Connecting to Power Operating Your Camera Configuration of The Menu Setting Up The Menu - Camera ID - Back Light Compensation... -
Page 6: Name And Function Of Each Part
Name and Function of Each Part Front C Mount Adaptor Attach the C-Mount Adapter when using the C-Mount Lens Tripod Mounting Bracket Screw Hole Used to fix the Tripod mounting Bracket on the top of the camera Auto Iris Lens Connector Used to connect the auto iris lens plug Day&Night Color CCD Camera Name and Function of Each Part... -
Page 7: Back
Name and Function of Each Part Power LED Back The LED turns on when power is supplied. DC/VIDEO Selection Switch Used to choose DC or VIDEO according to the type of your auto iris lens. External Terminal Used to connect external Day/Night input signal. This also provides the motion detect signal. -
Page 8: Installation Method
Installation Method Lens The lens is not supplied with this camera. Purchase a lens suitable for your environment. This camera accepts the auto iris lens and both C- and CS-mount lens. Installing Auto Iris Lens 1. Remove the cover from the iris lens plug supplied, and solder the lens cable to the plug as shown below. -
Page 9: Installing C/Cs Mount Lens
Installation Method Installing C/CS-Mount Lens Before mounting a lens, please check whether it is a C-mount or CS-Mount lens. The back focus is set for the CS-mount lens at the factory. Mounting a CS-Mount Lens After removing the protecting cap, attach the lens into the camera by turning clockwise. -
Page 10: Operating Your Camera
Operating Your Camera Configuration of The Menu Setup Menu Camera ID .OFF .ON .OFF .ON Lens / VIDEO .Manual Shutter .ESC .OFF .FLKless .Manual Gain .AGC .OFF White Balance .ATW .AWC .Manual Motion Detect .OFF .ON Color(Day&Night) .AUTO .ON .BW .EXT Sync .INT .L/L Reset... - Page 11 Operating Your Camera Camera ID If you enter a camera ID, the name will be displayed in the screen monitor. 1. Press the SET button to display the setup menu and move the arrow indicator to ‘Camera ID’ using the UP or DOWN button. Setup Camera ID Select the status “ON”...
-
Page 12: Back Light Compensation
Operating Your Camera Back Light Compensation (BLC) When the image is in front of strong background lighting, that will be presented dark on the monitor. If you select this function, you can get the clear image. 1. Press the SET button to display the setup menu and move the arrow indicator to ‘BLC’... -
Page 13: Shutter Speed Control
Operating Your Camera Shutter Speed Control You can control brightness of the screen by the shutter speed. You can select the automatic control and ‘OFF’ (1/60 or 1/50sec. fixed) mode, Flickerless and manual control of the shutter. 1. Press the SET button to display the setup menu and move the arrow indicator to ‘Shutter’... -
Page 14: Gain Control
Operating Your Camera Gain Control You can see a brighter picture at low light level. Increasing the gain level, you will see the noise increased although the picture gets brighter. 1. Press the SET button to display the setup menu and move the arrow indicator to ‘Gain’... -
Page 15: Motion Detection
Operating Your Camera Manual To fine adjust, select the Manual mode. You can increase or decrease the red or blue factor while monitoring the difference on the screen. Set to ‘Manual’ mode and press the ‘SET’ button. Increase or decrease the value for red(R-Gain) and blue(B-Gain), watching the color of the picture, and press the SET button when you obtain the best color. -
Page 16: Color(Day&Night)
Operating Your Camera 2. Specify the zone area. You can specify the zone area by setting a proper value from 0 to 15 with an increment of 1. Move the arrow indicator to ‘Top’ using the UP or DOWN button and increase or decrease the value using the LEFT or RIGHT button. Repeat the procedure for bottom, left, and right. -
Page 17: Synchronization Mode
Operating Your Camera Color B/W Change Change the value using the LEFT or RIGHT button(1~5) Color B/W Point Color B/W Time Change the value using the LEFT or RIGHT button(1~10) Color Time Change the value using the LEFT or RIGHT button(2~20) BURST Press SET to Return Color... -
Page 18: Using Remote Jack
Operating Your Camera Reset This function resets the camera to the default setting preset at the factory. 1. Press the SET button to display the Setup menu and move the arrow indicator to ‘Reset’ using the UP or DOWN button. Setup Camera ID Lens... -
Page 19: External Connecting Terminal
External Connecting Terminal Day/Night External Signal Input/Motion Detect Output The Color/BW mode change can be controlled by an external sensor or other equipment connected on the DN terminal(Day&Night)on the back side of camera.(Optional Function) When you use Motion Detection mode, the appointed signal is output in every time motion detected. -
Page 20: Troubleshooting
Mace assumes no risk and shall be subject to no liability for damages or loss resulting from the specific use or application made of the Products. Mace’s liability for any claim, whether based on breach of contract, negligence,...