
Related Manuals for Scotsman N0922L


Summary of Contents for Scotsman N0922L
- Page 1 Service Manual for Remote Low Side Modular Flaked and Nugget Ice Machines including Prodigy Plus D Series Models F1222L, F1322L, N0922L and N1322L...
-
Page 2: Table Of Contents
Scotsman flaked ice system to provide reliable ice making and the features needed by customers. Contents Installation: . -
Page 3: Installation
Testing has shown that using a filter that does not remove chlorine, such as the Scotsman Air temperature limits Aqua Patrol, will greatly improve this situation. -
Page 4: Location
• B530S – Use KBT27 approved by Scotsman. • B842S – Use KBT39 Scotsman reserves the right to make design changes • B948S - Use KBT38 for a single unit and/or improvements at any time. Specifications and design are subject to change without notice. -
Page 5: Cabinet Layout
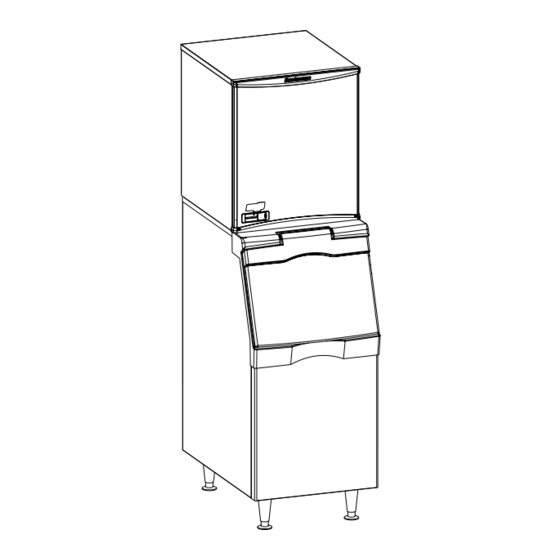
N0922L, N1322L, F1222L, F1522L Remote Low Side Service Manual Includes Prodigy Plus Cabinet Layout December 2014 Page 5... -
Page 6: Unpacking
N0922L, N1322L, F1222L, F1522L Remote Low Side Service Manual Includes Prodigy Plus Unpacking Remove the carton from the skid. Check for hidden Panel Removal freight damage, notify the carrier immediately if any is found. Retain the carton for the carrier’s inspection. -
Page 7: Water
N0922L, N1322L, F1222L, F1522L Remote Low Side Service Manual Includes Prodigy Plus Water The water supply for ice making must be cold, potable water. There is a single 3/8” male flare potable water connection on the back panel. Backflow The design of the float valve and reservoir prevents potable water backflow by means of a 1"... -
Page 8: Electrical
N0922L, N1322L, F1222L, F1522L Remote Low Side Service Manual Includes Prodigy Plus Electrical The machine includes a power cord, connect to the proper power supply. A separate circuit is recommended to avoid unintended shut downs. If a dedicated condensing unit is connected to this machine, it will have a separate power supply. -
Page 9: Refrigeration
Dedicated condensing unit: Add refrigerant charge. Recommended starting field charge: • Elevation over Condensing Unit: 15 feet. • N0922L or F1222L: 8 lb R-404A Line Routing: • N1322L of F1522L: n/a - rack only • Allowed: One rise after a drop. -
Page 10: Final Check List
N0922L, N1322L, F1222L, F1522L Remote Low Side Service Manual Includes Prodigy Plus Final Check List After Connections Control Operation 1. Wash out the bin. If desired, the interior of the bin Use and Operation could be sanitized. Once started, the ice machine will automatically make 2. -
Page 11: Initial Start Up
N0922L, N1322L, F1222L, F1522L Remote Low Side Service Manual Includes Prodigy Plus Initial Start Up 1. Turn the water supply on. • All models require sensor cleaning. 2. Switch the electrical power on. Confirm voltage is • All models require a top bearing check. -
Page 12: Controller
N0922L, N1322L, F1222L, F1522L Remote Low Side Service Manual Includes Prodigy Plus Controller Power Status Water De-scale Location of Optional Vari-Smart Sanitize Technician Section Code Description ..Freeze Mode flashes . . Freeze Mode is Pending Clean . -
Page 13: Autoalert And Display Code
N0922L, N1322L, F1222L, F1522L Remote Low Side Service Manual Includes Prodigy Plus AutoAlert and Display Code The controller uses indicator lights to provide the user Code Description with information on Power, Status, Water or Time to ..Freeze Mode Clean. -
Page 14: Component Indicator Lights
N0922L, N1322L, F1222L, F1522L Remote Low Side Service Manual Includes Prodigy Plus Component Indicator Lights The controller has six lights to indicate component Control Button Use operation: Recall diagnostic code: Bin Eyes Blocked • Hold off button in for 3 seconds. Release. -
Page 15: Electrical Component Details
N0922L, N1322L, F1222L, F1522L Remote Low Side Service Manual Includes Prodigy Plus Electrical Component Details Liquid line valve • Opened by the controller to start ice making. Closed to shut unit off. Line voltage coil. Controller • Senses water, ice making, and auger amps. -
Page 16: Sequence Of Operation
N0922L, N1322L, F1222L, F1522L Remote Low Side Service Manual Includes Prodigy Plus Sequence of Operation The ice machine’s function is to continuously produce Additionally, the control system uses the photo-eyes ice until the ice level control senses that there is to confirm ice making. -
Page 17: Electrical Sequence With Condensing Unit
N0922L, N1322L, F1222L, F1522L Remote Low Side Service Manual Includes Prodigy Plus Electrical Sequence with Condensing Unit Pushing and releasing the On button starts the machine. The sequence of operation begins with water. Water must be sensed or the controller will not start the ice making process. -
Page 18: Water System
N0922L, N1322L, F1222L, F1522L Remote Low Side Service Manual Includes Prodigy Plus Water System Water enters the machine through the 3/8" male flare Water Level: The correct water level should be at the rear of the cabinet, goes to the water reservoir checked when the machine is making ice. -
Page 19: Remote Refrigeration With Condensing Unit
N0922L, N1322L, F1222L, F1522L Remote Low Side Service Manual Includes Prodigy Plus Remote Refrigeration with Condensing Unit A condensing unit's compressor concentrates the heat From the evaporator, the refrigerant, carrying the from ice making into high pressure, hot discharge gas. -
Page 20: How Ice Is Made
N0922L, N1322L, F1222L, F1522L Remote Low Side Service Manual Includes Prodigy Plus How Ice Is Made Refrigeration effect is applied to the water between Flaked ice machines have 6 oblong and curved slots the auger and the evaporator. When that water's... -
Page 21: Scale Removal
6. Remove the water reservoir cover. 18. Push and release the Off button. 7. Mix a solution of 8 ounces of Scotsman Clear One Scale Remover and 3 quarts of 95-115 degree F. 19. Wash the reservoir cover in the remaining potable water. -
Page 22: Check Top Bearing
N0922L, N1322L, F1222L, F1522L Remote Low Side Service Manual Includes Prodigy Plus Check Top Bearing This task should only be done by a qualified service technician The bearing in the breaker should be checked at least two times per year. -
Page 23: Bearing Service
If the bearing only needs grease, or to confirm the quality of the grease low in the bearing, inject grease into the lower part of the bearing using Scotsman Drip Pan grease needle pn 02-3559-01 and Scotsman bearing grease cartridge, pn A36808-001. Be sure to inject grease evenly and thoroughly. -
Page 24: Options
N0922L, N1322L, F1222L, F1522L Remote Low Side Service Manual Includes Prodigy Plus Options Vari-Smart Another bin control method available on these machines is a bin thermostat. Optional adjustable ice level control (KVS) Type: Opens on temperature fall. Connects: To blue wires to controller, in place of the jumper connecting the blue wires between terminals 5 and 6. -
Page 25: Service Diagnosis
N0922L, N1322L, F1222L, F1522L Remote Low Side Service Manual Includes Prodigy Plus Service Diagnosis Symptom Probable Cause Possible Correction No ice No power Check that ice machine and condensing unit, if used, both have power. If power light is out, check transformer. -
Page 26: Service Diagnosis - Optional Ice Level Controls
N0922L, N1322L, F1222L, F1522L Remote Low Side Service Manual Includes Prodigy Plus Service Diagnosis - Optional Ice Level Controls Vari-Smart (KVS) Symptom Probable Cause Possible Correction No ice, bin full light is ON Adjustment knob set too low Rotate knob to first position, knob’s... -
Page 27: Repair Procedures: Bearing And Breaker
• c. Unscrew 4 allen head cap screws holding breaker to evaporator. a. Add food grade grease such as Scotsman part number 19-0569-01 to the seal area before installing • d. Lift up, and remove breaker/bearing assembly on the auger. -
Page 28: Repair Procedures: The Auger
N0922L, N1322L, F1222L, F1522L Remote Low Side Service Manual Includes Prodigy Plus Repair Procedures: The Auger Turn off the water to the machine, and unclip the evaporator drain hose, pull it down and drain the evaporator into the bin or a container. -
Page 29: Auger And Evaporator Inspection
N0922L, N1322L, F1222L, F1522L Remote Low Side Service Manual Includes Prodigy Plus Auger and Evaporator Inspection The auger must be carefully inspected for wear and scale. There are also wear areas like the top bearing surface and the edges of the flights. The edges of the auger have horizontal serrations and highly machined areas in between. -
Page 30: Repair Procedures: The Water Seal
4. Place a small bead of food grade silastic sealant (such as 732 RTV or Scotsman part number 19-0529- 01) on the area of the auger where the water seal is to be mounted. -
Page 31: Repair Procedures: Replace The Evaporator
N0922L, N1322L, F1222L, F1522L Remote Low Side Service Manual Includes Prodigy Plus Repair Procedures: Replace the Evaporator: (Assuming all the steps for removal of the thrust bearing, breaker, auger, and water seal have been performed.) 1. Close ball valves to isolate machine. -
Page 32: Repair Procedures: The Gear Reducer
N0922L, N1322L, F1222L, F1522L Remote Low Side Service Manual Includes Prodigy Plus Repair Procedures: The gear reducer (Assuming that the procedures through removal of the 4. After replacing parts as required, (if any) water seal have been performed.) reassemble the gearcase. The two smaller gears and the oil should be in the lower case, the output gear will be with the cover. -
Page 33: Repair Procedures: Thermostatic Expansion Valve
N0922L, N1322L, F1222L, F1522L Remote Low Side Service Manual Includes Prodigy Plus Repair Procedures: Thermostatic Expansion Valve 1. Remove front panel. 2. If the machine was in operation, push and release the off button to shut it down. 3. Disconnect electrical power. - Page 34 SCOTSMAN ICE SYSTEMS 775 Corporate Woods Parkway Vernon Hills, IL 60061 800-726-8762 www.scotsman-ice.com...