Table of Contents
Advertisement
RETURN TO MAIN INDEX
SVM133-B
September, 2002
TM
Commander
400
For use with machine code numbers: 9978, 9979, 10580, 10581
Safety Depends on You
Lincoln arc welding and cutting
equipment is designed and built
with safety in mind. However,
your overall safety can be in-
creased by proper installation . . .
and thoughtful operation on
your part. DO NOT INSTALL,
OPERATE OR REPAIR THIS
EQUIPMENT WITHOUT
READING THIS MANUAL AND
THE SAFETY PRECAUTIONS
CONTAINED THROUGHOUT.
And, most importantly, think
before you act and be careful.
SERVICE MANUAL
Copyright © 2002 Lincoln Global Inc.
• World's Leader in Welding and Cutting Products •
• Sales and Service through Subsidiaries and Distributors Worldwide •
Cleveland, Ohio 44117-1199 U.S.A. TEL: 216.481.8100 FAX: 216.486.1751 WEB SITE: www.lincolnelectric.com
Advertisement
Chapters
Table of Contents
Troubleshooting

Related Manuals for Lincoln Electric COMMANDER 400 SVM133-B


Summary of Contents for Lincoln Electric COMMANDER 400 SVM133-B
-
Page 1: Service Manual
RETURN TO MAIN INDEX SVM133-B September, 2002 Commander For use with machine code numbers: 9978, 9979, 10580, 10581 Safety Depends on You Lincoln arc welding and cutting equipment is designed and built with safety in mind. However, your overall safety can be in- creased by proper installation . -
Page 2: Safety
Miami, Florida 33135 or CSA Standard W117.2-1974. A Free copy of “Arc Welding Safety” booklet E205 is available from the Lincoln Electric Company, 22801 St. Clair Avenue, Cleveland, Ohio 44117-1199. BE SURE THAT ALL INSTALLATION, OPERATION, MAINTENANCE AND REPAIR PROCEDURES ARE PERFORMED ONLY BY QUALIFIED INDIVIDUALS. -
Page 3: Electric Shock Can Kill
ELECTRIC SHOCK can kill. 3.a. The electrode and work (or ground) circuits are electrically “hot” when the welder is on. Do not touch these “hot” parts with your bare skin or wet clothing. Wear dry, hole-free gloves to insulate hands. - Page 4 WELDING SPARKS can cause fire or explosion. 6.a. Remove fire hazards from the welding area. If this is not possible, cover them to prevent the welding sparks from starting a fire. Remember that welding sparks and hot materials from welding can easily go through small cracks and openings to adjacent areas.
- Page 5 PRÉCAUTIONS DE SÛRETÉ Pour votre propre protection lire et observer toutes les instructions et les précautions de sûreté specifiques qui parraissent dans ce manuel aussi bien que les précautions de sûreté générales suiv- antes: Sûreté Pour Soudage A L’Arc 1. Protegez-vous contre la secousse électrique: a.
-
Page 6: Table Of Contents
General Description ...B-2 Recommended Applications...B-3 Design Features...B-3 Welding Capability ...B-4 Controls and Settings...B-5 Engine Operation ...B-8 Welder Operation ...B-10 Auxiliary Power ...B-12 Accessories ...Section C Maintenance ...Section D Theory of Operation ...Section E Troubleshooting and Repair ...Section F Electrical Diagrams ...Section G Parts Manual...P267 Series... - Page 7 Section A-1 - INSTALLATION SECTION - Installation Technical Specifications ...A-2 Safety Precautions ...A-3 Location and Ventilation ...A-3 Storing ...A-3 Stacking ...A-3 Angle of Operation...A-3 Lifting ...A-4 High Altitude Operation...A-4 Towing...A-4 Pre-Operation Engine Service ...A-4 Oil ...A-4 Fuel...A-5 Cooling System...A-5 Battery Connections ...A-5 Muffler Outlet Pipe ...A-5 Spark Arrester...A-5 Electrical Output Connections...A-6...
-
Page 8: Installation
400 amps (DC Constant Current) 100% 400 amps (DC Constant Voltage) 500 amps (DC Constant Current) 500 amps (DC Constant Voltage) OUTPUT - WELDER AND GENERATOR Welding Range 40 - 575 Amps in 7 Ranges (Stick model) or 8 Ranges (Stick & Wire model) -
Page 9: Safety Precautions
(FULL) oil capacity in the crankcase. When operating the welder at an angle, the effective fuel capacity will be slightly less than the specified 25 gallons. COMMANDER 400... -
Page 10: Pre-Operation Engine Service
LIFTING The Commander 400 weights 1650 lb./748 kg (Stick model); 1683 lb./763 kg. (Stick & Wire model). A lift bail is provided for lifting with a hoist. WARNING FALLING EQUIPMENT can cause injury. Do not lift this machine using lift bail if it is equipped with a heavy accessory such as a trailer. -
Page 11: Fuel
FUEL NOTE: Use diesel fuel only. Fill the fuel tank with clean, fresh diesel fuel. The capacity of the fuel tank is 25 gallons (94.6 liters). See the Operation and Maintenance sections of this man- ual for more details about fuel. The Commander 400 is protected by a low fuel shutdown to prevent the engine from running out of fuel. -
Page 12: Electrical Output Connections
Cable diameters are increased for long cable lengths to reduce voltage drops. Lincoln Electric offers a welding accessory kit with the properly specified Accessories section of this manual for more information. -
Page 13: Machine Grounding
(home, shop, etc.). To prevent dangerous electric shock, other equipment powered by this engine driven welder must: a) be grounded to the frame of the welder using a grounded type plug, b) be double insulated. When this welder is mounted on a truck or trailer, its frame must be securely connected to the metal frame of the vehicle. -
Page 14: Connection Of The Commander 400 To Premises Wiring
FIGURE A.2 - CONNECTION OF THE COMMANDER 400 TO PREMISES WIRING 240 VOLT POWER 240 Volt 60 Hz. COMPANY 3-Wire Service METER DOUBLE POLE DOUBLE THROW SWITCH RATING TO BE THE SAME AS OR GREATER THAN PREMISES SERVICE OVERCURRENT PROTECTION. 50 AMP, 120/240 VOLT PLUG NEMA TYPE 14-50... -
Page 15: Operation...............................................................................................................................section B Safety Instructions
General Description ...B-2 Recommended Applications...B-3 Design Features...B-3 Welding Capability ...B-4 Controls and Settings...B-5 Engine Controls ...B-5 Welder Controls ...B-7 Auxiliary Power Controls ...B-8 Wire Feeder Mode Controls ...B-8 Engine Operation ...B-8 Starting the Engine ...B-8 Stopping the Engine ...B-9 Break-In Period...B-9 Typical Fuel Consumption ...B-9... -
Page 16: Operation
120/240 VAC auxiliary standby power. As a generator it can supply up to 10,000 watts of 120/240 volt AC power. As a welder it provides up to 400 amps of DC constant current output in six slope-controlled ranges. In addition a seventh general purpose welding range provides up to 575 amps of constant current welding output. -
Page 17: Recommended Applications
RECOMMENDED APPLICATIONS WELDER The Commander 400 (Stick model) provides excellent constant current DC welding output for stick (SMAW) welding. The Commander 400 (Stick & Wire model) also provides excellent constant voltage DC welding output for MIG (GMAW) and Inner shield (FCAW) welding. -
Page 18: Welding Capability
ADDITIONAL DESIGN FEATURES (Stick & Wire Model only) FOR WIRE WELDING • One constant voltage position for all wire welding. A 12 to 45V range across the entire current output range. • Excellent arc characteristics with MIG (GMAW) and Inner shield (FCAW) welding. •... -
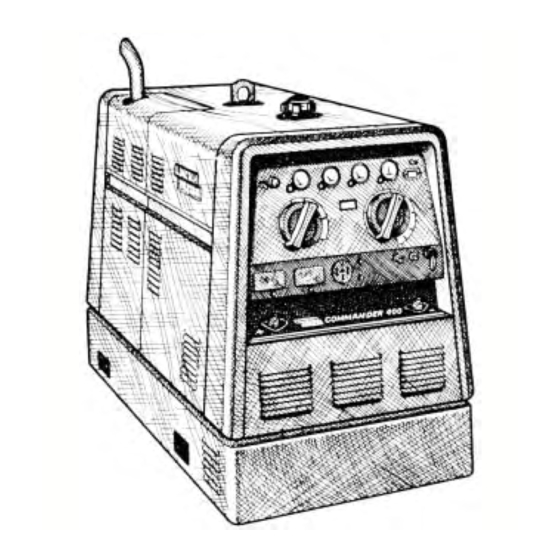
Page 19: Controls And Settings
CONTROLS AND SETTINGS The welder/generator controls are located on the case front panel. Refer to Figure B.1 and the explanations that follow. FIGURE B.1 – CASE FRONT PANEL CONTROLS ENGINE CONTROLS (Figure B.1, Items 1 through 8) See Figure B.1 for the location of the following fea- tures: 1. - Page 20 Check engine cooling blower belt. Also, check to be sure that the welder loads are within the rating of the welder. The light will remain on when the engine has been shut down due to an over- temperature condition.
-
Page 21: Welder Controls
For remote control, set the toggle switch in the “REMOTE” position. Provides a fine For control at the welder control panel, set the adjustment of toggle switch in the “LOCAL” position. welding current or voltage from 13. -
Page 22: Engine Operation
AUXILIARY POWER CONTROLS (Figure B.1 Items 15 - 19 ) 15. 120/240VAC RECEPTACLE: This is a 120/240VAC (14-50R) receptacle that provides 240VAC or can be split for 120VAC single phase auxiliary power. The receptacle has a 50 amp rating. Refer to “Auxiliary Power Receptacles”... -
Page 23: Stopping The Engine
BREAK-IN PERIOD The engine used to supply power for your welder is a heavy duty, industrial engine. It is designed and built for rugged use. It is very normal for any engine to use small quantities of oil until the break-in is accom- plished. -
Page 24: Welder Operation
B-10 WELDER OPERATION STICK WELDING The Commander 400 can be used with a broad range of DC stick electrodes. The OUTPUT RANGE switch provides six overlapping slope controlled current ranges. The OUTPUT CON- TROL adjusts the current from minimum to maximum within each range. -
Page 25: Commander 400 Settings With K799 Hi-Freq./K930-1 Tig Module
B-11 Table B.3 TYPICAL CURRENT RANGES DCEN (-) Tungsten Electrode 1%, 2% Diameter Thoriated in. (mm) Tungsten 0 .010 (.25) 2-15 0.020 (.50) 5-20 0.040 (1.0) 15-80 1/16 (1.6) 70-150 3/32 (2.4) 150-250 (3.2) 250-400 5/32 (4.0) 400-500 3/16 (4.8) 500-750 (6.4) 750-1000... -
Page 26: Auxiliary Power
WELDING Stick and Wire models only. Connect a wire feeder to the Commander 400 (see the Accessories section) and set the welder controls according to the instruc- tions in “Controls and Settings” in this section of the manual. The Stick and Wire model of the Commander 400, with... - Page 27 Stick Welding ...C-2 TIG Welding ...C-2 Semiautomatic Welding Accessories ...C-2 Connection of Lincoln Electric Wire Feeders...C-3 Connection of the LN-7 using K867 Universal Adapter...C-3 Connection of the LN-7 using K584 Input Cable Assembly ...C-4 Connection of the LN-8 using K867 Universal Adapter...C-5 Connection of the LN-8 using K595 Input Cable Assembly ...C-6...
-
Page 28: Accessories
K857 28 ft. (8.5 m) or K857-1 100 ft. (30.4 m) Remote Control - Portable control provides same dial range as the output control on the welder from a location up to the specified length from the welder. Has convenient plug for easy connection to the welder. -
Page 29: Connection Of Lincoln Electric Wire Feeders
CONNECTION OF LINCOLN ELECTRIC WIRE FEEDERS WARNING ELECTRIC SHOCK can kill. • Do not operate with panels open. • Disconnect NEGATIVE (-) BATTERY LEAD before servicing. • Do not touch electrically live parts. MOVING PARTS can injure. • Keep guards in place. - Page 30 1. Shut the welder off. 2. Connect the electrode cable from the LN-7 to the “+” terminal of the welder. Connect the work cable to the “CV- Wire” terminal of the welder. NOTE: Welding cable must be sized for current and duty cycle of application.
- Page 31 2. Connect the electrode cable from the LN-8 to the “+” terminal of the welder. Connect the work cable to the “CV- Wire” terminal of the welder. NOTE: Welding cable must be sized for current and duty cycle of application.
- Page 32 1. Shut the welder off. 2. Connect the electrode cable from the LN-8 to the “+” terminal of the welder. Connect the work cable to the “CV- Wire” terminal of the welder. NOTE: Welding cable must be sized for current and duty cycle of application.
- Page 33 1. Shut the welder off. 2. Connect the electrode cable from the LN-23P to the “CV- Wire” terminal of the welder. Connect the work cable to the “+” terminal of the welder. NOTE: Welding cable must be sized for current and duty cycle of application.
- Page 34 1. Shut the welder off. 2. Connect the electrode cable from the LN-25 to the “-” terminal of the welder. Connect the work cable to the “CV-” terminal of the welder. NOTE: Welding cable must be sized for current and duty cycle of application.
-
Page 35: Connection Of The K488 Sg Control Module And K487 Magnum Spool Gun
C.7.) 1. Shut the welder off. 2. Connect the electrode cable from the SG Control Module to the “+” terminal of the welder. Connect the work cable to the “CV- Wire” terminal of the welder. NOTE: Welding cable must be sized for current and duty cycle of application. - Page 36 C-10 C-10 NOTES COMMANDER 400...
- Page 37 Engine Maintenance Schedule...D-8 Engine Maintenance Parts ...D-9 Battery Maintenance ...D-10 Cleaning the Battery ...D-10 Checking Specific Gravity ...D-10 Checking Electrolyte Level ...D-10 Charging the Battery ...D-10 Welder/Generator Maintenance...D-11 Storage ...D-11 Cleaning...D-11 Name plates...D-11 Bearings...D-11 Receptacles ...D-11 Cable Connections ...D-11 Major Component Locations ...D-12...
-
Page 38: Maintenance
SAFETY PRECAUTIONS WARNING • Have qualified personnel do all maintenance and troubleshooting work. • Turn the engine off before working inside the machine. • Remove covers or guards only when necessary to perform maintenance and replace them when the maintenance requiring their removal is complete. •... -
Page 39: Maintenance
OIL FILTER DIPSTICK CHANGE THE OIL FILTER: Change the oil filter the first time between 25 and 50 hours of operation. Then, under normal operating conditions, change the oil filter after every 250 hours of operation. If the engine is operated under heavy load or in high ambient temper- atures, change the oil filter more frequently. -
Page 40: Fuel Filters
FUEL FILTERS: WARNING When working on the fuel system: • Keep unshielded lights away, do not smoke ! • Do not spill fuel ! The Commander 400 is equipped with a Fuel Pre- Filter/Water Separator Assembly located before the lift pump and a Secondary Fuel Filter located after the lift pump and before the fuel injectors. - Page 41 4. Slide the new element onto the grommet post on the bottom of the filter header until the element no longer easily moves up into the filter header. Now rotate the element (it may take almost 1 full turn) with a slight upward pressure until the element begins to further engage the header.
-
Page 42: Bleeding The Fuel System
BLEEDING THE FUEL SYSTEM: In the event the engine is operated until it runs out of fuel, you will need to bleed the fuel system in order to start the engine. Refer to the engine operation manual. AIR FILTER: CAUTION Excessive air filter restriction will result in reduced engine life. -
Page 43: Cooling System
1. Allow the machine to cool. 2. Unfasten and slide the battery holder out from the welder. 3. Disconnect the negative battery cable. 4. Remove the engine end panel for access to the engine. - Page 44 DEUTZ ENGINE MAINTENANCE SCHEDULE FREQUENCY MAINTENANCE REQUIRED Daily or Before • Fill fuel tank. Starting Engine • Check oil level. • Check air cleaner for dirty, loose, or damaged parts. Replace if necessary. • Check air intake and cooling areas, clean as necessary. First 50 Hours •...
-
Page 45: Cooling Blower Belt
ITEM Air Cleaner Element Cooling Blower Belt Oil Filter Element Fuel Filter Element Water Separator Element Fuel Pre-Filter Screen Battery MAINTENANCE Table D.2 ENGINE MAINTENANCE PARTS MANUFACTURER Donaldson Lincoln Gates Deutz Purolator Napa Fram Deutz Purolator Napa Fram Lincoln Stanadyne Lincoln Stanadyne COMMANDER 400... -
Page 46: Battery Maintenance
Damage to the engine alternator and the printed cir- cuit board can result from incorrect connection. • CONNECTING A BATTERY CHARGER - Remove the battery from the welder by disconnecting the negative cable first, then the positive cable and battery clamp. -
Page 47: Welder/Generator Maintenance
Where the welder is used constantly or in excessively dirty loca- tions, it may be necessary to add one half ounce of grease per year. A pad of grease one inch wide, one inch long, and one inch high weighs approximately one half ounce. -
Page 48: Major Component Locations
D-12 FIGURE D.5 - MAJOR COMPONENT LOCATIONS 1. CASE DOOR ASSEMBLY 2. ENGINE 3. SHUTDOWN SOLENOID 4. IDLER SOLENOID 5. REAR PANEL ASSEMBLY 6. BASE 7. FRONT PANEL ASSEMBLY 8. CONTROL PANEL 9. SCR/DIODE RECTIFIER BRIDGE ASSEMBLY 10. FUEL TANK 11. - Page 49 Section E-1 -THEORY OF OPERATION SECTION- Theory of Operation ...Section E General Description ...E-2 Battery, Starter, Engine, Rotor and Stator ...E-2 Exciter Feedback, Control Board, Local and Remote Control ...E-3 Weld Winding, Output Bridge, Output Choke and CV Capacitors ...E-4 SCR Operation ...E-5 Induction Generators ...E-6 STARTER...
-
Page 50: Theory Of Operation
120/240 VAC auxiliary stand- by power. As a generator it can supply up to 10,000 watts of 120/240 volt AC power. As a welder it provides up to 400 amps of DC constant current output in six slope-controlled ranges. - Page 51 THEORY OF OPERATION FIGURE E.3 – EXCITER FEEDBACK, CONTROL BOARD, LOCAL AND REMOTE CONTROL STARTER ALTERNATOR MECHANICAL ENGINE ROTATION SHUTDOWN SOLENOID IDLER SOLENOID BATTERY EXCITER CAPACITORS 115/230VAC RECEPTACLE ENGINE SENSORS EXCITER FEEDBACK, CONTROL BOARD, LOCAL AND REMOTE CONTROL The exciter voltage is monitored and fed back through the exciter voltage feedback board to the control board.
- Page 52 THEORY OF OPERATION FIGURE E.4 – WELD WINDING, OUTPUT BRIDGE, OUTPUT CHOKE AND CV CAPACITORS STARTER ALTERNATOR MECHANICAL ENGINE ROTATION SHUTDOWN SOLENOID IDLER SOLENOID BATTERY EXCITER CAPACITORS 115/230VAC RECEPTACLE ENGINE SENSORS WELD WINDING, OUTPUT BRIDGE, OUTPUT CHOKE AND CV CAPACI- TORS The three-phase AC output that is created in the stator weld winding is connected to the SCR/Diode output...
-
Page 53: Scr Operation
THEORY OF OPERATION SCR OPERATION A silicon controlled rectifier (SCR) is a three terminal device used to control rather large currents to a load. An SCR acts very much like a switch. When a gate sig- nal is applied to the SCR, it is turned ON and there is current flow from anode to cathode. - Page 54 THEORY OF OPERATION INDUCTION GENERATORS Commander utilizes Asynchronous Induction Generator to convert mechan- ical energy into electrical energy. The following is a brief description of an induction generator. The induction generator is an induction motor driven above the synchronous speed. The rotor conductors pass through the magnetic field of the stator in a direc- tion that converts mechanical energy into electrical energy.
- Page 55 Section F-1 TROUBLESHOOTING & REPAIR SECTION Troubleshooting & Repair Section ...Section F How to Use Troubleshooting Guide ...F-2 PC Board Troubleshooting Procedures ...F-3 Troubleshooting Guide ...F-4 - F-15 Initialization Sequence and Commander 400 Error Code Explanations ...F-16 Error Codes with G2713-I Control Board ...F-17 Error Codes with G2713-2 or -3 Control Boards...F-21 Test Procedures ...F-27 Case Cover Removal and Replacement Procedure ...F-27...
-
Page 56: Troubleshooting & Repair Section
TROUBLESHOOTING & REPAIR HOW TO USE TROUBLESHOOTING GUIDE Service and repair should be performed by only Lincoln Electric Factory Trained Personnel. Unauthorized repairs performed on this equipment may result in danger to the technician and machine operator and will invalidate your factory warranty. For your safety and to avoid Electrical Shock, please observe all safety notes and precautions detailed throughout this manual. -
Page 57: Pc Board Troubleshooting Procedures
• If the PC Board uses protective shorting jumpers, don’t remove them until installation is complete. • If you return a PC Board to The Lincoln Electric Company for credit, it must be in the static-shielding bag. This will prevent further damage and allow prop- er failure analysis. -
Page 58: Troubleshooting Guide
If for any reason you do not understand the test procedures or are unable to perform the test/repairs safely, con- tact the Lincoln Electric Service Department for electrical troubleshooting assistance before you proceed. Call 1- 800-833-9353 (WELD). - Page 59 If for any reason you do not understand the test procedures or are unable to perform the test/repairs safely, con- tact the Lincoln Electric Service Department for electrical troubleshooting assistance before you proceed. Call 1- 800-833-9353 (WELD).
- Page 60 If for any reason you do not understand the test procedures or are unable to perform the test/repairs safely, con- tact the Lincoln Electric Service Department for electrical troubleshooting assistance before you proceed. Call 1- 800-833-9353 (WELD). POSSIBLE AREAS OF...
- Page 61 If for any reason you do not understand the test procedures or are unable to perform the test/repairs safely, con- tact the Lincoln Electric Service Department for electrical troubleshooting assistance before you proceed. Call 1- 800-833-9353 (WELD).
- Page 62 If for any reason you do not understand the test procedures or are unable to perform the test/repairs safely, con- tact the Lincoln Electric Service Department for electrical troubleshooting assistance before you proceed. Call 1- 800-833-9353 (WELD). POSSIBLE AREAS OF...
- Page 63 If for any reason you do not understand the test procedures or are unable to perform the test/repairs safely, con- tact the Lincoln Electric Service Department for electrical troubleshooting assistance before you proceed. Call 1- 800-833-9353 (WELD). detailed in the beginning of this manual.
- Page 64 If for any reason you do not understand the test procedures or are unable to perform the test/repairs safely, con- tact the Lincoln Electric Service Department for electrical troubleshooting assistance before you proceed. Call 1- 800-833-9353 (WELD). POSSIBLE AREAS OF...
- Page 65 14 pin amphenol. If for any reason you do not understand the test procedures or are unable to perform the test/repairs safely, con- tact the Lincoln Electric Service Department for electrical troubleshooting assistance before you proceed. Call 1- 800-833-9353 (WELD).
- Page 66 If for any reason you do not understand the test procedures or are unable to perform the test/repairs safely, con- tact the Lincoln Electric Service Department for electrical troubleshooting assistance before you proceed. Call 1- 800-833-9353 (WELD).
- Page 67 (Continued) If for any reason you do not understand the test procedures or are unable to perform the test/repairs safely, con- tact the Lincoln Electric Service Department for electrical troubleshooting assistance before you proceed. Call 1- 800-833-9353 (WELD).
- Page 68 If for any reason you do not understand the test procedures or are unable to perform the test/repairs safely, con- tact the Lincoln Electric Service Department for electrical troubleshooting assistance before you proceed. Call 1- 800-833-9353 (WELD).
- Page 69 If for any reason you do not understand the test procedures or are unable to perform the test/repairs safely, con- tact the Lincoln Electric Service Department for electrical troubleshooting assistance before you proceed. Call 1- 800-833-9353 (WELD).
- Page 70 F-16 F-16 TROUBLESHOOTING & REPAIR COMMANDER 400 INITIALIZATION SEQUENCE AND ERROR CODE EXPLANATIONS When the Commander 400 is started, the display flashes several messages during initializa- tion. They usually go by so fast you cannot see them. Each message correlates to an ini- tialization test that the microcontroller program runs.
- Page 71 F-17 TROUBLESHOOTING & REPAIR COMMANDER 400 WITH G2713-1 CONTROL BOARD ERROR CODES DURING INITIALIZATION SEQUENCE bAd uP DEFINITION / SYMPTOM Program is stuck in ROM/RAM check. ROM/RAM is corrupt. Program is stuck in power supply stabilization. Program is stuck in register initialization and Interrupt enables.
- Page 72 F-18 TROUBLESHOOTING & REPAIR COMMANDER 400 WITH G2713-1 CONTROL BOARD ERROR CODES DURING INITIALIZATION SEQUENCE DEFINITION / SYMPTOM The processor is not receiving zero cross signals properly or the engine RPM is out of range. The exciter voltage is out of range (greater than 550 or less than 140VAC).
- Page 73 F-19 TROUBLESHOOTING & REPAIR COMMANDER 400 WITH G2713-1 CONTROL BOARD ERROR CODES DURING INITIALIZATION SEQUENCE DEFINITION / SYMPTOM The output current is too high (greater than 750 amps for more than 1 second). XIRQ error (illegal external interrupt request). COMMANDER 400 F-19 CORRECTIVE ACTION The machine may be “over...
- Page 74 F-20 TROUBLESHOOTING & REPAIR COMMANDER 400 WITH G2713-1 CONTROL BOARD ERROR CODES DURING INITIALIZATION SEQUENCE DEFINITION / SYMPTOM RTI error (illegal return from interrupt). SWI error (illegal software interrupt request). IOT error (illegal op code trap). COP time-out error. CME error (slow or stopped processor clock).
- Page 75 F-21 TROUBLESHOOTING & REPAIR COMMANDER 400 WITH G2713-2 or -3 CONTROL BOARD ERROR CODES DURING INITIALIZATION SEQUENCE bAd uP DEFINITION / SYMPTOM Program is stuck in ROM/RAM check. ROM/RAM is corrupt. Program is stuck in calibration constant loading. The processor is not getting good initial zero crosses.
- Page 76 F-22 TROUBLESHOOTING & REPAIR COMMANDER 400 WITH G2713-2 or -3 CONTROL BOARD ERROR CODES DURING INITIALIZATION SEQUENCE DEFINITION / SYMPTOM Processor is not reading a valid range control switch position. The exciter voltage level is too high (greater than 550VAC). The exciter voltage level is too low (less than 140VAC).
- Page 77 F-23 TROUBLESHOOTING & REPAIR COMMANDER 400 WITH G2713-2 or -3 CONTROL BOARD ERROR CODES WHILE RUNNING DEFINITION / SYMPTOM The output current is too high (greater than 750 amps for more than 1 second). XIRQ error (illegal external interrupt request). COMMANDER 400 F-23 CORRECTIVE ACTION...
- Page 78 F-24 TROUBLESHOOTING & REPAIR COMMANDER 400 WITH G2713-2 or -3 CONTROL BOARD ERROR CODES WHILE RUNNING DEFINITION / SYMPTOM Unit has shut down because of low fuel. Invalid range control switch position. COMMANDER 400 F-24 CORRECTIVE ACTION Add more fuel. If there is less than half a tank of fuel,check for proper operation of the fuel float.
- Page 79 F-25 TROUBLESHOOTING & REPAIR COMMANDER 400 WITH G2713-2 or -3 CONTROL BOARD ERROR CODES WHILE RUNNING DEFINITION / SYMPTOM RTI error (illegal return from interrupt). SWI error (illegal software interrupt request). IOT error (illegal op code trap). COP time-out error. CME error (slow or stopped processor clock).
- Page 80 F-26 TROUBLESHOOTING & REPAIR COMMANDER 400 WITH G2713-2 OR -3 CONTROL BOARD ERROR CODES WHILE RUNNING DEFINITION / SYMPTOM The exciter voltage is too high (greater than 550 VAC). The exciter voltage is too low (less than 140 VAC). The processor is not receiving zero cross signals properly or the engine RPM is too high.
-
Page 81: Case Cover Removal And Replacement Procedure
TROUBLESHOOTING & REPAIR CASE COVER REMOVAL AND REPLACEMENT PROCEDURE Service and repair should be performed by only Lincoln Electric factory trained personnel. Unauthorized repairs performed on this equipment may result in danger to the technician or machine operator and will invalidate your factory warranty. For your safety and to avoid electrical shock, please observe all safety notes and precautions detailed throughout this manual. - Page 82 F-28 TROUBLESHOOTING & REPAIR CASE COVER REMOVAL AND REPLACEMENT PROCEDURE (continued) FIGURE F.1 – DOOR CHAIN REMOVAL CHAIN PROCEDURE 1. Turn the engine off. 2. Unlatch and open engine service access door. 3. Using the 7/16" wrench, remove the chain from the door assembly.
- Page 83 F-29 TROUBLESHOOTING & REPAIR CASE COVER REMOVAL AND REPLACEMENT PROCEDURE (continued) 4. Using the 3/8" wrench, remove the three screws holding the door assembly to the left side panel. See Figure F.2. FIGURE F.2 – DOOR ASSEMBLY/LEFT SIDE PANEL SCREW LOCATIONS 5.
- Page 84 F-30 TROUBLESHOOTING & REPAIR CASE COVER REMOVAL AND REPLACEMENT PROCEDURE (continued) 6. Carefully lift the door assembly from the machine. FIGURE F.4 – LEFT SIDE ENGINE COVER REMOVAL LOOSEN TWO END SCREWS 8. Using the 3/8" wrench, remove the screws from the front roof assembly.
- Page 85 F-31 TROUBLESHOOTING & REPAIR CASE COVER REMOVAL AND REPLACEMENT PROCEDURE (continued) FRONT SHROUD REMOVAL PROCEDURE 1. Using the 5/16" nut driver, remove the screws from the front control panel assem- bly. Do NOT remove the phillips head screws. Lower the panel. See Figure F.5. FIGURE F.5 –...
-
Page 86: Case Front Knobs - Removal And Replacement Procedure
F-32 TROUBLESHOOTING & REPAIR CASE FRONT KNOBS - REMOVAL AND REPLACEMENT PROCEDURE Side View (Pull) Knob Nameplate (Push) Removal: 1. Rotate the handle portion of the knob to an approximate vertical orientation (switch detent may position handle a few degrees off vertical). This orientation should be noted and repeated at replacement for proper "D"... -
Page 87: Idler Solenoid Test
F-33 TROUBLESHOOTING & REPAIR Service and repair should be performed by only Lincoln Electric factory trained personnel. Unauthorized repairs performed on this equipment may result in danger to the technician or machine operator and will invalidate your factory warranty. For your safety and to avoid elec- trical shock, please observe all safety notes and precautions detailed throughout this manual. - Page 88 F-34 TROUBLESHOOTING & REPAIR IDLER SOLENOID TEST (continued) FIGURE F.8 – IDLER SOLENOID LEAD TERMINALS TEST PROCEDURE 1. Turn the engine off. 2. Unlatch, lift and secure the right side engine service access door. Using a 5/16”, open the control panel and tilt out. Remove the control board cover.
-
Page 89: Shutdown Solenoid Test
TROUBLESHOOTING & REPAIR SHUTDOWN SOLENOID TEST Service and repair should be performed by only Lincoln Electric factory trained personnel. Unauthorized repairs performed on this equipment may result in danger to the technician or machine operator and will invalidate your factory warranty. For your safety and to avoid elec- trical shock, please observe all safety notes and precautions detailed throughout this manual. - Page 90 F-36 TROUBLESHOOTING & REPAIR SHUTDOWN SOLENOID TEST (continued) FIGURE F.9 - SHUTDOWN SOLENOID LEAD TERMINALS TEST PROCEDURE 1. Turn the engine off. 2. Unlatch, lift and secure the right side engine service access door. Using a 5/16” nut dri- ver, open up the control panel and tilt out. Remove the control board cover 3.
-
Page 91: Engine Throttle Adjustment Test
TROUBLESHOOTING & REPAIR ENGINE THROTTLE ADJUSTMENT TEST Service and repair should be performed by only Lincoln Electric factory trained personnel. Unauthorized repairs performed on this equipment may result in danger to the technician or machine operator and will invalidate your factory warranty. For your safety and to avoid elec- trical shock, please observe all safety notes and precautions detailed throughout this manual. - Page 92 F-38 TROUBLESHOOTING & REPAIR ENGINE THROTTLE ADJUSTMENT TEST (continued) FIGURE F.10 - BLOWER PADDLE MARKED FOR STROBE-TACH METHOD MARK BLOWER PADDLE HERE TEST PROCEDURE Strobe Tach Method 1. Conduct this procedure with the engine OFF. 2. Unlatch, lift and secure the right side engine service access door.
- Page 93 F-39 TROUBLESHOOTING & REPAIR ENGINE THROTTLE ADJUSTMENT TEST (continued) 6. If either of the readings is incorrect, adjust the throttle as follows: Adjust HIGH IDLE: Use the 10mm wrench to loosen the locking nut. See Figure F.11 for location of the adjusting screw and locking nut. Turn the threaded screw counter-clockwise to increase the HIGH IDLE speed.
- Page 94 F-40 TROUBLESHOOTING & REPAIR ENGINE THROTTLE ADJUSTMENT TEST (continued) FIGURE F.11 - HIGH IDLE ADJUSTMENT FIGURE F.12 - LOW IDLE ADJUSTMENT ADJUSTING COLLAR LOCKING NUT COMMANDER 400 F-40 B O S C H 90 3 5 7 0 0 8 80 D 41 0/3 PE S 3A 0 40 0 46 3...
-
Page 95: Static Scr/Diode Rectifier Bridge Test
TROUBLESHOOTING & REPAIR STATIC SCR/DIODE RECTIFIER BRIDGE TEST Service and repair should be performed by only Lincoln Electric factory trained personnel. Unauthorized repairs performed on this equipment may result in danger to the technician or machine operator and will invalidate your factory warranty. For your safety and to avoid elec- trical shock, please observe all safety notes and precautions detailed throughout this manual. - Page 96 F-42 TROUBLESHOOTING & REPAIR STATIC SCR/DIODE RECTIFIER BRIDGE TEST (continued) FIGURE F.13 – CONTROL BOARD PLUG J6 LOCATION PLUG J6 TEST PROCEDURE 1. Turn off the engine. 2. Disconnect the welding cables from the welding output terminals. 3. Perform the Case Removal Procedure (including front shroud removal).
- Page 97 F-43 TROUBLESHOOTING & REPAIR STATIC SCR/DIODE RECTIFIER BRIDGE TEST (continued) FIGURE F.14 – SNUBBER BOARD PLUG J30 LOCATION SNUBBER BOARD LOCATION (LEFT SIDE, BELOW FUEL TANK) 6. Using the 3/8” nut driver, locate and remove the snubber board cover. See Figure F.14. 7.
- Page 98 F-44 TROUBLESHOOTING & REPAIR STATIC SCR/DIODE RECTIFIER BRIDGE TEST (continued) FIGURE F.16 – HEAT SINK AND SCR TEST POINTS DIODE DD REMOVE INSULATING PAINT 9. Remove the red insulating paint from the heat sink test points. See Figure F.16. NOTE: Do not disassemble the heat sink. 10.
-
Page 99: Active Scr Test
F-45 TROUBLESHOOTING & REPAIR Service and repair should be performed by only Lincoln Electric factory trained personnel. Unauthorized repairs performed on this equipment may result in danger to the technician or machine operator and will invalidate your factory warranty. For your safety and to avoid elec- trical shock, please observe all safety notes and precautions detailed throughout this manual. - Page 100 F-46 TROUBLESHOOTING & REPAIR ACTIVE SCR TEST (continued) FIGURE F.17 – CONTROL BOARD PLUG J6 LOCATION PLUG J6 TEST PROCEDURE 1. Turn OFF the engine. 2. Perform the Case Removal procedure (including front shroud removal). 3. Disconnect the welding cables from the welding output terminals.
- Page 101 F-47 TROUBLESHOOTING & REPAIR ACTIVE SCR TEST (continued) FIGURE F.19 - RESISTOR R1 LOCATION 8. Locate and remove lead #204B from resistor R1 (50 ohms, 100 Watts). Figure F.19. FIGURE F.20 - HEAT SINK TEST POINTS REMOVE INSULATING PAINT 9. Remove the red insulating paint from the heat sink test points.
- Page 102 F-48 TROUBLESHOOTING & REPAIR ACTIVE SCR TEST (continued) FIGURE F.21 - SCR TESTER CIRCUIT AND SCR CONNECTIONS REMOVE INSULATING PAINT CATHODE ANODE 10. Construct the circuit shown in Figure F.21. One 6-volt lantern battery can be used. Set voltmeter scale low, at approximately 0-5 volts or 0-10 volts.
-
Page 103: Charging Circuit Test
F-49 TROUBLESHOOTING & REPAIR Service and repair should be performed by only Lincoln Electric factory trained personnel. Unauthorized repairs performed on this equipment may result in danger to the technician or machine operator and will invalidate your factory warranty. For your safety and to avoid elec- trical shock, please observe all safety notes and precautions detailed throughout this manual. - Page 104 F-50 TROUBLESHOOTING & REPAIR CHARGING CIRCUIT TEST (continued) FIGURE F.22 – ENGINE ALTERNATOR LOCATION #239 #238 TEST PROCEDURE 1. Turn the engine off. 2. Perform Case Cover Procedure up to Step 7. 3. Locate the engine alternator. See Figure F.22. 4.
-
Page 105: Stator Voltage Test
F-51 TROUBLESHOOTING & REPAIR Service and repair should be performed by only Lincoln Electric factory trained personnel. Unauthorized repairs performed on this equipment may result in danger to the technician or machine operator and will invalidate your factory warranty. For your safety and to avoid elec- trical shock, please observe all safety notes and precautions detailed throughout this manual. - Page 106 F-52 TROUBLESHOOTING & REPAIR STATOR VOLTAGE TEST (continued) FIGURE F.23 – CONTROL BOX STUD TERMINALS T1 STUD #6 LEADS T2 STUD #5 LEADS T3 STUD #3 LEADS TEST PROCEDURE – Auxiliary Power Windings Test 1. Turn off the engine. 2. Perform Case Cover Procedure, including front shroud removal.
- Page 107 F-53 TROUBLESHOOTING & REPAIR STATOR VOLTAGE TEST (continued) FIGURE F.24 – SCR/DIODE RECTIFIER BRIDGE LEADS W2/W5 W1/W4 W3/W6 TEST PROCEDURE – Weld and PC Board Windings Test 7. Check for 48-55VAC at leads W1/W4 to leads W2/W5 located at the SCR/Diode Bridge. See Figure F.24 and the Wiring Diagram.
- Page 108 F-54 TROUBLESHOOTING & REPAIR STATOR VOLTAGE TEST (continued) FIGURE F.26 – EXCITER LEADS T1, T2, T3 TEST PROCEDURE – Exciter Winding Voltage Test 11. Turn the engine off. 12. Locate the exciter leads T1, T2 and T3. See Figure F.26. 13.
-
Page 109: Fine Control Potentiometer Test
TROUBLESHOOTING & REPAIR FINE CONTROL POTENTIOMETER TEST Service and repair should be performed by only Lincoln Electric factory trained personnel. Unauthorized repairs performed on this equipment may result in danger to the technician or machine operator and will invalidate your factory warranty. For your safety and to avoid electrical shock, please observe all safety notes and precautions detailed throughout this manual. -
Page 110: Troubleshooting And Repair
F-56 TROUBLESHOOTING AND REPAIR FINE CONTROL POTENTIOMETER TEST (continued) TEST PROCEDURE NOTE: In this test procedure, the positive output stud is used for common. 1. Using the 5/16” nut driver, open the control panel and tilt out. Remove the control board cover. Put the LOCAL/REMOTE switch in the “LOCAL”... -
Page 111: Range Switch Test
F-57 TROUBLESHOOTING & REPAIR Service and repair should be performed by only Lincoln Electric factory trained personnel. Unauthorized repairs performed on this equipment may result in danger to the technician or machine operator and will invalidate your factory warranty. For your safety and to avoid electrical shock, please observe all safety notes and precautions detailed throughout this manual. - Page 112 F-58 TROUBLESHOOTING AND REPAIR RANGE SWITCH TEST (continued) TEST PROCEDURE NOTE: In this test procedure, the positive output stud is used for common. 1. Using the 5/16” nut driver, open the control panel and tilt out. Remove the control board cover. Start the machine.
- Page 113 F-59 F-59 TROUBLESHOOTING & REPAIR RANGE SWITCH TEST (continued) Figure F.28 Control Board Plug J7 C112 Plug J7 Pin #1 Pin #7 Pin #10 COMMANDER 400...
- Page 114 F-60 F-60 NOTES COMMANDER 400...
-
Page 115: Shunt Calibration Test
TROUBLESHOOTING & REPAIR SHUNT CALIBRATION TEST Service and repair should be performed by only Lincoln Electric factory trained personnel. Unauthorized repairs performed on this equipment may result in danger to the technician or machine operator and will invalidate your factory warranty. For your safety and to avoid electrical shock, please observe all safety notes and precautions detailed throughout this manual. - Page 116 F-62 TROUBLESHOOTING AND REPAIR SHUNT CALIBRATION TEST (continued) TEST PROCEDURE NOTE: In this test procedure, the positive output stud is used for common. 1. Using the 5/16” nut driver, open the control panel and tilt out. Remove the control board cover. Start the machine.
-
Page 117: Exciter Voltage Feedback Test
EXCITER VOLTAGE FEEDBACK TEST WARNING Service and repair should be performed by only Lincoln Electric factory trained personnel. Unauthorized repairs performed on this equipment may result in danger to the technician or machine operator and will invalidate your factory warranty. For your safety and to avoid electrical shock, please observe all safety notes and precautions detailed throughout this manual. - Page 118 F-64 TROUBLESHOOTING AND REPAIR EXCITER VOLTAGE FEEDBACK TEST (continued) TEST PROCEDURE 1. Set the machine to the following settings, then start the machine: Control dial to 1 (min) Range dial to 90A max Idler switch in the “Auto” position Output control source (2-4) switch in the “Welding Terminals Remotely Controlled”...
-
Page 119: Exciter Capacitor Bank Test
TROUBLESHOOTING & REPAIR EXCITER CAPACITOR BANK TEST Service and repair should be performed by only Lincoln Electric factory trained personnel. Unauthorized repairs performed on this equipment may result in danger to the technician or machine operator and will invalidate your factory warranty. For your safety and to avoid electrical shock, please observe all safety notes and precautions detailed throughout this manual. - Page 120 F-66 TROUBLESHOOTING AND REPAIR EXCITER CAPACITOR BANK TEST (continued) WARNING Check for voltage across capacitors. Voltages could be high and danger- ous. Discharge capacitors with a high wattage (50 Ohm min.) resistor if necessary before performing tests. TEST PROCEDURE 1. With the engine off, disconnect the negative bat- tery cable.
-
Page 121: Control Board Power Supply Test
TROUBLESHOOTING & REPAIR CONTROL BOARD POWER SUPPLY TEST Service and repair should be performed by only Lincoln Electric factory trained personnel. Unauthorized repairs performed on this equipment may result in danger to the technician or machine operator and will invalidate your factory warranty. For your safety and to avoid electrical shock, please observe all safety notes and precautions detailed throughout this manual. - Page 122 F-68 TROUBLESHOOTING AND REPAIR CONTROL BOARD POWER SUPPLY TEST (continued) TEST PROCEDURE NOTE 1: In this test procedure, the positive output stud is used for common. NOTE 2: This test procedure does not test the engine control power supply portion of the control board.
-
Page 123: Stator Resistance Test
TROUBLESHOOTING & REPAIR STATOR RESISTANCE TEST Service and repair should be performed by only Lincoln Electric factory trained personnel. Unauthorized repairs performed on this equipment may result in danger to the technician or machine operator and will invalidate your factory warranty. For your safety and to avoid electrical shock, please observe all safety notes and precautions detailed throughout this manual. - Page 124 F-70 TROUBLESHOOTING AND REPAIR STATOR RESISTANCE TEST (continued) TEST PROCEDURE 1. With the engine off, disconnect the negative bat- tery cable. Make sure that there is nothing plugged into the 115V and 230V receptacles. 2. Using the 5/16” nut driver, open up the control panel and tilt out.
- Page 125 F-71 TROUBLESHOOTING AND REPAIR STATOR RESISTANCE TEST (continued) TEST PROCEDURE 14. Connect the test leads J50 and J51 to the stator winding under test. Close S1 and read the volt- ages at V1 and V2, then open S1 IMMEDIATELY. Damage can occur to the stator winding under test if S1 is left in the “on”...
-
Page 126: Normal Open Circuit Voltage Waveform (115 Vac Supply
F-72 TROUBLESHOOTING & REPAIR NORMAL OPEN CIRCUIT VOLTAGE WAVEFORM (115VAC SUPPLY) HIGH IDLE – NO LOAD – OUTPUT CURRENT CONTROL AT MAXIMUM 15.8 ms This is the typical auxiliary output voltage generated from a properly operating machine. Note that each vertical division represents 50 volts and that each horizontal division rep- resents 5 milliseconds in time. -
Page 127: Normal Open Circuit Voltage Waveform (Stick) Max Tap
F-73 TROUBLESHOOTING & REPAIR NORMAL OPEN CIRCUIT VOLTAGE WAVEFORM (STICK) MAX TAP – MAX CONTROL POT – HIGH IDLE – NO LOAD This is the typical DC open circuit out- put voltage generated from a properly operating machine. Note that each vertical division represents 50 volts and that each horizontal division rep- resents 5 milliseconds in time. -
Page 128: Normal Weld Voltage Waveform (Stick Cc) Machine Loaded To 400 Amps At 40 Volts
F-74 TROUBLESHOOTING & REPAIR NORMAL WELD VOLTAGE WAVEFORM (STICK CC) MACHINE LOADED TO 400AMPS AT 40 VOLTS This is the typical DC output voltage generated from a properly operating machine. Note that each vertical division represents 20 volts and that each horizontal division represents 5 milliseconds in time. -
Page 129: Normal Weld Voltage Waveform (Wire Cv) Machine Loaded To 400 Amps At 40 Volts
F-75 TROUBLESHOOTING & REPAIR NORMAL WELD VOLTAGE WAVEFORM (WIRE CV) MACHINE LOADED TO 400AMPS AT 40 VOLTS This is the typical DC output voltage generated from a properly operating machine. Note that each vertical division represents 20 volts and that each horizontal division represents 5 milliseconds in time. -
Page 130: Normal Open Circuit Voltage Waveform (Wire Cv Tap
F-76 TROUBLESHOOTING & REPAIR NORMAL OPEN CIRCUIT VOLTAGE WAVEFORM (WIRE CV TAP) MAX CONTROL POT – HIGH IDLE – NO LOAD This is the typical DC open circuit output voltage generated from a properly operating machine. Note that each vertical division represents 20 volts and that each horizontal division represents 5 milliseconds in time. -
Page 131: Normal Solenoid Pull & Hold Coil Waveforms
F-77 TROUBLESHOOTING & REPAIR NORMAL SOLENOID PULL & HOLD COIL WAVEFORMS 100 ms 100 ms The scope pictures above are typical waveforms seen directly across the pull and hold terminals on both the Idle and Shutdown solenoids when they are operating normally. Note: Voltages across the shutdown solenoid coils may be slightly lower than these waveforms since the... -
Page 132: Abnormal Solenoid Pull & Hold Coil Waveforms
F-78 TROUBLESHOOTING & REPAIR ABNORMAL SOLENOID PULL & HOLD COIL WAVEFORMS SCOPE SETTINGS Volts/Div...1V/Div. Horizontal Sweep ...20 ms/Div. Coupling...DC Trigger...Internal 200 MV 20 ms 20 ms Volts/Div...200 MV/Div. Horizontal Sweep ...5 ms/Div. Coupling...DC Trigger...Internal The scope pictures above are exam- ples of a short at the output of both the pull and the hold coil circuits on the control PC board. -
Page 133: Typical Exciter Voltage Feedback Waveforms
F-79 TROUBLESHOOTING & REPAIR TYPICAL EXCITER VOLTAGE FEEDBACK WAVEFORMS This is the typical waveform output from each of the three phases from the Exciter Feedback Module (L10953-1) at high idle/no load under normal operation. The peak should measure between 3.5 - 4.5 Vdc, and the period should measure approxi- mately 8.0 - 9.0 ms (make sure that the machine is set up to the proper... -
Page 134: Abnormal Exciter Voltage Feedback Waveforms
F-80 TROUBLESHOOTING & REPAIR ABNORMAL EXCITER VOLTAGE FEEDBACK WAVEFORMS This is an example of a bad wave- form at one of the Exciter Module outputs (J4 pin 3 to pin 7). Note: The distortion in the waveform that causes the period to be in excess of 9.5 ms. - Page 135 TROUBLESHOOTING & REPAIR CONTROL PC BOARD REMOVAL, REPLACEMENT, Service and repair should be performed by only Lincoln Electric factory trained personnel. Unauthorized repairs performed on this equipment may result in danger to the technician or machine operator and will invalidate your factory warranty. For your safety and to avoid elec- trical shock, please observe all safety notes and precautions detailed throughout this manual.
- Page 136 F-82 TROUBLESHOOTING & REPAIR CONTROL PC BOARD REMOVAL AND REPLACEMENT (continued) FIGURE F.33 – MOLEX PLUG REMOVAL ENGINE PROTECTION BOARD MOLEX PLUG CV BOARD MOLEX PLUG CONTROL BOARD MOLEX PLUGS PROCEDURE Before starting the following procedure, refer to topic “PC Board Procedures”...
- Page 137 F-83 TROUBLESHOOTING & REPAIR CONTROL PC BOARD REMOVAL AND REPLACEMENT (continued) FIGURE F.34 – CONTROL BOARD LEADS 5. Remove lead #227 from terminal B1 on the control board. See Figure F. 34. 6. Remove lead # 262 from terminal B2 on the control board.
- Page 138 F-84 TROUBLESHOOTING & REPAIR CONTROL PC BOARD REMOVAL AND REPLACEMENT (continued) CALIBRATION PROCEDURE (Stick and Wire Model Only) 1. Set the front control panel as follows: ”Control” dial to 0 (Min.). “Range” dial to the ‘Wire Welding’ setting. “Idler” switch in the “Auto” position. “Volts/Amps”...
-
Page 139: Shutdown Solenoid Removal And Replacement
TROUBLESHOOTING & REPAIR SHUTDOWN SOLENOID REMOVAL AND REPLACEMENT Service and repair should be performed by only Lincoln Electric factory trained personnel. Unauthorized repairs performed on this equipment may result in danger to the technician or machine operator and will invalidate your factory warranty. For your safety and to avoid elec- trical shock, please observe all safety notes and precautions detailed throughout this manual. - Page 140 F-86 TROUBLESHOOTING & REPAIR SHUTDOWN SOLENOID REMOVAL AND REPLACEMENT (continued) FIGURE F.35 – SHUTDOWN SOLENOID LEAD CONNECTIONS PROCEDURE 1. Turn the engine off. 2. Unlatch, lift and secure the right side engine access door. PULL-IN COIL (LARGER TERMINALS EACH SIDE #225 AND #262) SHUTDOWN SOLENOID...
- Page 141 F-87 TROUBLESHOOTING & REPAIR SHUTDOWN SOLENOID REMOVAL AND REPLACEMENT (continued) FIGURE F.36 – SHUTDOWN SOLENOID LINKAGE ARM ASSEMBLY PIVOT PIN SPACER WASHER PLAIN WASHER RETAINING RING 4. Using the 7/16" wrench, remove the three nuts, two bolts and three lock washers mount- ing the shutdown solenoid assembly to the engine.
- Page 142 F-88 F-88 NOTES COMMANDER 400...
-
Page 143: Scr/Diode Rectifier Bridge Removal And Replacement
SCR/DIODE RECTIFIER BRIDGE REMOVAL AND REPLACEMENT Service and repair should be performed by only Lincoln Electric factory trained personnel. Unauthorized repairs performed on this equipment may result in danger to the technician or machine operator and will invalidate your factory warranty. For your safety and to avoid elec- trical shock, please observe all safety notes and precautions detailed throughout this manual. - Page 144 F-90 TROUBLESHOOTING & REPAIR SCR/DIODE RECTIFIER BRIDGE REMOVAL AND REPLACEMENT (continued) FIGURE F.37 – SCR/DIODE RECTIFIER BRIDGE DETAILS SHUNT REMOVE BOLT AT POSITIVE HEAT SINK PLATE (LOWER) STATOR WELD WINDING LEADS PROCEDURE 1. Turn the engine off. 2. Perform Case Cover Procedure (including front shroud removal).
- Page 145 F-91 TROUBLESHOOTING & REPAIR SCR/DIODE RECTIFIER BRIDGE REMOVAL AND REPLACEMENT (continued) FIGURE F.38 – NEGATIVE “STICK” OUTPUT TERMINAL 9. Using the 3/4" wrench, remove lead #207 from the negative "stick" output terminal. Figure F.38 and the Wiring Diagram. Cut any necessary cable ties.
- Page 146 F-92 TROUBLESHOOTING & REPAIR SCR/DIODE RECTIFIER BRIDGE REMOVAL AND REPLACEMENT (continued) FIGURE F.40 – RESISTOR R1 LOCATION 12. Using the 11/32" wrench, remove the #204B lead from the R1 (50 Ohm -100 Watt) resis- tor. See Figure F.40. Cut any necessary cable ties and clear leads for SCR/diode rec- tifier bridge assembly removal.
- Page 147 F-93 TROUBLESHOOTING & REPAIR SCR/DIODE RECTIFIER BRIDGE REMOVAL AND REPLACEMENT (continued) FIGURE F.42 – SCR/DIODE RECTIFIER BRIDGE ASSEMBLY REMOVAL RECTIFIER 15. Carefully lift and slide the SCR/diode rectifier bridge assembly out the left side of the machine. See Figure F.42. REASSEMBLY 16.
- Page 148 F-94 F-94 NOTES COMMANDER 400...
-
Page 149: Scr Removal And Replacement
TROUBLESHOOTING & REPAIR SCR REMOVAL AND REPLACEMENT Service and repair should be performed by only Lincoln Electric factory trained personnel. Unauthorized repairs performed on this equipment may result in danger to the technician or machine operator and will invalidate your factory warranty. For your safety and to avoid elec- trical shock, please observe all safety notes and precautions detailed throughout this manual. - Page 150 SCR in the same orientation as the original may result in subsequent damage to the new SCR and other components of the welder. See Figure F.43. FIGURE F.43 – SCR DETAILS CAUTION The unclamping and clamping procedure outlined below is critical for the prevention of internal SCR damage.
- Page 151 SCR mounting surfaces. 9. Apply a thin (0.001” to 0.003”) layer of PEN- ETROX A-13 (Lincoln Electric #E2529) or PENETROX A, heat sink compound, to each heat sink’s SCR mounting surface.
- Page 152 F-98 TROUBLESHOOTING & REPAIR SCR REMOVAL AND REPLACEMENT (continued) FIGURE F.45 – 1/2” WIDE LEAF SPRING 11. Go to the procedure below that matches your machine’s cap screw. THREAD IS ON YOUR CAP SCREWS BEFORE PROCEEDING TO THE ASSEM- BLY PROCEDURE. Two different designs of leaf springs and housings have been used to clamp the SCR to the rectifier.
- Page 153 F-99 TROUBLESHOOTING & REPAIR SCR REMOVAL AND REPLACEMENT (continued) CLAMPING PROCEDURE FOR 1/4-28 CAP SCREWS NOTE: This procedure can only be used with 1/4- 28 cap screws. Do not use cap screws with any other type thread or new SCR will be damaged. Do not over tighten cap screws.
- Page 154 F-100 TROUBLESHOOTING & REPAIR SCR REMOVAL AND REPLACEMENT (continued) FIGURE F.47 – HOUSING AND PRESSURE PAD FOR 5/8” WIDE LEAF SPRING PROCEDURE FOR THE 5/8 INCH WIDE SPRING 1. Place a piece of sleeving around each cap screw. 2. Insert cap screws through the leaf spring. The leaf spring is flat so the orientation of the leaf spring does not matter.
- Page 155 F-101 TROUBLESHOOTING & REPAIR SCR REMOVAL AND REPLACEMENT (continued) CLAMPING PROCEDURE FOR 1/4-28 CAP SCREWS NOTE: This procedure can only be used with 1/4-28 cap screws. Do not use cap screws with any other type thread or new SCR will be damaged. Do not over tighten cap screws.
- Page 156 F-102 F-102 NOTES COMMANDER 400...
-
Page 157: Mounting Stud Type Diodes To Aluminum Heat Sinks
TROUBLESHOOTING & REPAIR MOUNTING OF STUD TYPE DIODES TO ALUMINUM Service and repair should be performed by only Lincoln Electric factory trained personnel. Unauthorized repairs performed on this equipment may result in danger to the technician or machine operator and will invalidate your factory warranty. For your safety and to avoid elec- trical shock, please observe all safety notes and precautions detailed throughout this manual. - Page 158 F-104 TROUBLESHOOTING & REPAIR MOUNTING OF STUD TYPE DIODES TO ALUMINUM PROCEDURE 1. Turn the engine off. 2. Perform the SCR/Diode Bridge Removal Procedure. 3. Loosen the appropriate diode nut and remove the diode that is to be replaced. 4. Clean the area on the heat sink around the diode mounting surface using a putty knife or similar tool.
-
Page 159: Engine, Stator/Rotor Removal And Replacement
TROUBLESHOOTING & REPAIR ENGINE, STATOR/ROTOR REMOVAL AND REPLACEMENT Service and repair should be performed by only Lincoln Electric factory trained personnel. Unauthorized repairs performed on this equipment may result in danger to the technician or machine operator and will invalidate your factory warranty. For your safety and to avoid elec- trical shock, please observe all safety notes and precautions detailed throughout this manual. - Page 160 F-106 TROUBLESHOOTING & REPAIR ENGINE, STATOR/ROTOR REMOVAL AND REPLACEMENT (continued) FIGURE F.49 – FUEL TANK REMOVAL DETAILS FUEL LEVEL SENSOR PREPARATION AND LEAD REMOVAL PROCEDURE 1. Turn the engine off. 2. Using the 3/8" and 1/2" wrenches, remove the battery cover and disconnect Remove the battery by sliding it out.
- Page 161 F-107 TROUBLESHOOTING & REPAIR ENGINE, STATOR/ROTOR REMOVAL AND REPLACEMENT (continued) FIGURE F.50 – REAR PANEL ASSEMBLY REMOVAL DETAILS 9. Using the 3/8" wrench, remove the screws holding the rear panel assembly to the machine base. See Figure F.50. FIGURE F.51 – GROUNDING STRAP REMOVAL REAR PANEL ASSEMBLY...
- Page 162 F-108 TROUBLESHOOTING & REPAIR ENGINE, STATOR/ROTOR REMOVAL AND REPLACEMENT (continued) FIGURE F.52 – SHUTDOWN SOLENOID LEAD REMOVAL 12. Label and remove the four leads #224, #240, #225 and #262 from the shutdown solenoid. See Figure F.52. Cut any necessary cable ties.
- Page 163 F-109 TROUBLESHOOTING & REPAIR ENGINE, STATOR/ROTOR REMOVAL AND REPLACEMENT (continued) FIGURE F.54 – OIL PRESSURE SENSOR LEAD REMOVAL 14. Label and remove leads #228 and #234 from the oil pressure sensor. See Figure F.54. FIGURE F.55 – OIL TEMPERATURE SENSOR LEAD REMOVAL TEMPERATURE SENSOR PRESSURE...
- Page 164 F-110 TROUBLESHOOTING & REPAIR ENGINE, STATOR/ROTOR REMOVAL AND REPLACEMENT (continued) FIGURE F.56 – ENGINE GROUNDING LEAD ENGINE GROUNDING LEAD ATTACHMENT POINT 16. Using the 11/16" socket wrench, remove the grounding lead from the top of the engine bell housing. See Figure F.56. 17.
- Page 165 NUTS (3) 26. Check for voltage at the three studs . If volt- age is present, do not proceed. Call the Lincoln Electric Service Dept. at 1-800-833- 9353. With the 7/16" wrench, remove the three nuts and washers that mount the exciter board to the three studs.
- Page 166 F-112 TROUBLESHOOTING & REPAIR ENGINE, STATOR/ROTOR REMOVAL AND REPLACEMENT (continued) FIGURE F.58 – CONTROL BOARD PLUG J2 LOCATION PLUG J2 28. Locate and remove plug J2 from the control board. See Figure F. 58. Thread plug J2 out of the control box. 29.
- Page 167 F-113 TROUBLESHOOTING & REPAIR ENGINE, STATOR/ROTOR REMOVAL AND REPLACEMENT (continued) FIGURE F.60 – VERTICAL BAFFLE /ENGINE MOUNT REMOVAL CAPACITOR AND SCR ASSEMBLY FUEL TANK SUPPORT RAIL 32. Using the 3/8" wrench, remove the eight screws that mount the lift frame vertical baf- fle to the lift frame assembly.
- Page 168 F-114 TROUBLESHOOTING & REPAIR ENGINE, STATOR/ROTOR REMOVAL AND REPLACEMENT (continued) Cap Screws (4) Fan Hub Fan Nut STATOR REMOVAL PROCEDURE 1. Using the 1/4" Allen wrench, remove the four cap screws mounting the fan blade to the hub. 2. Using the 1-13/32" socket wrench, remove the fan nut from the threaded shaft.
- Page 169 F-115 TROUBLESHOOTING & REPAIR ENGINE, STATOR/ROTOR REMOVAL AND REPLACEMENT (continued) FIGURE F.62 – BLOWER PADDLE/FLEX PLATE REMOVAL ROTOR ROTOR REMOVAL PROCEDURE 1. Using the 5/8" wrench, remove the blower paddles/rotor flex plate bolts and lock wash- ers. See Figure F. 62. Support the rotor and engine securely.
- Page 170 F-116 TROUBLESHOOTING & REPAIR ENGINE, STATOR/ROTOR REMOVAL AND REPLACEMENT (continued) LEAD RECONNECTION CHECKLIST Engine Engine grounding strap to engine Leads #242E and #229 to fuel level sensor Leads #224, #240, #225, and #262 to shut- down solenoid Leads #226, #237, #227, and #254 to the idler solenoid Leads #228 and #234 to oil pressure sensor Leads #233A and #241 to oil temperature...
-
Page 171: Retest After Repair
Load Volts Voltage 230 - 250 RETEST AFTER REPAIR ENGINE OUTPUT No Load RPM 1325 - 1400 1890 - 1915 WELDER DC (STICK) OUTPUT Open Circuit Volts WELDER CV (WIRE) OUTPUT Open Circuit Volts AUXILIARY POWER OUTPUT Load Amps Open Circuit Voltage 44.6... - Page 172 F-118 F-118 NOTES COMMANDER 400...
- Page 173 ELECTRICAL DIAGRAMS TABLE OF CONTENTS ELECTRICAL DIAGRAMS SECTION Electrical Diagrams Section ...Section G Wiring Diagram - Stick Model (Code 9978)...G-2 Wiring Diagram - Stick & Wire Model (Code 9979)...G-3 Wiring Diagram - Stick Model (Code 10580)...G-4 Wiring Diagram - Stick & Wire Model (Code 10581)...G-5 Amphenol Bypass PC Board Schematic ...G-6 Amphenol Bypass PC Board Layout ...G-7 Auxiliary Protection PC Board Schematic ...G-8...
- Page 174 WIRING DIAGRAM - STICK MODEL (CODE 9978) 1002 1004 1006 1008 240A STUD T1 ON CAPACITOR CONNECTION BLOCK 1009 1013 1015 1011 FEEDBACK BOARD CONNECTIONS TO CAPACITORS MADE VIA EYELET BOLTED 240 uF CONNECTIONS 1010 STATOR 1014 1012 1016 STUD T2 ON CAPACITOR CONNECTION BLOCK 1017...
-
Page 175: Electrical Diagrams
WIRING DIAGRAM - STICK & WIRE MODEL (CODE 9979) 1002 1004 1006 1008 240A STUD T1 ON CAPACITOR CONNECTION BLOCK 1009 1013 1011 1015 FEEDBACK BOARD CONNECTIONS TO CAPACITORS MADE 240 uF VIA EYELET BOLTED CONNECTIONS STATOR 1010 1014 1012 1016 STUD T2 ON CAPACITOR... - Page 176 ELECTRICAL DIAGRAMS WIRING DIAGRAM - STICK MODEL (CODE 10580) NOTE: This diagram is for reference only. It may not be accurate for all machines covered by this manual. The wiring diagram specific to your code is pasted inside one of the enclosure panels of your machine. COMMANDER 400...
- Page 177 ELECTRICAL DIAGRAMS WIRING DIAGRAM - STICK & WIRE MODEL (CODE 10581) NOTE: This diagram is for reference only. It may not be accurate for all machines covered by this manual. The wiring diagram specific to your code is pasted inside one of the enclosure panels of your machine. COMMANDER 400...
- Page 178 ELECTRICAL DIAGRAMS SCHEMATIC - AMPHENOL BYPASS PC BOARD NOTE: This diagram is for reference only. It may not be accurate for all machines covered by this manual. COMMANDER 400...
- Page 179 Lincoln Electric discourages board level troubleshooting and repair since it may compromise the quality of the design and may result in danger to the Machine Operator or Technician.
- Page 180 ELECTRICAL DIAGRAMS SCHEMATIC - AUXILIARY PROTECTION PC BOARD NOTE: This diagram is for reference only. It may not be accurate for all machines covered by this manual. COMMANDER 400...
- Page 181 Lincoln Electric discourages board level troubleshooting and repair since it may compromise the quality of the design and may result in danger to the Machine Operator or Technician.
- Page 182 G-10 G-10 ELECTRICAL DIAGRAMS SCHEMATIC - BYPASS PC BOARD NOTE: This diagram is for reference only. It may not be accurate for all machines covered by this manual. COMMANDER 400...
- Page 183 Lincoln Electric discourages board level troubleshooting and repair since it may compromise the quality of the design and may result in danger to the Machine Operator or Technician.
- Page 184 G-12 SCHEMATIC - CONTROL PC BOARD PART 1 ELECTRICAL DIAGRAMS NOTE: This diagram is for reference only. It may not be accurate for all machines covered by this manual. G-12 A485 3-27-97B COMMANDER 400...
- Page 185 G-13 G-13 ELECTRICAL DIAGRAMS SCHEMATIC - CONTROL PC BOARD PART 2 NOTE: This diagram is for reference only. It may not be accurate for all machines covered by this manual. COMMANDER 400...
- Page 186 Lincoln Electric discourages board level troubleshooting and repair since it may compromise the quality of the design and may result in danger to the Machine Operator or Technician.
- Page 187 G-15 G-15 ELECTRICAL DIAGRAMS SCHEMATIC - CV CONTROL PC BOARD NOTE: This diagram is for reference only. It may not be accurate for all machines covered by this manual. COMMANDER 400...
- Page 188 Lincoln Electric discourages board level troubleshooting and repair since it may compromise the quality of the design and may result in danger to the Machine Operator or Technician.
- Page 189 G-17 G-17 ELECTRICAL DIAGRAMS SCHEMATIC - ENGINE PROTECTION PC BOARD 12-15-95A NOTE: This diagram is for reference only. It may not be accurate for all machines covered by this manual. COMMANDER 400...
- Page 190 Lincoln Electric discourages board level troubleshooting and repair since it may compromise the quality of the design and may result in danger to the Machine Operator or Technician.
- Page 191 G-19 G-19 ELECTRICAL DIAGRAMS SCHEMATIC - METER PC BOARD NOTE: This diagram is for reference only. It may not be accurate for all machines covered by this manual. COMMANDER 400...
- Page 192 Lincoln Electric discourages board level troubleshooting and repair since it may compromise the quality of the design and may result in danger to the Machine Operator or Technician.
- Page 193 G-21 G-21 ELECTRICAL DIAGRAMS SCHEMATIC - REMOTE PROTECTION PC BOARD NOTE: This diagram is for reference only. It may not be accurate for all machines covered by this manual. COMMANDER 400...
- Page 194 Lincoln Electric discourages board level troubleshooting and repair since it may compromise the quality of the design and may result in danger to the Machine Operator or Technician.
- Page 195 G-23 G-23 ELECTRICAL DIAGRAMS SCHEMATIC - SNUBBER PC BOARD NOTE: This diagram is for reference only. It may not be accurate for all machines covered by this manual. COMMANDER 400...
- Page 196 Lincoln Electric discourages board level troubleshooting and repair since it may compromise the quality of the design and may result in danger to the Machine Operator or Technician.
- Page 197 Your Company__________________________ Your Name_____________________________ Please give detailed description below: ___________________________________________________________________________ ___________________________________________________________________________ ___________________________________________________________________________ ___________________________________________________________________________ ___________________________________________________________________________ ___________________________________________________________________________ ___________________________________________________________________________ ___________________________________________________________________________ ___________________________________________________________________________ ___________________________________________________________________________ ___________________________________________________________________________ ___________________________________________________________________________ ___________________________________________________________________________ SD287 01/99 Thank You, Technical Services Group Lincoln Electric Co. 22801 ST. Clair Ave. Cleveland, Ohio 44117-1199 FAX 216-481-2309...