Panasonic AG-HPG10P Operating Instructions Manual
Panasonic memory card portable recorder
Hide thumbs
Also See for AG-HPG10P:
- Parts list (7 pages) ,
- Operating instructions manual (92 pages) ,
- Operating instructions manual (92 pages)
Table of Contents
Advertisement
Quick Links
FRANÇAIS
Pour des explications en français, veuillez vous reporter au CD-ROM fourni.
Before operating this product, please read the instructions carefully and save this manual for
future use.
F0707K0 -M
D
Printed in Japan
Operating Instructions
Memory Card Portable Recorder
AG-HPG10P
Model No.
AG-HPG10E
Model No.
ENGLISH
VQT1H84
Advertisement
Table of Contents

Related Manuals for Panasonic AG-HPG10P


Summary of Contents for Panasonic AG-HPG10P
- Page 1 Operating Instructions Memory Card Portable Recorder AG-HPG10P Model No. AG-HPG10E Model No. FRANÇAIS Pour des explications en français, veuillez vous reporter au CD-ROM fourni. Before operating this product, please read the instructions carefully and save this manual for future use.
-
Page 2: Read This First
Read this first! indicates safety information. CAUTION: CAUTION THE AC RECEPTACLE (MAINS SOCKET RISK OF ELECTRIC SHOCK DO NOT OPEN OUTLET) SHALL BE INSTALLED NEAR THE EQUIPMENT AND SHALL BE EASILY CAUTION: TO REDUCE THE RISK OF ELECTRIC SHOCK, DO NOT REMOVE COVER (OR BACK). ACCESSIBLE. -
Page 3: Declaration Of Conformity
Model Number: AG-HPG10P Trade Name: PANASONIC Responsible Party: Panasonic Corporation of North America One Panasonic Way, Secaucus, NJ 07094 Support contact: Panasonic Broadcast & Television Systems Company 1-800-524-1448 This device complies with Part 15 of FCC Rules. Operation is subject to the following two conditions: (1) This device may not cause harmful interference, and (2) this device must accept any interference received, including interference that may cause undesired operation. - Page 4 Fuse If you lose the fuse cover the plug must not be used until a replacement cover is obtained. A replacement fuse cover can be purchased from your local Panasonic Dealer.
-
Page 5: Important Safety Instructions
IMPORTANT SAFETY INSTRUCTIONS 1) Read these instructions. 2) Keep these instructions. 3) Heed all warnings. 4) Follow all instructions. 5) Do not use this apparatus near water. 6) Clean only with dry cloth. 7) Do not block any ventilation openings. Install in accordance with the manufacturer’s instructions. 8) Do not install near any heat sources such as radiators, heat registers, stoves, or other apparatus (including amplifiers) that produce heat. -
Page 6: Recommendation For Use Of Genuine Panasonic Battery Pack (Rechargeable Battery)
To ensure that our products are used in utmost safety, we once again remind you that we recommend the use of a genuine Panasonic battery pack for any Panasonic product that is to use a battery pack. The genuine Panasonic battery packs are sold under our stringent quality control. -
Page 7: Software Information For This Product
Descriptions of the GPL and LGPL are stored on the installation CD included with this camera-recorder. See the folder named \LDOC. (The description is the original (written in English).) To download the relevant source code, visit https://eww.pavc.panasonic.co.jp/pro-av/ Please note that we cannot answer any questions you may have about the content, etc. of any source code you may obtain from the above Web site. -
Page 8: Table Of Contents
IMPORTANT SAFETY INSTRUCTIONS ..5 Switching playback formats ......30 Recommendation for Use of Genuine Names and functions of thumbnail display Panasonic Battery Pack screen parts ..........30 (Rechargeable Battery) ......6 Changing the displays on the thumbnail Software information for this product ..7 display screen .......... - Page 9 Saving data Menu Copying data from P2 cards to the hard Basic operations on the setting menus ..74 drive ............54 Initializing the setting menu ......74 Copying data from P2 cards to the hard Setting menu configuration ......75 drive (USB HOST mode) .......
-
Page 10: How To Use The Unit
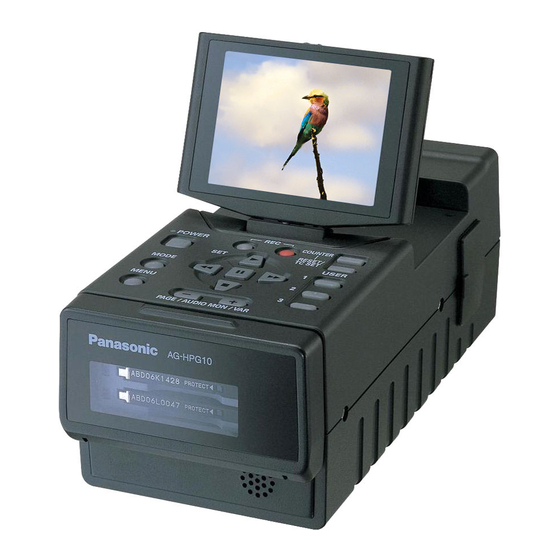
How to use the unit Housed in a compact cabinet which can be battery-powered, this Memory Card Portable Recorder comes with two P2 card slots, a 3.5-inch LCD monitor, USB 2.0, IEEE1394, component signal, composite signal, SDI and many other input/output signal connectors, and it can be easily operated to play back the data content which has been shot by a P2 camera recorder. - Page 11 Saving data in external devices Saving data onto an external hard drive (Page 54) The data content of P2 cards can be saved onto an external hard drive. Also, the data saved on an external hard drive can be reloaded onto a P2 card. (Only in the USB HOST mode) AG-HPG10 (this unit) Hard drive...
-
Page 12: About This Manual
About this manual Note concerning illustrations in these instructions • Illustrations (portable recorder, menu screens, etc.) in these operating instructions differ slightly from the actual portable recorder. References • References are shown as (Page 12). Before use Be absolutely sure to check the calendar and time zone, and set them if necessary. •... -
Page 13: Accessories
Accessories Battery ∗ AC adapter AC power supply cords AG-HPG10P AG-HPG10E ( For the U.K.) ( For areas other than the U.K.) DC cord Component video Pin-BNC conversion Operating Instructions plugs (x3) cable P2 card driver software (CD-ROM) ∗ For the model number of the battery, refer to the [OPTIONAL PERIPHERALS] item. (Page 97) -
Page 14: Name Of The Parts
Name of the parts Operation area REC button (Page 50) MENU/MODE CHK button POWER button (Pages 18, 87) (Pages 19, 27) PLAY button (Pages 19, 44) COUNTER button (Page 51) STILL button (Pages 19, 44) 10 RESET/TC SET button (Pages 22, 51) REW button (Pages 19, 44) 11 FF button (Pages 19, 44) THUMBNAIL/MODE button... -
Page 15: Mechanism Area And Input/Output Connector Area
Mechanism area and input/output connector area 14 15 OUTPUT CH 1 AUDIO CH 2 VIDEO HD/SD-SDI COMPONENT OUT 1394 POWER COUNTER RESET/ TC SET USER THUMBNAIL /MODE MENU/MODE CHK AG -H PG PAGE / AUDIO MON / VAR HOST OPEN DEVICE LCD monitor (Pages 18, 22) 12 Battery (Page 16) -
Page 16: Charging The Battery
Charging the battery Charging Before using the battery, give it a full charge using Charging time and play time of supplied battery the AC adapter. It is recommended that you have a Capacity Charging Continuous spare battery available in case you need it. time playback time 5400 mAh... -
Page 17: Installing And Removing The Power Supply
Installing and removing the power supply Installing and removing the battery Insertion Removal Insert the battery until it clicks into place. Press [POWER] for at least 2 seconds to turn the power off, and check that the power lamp has gone off. (Page 18) OUTPUT CH 1 AUDIO... -
Page 18: Basic Operations
Basic operations Turning the power on and off Hold down [POWER] for at least 2 seconds. • The power lamp lights, and the power is turned on. • When [POWER] has been held down for more than 2 seconds while the power is on, the power lamp will go off, and the power will be turned off. -
Page 19: Menu Operations
Menu operations This unit is provided with three kinds of screens: the thumbnail display screen, thumbnail display off screen (1394 input recording standby mode, playback standby mode) and PC mode screen. When [MENU/MODE CHK] is pressed on any of these screens, the menu will be displayed. (No menus are displayed in the USB DEVICE mode or 1394 DEVICE mode.) Operations performed when the function buttons are pressed This is used to move the menu highlighting to the item above;... -
Page 20: Operation Modes
Basic operations (continued) Operation modes This unit has the following 3 modes which can be selected by pressing [THUMBNAIL/MODE]. Turn on the power. Thumbnail display screen On this screen, the data content on the P2 cards is displayed as thumbnails to play back or manage the clips. - Page 21 PC mode Connect the unit to the external device, and save or manage the clips. Depending on the connection method and application, the USB HOST mode, USB DEVICE mode, 1394 HOST mode and 1394 DEVICE mode are available; perform the mode settings using the setting menu on the thumbnail display off screen.
-
Page 22: Lcd Monitor Settings
Basic operations (continued) LCD monitor settings Hold down [POWER] for at least 2 seconds Using , adjust the selected item. to turn the power on. Press [MENU/MODE CHK] 3 times to release First check that an image is displayed on the the menu mode. -
Page 23: Setting The Calendar
Setting the calendar The “CLOCK SET” value is recorded on the data content (clips), and it affects the sequence in which the thumbnails are played back. Before recording, be absolutely sure to check the “CLOCK SET” and “TIME ZONE” settings, and set them if necessary. Described below is the procedure for setting the clock to 5:20 PM on May 25, 2007. -
Page 24: P2 Cards
P2 cards Inserting P2 cards • When the unit is to be used for the first time, the first step is always to set the internal clock. (Page 23) Hold down [POWER] for at least 2 seconds to turn the power on. Open the card slot cover, and insert the P2 card into the P2 card slot as far as it will go. -
Page 25: Formatting P2 Cards
Formatting P2 cards Hold down [POWER] for at least 2 seconds Select “YES” on the confirmation screen, to turn the power on. and press The thumbnail screen now appears. • The selected P2 card is now formatted. Press [MENU/MODE CHK]. When the completion message has appeared, press “OK”... -
Page 26: Ejecting P2 Cards
P2 cards (continued) Ejecting P2 cards • During playback, a P2 card will not be recognized Press even if it has been inserted into the other empty When the P2 card access LED to be ejected is slot, and the P2 card access LED will not blinking in orange, press to stop it blinking. -
Page 27: P2 Card Recording Durations
P2 card recording durations DVCPRO/DV DVCPRO50 DVCPRO HD ∗ Model number Capacity Audio 2CH Audio 4CH AJ-P2C004HG 4 GB Approx. 16 minutes Approx. 8 minutes Approx. 4 minutes AJ-P2C008HG 8 GB Approx. 32 minutes Approx. 16 minutes Approx. 8 minutes AJ-P2C016RG 16 GB Approx. -
Page 28: Using Sd/Sdhc Memory Cards
• If the card is not going to be formatted, select the P2 support page on the web site below. “EXIT”. https://eww.pavc.panasonic.co.jp/pro-av/ • When using the SD memory cards, always remember to close the cover. • Also refer to “Concerning the use of memory... -
Page 29: Saving User Files On Sd Memory Cards
Saving USER files on SD memory cards Up to four sets of settings can be saved as four Press [MENU/MODE CHK] four times to files on the SD memory card, and they can be release the menu mode. loaded from the card. To give titles to files Press [THUMBNAIL/MODE] to display the 1) Perform steps 1 to 6. -
Page 30: Thumbnail Display
Thumbnail display The video data produced on a P2 card by a single shooting session is referred to as a clip. When the unit’s power is turned on, the clips are displayed as thumbnails on the LCD monitor. (If there are many clips, it will take a few moments for all the clips to be displayed.) Playback formats Switching playback formats... - Page 31 Menu configuration of thumbnail display screen THUMBNAIL OPERATION PROPERTY ALL CLIP DELETE CLIP PROPERTY EXPORT SAME FORMAT CLIPS FORMAT CARD STATUS EXPLORE SELECTED CLIPS REPAIR CLIP DEVICES SETUP MARKED CLIPS PROPERTY SETUP EXIT CONNECTION TEXT MEMO CLIPS SYSTEM INFO SLOT CLIPS COPY EXIT SETUP...
- Page 32 Thumbnail display (continued) Names and functions of thumbnail display screen parts (continued) 3 Time display (Page 34) Incomplete clip indicator Depending on what has been set, the time code This appears when a single clip has been at the clip recording start point or the user’s bit recorded onto a multiple number of P2 cards at the clip recording start point, shooting time, and one of the P2 cards concerned has not...
-
Page 33: Changing The Displays On The Thumbnail Display Screen
Changing the displays on the thumbnail display screen You can customize the thumbnail display screen to better suit your operating needs for more efficient operation. Display the thumbnail display screen. Press [MENU/MODE CHK]. Using , select the type of clip to be displayed at the lower level of “THUMBNAIL”, and press ALL CLIP: Select this to display all the clips. -
Page 34: Setting The Items To Be Displayed
Thumbnail display (continued) Setting the items to be displayed You can customize how the thumbnails are to be displayed to better suit your intended application. This enables you to change the display of the thumbnail indicators, data displays and other settings. DATE This menu item enables you to select Display the thumbnail display screen. -
Page 35: Clip Management
Clip management Selecting clips When performing operations on the thumbnail display screen, select the clip which will be the target of these operations as follows. Using , move the yellow frame (cursor) to the target clip. Press A bluish-green frame now appears at the clip where the cursor is positioned to indicate that the clip has been selected. -
Page 36: Repairing And Connecting Clips
Clip management (continued) Repairing and connecting clips Repairing defective clips Connecting incomplete clips The defective clip indicator (yellow ) appears In some cases, clips recorded on a multiple in order to indicate that there is a problem in the number of P2 cards may not be recognized as clip such as the power having been suddenly cut a single continuous clip and may be recognized off while it was being recorded. -
Page 37: Copying Clips
Copying clips Clips can be copied onto the P2 cards in either of the P2 card slots. • While clips are being copied, do not turn off the power or eject the card. Otherwise, defective clips will be produced. If defective clips are produced, delete them, and copy the original clips again. •... -
Page 38: Displaying The Clip Information
Clip management (continued) Displaying the clip information You can display detailed information about clips on the screen, and check it. Display the thumbnail display screen. Using , move the cursor to the target clip. Press [MENU/MODE CHK]. Using , select “PROPERTY”, and press Select “CLIP PROPERTY”... - Page 39 4) Clip information VIDEO: Video signal system, etc. (frame rate, The following information is displayed. pull-down, aspect ratio) CLIP NAME: Clip name AUDIO: Audio channel system, etc. (sampling START TC: Time code when recording was rate, bit rate) started ACCESS: Last update date, etc.
-
Page 40: Editing The Clip Information
Clip management (continued) Editing the clip information You can edit the clip information. Display the thumbnail display screen. The editing keyboard window now appears. Using , select the keys, Using , move the cursor to the target and while entering them using , edit the clip. -
Page 41: Inserting Shot Marks Into Clips
Inserting shot marks into clips You can differentiate one clip from all the other clips by inserting shot marks. Display the thumbnail display screen. Using , move the cursor to the target clip. Press [USER] in which the shot mark function was allocated. (Page 27) To release a shot mark, repeat the above steps. - Page 42 When the number of times the card data has The card details are displayed as follows. been rewritten has exceeded the standard BRAND : Panasonic • DIR ENTRY NG CARD: MODEL NO. : AJ-P2C008HG When the position of the folder does not SERIAL NO.
-
Page 43: Displaying The Sd Memory Card Information
Displaying the SD memory card information You can display the usage statuses of the SD memory cards on the screen, and check them. Display the thumbnail display screen. Press [MENU/MODE CHK]. Using , select “PROPERTY” – “DEVICES” – “SD CARD”, and press The following information is displayed. -
Page 44: Clip Playback
Clip playback Playing back clips Display the thumbnail display screen. Using , move the yellow frame (cursor) to the target clip. Press Playback starts from the clip where the cursor is positioned. When this clip has finished playing back, the subsequent clips with the same playback format are played back in turn, and when the last clip has been played back, the thumbnail screen is restored. -
Page 45: Variable-Speed Searches
Variable-speed searches Repeat playback You can change the playback speed and search The selected clip is played repeatedly. for specific locations. Press [THUMBNAIL/MODE] to display the Press during playback. thumbnail display off screen. is displayed. Press [MENU/MODE CHK]. Press , and change the playback Using , select “PLAYBACK speed. -
Page 46: Playback From Text Memo Position
Clip playback (continued) Playback from text memo position Using , move the cursor to the Display the thumbnail display screen. number of the text memo to be played back, Press [MENU/MODE CHK]. and press Playback starts from the time code position of Using , select “THUMBNAIL”... -
Page 47: Deleting Text Memos
Deleting text memos Replacing thumbnail images The thumbnail display images of the clips to which Proceed with steps 1 to 4 in “Playback from text memos were added at the top of the LCD text memo position”, and select the text monitor screen can be replaced with still images to memos in the clips. -
Page 48: Outputting Images To An External Monitor For Playback
Outputting images to an external monitor for playback You can connect an external monitor to the output connector of the unit, output clips to the external monitor and play them back on the monitor. AUDIO OUT CH1/ CH2 connectors VIDEO OUT connector Component signal output connector (D4... -
Page 49: Recording
CMPNT/SDI SEL : This is used to set the format of the D connector output and HD/SD-SDI output signals. (When SYSTEM AUTO The signals corresponding to the setting for SYS FORMAT item (Page 76) on the FREQ is set to 59.94 RECORDING SETUP screen are output. -
Page 50: Recording Data On P2 Cards
Recording data on P2 cards 1394 input recording You can connect a digital video component equipped with a 1394 connector, and digitally record video signals, audio signals or time codes, etc. on the unit. This Unit Digital component AG -H PG IEEE1394 input/output connector 1394 cable... -
Page 51: 2-Slot Continuous Recording
• Before connecting or disconnecting the 1394 cable, you must turn off the power of the component connected to the unit. • When connecting the unit to a component which uses a 6-pin type of 1394 connector, thoroughly check the 1394 cable and shapes of the connectors at its ends before initiating the connection. -
Page 52: 1394Tc Preset Mode
Recording data on P2 cards (continued) 1394TC preset mode Specifying the time code (TC PRESET) The TC initial value can be synchronized when Set “TC PRESET” so you can record a value of images are shot using multiple cameras. your choice as the initial setting for the time code Preset operations cannot be performed during to be used at the start of recording. -
Page 53: Set The User's Bit
After the time code value has been set, Set the user’s bit. press [MENU/MODE CHK]. Using , select the user’s bit characters. • You can use numbers from 0 to 9 and letters Using , move to “YES”, and press from A to F. -
Page 54: Copying Data From P2 Cards To The Hard Drive
Panasonic disclaims all liability for the loss of data caused by a failure of or any form of trouble occurring in the hard drive, and also for any direct and indirect damages suffered as a result of such failure or trouble. -
Page 55: Copying Data From P2 Cards To The Hard Drive (Usb Host Mode)
Usable hard drives The following hard drive can be used. • Panasonic portable hard disk unit for P2 store (AJ-PCS060G) • Any hard drive which can be connected using USB 2.0 • USB bus power (5 V, 0.5 A) is also supported, but some hard drives cannot be started up using it. If this is the case, supply power from a separate source to the hard drive. -
Page 56: Types Of Hard Drives And Usable Functions
Copying data from P2 cards to the hard drive (USB HOST mode) (continued) Types of hard drives and usable functions The functions that can be used differ from one hard drive to another. The hard drive type is displayed following [PARTITION:] on the left of the HDD EXPLORE screen in the unit’s HOST mode. Hard drive type Features Functions that can be used... -
Page 57: Formatting The Hard Drive
Formatting the hard drive Formatting initializes the hard drive to a format which can be used by TYPE S. • Bear in mind that when the hard drive is formatted, all the existing data on that drive will be erased. Switch to the USB HOST mode. -
Page 58: Exporting Data To A Hard Drive In 1-Card Increments
Copying data from P2 cards to the hard drive (USB HOST mode) (continued) Exporting data to a hard drive in 1-card increments If you are using a TYPE S hard drive, you can export all the data on one P2 card at a time to the hard drive (write data from P2 cards onto the hard drive). -
Page 59: Hard Drive Data Display
Hard drive data display You can display the hard drive information. PARTITION Type of hard drive Switch to the USB HOST mode. VENDER Name of vender Connect the USB hard drive. MODEL Hard drive model name SIZE Total memory size of hard Press [MENU/MODE CHK]. -
Page 60: Thumbnail Displays Of Clips On The Hard Drive
Copying data from P2 cards to the hard drive (USB HOST mode) (continued) Thumbnail displays of clips on the hard drive You can also display and manage thumbnails of the clips stored on the hard drive just as you can with clips on the P2 cards installed in the unit. -
Page 61: Importing Data From A Hard Drive To P2 Cards
Importing data from a hard drive to P2 cards Importing clips one partition at a time • When data has been imported to a P2 card which from a TYPE S or P2 store hard drive is different from the source P2 card, some clips may be incomplete (in which case, they will be You can import data (load data from the hard drive indicated by the... -
Page 62: Copying Data From P2 Cards To The Hard Drive (1394 Host Mode)
Copying data from P2 cards to the hard drive (1394 HOST mode) Switching to the 1394 HOST mode Hard drive status The status is displayed display in white if the hard drive is connected and can be Turn on the power of the hard drive (which used, in black when it is supports 1394.a SBP2) to be connected, not connected, and in red... -
Page 63: Copying Data From P2 Cards To The Hard Drive
Copying data from P2 cards to the Hard drive status displays hard drive You can display the status of the hard drive which • Use a hard drive with enough memory to is connected to the unit. accommodate the data to be copied. Using , select “PROPERTY”, and •... -
Page 64: Editing By Means Of External Devices
Editing by means of external devices Editing the P2 card data (USB DEVICE mode/1394 DEVICE mode) You can connect a personal computer to the unit using a USB cable (for a Windows machine) or a 1394 cable (for a Macintosh machine), and operate the image data on the unit’s P2 card from the computer. USB cable This unit (optional accessory) -
Page 65: Editing In The 1394 Device Mode
Hold down [POWER] for at least 2 seconds to turn off the unit’s power. The PC mode cannot be released simply by holding down [THUMBNAIL/MODE]. • While the USB connection is established, the P2 card access LEDs will remain off at all times except when the data on the cards is being accessed. -
Page 66: Screen Displays
Screen displays Normal displays TC 12 : 34 : 56 : 00 106 min REPEAT FULL HD1080i 1394TC TEXT MEMO 2005 23 : 59 : 59 60 : 24P USB HOST VOLUME [ + ] 1 Time code displays FR 50P : 50P progressive mode Each time [COUNTER] is pressed, the following (50 frames per second) - Page 67 50M: MARK ON : Recording and playback in the 480i, 576i When a shot mark has been added DVCPRO50 format MARK OFF : 25M: When a shot mark has been deleted Recording and playback in the 480i, 576i TEXT MEMO : DVCPRO25 format When a text memo has been added INVALID :...
-
Page 68: Warning Displays
Screen displays (continued) 16 Remaining media memory displays RUN DOWN CARD The amount of memory remaining on the The P2 card has reached the end of its service card in the slot targeted for recording is life. It is recommended that you replace it. Even displayed when “ONE CARD”... - Page 69 LACK OF REC CAPACITY! TURN POWER OFF! There is not enough memory on the card for the Turn the power off, and turn it back on for use. clips to be recorded. Insert a card with enough CANNOT RECOGNIZE HDD! memory on the card for the clips to be recorded.
-
Page 70: Error Displays
Screen displays (continued) Error displays Errors are displayed when trouble has occurred in the unit, P2 card, etc. If the error persists even after turning the power off and back on, depending on what the error message says, replace the card or contact your dealer. -
Page 71: Selecting What Is To Be Displayed On The Screen
Selecting what is to be displayed on the screen The following items appearing on the LCD monitor screen are displayed when [MENU/MODE CHK] is held down or when a setting for the “OTHER DISPLAY” item (Page 80) on the setting menu “DISPLAY SETUP” screen has been selected. -
Page 72: List Of Recording/Playback And Output Formats
List of recording/playback and output formats When the 59.94 Hz system format is set Format Output Recording status Output status setting setting Recording/ 1394 recording/ playback CMPNT/ SDI OUT COMPONENT Playback 1394 SDI OUT VIDEO OUT FORMAT playback format audio SDI SEL AUDIO output... - Page 73 When the 50 Hz system format is set Format Output Recording status Output status setting setting Recording/ 1394 recording/ playback CMPNT/ SDI OUT COMPONENT Playback 1394 SDI OUT VIDEO OUT FORMAT playback format audio SDI SEL AUDIO output channels 1080i/ 1080i/ AUTO 1080i/...
-
Page 74: Menu
Basic operations on the setting menus Hold down [POWER] for at least 2 seconds Using , move to the item to be set. to turn the power on. First press , then select the setting to be Press [THUMBNAIL/MODE] to switch to the changed using , and press thumbnail display off screen. -
Page 75: Setting Menu Configuration
Setting menu configuration SYS FORMAT MAIN MENU RECORDING SETUP (Pages 76 - 77) SD(480i/576i)MODE 1394 TC REGEN TC MODE TC PRESET 1394 UB REGEN UB MODE UB PRESET 1394 IN PRESET Menus enclosed in the USER1 SW MODE broken-line frames (Page 78) USER2 are not displayed in the... -
Page 76: List Of Setting Menus
List of setting menus RECORDING SETUP screen When the settings are changed using the “SYSTEM FREQ” item (Page 83) on the “OTHER FUNCTIONS” screen, whatever has been set for “SYS FORMAT” on the “RECORDING SETUP” screen will be changed to the initial setting. Item Description of settings SYS FORMAT... - Page 77 RECORDING SETUP screen (continued) Item Description of settings UB MODE This is used to set what is to be recorded as the user’s bit. “OFF” must be selected for the “1394 UB REGEN” item setting. (Page 53) USER: The user information is recorded. TIME: The time of the recording is recorded.
-
Page 78: Sw Mode Screen
List of setting menus (continued) SW MODE screen Item Description of settings USER1 This is used to set which function is to be assigned to the USER1 button. SYS FORMAT: System format (Page 76) SD MODE : SD mode (Page 76) SHOT MARK : A shot mark is recorded on the clip. -
Page 79: Playback Functions Screen
PLAYBACK FUNCTIONS screen Item Description of settings REPEAT PLAY This is used to set repeat playback. (Page 45) Playback is repeated. After playing back the last clip in the playable format which has been set in the “SYS FORMAT” item on the “RECORDING SETUP” screen, the first clip in the playable format is played back in succession. -
Page 80: Display Setup Screen
List of setting menus (continued) DISPLAY SETUP screen Item Description of settings VIDEO OUT OSD When ON is selected as this item’s setting, the information displayed on the LCD monitor is output as a video output signal together with the video signals. (Component output signals, VIDEO output signals, SDI output signals) ON, OFF <Note>... -
Page 81: Card Functions Screen
DISPLAY SETUP screen (continued) Item Description of settings LCD ASPECT This is used to select the aspect ratio for the LCD monitor. SYS FORMAT needs to be set to 480i/60i or 576i/50i. AUTO: The aspect ratio is automatically selected based on the recording mode, playback mode and other information. -
Page 82: Other Functions Screen
List of setting menus (continued) OTHER FUNCTIONS screen Item Description of settings PC MODE This is used to select the connectors and mode to be used for data transfer. (The USB and 1394 connectors cannot be used at the same time.) USB DEVICE: File transfer mode using the USB connector USB HOST:... - Page 83 (PLAY, CUE (rapid forward), REV (rapid reverse), FF, REW or STILL) or during recording. SYSTEM FREQ This is used to switch the system frequency. 59.94 Hz, 50 Hz (AG-HPG10P) 59.94 Hz, 50 Hz (AG-HPG10E) <Note> When the system frequency has been changed, turn the unit’s power off and then back on so that the setting takes effect.
-
Page 84: Option Menu Screen
List of setting menus (continued) OPTION MENU screen This screen appears when [MENU/MODE CHK] is pressed while is held down on the thumbnail display off screen. Item Description of settings 1394 STATUS The 1394 status display sub-screen is displayed. FORMAT: Format of the input or output signals RATE: Transfer rate of the input or output signals... -
Page 85: Warning System Table
Warning system table When trouble is detected immediately after the power is turned on or during operation, the user is alerted by the power lamp and beep sound (provided that “ON” is selected as the “BEEP SOUND” setting on the “OTHER FUNCTIONS”... -
Page 86: Main Differences Between The Usb Host Mode And 1394 Host Mode
Main differences between the USB HOST mode and 1394 HOST mode Function USB HOST 1394 HOST Export of data on a card by card basis (max. 23) (max. 15) Import from hard drive to P2 card (clips selectable) Χ Thumbnail display of clips on hard Χ... -
Page 87: Troubleshooting (Q&A)
Troubleshooting (Q&A) Power-related Q&A No power. • Has the battery or AC adapter been connected properly? Check the P 17 connections. • When turning on the power, hold down [POWER] for at least 2 P 18 seconds. The power suddenly goes •... - Page 88 Troubleshooting (Q&A) (continued) Recording Recording does not start. • Is the unit’s power on? P 18 • Has the battery reached the end of its service life? The battery may — have reached the end of its service life. Although the service life will differ depending on how the battery has been used, if the battery can be used only for short periods of time even after it has been fully charged, it means that it has reached the end of its service life.
- Page 89 Playback Mosaic-like noise appears • This phenomenon is characteristic of digital equipment. It is not a — during rapid forward or sign of trouble. rapid reverse playback. No playback pictures • Is the input selector on the TV set at the “video input” position? —...
-
Page 90: Operating Precautions
Operating precautions When using the unit in rainy or snowy weather, AC adapter and battery at the beach or other locations, take care to • When the battery temperature is extremely high protect it from precipitation and sea water. or extremely low or when the battery has not •... - Page 91 Characteristics of the battery Liquid crystal display A rechargeable lithium-ion battery is used in this • When the same image or characters are left unit. Electrical energy is generated by the chemical displayed on the LCD monitor for a prolonged reactions taking place inside it.
-
Page 92: Updating The Drivers Installed In The Unit
Updating the drivers installed in the unit For the latest information concerning drivers, access the P2 support page on the web site given below. https://eww.pavc.panasonic.co.jp/pro-av/ When updating a driver, check the unit’s version by selecting thumbnail menu “OPERATION” – “SERVICE”... -
Page 93: Storage Precautions
Storage precautions Before storing the unit, remove its battery. P2 cards Select a location with minimal moisture and a • After removing the P2 cards from the unit, always relatively constant temperature to store the unit. remember to cover their terminals with the [Recommended temperature: 15 °C to 25 °C dedicated caps to keep sand and dust away from (59 °F to 77 °F)]... -
Page 94: Handling The Data Recorded On P2 Cards
“P2 viewer” dedicated software from the following web site and use it for this purpose. (Operating systems supported: Windows XP, Windows 2000) https://eww.pavc.panasonic.co.jp/pro-av/ When transferring data to a personal computer using a regular IT tool such as Microsoft Windows Explorer or Apple Finder, proceed as follows. -
Page 95: Concerning The Use Of Memory Cards
It is recommended that the SD and SDHC memory cards or the miniSD and miniSDHC cards made by Panasonic be used. For the latest information on the unit and the memory cards which can be used by the unit, access the P2 support page on the web site below. -
Page 96: Specifications
Specifications [GENERAL] Sampling frequency Y: 74.25 MHz, P : 37.125 MHz (DVCPRO HD) Supply voltage DC7.2 V/7.9 V Quantizing Power consumption 11 W 8 bit (DVCPRO HD) Video compression system indicates safety information. DCT + variable-length code (DVCPRO HD) Operating ambient temperature Video compression ratio 0 °C to 40 °C (32 °F to 104 °F) 1/6.7 (DVCPRO HD) - Page 97 [AUDIO] [OPTIONAL PERIPHERALS] Audio recording formats (1394 input) Battery 48 kHz, 16 bits, 4 channels (DVCPRO HD, CGP-D28/CGP-D28s (2800 mAh) DVCPRO50) CGA-D54/CGA-D54s (5400 mAh: identical to 48 kHz, 16 bits, 2 channels or 4 channels supplied battery) (DVCPRO/DV) ∗ 32 kHz, 12 bits, 4 channel input signals in the DV format are converted into 48 kHz, 16 bits and 4 channels, and recorded.
- Page 98 Panasonic Broadcast & Television Systems Company Unit Company of Panasonic Corporation of North America Executive Office: One Panasonic Way 4E-7, Secaucus, NJ 07094 (201) 348-7000 EASTERN ZONE: One Panasonic Way 4E-7, Secaucus, NJ 07094 (201) 348-7196 Southeast Region: (201) 348-7162 WESTERN ZONE: 3330 Cahuenga Blvd W., Los Angeles, CA 90068 (323) 436-3500...