
Related Manuals for GPX TDE4074B


Summary of Contents for GPX TDE4074B
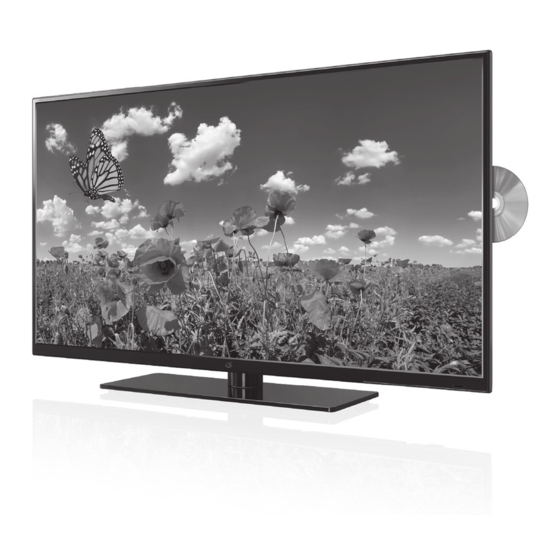
- Page 1 40" LED HDTV + DVD User’s Guide for Model No. TDE4074B v1129-01 For the most up-to-date version of this User’s Guide, go to www.gpx.com...
-
Page 2: Important Safety Instructions
Safety Instructions & Warnings Important Safety Instructions Warning: To reduce the risk of electric CAUTION RISK OF ELECTRIC SHOCK shock, do not remove cover (or back). No • Read these Instructions. DO NOT OPEN user-serviceable parts inside. Refer servicing ATTENTION • Keep these Instructions. RISQUE D' ÉLECTROCUTION to qualified service personnel. - Page 3 Safety Instructions & Warnings Additional Warnings and Precautions disposal or recycling practices in your area. They should never be incinerated since they might explode. • CAUTION: TO PREVENT ELECTRIC SHOCK, MATCH AVIS: Les piles Lithium ion, comme toutes les autres piles WIDE BLADE OF PLUG TO WIDE SLOT, FULLY INSERT. rechargeables, sont recyclables et doivent être etées avec vos Avis: AFIN DE PRÉVENIR LES CHOCS ÉLÉCTRIQUES, déchets ménagers. Contactez votre municipalité pour obtenir FAITES CORRESPONDRE LA FICHE BLANCHE DE LA des conseils sur les moyens de disposition et de recyclage PRISE À...
-
Page 4: Table Of Contents
Table of Contents Your 40" LED HDTV + DVD � � � � � � � � � � � � � � � � � � � � � � � � � � � � � � � � � � � � � � � � � � � � � � � � � � � � � � � � � � � � � � � � � � � � � � � � � � � � � � � � �5 Includes Setup �... -
Page 5: Your 40" Led Hdtv + Dvd
Your 40" LED HDTV + DVD Includes • Removable stand • 3.5mm to RCA audio adapter • Remote control and 2 AAA batteries Setup Some pixels may be visible on the screen, appearing as tiny red, green, blue or black spots. This is normal and is not a defect on the TV, and does not negatively affect the performance or picture quality. -
Page 6: Orientation
Orientation TV Controls & Inputs Eject USB Port Play/Pause Memory Card Port CD/DVD Player PC Audio Input TV Controls 3.5mm Component (Front): Audio Output Video Input VGA/PC (Y/Pb/Pr) Video Input Volume -/+ Optical Audio Output Composite TV Antenna/ Channel -/+ Video Input (Y) Cable Input Stereo... -
Page 7: Remote
Remote Power Mute Press to mute the volume. Press to power the television off or on. Freeze Display Press to freeze or unfreeze the Press to view the on-screen display. DISPLAY ASPECT FREEZE SLEEP current frame in TV mode. Aspect Sleep Press to adjust the aspect ratio Press to set the sleep timer. -
Page 8: Connecting Devices To Your
Connecting Devices to Your TV Connecting Cable/TV Antenna You will need: a cable/antenna wire (not included). 1. Connect the Cable/Antenna wire to the input on the television. 2. Press the Source button to switch to TV mode. 3. Press the Setup button to access the setup menu. 4. - Page 9 Connecting Cable/TV Antenna- Rear View Connecting HDMI - Rear View HDMI Connecting Composite Audio/Video- Rear View HDMI...
-
Page 10: Connecting A Computer
Connecting Devices to Your TV Connecting Component (YPbPr) Video/Audio You will need: component video (green, blue, red) and RCA stereo (red, white) cables (not included). 1. Connect the audio output on your media device to the corresponding color coded audio input on the television with stereo RCA cables. - Page 11 Connecting Component (YPbPr) Cables - Rear View Connecting a Computer- Rear View Connecting Optical Audio - Rear View...
-
Page 12: Using The 3.5 Mm Audio Out
Connecting Devices to Your TV Using the 3.5 MM Audio Out Requires a 3.5 mm to RCA audio cable (included) Note: This is not a headphone jack, please do not attempt to use headphones with this port. 1. Connect a 3.5 mm to RCA cable to the Audio Output on the unit and an audio input on an external stereo system. - Page 13 Using the 3.5 MM Audio Out - Rear View...
-
Page 14: Dvd & Cd
DVD & CD Playing a DVD or CD Note: This unit is not compatible with MP3 CDs. 1. Insert a DVD or CD into the slot-load disc drive, with the label side facing the rear of the television. Once a DVD or CD is loaded into the television, the TV will automatically switch to DVD mode 2. -
Page 15: Usb & Sd, Mmc, Ms Memory Card
USB & SD, MMC, MS Memory Card Using a USB Thumb Drive 1. Load a USB thumb drive into the USB Port on the side of the television. 2. Press the Source button to switch to USB mode. 3. Use the Arrow and Enter buttons to select and play content from the connected USB thumb drive. -
Page 16: Settings
Settings Auto Scanning for Channels The Auto Channel Scan must be run before any channels can be viewed on the television. Initial channel scanning process may take up to 15 min. 1. Press the Source button to switch to TV mode. 2. -
Page 17: Mounting To A Wall
Mounting to a Wall 200mm 200mm Specifications • 200mm x 200mm spacing (ht. x wth.) • M6 bolt pattern and thread pitch A 15 to 25mm long bolt is recommended, depending on the thickness of the wall bracket selected. We strongly recommend having this television mounted professionally. -
Page 18: Company Information
Pour télécharger ce guide de l’utilisateur en anglais, espagnol ou français, ou pour obtenir des réponses à des questions fréquemment posées, consultez la rubrique d’assistance sur: www.gpx.com Green Initiative Our Environmental Commitment to "Protect for Today and Sustain for Tomorrow".