Table of Contents
Advertisement
Quick Links
Advertisement
Table of Contents

Related Manuals for Samsung SCV-2081


Summary of Contents for Samsung SCV-2081
-
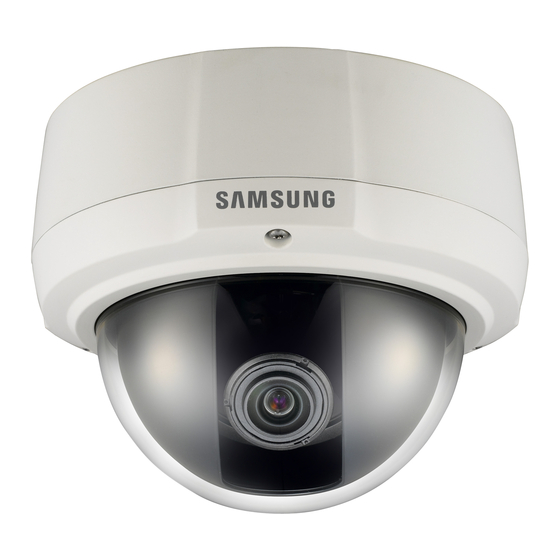
Page 1: Dome Camera
High Resolution Vandal-Resistant Dome Camera User Manual SCV-2081... -
Page 2: User Manual
Samsung Techwin. Disclaimer Samsung Techwin makes the best to verify the integrity and correctness of the contents in this document, but no formal guarantee shall be provided. Use of this document and the subsequent results shall be entirely on the user’s own responsibility. - Page 3 Before operating the camera, confirm the camera model and correct input power voltage. To help you understand this manual thoroughly, we’ll introduce our model description. ■ SCV-2081 SERIES • NTSC MODEL • PAL MODEL SCV-2081N SCV-2081P ■ MODEL DESCRIPTION • SCV-2081X _...
-
Page 4: Safety Information
safety information CAUTION RISK OF ELECTRIC SHOCK. DO NOT OPEN TO REDUCE THE RISK OF ELECTRIC SHOCK, DO NOT REMOVE CAUTION: COVER (OR BACK) NO USER SERVICEABLE PARTS INSIDE. REFER SERVICING TO QUALIFIED SERVICE PERSONNEL. This symbol indicates that dangerous voltage consisting a risk of electric shock is present within this unit. - Page 5 fi re or electric shock. If this product fails to operate normally, contact the nearest service center. never disassemble or modify this product in any way. (samsung is not liable for problems caused by unauthorized modifi cations or attempted repair.) When cleaning, do not spray water directly onto parts of the product.
-
Page 6: Fcc Statement
safety information FCC STATEMENT This device complies with part 15 of the FCC Rules. Operation is subject to the following two conditions : This device may not cause harmful interference, and This device must accept any interference received including interference that may cause undesired operation. -
Page 7: Important Safety Instructions
important safety instructions Read these instructions. Keep these instructions. Heed all warnings. Follow all instructions. Do not use this apparatus near water. Clean only with dry cloth. Do not block any ventilation openings. Install in accordance with the manufacturer’s instructions. Do not install near any heat sources such as radiators, heat registers, or other apparatus (including amplifi... -
Page 8: Table Of Contents
contents INTRODUCTION Features What’s included Component names and Functions INSTALLATION Disassembling Installing the camera on a ceiling or wall Adjust the panning and tilting while watching the monitor CONNECTION Connecting to Monitor Connecting to Power Using Coaxial Communications SETUP Menu Confi gration Menu Setup TROUBLESHOOTING Troubleshooting... -
Page 9: Introduction
CCD, the camera produces clear picture quality with a horizontal resolution of 600 TV lines for color and 700 TV lines for BW. SSNR3 (Samsung Super Noise Reduction) Function The high-performance W-V DSP chip effectively removes low-light gain noise and afterimage to provide clear images even in dark environments. - Page 10 WHAT’S INCLUDED Check if the following items are included in the product package. High Resolution Vandal-Resistant Dome Camera High Resolution Vandal-Resistant User Manual Dome Camera SCV-2081 Quick Set-up Guide SCV-2081 SCV-2081 User Manual Quick Set-up Guide M4 Tapping Screw 3EA...
- Page 11 COMPONENT NAMES AND FUNCTIONS FRONT ➋ ➌ ➍ ❶ ➐ ➎ ➒ ➏ ➑ ❶ Dome Cover ❷ Shield case ❸ Pan Base : control panning angle of camera ❹ 3.6 Vari-focal Lens Module 2.8 ~ 10.0mm (F1.2) ❺ Tilt Base : control tilting angle of camera ❻...
-
Page 12: Installation
installation DISASSEMBLING Using the L-wrench provided, loosen 3 screws by turning them counterclockwise and separate the dome cover. Dome Cover INSTALLING THE CAMERA ON A CEILING OR WALL Drill holes on the ceiling by matching to the holes on the case bed,and insert plastic anchors (HUD 5) (not included )fully into the holes. - Page 13 Connect power and video cables and arrange them through the hole you want to pass when mounting the main body on the mounting bracket, note that not to damage or squeeze the cables. Video output jack Power input terminal Adjust the lens in a desired direction. Secure the Sheild case to the main unit.
- Page 14 installation ADJUST THE PANNING, TILTING & ROTATION WHILE WATCHING THE MONITOR 73˚ 174˚ 176˚ Rotate Base Tilt Base Pan Base You can adjust camera to any direction by using Pan, Tilt, Rotate mechanism. Pan Base moves by 176˚ to each side direction and 352˚ on the whole. Tilt Base covers total 73˚...
-
Page 15: Connection
connection CONNECTING TO MONITOR Connect the VIDEO-OUT jack to the VIDEO-IN jack of monitor. Monitor CCTV Camera As the connecting method varies with the instruments, refer to the manual supplied with the instrument. Only connect the cable when the power is turned off. CONNECTING TO POWER Connect the adaptor to the power input connector as shown in the fi... - Page 16 connection * Standard voltage for camera operation : DC 12V ±10%, AC 24V ± 10% * There may be some deviation in voltage drop depending on the type of wire and the manufacturer. Be sure to connect power only after all the installation is complete. ...
-
Page 17: Setup
setup MENU CONFIGRATION Setup Menu ● LENS ● ● ● BRIGHTNESS SHUTTER EXPOSURE ● ● SENS-UP RETURN ● ATW ● OUTDOOR ● INDOOR WHITE BALANCE ● MANUAL ● AWC SET ● ● SSDR ● ● ● BACKLIGHT ● ● SSNR3 ●... - Page 18 setup MAIN SETUP ▶ 1.LENS Select the function Change the status 2.EXPOSURE by moving up or by moving the down direction of setup switch left or 3.WHITE BAL function setup switch. right. 4.SSDR 5.BACKLIGHT 6.SSNR3 7.DAY/NIGHT AUTO 8.SPECIAL 9.EXIT SAVE Select a desired function using the Function Setup switch.
- Page 19 EXPOSURE When the SETUP menu screen is displayed, MAIN SETUP select EXPOSURE by using the Function 1.LENS Setup switch so that the arrow indicates ▶ 2.EXPOSURE 'EXPOSURE'. 3.WHITE BAL Select a desired mode using the Function Setup switch. BRIGHTNESS : Adjusts the video brightness. EXPOSURE SETUP ▶...
- Page 20 setup SENS-UP : When it is night or dark, the LIMIT camera automatically detects the ▶ AUTO light level and maintains a clear picture if this mode is activated. OFF : Deactivates the SENS-UP function. Press SET to Return AUTO : Activates the SENS-UP function. RETURN : Select this to save the changes in the EXPOSURE menu and return to the SETUP menu.
- Page 21 White Balance operation may become unstable. SSDR (SAMSUNG SUPER DYNAMIC RANGE) SSDR illuminates darker areas of an image while retaining the same light level for brighter areas to even out the overall brightness of images with high contrast between bright and dark areas.
- Page 22 setup BACKLIGHT This camera is designed so that it delivers a distinctive subject and background at the same time, even when the subject is in backlight, unlike conventional cameras, by adopting a proprietary W-V DSP chip. When the SETUP menu screen is displayed, MAIN SETUP select ‘BACKLIGHT’...
- Page 23 The HLC is not activated in light or overly dark conditions. (In NIGHT ONLY mode.) When HLC Function is used, D-ZOOM and DIS function are not activated. SSNR3 This function reduces the background noise in a low luminance environments. When the SETUP menu screen is displayed, MAIN SETUP select 'SSNR3' by using the Function Setup...
- Page 24 setup DAY/NIGHT You can display pictures in color or black and white. When the SETUP menu screen is displayed, MAIN SETUP select ‘DAY/NIGHT’ by using the Up and 1.LENS Down buttons so that the arrow indicates 2.EXPOSURE ‘DAY/NIGHT’. 3.WHITE BAL Select a desired mode using the Left and 4.SSDR Right buttons according to the picture...
- Page 25 SPECIAL When the SETUP menu screen is displayed, MAIN SETUP select ‘SPECIAL’ by using the Function 1.LENS Setup switch so that the arrow indicates 2.EXPOSURE ‘SPECIAL’. 3.WHITE BAL 4.SSDR 5.BACKLIGHT 6.SSNR3 7.DAY/NIGHT AUTO ▶ 8.SPECIAL 9.EXIT SAVE Select a desired mode using the Function SPECIAL ▶...
- Page 26 setup RETURN : Select this to save the settings for the IMAGE ADJ menu and to return to the SPECIAL menu. If you increase the SHARPNESS level too high, the picture may become distorted or noise may appear. Monitor : Please change the settings value of video appropriate to your monitor. LCD : Please select this menu item when LCD MONITOR using an LCD monitor.
- Page 27 When the CAM TITLE menu is ‘OFF’, no title will be displayed on the monitor screen even if you enter one. Only English is available in the mode. If you move the cursor to CLR and press the Function Setup switch, all the letters are deleted. To edit a letter, change the cursor to the bottom left arrow and press the Function Setup switch.
- Page 28 setup SEL POS : Determines which of the 4 vertices of each MD area is to be used. XPOS : Determines the coordinate of the horizontal axis for SEL POS. YPOS : Determines the coordinate of the vertical axis for SEL POS. FILL SET : Fills in a selected MD area.
- Page 29 DIS (Digital Image Stabilizer) : This function mitigates any picture movement due to external factors such as wind. As the DIS function uses the digital zoom the camera's resolution will decrease. DIS doesn’t operate when background illumination is too low. ...
-
Page 30: Troubleshooting
troubleshooting TROUBLESHOOTING If you have trouble operating your camera, refer to the following table. If the guidelines do not enable you to solve the problem, contact an authorized technician. PROBLEM SOLUTION Nothing appears on the screen. Check that the power cord and line connection between the camera and monitor are fi... -
Page 31: Specifi Cations
specifications SPECIFICATIONS SCV-2081N SCV-2081P VIDEO Imaging Device 1/3 inch, Diagonal 6mm Super HAD CCD II Total Pixels 811(H) x 508(V) 795(H) x 596(V) Effective Pixels 768(H) x 494(V) 752(H) x 582(V) Scanning System 2 : 1 Interlace Synchronization Internal / Line Lock Frequency H:15.734KHz / V:59.94Hz H:15.625KHz / V:50Hz... - Page 32 specifications SCV-2081N SCV-2081P Backlight Compensation BLC / HLC / Off Contrast Enhancement SSDR ( Off / On ) Digital Noise Reduction SSNR Ⅲ (Off / On) Digital Image Stabilization Off / On Motion Detection Off / On (8 programmable zones) Privacy Masking Off / On (12 programmable zones) Sens-up...
-
Page 33: Dimension
DIMENSION Unit : mm(Inches) English_33... - Page 34 MEMO...
- Page 35 MEMO...
- Page 36 MEMO...
- Page 37 MEMO...
- Page 38 MEMO...
- Page 39 MEMO...
- Page 40 SAMSUNG TECHWIN AMERICA Inc. SAMSUNG TECHWIN EUROPE LTD. 100 Challenger Rd. Suite 700 Ridgefield Park, NJ 07660 Samsung House, 1000 Hillswood Drive, Hillswood Business Park Toll Free : +1-877-213-1222 Direct : +1-201-325-6920 Chertsey, Surrey, UNITED KINGDOM KT16 OPS Fax : +1-201-373-0124 TEL : +44-1932-45-5300, FAX : +44-1932-45-5325 www.samsungcctvusa.com...