Panasonic KX-TVP50 Installation Manual
Voice processing system
Hide thumbs
Also See for KX-TVP50:
- Installation manual (340 pages) ,
- Subscriber's manual (52 pages) ,
- Getting started (16 pages)
Table of Contents
Troubleshooting

Related Manuals for Panasonic KX-TVP50


Summary of Contents for Panasonic KX-TVP50
- Page 1 Voice Processing System Installation Manual KX-TVP50 Model No. Thank you for purchasing a Panasonic Voice Processing System, Model KX-TVP50. Please read this manual before installing, customising, or operating the Voice Processing System.
- Page 2 Thank you for purchasing the Panasonic Model KX-TVP50 Voice Processing System. We are confident that it will provide your customer or client with many years of dependable service. This Voice Processing System was especially tailored for the environment of your country. For example, it can be configured for English, Spanish, or a third language: System prompts—Recorded by the factory in English...
- Page 3 Important Information Important Information SAFETY REQUIREMENTS • Follow all product warnings, cautions, and instructions. • Handle the unit carefully. Do not drop or otherwise expose the unit to physical shock. • If the unit malfunctions, disconnect the unit from the telephone line and check the line by reconnecting the telephone.
- Page 4 Important Information The serial number of this product may be found on the label affixed to the back of the unit. You should note the serial number of this unit in the space provided and retain this book as a permanent record of your purchase to aid in identification in the event of theft.
- Page 5 Important Information CAUTION Danger of explosion if battery is incorrectly replaced. Replace only with the same or equivalent type recommended by the manufacturer. Dispose of used batteries according to the manufacturer's instructions. Note Before you start setting or changing system parameters, we recommend that you turn off the Call Progression Mode with the OFLN command.
-
Page 6: Table Of Contents
Table of Contents Table of Contents 1 VOICE PROCESSING SYSTEM OVERVIEW 1.1 WHAT THE VPS CAN AND CANNOT DO............. 12 1.1.1 Why Voice Processing? ....................12 1.1.2 Basic Operations......................12 1.1.3 VPS Limitations ......................13 1.2 SYSTEM ADMINISTRATION, MANAGEMENT, AND USE....... 14 1.2.1 System Administration .................... - Page 7 3.2.2 RS-232C Settings ......................44 3.2.3 Port Settings ........................44 3.2.4 PBX Interface Parameters ...................45 3.3 CONNECTING THE VPS WITH PANASONIC KX-T SERIES PBXs ....48 3.3.1 VPS Programming for Inband Integration ..............48 3.3.2 KX-TA series Programming for Inband Integration via the Manager’s Extension ..49 3.3.3 KX-TD816 and KX-TD1232 Programming for Inband Integration via the Manager’s...
- Page 8 Table of Contents 5 CUSTOMISING THE SYSTEM 5.1 STARTING UP......................84 5.1.1 Before Programming ....................84 5.1.2 Quick Setup ........................ 84 5.1.3 Starting the Quick Setup..................... 85 5.2 PORT SETTING OPTIONS..................92 5.2.1 Custom Service Setting Example ................92 5.2.2 Custom Service Features .................... 93 5.2.3 Custom Service Programming..................
- Page 9 Table of Contents 7.2.2 On-line Set (ONLN) ....................127 7.2.3 Set Password (PASS) ....................127 7.2.4 Set Time (TIME) .......................128 7.2.5 Print Reports at Specified Time (PSET)..............129 7.2.6 Error Log Display (ELOG) ..................130 7.2.7 Saving the System Data to the Backup Device (SAVE)..........132 7.2.8 Loading New or Saved Data to the VPS (LOAD).............134 7.2.9 Print All of the VPS Parameters (GPRN)..............135 7.2.10 Program Version Display (VERS)................135...
- Page 10 Table of Contents B5.3 Caller ID Call Routing Parameters ................225 B6 SYSTEM ADMINISTRATION—SYSTEM PARAMETER SETTINGS .... 228 B6.1 System Group Assignment ..................228 B6.2 Time Service ......................231 B6.3 Holiday Setting ......................235 B6.4 Daylight Saving Time (DST) ..................237 B6.5 Prompt Setting ......................
-
Page 11: Voice Processing System Overview
VOICE PROCESSING SYSTEM OVERVIEW Section 1 VOICE PROCESSING SYSTEM OVERVIEW Installation Manual... -
Page 12: What The Vps Can And Cannot Do
VOICE PROCESSING SYSTEM OVERVIEW 1.1 WHAT THE VPS CAN AND CANNOT DO 1.1.1 Why Voice Processing? The VPS handles incoming and outgoing calls. When a call comes in, it answers, forwards to appropriate extensions, takes and stores messages, and notifies subscribers when messages are left. -
Page 13: Vps Limitations
VOICE PROCESSING SYSTEM OVERVIEW 1.1.3 VPS Limitations The VPS does not support: UCD functions UCD (Uniform Call Distribution) is a service that distributes calls evenly among extensions; when all extensions are unavailable, it returns to callers to say that all extensions are busy. Calls can be forwarded by the VPS to the KX-TD1232/816 floating number of a UCD group. -
Page 14: System Administration, Management, And Use
VOICE PROCESSING SYSTEM OVERVIEW 1.2 SYSTEM ADMINISTRATION, MANAGEMENT, AND USE 1.2.1 System Administration System Administration is accomplished by the installer using terminal emulation software. It concerns setting and changing system parameters and diagnosing system problems. 1.2.2 System Management Two system functions are performed by the customer: System Management and Message Management. -
Page 15: System Basics
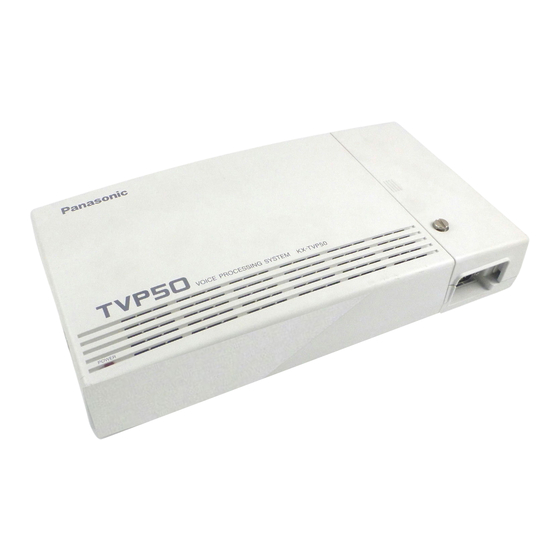
VOICE PROCESSING SYSTEM OVERVIEW 1.3 SYSTEM BASICS 1.3.1 General The KX-TVP50 is initially configured with 2 ports and 2 h of storage. 1.3.2 System Components Main Cabinet MODE (DIP Switch) Port 1 Port 2 Ferrite Core AC Inlet Earth Terminal... - Page 16 VOICE PROCESSING SYSTEM OVERVIEW Power Indicator: Indicates the system status: when flashing, the system is off-line (not ready to receive calls). MODE (DIP Switch): (Check the status of this switch only at start-up.) Provides the following additional functions: Table 1 Position Additional Function •1...
-
Page 17: Which Phone Systems Are Compatible
• Panasonic KX-TD816 We cannot guarantee adequate integration of the VPS with other PBX systems or with Key Systems. If the customer does not have a recommended Panasonic PBX system, be sure that the system has the features listed below. -
Page 18: Installer Equipment And Software Requirements
Upon receiving these digits, the VPS goes on-hook and is ready to handle another call. Digital (APT/DPT) Integration is available when the VPS is connected to a Panasonic KX-TA series or other Panasonic KX-TD series digital PBX (depending on the software version). This Digital Integration provides the VPS with more information than Touchtone Integration. -
Page 19: Specifications
VOICE PROCESSING SYSTEM OVERVIEW 1.3.5 Specifications Table 2 Ports: 2 ports Voice Storage (approximate): 2 h Custom Services: 100 Message Retention: 1 to 30 days or unlimited Number of Mailboxes: 30 Subscriber and 2 Manager Mailboxes Number of Messages per Mailbox: 100 maximum (programmable) 1.3.6 Hardware •... -
Page 20: Recommendations For System Configuration
VOICE PROCESSING SYSTEM OVERVIEW 1.3.8 Recommendations for System Configuration General guideline: a ratio of 6/1 (for every 6 lines, 1 port). There are 2 questions to ask when considering how many ports are desirable: • Are the ports answering all incoming calls or just forwarded/transferred calls? •... -
Page 21: Digital Integration
Integration is available when the VPS is connected to a KX-TD digital PBX. 1.4.2 APT Integration To the Panasonic KX-TA analogue PBX, the VPS ports look like proprietary telephones. The PBX thinks that the VPS is a proprietary telephone, and the VPS mimics all actions of a proprietary telephone. -
Page 22: Dpt Integration
VOICE PROCESSING SYSTEM OVERVIEW 1.4.4 DPT Integration To the Panasonic KX-TD series PBX that uses DPT Integration, the VPS ports look like digital extensions. The PBX thinks that the VPS is a digital phone, and the VPS mimics all actions of a digital set. -
Page 23: Installation
INSTALLATION Section 2 INSTALLATION Installation Manual... -
Page 24: Safety Precautions
INSTALLATION 2.1 SAFETY PRECAUTIONS Please read the following precautions before installing the VPS. 2.1.1 Installation The VPS needs to be mounted on a wall. Improper placement of the system may result in malfunction, noise, or discoloration. Avoid installing the VPS in the following places: •... -
Page 25: Wiring
INSTALLATION 2.1.2 Wiring • Do not wire the telephone cable parallel to an AC power source, computer, etc. If cables are run near those wires, shield them with metal tubing or use shielded cables and earth the shields. • Use protectors if running cables on the floor. Avoid running cables under carpets. •... -
Page 26: Unpacking
INSTALLATION 2.2 UNPACKING Unpack the box and check the items below. Table 5 Main Unit AC Cord Screws (Wall Mounting) Anchor Plugs (Wall Mounting) Plug Adaptor* * The plug adaptor is to be used if the power plug will not fit your socket. Assemble as shown in illustration below, using the plug that fits your socket. -
Page 27: Mounting The Vps On The Wall
INSTALLATION 2.3 MOUNTING THE VPS ON THE WALL The wall where the VPS is to be mounted must be able to support the weight of the VPS. If screws other than the ones supplied are used, use the same-sized diameter screws as the enclosed ones. -
Page 28: Frame Earth Connection
INSTALLATION 2.4 FRAME EARTH CONNECTION IMPORTANT!!! Connect the frame of the main unit to the earth. Loosen the screw. Insert the earth wire. Tighten the screw. Connect the earth wire to the earth. To earth Installation Manual... -
Page 29: Installation Steps
Standard Initialisation (For Digital Integration Connection) Program the ports of the PBX for voice processing (see Section 4 INTEGRATING THE VPS WITH THE PANASONIC KX-TA ANALOGUE PBX AND KX-TD DIGITAL PBX). Program the KX-TA series, the KX-TD1232, or the KX-TD816 for Voice Mail integration. - Page 30 INSTALLATION Set the DIP Switch back to position 0. CAUTION If the DIP Switch is not reset to position 0 after initialisation, all programming will be lost when the voice processor loses power! Perform Quick Setup (see Section 5 CUSTOMISING THE SYSTEM). Check Quick Setup: •...
-
Page 31: Installing An Optional Expansion Memory Card
INSTALLATION 2.6 INSTALLING AN OPTIONAL EXPANSION MEMORY CARD 2.6.1 General The flash memory capacity of the VPS can be increased if an optional expansion memory card is installed. • The KX-TVP52 card will increase the flash memory capacity of the VPS from 2 h to 4 h. •... - Page 32 INSTALLATION Take out the screws and remove the metal bar. Screws Metal Bar Attach the optional expansion memory card firmly. Secure the screw. Screw SLAVE CAUTION Do not attach the optional expansion memory card at the "MASTER" position. Attach it at the "SLAVE"...
-
Page 33: Connections
INSTALLATION 2.7 CONNECTIONS 2.7.1 Connecting to the PBX The VPS can be connected to up to 2 extension ports of the PBX. Use a 4-conductor wire for connection with KX-TA series systems that use APT Integration, and for connection with KX- TD series systems that use DPT Integration. -
Page 34: Connection For Apt Integration
INSTALLATION 2.7.3 Connection for APT Integration Ports 1-2 of the VPS Telephone Line Modular Jacks PORT 1 PORT 1 PORT 2 PORT 2 To KX-TA series Extension Jacks 07 and 08 (or 15 and 16) To Extension Port of the PBX 2.7.4 Connection for DPT Integration Ports 1-2 of the VPS Telephone Line... -
Page 35: Connection For Non-Apt/Dpt Integration
INSTALLATION 2.7.5 Connection for Non-APT/DPT Integration Ports 1-2 of the VPS Telephone Line Modular Jacks PORT 1 PORT 1 PORT 2 PORT 2 To Extension Ports of To Extension Non-APT/DPT Integration PBX Port of the PBX Installation Manual... -
Page 36: Terminal Connection
INSTALLATION 2.8 TERMINAL CONNECTION 2.8.1 Requirements for Connecting Programming Terminal The programming terminal must be connected with a serial cable with an RS-232C connector at the RS-232C port. This must be a null modem cable. This enables system administration (system setup, mailbox setup, and system diagnosis) to be performed. Communication parameters of the VPS have been set to the following values at the factory: Table 6 COMMUNICATION PARAMETERS... - Page 37 INSTALLATION ® VPS (9 pin) 9-pin Cable Printer/IBM Circuit Circuit Signal Signal type type name name (EIA) (EIA) VPS (9 pin) 25-pin Cable Printer/PC Circuit Circuit Signal Signal type type name name (EIA) (EIA) Table 7 Pin Configuration of the RS-232C Circuit Type Signal Name Number...
-
Page 38: Rs-232C Signals
INSTALLATION Table 7 Pin Configuration of the RS-232C Circuit Type Signal Name Number RS-232C CCITT Data Set Ready Signal Ground Data Carrier Detect Data Terminal Ready 108.2 2.8.3 RS-232C Signals Frame Ground (FG) Connects an external ground to the unit frame, usually the earth pin of the AC power cord. Transmitted Data (TXD)—output Conveys signals from the unit to the terminal/printer. -
Page 39: Integrating The Vps With Panasonic Kx-T Phone Systems
INTEGRATING THE VPS WITH PANASONIC KX-T PHONE SYSTEMS Section 3 INTEGRATING THE VPS WITH PANASONIC KX-T PHONE SYSTEMS Installation Manual... -
Page 40: Guidelines For Integration
INTEGRATING THE VPS WITH PANASONIC KX-T PHONE SYSTEMS 3.1 GUIDELINES FOR INTEGRATION 3.1.1 APT/DPT or Inband Signalling? There are 3 types of integration available on the VPS: Inband Signalling, APT and DPT. The VPS used with any other brand of telephone equipment requires inband equipment. -
Page 41: Pbx Requirements For Integration
INTEGRATING THE VPS WITH PANASONIC KX-T PHONE SYSTEMS Table 8 VPS/PBX COMMUNICATION PBX to VPS VPS to PBX Call Progress Tones SLT Signals • ringback • on/off hook • busy • hookswitch flash • reorder • touchtones Touchtones The VPS must also have access to certain PBX features. For example, if the VPS takes a message, one way it can notify the mailbox owner is by dialling the PBX's Message-Waiting- Lamp-On code. - Page 42 INTEGRATING THE VPS WITH PANASONIC KX-T PHONE SYSTEMS TEST:Call an SLT extension from the telephone in question. When the call is answered, see if the person receiving the call hears touchtones when numbers are dialled. Message Waiting Notification from an SLT The PBX extensions should light a lamp or receive stutter dial tone when the Message-Waiting- Lamp-On code is dialled by the VPS.
- Page 43 INTEGRATING THE VPS WITH PANASONIC KX-T PHONE SYSTEMS TEST: Place an outside call from an SLT. See if you can set up a screened transfer to another extension. Next, try the same test with an internal call. (The VPS may have to transfer both types of calls.)
-
Page 44: Pbx Parameters And Port Settings
INTEGRATING THE VPS WITH PANASONIC KX-T PHONE SYSTEMS 3.2 PBX PARAMETERS AND PORT SETTINGS 3.2.1 General Guidelines and Definitions Optimal performance of the VPS/PBX system relies on proper VPS programming. There are 3 categories of hardware settings: RS-232C, Port Settings, and PBX Interface Parameters. -
Page 45: Pbx Interface Parameters
Specifies the method of integration to be used between the VPS and PBX. If PBX type is set to the Panasonic KX-T series, the Inband Signalling parameters are set automatically and should not be altered. APT Integration is only available when a KX-TA series PBX is connected and the software is upgraded. - Page 46 INTEGRATING THE VPS WITH PANASONIC KX-T PHONE SYSTEMS • Reconnect Sequence on No Answer: Tells the VPS how to return to the caller if the called extension does not answer. PBXs differ in how they handle this function. Test from an SLT to determine the sequence.
- Page 47 INTEGRATING THE VPS WITH PANASONIC KX-T PHONE SYSTEMS Table 11 Code Call State Sent to the Voice Mail Port When... (default) Forwarded to Voice The extension dialled is forwarded to Voice Mail and no Mail (Busy) other Voice Mail ports are available to accept the call. (This signals the Voice Mail port [usually Auto-Attendant] to let the caller to leave a message.)
-
Page 48: Connecting The Vps With Panasonic Kx-T Series Pbxs
INTEGRATING THE VPS WITH PANASONIC KX-T PHONE SYSTEMS 3.3 CONNECTING THE VPS WITH PANASONIC KX-T SERIES PBXs 3.3.1 VPS Programming for Inband Integration Set parameters from the System Administration Terminal. The table below lists recommended parameters for Panasonic KX-T series PBXs. -
Page 49: Kx-Ta Series Programming For Inband Integration Via The Manager's Extension
INTEGRATING THE VPS WITH PANASONIC KX-T PHONE SYSTEMS Table 12 PBX Type Other T308/ T1232 T336 TD816/ TD308 TA series Manufacturers T616 TD1232 Call Waiting Sequence Release Sequence for Call Waiting Check with manufacturer. Not Available Adding "A" for "answer" to the operator and extension transfer eliminates the message: "You have a call"... - Page 50 INTEGRATING THE VPS WITH PANASONIC KX-T PHONE SYSTEMS VPS in System Programme [600]. One extension group is for jack 07, or jacks 07 and 08 of the KX-TA series. The other extension group is for jack 15, or jacks 15 and 16.
- Page 51 INTEGRATING THE VPS WITH PANASONIC KX-T PHONE SYSTEMS CAUTION DO NOT create a mailbox in both VPS for the same extension. Each extension can have a maximum of 1 mailbox in either VPS. The extension should assign a Voice Mail extension from the VPS which contains its mailbox as the destination for Call Forwarding and Voice Mail Transfer.
-
Page 52: Kx-Td816 And Kx-Td1232 Programming For Inband Integration Via The Manager's Extension
INTEGRATING THE VPS WITH PANASONIC KX-T PHONE SYSTEMS 3.3.3 KX-TD816 and KX-TD1232 Programming for Inband Integration via the Manager’s Extension Select a maximum of 2 station ports to be connected to the VPS. Plug each station into a Voice Mail port. - Page 53 INTEGRATING THE VPS WITH PANASONIC KX-T PHONE SYSTEMS Choose "Station Setting" from the Station Menu. Station Menu 1. Station Setting 2. COS & Mailbox ID 3. CO line Outgoing 4. DIL 1:N 5. ISDN Extension Setting 6. SDN Extension CO outgoing 7.
- Page 54 INTEGRATING THE VPS WITH PANASONIC KX-T PHONE SYSTEMS Choose "Miscellaneous" from the System Menu. System Menu 01. Day/Night 14. Opera/Manager/EXT Group 02. Class of Service 15. Miscellaneous 03. Emergency/Quick Dial 16. Caller ID Modification 04. Speed Dial 17. Switch Type 05.
- Page 55 INTEGRATING THE VPS WITH PANASONIC KX-T PHONE SYSTEMS Return to the System Data Programming Main Menu. Select "Line" and then select "CO Line Setting 1". Program all lines DIL to the first extension of the Voice Mail hunt group. CO Line Setting...
- Page 56 INTEGRATING THE VPS WITH PANASONIC KX-T PHONE SYSTEMS Installation Manual...
-
Page 57: Integrating The Vps With The Panasonic Kx-Ta Analogue Pbx And Kx-Td Digital Pbx
INTEGRATING THE VPS WITH THE PANASONIC KX-TA ANALOGUE PBX AND KX-TD DIGITAL PBX Section 4 INTEGRATING THE VPS WITH THE PANASONIC KX-TA ANALOGUE PBX AND KX-TD DIGITAL PBX Installation Manual... -
Page 58: Guidelines For Digital Integration
INTEGRATING THE VPS WITH THE PANASONIC KX-TA ANALOGUE PBX AND KX-TD DIGITAL PBX 4.1 GUIDELINES FOR DIGITAL INTEGRATION 4.1.1 Why Digital Integration is Important The VPS works well with most PBXs because its connections are made through a standard single line (tip/ring) telephone interface. However, the communication between the PBX and VPS is best when Digital Integration is used;... - Page 59 INTEGRATING THE VPS WITH THE PANASONIC KX-TA ANALOGUE PBX AND KX-TD DIGITAL PBX Table 13 DIGITAL INTEGRATION FEATURES Intercom Paging* Callers can page subscribers through built-in speakers and external paging equipment. For a Caller ID Caller, if his name has been recorded for the Caller Name Announcement feature, the name will be announced at the end of the page.
-
Page 60: Connecting The Vps With The Panasonic Kx-Ta Series
INTEGRATING THE VPS WITH THE PANASONIC KX-TA ANALOGUE PBX AND KX-TD DIGITAL PBX 4.2 CONNECTING THE VPS WITH THE PANASONIC KX-TA SERIES 4.2.1 KX-TA series Software Verification and Programming for Digital Integration via the Manager’s Extension It is important that the KX-TA series has the proper software level to allow Digital Integration with the VPS. - Page 61 INTEGRATING THE VPS WITH THE PANASONIC KX-TA ANALOGUE PBX AND KX-TD DIGITAL PBX Extension group 7 VPS1 Port 1 Port 2 KX-TA series VPS2 Port 1 Port 2 Extension group 8 From the SYS-PGM NO ?screen: Enter [130] (for VPS1) or [131] (for VPS2).
- Page 62 INTEGRATING THE VPS WITH THE PANASONIC KX-TA ANALOGUE PBX AND KX-TD DIGITAL PBX Recommended Outside (CO) Line feature settings: If the VPS is answering all incoming calls: Outside (CO) Line Mode—Use System Programmes [414] (Day Mode), [415] (Night Mode), [416] (Lunch Mode) to set this parameter. Program all lines DIL to the first extension of the Voice Mail hunt group.
- Page 63 INTEGRATING THE VPS WITH THE PANASONIC KX-TA ANALOGUE PBX AND KX-TD DIGITAL PBX CAUTION Setting the DIP Switch to position 5 will default the Voice Processing System, resulting in a loss of all user programming, and voice messages (except User1 and User2 prompts).
- Page 64 INTEGRATING THE VPS WITH THE PANASONIC KX-TA ANALOGUE PBX AND KX-TD DIGITAL PBX Possible causes of the message: "APT Interface Connection is not Established" Table 15 Cause Action The PBX is not a correct type. Since the VPS is Connect a correct PBX and set...
- Page 65 INTEGRATING THE VPS WITH THE PANASONIC KX-TA ANALOGUE PBX AND KX-TD DIGITAL PBX Change the extension numbers of both VPS port 1 and 2 for VPS2 from 107 and 108 to 115 and 116 (see "Extension Number of VPS Port 1" and "Extension Number of VPS Port 2"...
-
Page 66: Connecting The Vps With The Panasonic Kx-Td816 And Kx-Td1232
INTEGRATING THE VPS WITH THE PANASONIC KX-TA ANALOGUE PBX AND KX-TD DIGITAL PBX 4.3 CONNECTING THE VPS WITH THE PANASONIC KX-TD816 AND KX-TD1232 Notes • Do not use system programmes [106] or [602] for DPT Integration. • The next 2 sections (4.3.1 KX-TD1232 Software Verification and Programming for DPT Integration via the Manager’s Extension and 4.3.2 KX-TD1232 Software Verification and... - Page 67 INTEGRATING THE VPS WITH THE PANASONIC KX-TA ANALOGUE PBX AND KX-TD DIGITAL PBX From the SYS-PGM NO ? screen: Enter [116]. Press the NEXT button (SP-PHONE). Enter the system number ([0] or [1], master/slave). The system displays the ROM version and the date it was created.
- Page 68 INTEGRATING THE VPS WITH THE PANASONIC KX-TA ANALOGUE PBX AND KX-TD DIGITAL PBX From the SYS-PGM NO ? screen: Enter [118]. Press the NEXT button (SP-PHONE). Screen output: VM NO? Press the NEXT button (SP-PHONE). Screen output: VM-01:#_ _ -1: 165 ( _ _ = the port number you entered in programme 117) Enter the Extension Number that you want this port to have.
- Page 69 INTEGRATING THE VPS WITH THE PANASONIC KX-TA ANALOGUE PBX AND KX-TD DIGITAL PBX Screen output: Checking Flash Memory Cards. Please wait... PORT TEST... SYSTEM SETUP 1... 2... 3... • The VPS tests the CPU card, the flash memory, and the ports until "1...2...3..."...
- Page 70 INTEGRATING THE VPS WITH THE PANASONIC KX-TA ANALOGUE PBX AND KX-TD DIGITAL PBX Start up completed. The Power Indicator light stops blinking when the start-up has been successful. (The delay varies according to the system’s condition.) "**ON LINE MODE**" is displayed.
-
Page 71: Kx-Td1232 Software Verification And Programming For Dpt Integration Via The Operating And Maintenance Tool
INTEGRATING THE VPS WITH THE PANASONIC KX-TA ANALOGUE PBX AND KX-TD DIGITAL PBX 4.3.2 KX-TD1232 Software Verification and Programming for DPT Integration via the Operating and Maintenance Tool Follow these steps after communication between the KX-TD1232 and the programming software has been established. Refer to the Operating and Maintenance manual for connection information. - Page 72 INTEGRATING THE VPS WITH THE PANASONIC KX-TA ANALOGUE PBX AND KX-TD DIGITAL PBX Go to the Main Menu. Choose "System Data Programming" (BATCH [1] or INTERACTIVE [2]). Main Menu 1. System Data Programming (BATCH) 2. System Data Programming (INTERACTIVE) 3. Disk File Management 4.
- Page 73 INTEGRATING THE VPS WITH THE PANASONIC KX-TA ANALOGUE PBX AND KX-TD DIGITAL PBX Voice Mail Integration VM Port No. Master [30] [ ] [ ] [ ] [ ] [ ] Slave [ ] [ ] [ ] [ ] [ ] [ ]...
- Page 74 INTEGRATING THE VPS WITH THE PANASONIC KX-TA ANALOGUE PBX AND KX-TD DIGITAL PBX The required programming is now complete and the VPS and KX-TD1232 should be able to communicate through DPT Integration. We recommend that the KX-TD1232 system has any optional extension cards installed and telephones connected before starting the VPS.
-
Page 75: Common Digital Integration Features And Setup Procedures
INTEGRATING THE VPS WITH THE PANASONIC KX-TA ANALOGUE PBX AND KX-TD DIGITAL PBX 4.4 COMMON DIGITAL INTEGRATION FEATURES AND SETUP PROCEDURES The following features can be used on any KX-T proprietary telephone (7000 series analogue; 7200/7400 series digital). KX-T7000 series is used with the KX-TA series PBX. The KX- T7200 and KX-7400 series are used with the KX-TD series PBX. -
Page 76: Live Call Screening Password Cancelling
INTEGRATING THE VPS WITH THE PANASONIC KX-TA ANALOGUE PBX AND KX-TD DIGITAL PBX 4.4.3 Live Call Screening Password Cancelling To cancel the password, follow the procedure below. (It is not necessary to enter PITS Programming to activate this feature.) Lift the handset or Press the SP-PHONE button. -
Page 77: Live Call Screening Private/Hands-Free Mode Assignment Via Station Programming
INTEGRATING THE VPS WITH THE PANASONIC KX-TA ANALOGUE PBX AND KX-TD DIGITAL PBX 4.4.5 Live Call Screening Private/Hands-Free Mode Assignment via Station Programming This programme assigns a VPS response for when a message is being left in a mailbox. It determines whether an alert tone is sent or whether the recorded message is played through the built-in speaker of the extension. -
Page 78: Live Call Screening Button Assignment Via Station Programming
INTEGRATING THE VPS WITH THE PANASONIC KX-TA ANALOGUE PBX AND KX-TD DIGITAL PBX 4.4.6 Live Call Screening Button Assignment via Station Programming For the Live Call Screening feature to work at an extension, the extension must have an LCS button lit at the time of the message reception. This key must either be a DSS/BLF or CO key with a lamp. -
Page 79: Two-Way Recording Button Assignment Via Station Programming
INTEGRATING THE VPS WITH THE PANASONIC KX-TA ANALOGUE PBX AND KX-TD DIGITAL PBX Press STORE. The STORE indicator light turns on. The display shows the initial programming mode. For KX-TA series PBX Set the MEMORY switch to "SET". For KX-TD series PBX Press the PROGRAM button or lift the handset. -
Page 80: Two-Way Transfer Button Assignment Via Station Programming
INTEGRATING THE VPS WITH THE PANASONIC KX-TA ANALOGUE PBX AND KX-TD DIGITAL PBX 4.4.9 Two-Way Transfer Button Assignment via Station Programming For the Two-Way Transfer feature to work at an extension, the extension must have a TWT button on it. This key must either be a DSS/BLF or CO key with a lamp. Follow the procedure below to assign a TWT button on an extension. -
Page 81: Live Call Screening Activation
INTEGRATING THE VPS WITH THE PANASONIC KX-TA ANALOGUE PBX AND KX-TD DIGITAL PBX For KX-TD series PBX a. With the phone on-hook, Press the PROGRAM button. b. Dial [99]. (Display changes to PITS-PGM Mode.) Press the desired Flexible (CO or DSS/BLF) button that you want to assign as the VTR button. -
Page 82: Live Call Screening Password Control
INTEGRATING THE VPS WITH THE PANASONIC KX-TA ANALOGUE PBX AND KX-TD DIGITAL PBX 4.4.12 Live Call Screening Password Control This feature allows Operator(s) and the Manager of the PBX to cancel the password for LCS at any extension. If a user forgets the preprogrammed password, Operator(s) and the Manager of the PBX can cancel the LCS password. -
Page 83: Customising The System
CUSTOMISING THE SYSTEM Section 5 CUSTOMISING THE SYSTEM Installation Manual... -
Page 84: Starting Up
CUSTOMISING THE SYSTEM 5.1 STARTING UP 5.1.1 Before Programming Determine the customer’s needs. • Work with the owner, manager, and receptionist to build the Custom Service Greetings and Holiday Greetings. • Figure out which ports are to be answered by which greetings. •... -
Page 85: Starting The Quick Setup
This utility provides a quick way of programming the Voice Processing System to operate in a standard automated attendant or voice mail configuration when connected to a Panasonic KX-T series telephone system. The system will prompt you to enter, modify or confirm settings based upon which PBX type you select. - Page 86 CUSTOMISING THE SYSTEM PBX Type Press ENTER. Screen output: Quick Setup - PBX type Please select your PBX type. 1. KX-T308/KX-T616 2. KX-T1232 3. KX-T96 4. KX-T336 5. KX-TD816/KX-TD1232 6. KX-TD308 7. KX-TA series 0. OTHERS Select your PBX type. The required steps are different for some models. Go to the step indicated below for that type.
- Page 87 CUSTOMISING THE SYSTEM Type [S] to go to the next screen. Extension Numbers for Mailboxes Screen output: Quick Setup - Enter Extensions for Mailboxes What extensions need a mailbox on this system? 1:110 2:111 3:112 4:113 5:114 6:115 7:116 8:117 9:118 10:119 11:120...
- Page 88 Up to 16 alphabetic characters can be assigned as an Owner’s Last Name. Note • Mailbox numbers displayed on this screen Panasonic KX-TA Series and KX-TD Series Systems The same numbers as the extensions of the KX-TA series and KX-TD series systems that were automatically transmitted to the VPS—Auto Configuration.
- Page 89 CUSTOMISING THE SYSTEM COS number 1 will be set to "Yes". It will stay "No" for COS number 2 through number 62. To program mailbox parameters other than the extension numbers and Owner’s Last Name (or First Name), see 5.5 SETTING MAILBOXES. The caller can use "Dial by Name"...
- Page 90 CUSTOMISING THE SYSTEM To go to the next screen without assigning the password, Press ENTER. Date and Time Setting Screen output: Quick Setup-Time Setting Current time is 3:04, PM Enter new time (HH:MM, AM/PM) : = Current date is MON 1-JAN-2001 Enter new date (DD-MM-YY) : = Enter the time (hour, minute in 2 digits, comma and A or P) and date (day, month and year in 2 digits).
- Page 91 CUSTOMISING THE SYSTEM Screen output: PORT TEST ... SYSTEM SETUP ... 1 ... 2 ... 3 ... Screen output when Quick Setup is finished: **ON LINE MODE** > Installation Manual...
-
Page 92: Port Setting Options
CUSTOMISING THE SYSTEM 5.2 PORT SETTING OPTIONS Design each system according to the needs of your customer. You should be familiar with all options for port assignment so that customers get exactly what they need and expect. Each port can be assigned as Voice Mail, Interview Service, Automated Attendant, or Custom Service. Custom Service is the most flexible of all the services because it allows access to the other services by pressing one key. -
Page 93: Custom Service Features
CUSTOMISING THE SYSTEM The top of the tree should include what callers will hear when they are first connected to the VPS. Then create a branch for each option until each caller option has been documented. Next, fill in each box with the action that it represents so you can easily remember what action corresponds to each keystroke. -
Page 94: Custom Service Programming
CUSTOMISING THE SYSTEM that COS. (This tells the VPS which paging group to dial). In the Intercom paging section, assign the number "333" to the paging group assigned to the sales dept. Fax Management (1-5-7-8) Assigns up to 2 fax machines that can be extensions from the PBX. If the CNG tone is heard, the VPS will automatically forward the call to the first fax machine. - Page 95 CUSTOMISING THE SYSTEM System Administration Top Menu: Enter The Number: = 1 (Program) Enter The Number: = 4 (Service Setting) Enter The Number: = 2 (Custom Service) The system then asks what Custom Service number you want to edit. Enter the desired number (1-100).
- Page 96 CUSTOMISING THE SYSTEM Enter data into the Custom Service menu; use the table below as a guide. Table 19 Description Value Range Description/Function (Default) Description Up to 32 The information typed in this field is for reference only. characters Any ASCII character (except \) can be used. (None) Prompt Mode 1.
- Page 97 CUSTOMISING THE SYSTEM Keypad Assignment Options Table 20 Entry Function Allows the caller to leave messages in a specific a. Transfer to Mailbox mailbox. b. Transfer to Extension Transfers the caller to a specific extension. c. Operator Transfers the caller to the operator. Plays the Custom Service exit prompt and d.
-
Page 98: Recording Menus
CUSTOMISING THE SYSTEM 5.2.4 Recording Menus After you have finished entering the parameters in each menu, record the menu messages. Menu messages inform the caller of available options and their corresponding keys. For this reason, the prompts must match the programming that has been input. Note The Message Manager’s mailbox might be 98, 998, 9998, or 99998. -
Page 99: Mailbox Groups
CUSTOMISING THE SYSTEM • Service Access Command—A caller can switch to Voice Mail service by dialling [#6] during a call. • Via Custom Service—This service can be assigned to a keypad digit within a Custom Service. After pressing this key, the caller enters Voice Mail service. 5.2.7 Mailbox Groups This programme allows a message to be delivered to several mailboxes at once. -
Page 100: Interview Service
CUSTOMISING THE SYSTEM phones. Extension groups work well in areas where the call would not be intended for a specific person (e.g., a Parts Centre, Technical Support Group, etc.). To establish an extension group: From the System Administration Top Menu, Type [1-5-1-2-1] (Program-System Parameter-System Group Assignment-Extension Group-Enter). -
Page 101: Automated Attendant
CUSTOMISING THE SYSTEM Enter the subscriber’s mailbox and Record the Questions. Call the VPS and Press [#6 ] then Dial the Mailbox Number assigned to the interview mailbox. From the Main Menu Press [6-1]. Confirm that your questions have been recorded. Call the VPS and Press [#6] and the Interview Mailbox Number. -
Page 102: Operator Service
CUSTOMISING THE SYSTEM 5.2.12 Operator Service This service (when enabled) can be accessed via: • Voice Mail—Rotary Telephone Service allows rotary callers to reach the General Delivery Mailbox or Operator Service. • Automated Attendant—Dial 0 and your call will go to Operator Service. •... -
Page 103: Setting Ports
CUSTOMISING THE SYSTEM 5.3 SETTING PORTS 5.3.1 Port Service Menu Access the Port Service Menu through the following sequence: System Administration Top Menu: Enter The Number: = 1 (Program) Enter The Number: = 3 (Port/Trunk Service) Enter The Number: = 1 (Port Service) Screen output: Program - Port/Trunk Service - Port Service Enter the Port Number (1-2) :=... - Page 104 CUSTOMISING THE SYSTEM Table 21 Description Value Range Description/Function (Default) Incoming Call 1. System Specifies the language of voice prompts to be played on Service this port. When set to "Selective", the caller can select the 2. User 1 Prompt language of his choice, provided the Message Manager 3.
-
Page 105: Automated Attendant Parameters
CUSTOMISING THE SYSTEM 5.4 AUTOMATED ATTENDANT PARAMETERS Automated Attendant parameters include: Department Dialing, Operator Parameters, and Alternate Extension. If the VPS needs a special transfer procedure for an extension (such as modem extension), alternate extension should be assigned (see "Alternate Extension Assignment" in B5.1 Automated Attendant Parameters). -
Page 106: Operator's Parameters
CUSTOMISING THE SYSTEM 5.4.3 Operator’s Parameters If you enable operator service, you must set the following parameters: Operator’s Extension and Mailbox Number, Coverage Modes, and Message Repeat Cycle. Operator 1: The default is set at "0" which coincides with the operator of the PBX. When a caller tries to leave a message to the Operator 1, the message will automatically go to the General Delivery Mailbox (GDM) by default. - Page 107 CUSTOMISING THE SYSTEM Table 22 Description Value Range Description/Function (Default) Operator’s 1-5 Digits Specifies the extension number for Operator 1. Extension [Notes] • The default setting (0) cannot be used with the Message Waiting Notification—Lamp feature and the Remote Call Forwarding Set feature. When using these features, you must assign the extension number that is included in the Extension Numbering Plan.
- Page 108 CUSTOMISING THE SYSTEM Table 22 Description Value Range Description/Function (Default) No Answer 1. Caller Select Specifies how to handle Operator 1 calls when not Coverage answered within the time period set by the 2. Leave Message Mode "Operator No Answer Time" mode. 3.
-
Page 109: Setting Mailboxes
CUSTOMISING THE SYSTEM 5.5 SETTING MAILBOXES 5.5.1 Mailbox Setting Menu Access the Mailbox Setting Menu through the following sequence: System Administration Top Menu: Enter The Number: = 1 (Program) Enter The Number: = 1 (Mailbox Setting) Program - Mailbox Setting Menu 1. - Page 110 CUSTOMISING THE SYSTEM Table 23 Value Range Description Description/Function (Default) Covering Specifies where a caller will be transferred when 2-5 Digits Extension Covering Extension is dialled or set under Incomplete (None) Call Handling. Interview Used to permit mailbox owner to have an interview 2-5 Digits Mailbox mailbox.
- Page 111 CUSTOMISING THE SYSTEM Enter the data using the following table as a guide. Table 24 Parameter Value Range Description/Function (Default) Dial Number Up to 32 digits Assigns a telephone or beeper number to Device 1, 2, or consisting of 1-9, 3.
- Page 112 CUSTOMISING THE SYSTEM Table 24 Parameter Value Range Description/Function (Default) Time Frame 1, 2 1-12: h Specifies the daily schedule for the Message Waiting MON: Notification service for 1 week for this device. 00-59: min TUE: AM/PM: WED: Note: These parameters are active only when "Use a.m./p.m.
-
Page 113: Deleting A Mailbox
CUSTOMISING THE SYSTEM 5.5.3 Deleting a Mailbox From Mailbox Setting Menu: Enter The Number : = 2 Program - Mailbox Setting - Delete Enter the Mailbox Number : = Are you sure? (Y/ N) : = 5.5.4 Password Reset To reset a subscriber's password, go to the Password Reset Menu. "Enter the Mailbox Number" appears on the screen. -
Page 114: Training The Subscriber
Finally, if Custom Service menus are used, subscribers should be encouraged to listen to these menus often and make suggestions for improvement. Custom service is a very powerful feature of the Panasonic VPS. Make the most out of this feature. Installation Manual... -
Page 115: Final Setup
FINAL SETUP Section 6 FINAL SETUP Installation Manual... -
Page 116: Message Manager's Mailbox (Mailbox 998)
FINAL SETUP 6.1 MESSAGE MANAGER'S MAILBOX (Mailbox 998) The Message Manager is responsible for recording and updating a wide variety of system messages. Please refer to D6 RECORDING MESSAGES to see the full array of recording tasks. Follow the instructions below to record Custom Service prompts and user prompts. Note: The Message Manager’s mailbox might be 98, 998, 9998, or 99998. -
Page 117: Company Greetings (Enter #6*998,5,1)
FINAL SETUP 6.1.3 Company Greetings (Enter #6 998,5,1) Access the Message Manager’s Main Command Menu. Press [5] to modify messages. Press [1] to change the Company Greeting. Continue following voice prompts through appropriate menus. Prompts lead you through the choices and recording process. After you record the company greeting, it may be necessary to enter programming through the terminal and set the company greeting assignment under the Port Settings Menu, Trunk Service Menu and Holiday Service Menu. -
Page 118: Customising User Prompts (Enter #6*998,5,6)
FINAL SETUP Note This prompt should match the prompt that is selected for each port. The recording will be played directly after the call is received. 6.1.6 Customising User Prompts (Enter #6 998,5,6) The customer may want to enter user prompts in place of the factory-provided system prompts. To change the user prompts: Access the Main Menu of Message Manager’s Service. -
Page 119: Setting Up Mailboxes
FINAL SETUP 6.2 SETTING UP MAILBOXES The following steps complete the basic installation of the VPS. For each mailbox on the system, a No Answer, Busy, and After Hours Greetings should be recorded, as well as the Owner’s Name and Password. Please follow the steps below to set up the mailboxes accordingly. -
Page 120: Recording The Owner's Name
FINAL SETUP 6.2.2 Recording the Owner’s Name Dial the Extension Number of the VPS. When the VPS answers, Press [#6 ] and Dial the Number of the mailbox to which you wish to record the Owner’s Name. Enter your Password (if programmed), then Press [#]. You are now inside the mailbox. -
Page 121: Backing Up The System
FINAL SETUP 6.3 BACKING UP THE SYSTEM Choose the Utility Command. Type [SAVE], then Press ENTER. See screen output below. From System Administration Top Menu: Enter The Number := 3 (Utility Command) $ SAVE VPS Flash Memory Data Save ( VPS -> PC : Xmodem ) 1: Program 2: Parameters 3: System Prompts... - Page 122 FINAL SETUP Notes Recorded caller names for the Caller Name Announcement (System/Personal) cannot be saved by the above procedure, only Caller ID numbers can be saved. When the saved Caller ID numbers are loaded using LOAD command, the following things should be done: •...
-
Page 123: System Maintenance And Troubleshooting
SYSTEM MAINTENANCE AND TROUBLESHOOTING Section 7 SYSTEM MAINTENANCE AND TROUBLESHOOTING Installation Manual... -
Page 124: Initialising The System
SYSTEM MAINTENANCE AND TROUBLESHOOTING 7.1 INITIALISING THE SYSTEM Initialising the system clears all voice data except user prompts and returns all system parameters to their default settings. Throughout this section, menu selections are indicated as "System Administration Top Menu-(Selection Number)". This means that the System Administration Top Menu must first be accessed. - Page 125 SYSTEM MAINTENANCE AND TROUBLESHOOTING Type [Y] to start the system resetting. System Initializing • • • When system initialising is complete, the following display will appear: ** ON LINE MODE ** > Note The execution time for System Reset/Clear may differ each time it is performed because of system capacity and system programmes.
-
Page 126: Utility Commands
SYSTEM MAINTENANCE AND TROUBLESHOOTING 7.2 UTILITY COMMANDS In the Utility Command Mode, the System Administrator can access the functions described below by entering the appropriate command at the "$" prompt, and Pressing RETURN. To select the Utility Commands Menu, follow the menu path as shown: System Administration Top Menu-3 Utility Command (Type 'HELP' for command list.) Table 26... -
Page 127: Off-Line Set (Ofln)
SYSTEM MAINTENANCE AND TROUBLESHOOTING 7.2.1 Off-line Set (OFLN) Use the OFLN command to turn off the VPS Call Progression Mode. Set the VPS to Off-Line Mode before deleting a mailbox, since this operation involves the updating of a large number of related parameters. -
Page 128: Set Time (Time)
SYSTEM MAINTENANCE AND TROUBLESHOOTING Type PASS, then Press RETURN. $ PASS 1: Administrator Password 2: System Reset/Clear Password := To create a password or change an existing password, Go to Step 3. To clear a password, Go to Step 4. To create a password or change an existing password: a) Type [1] or [2] Maximum 10 characters... -
Page 129: Print Reports At Specified Time (Pset)
SYSTEM MAINTENANCE AND TROUBLESHOOTING Type TIME, then Press RETURN. $ TIME Current time is 12:34, PM Enter new time (HH:MM, AM/PM) : = Type the current time. Current date is MON 1-JAN-2001 Enter new date (DD-MM-YY) : = Type the current date. For the year, type the last 2 digits. Note Enter the exact time and date. -
Page 130: Error Log Display (Elog)
SYSTEM MAINTENANCE AND TROUBLESHOOTING 7.2.6 Error Log Display (ELOG) Use the ELOG command to diagnose VPS problems. Selection of this command will display an error log. COM. Communication error between CPU and DSP DATA Process error of voice data MEM. Memory error PRG. - Page 131 SYSTEM MAINTENANCE AND TROUBLESHOOTING Examples of a terminal display when errors are generated: Table 28 Error Indications at System Startup Indication Meaning ROM ERROR: Sum Error!! ROM checksum error. FLASH MEMORY ERROR: Initialize Flash Memory initialisation error. Error!! FLASH MEMORY ERROR: No No system Flash Memory present.
-
Page 132: Saving The System Data To The Backup Device (Save)
When performing this operation, always wait until the process completion indication appears. WARNING Never save (back-up) and upload the "Program" without Panasonic Technical support. The memory required to save each data component is indicated below. 1. Program—approximately 1 Mbytes (See Warning above) 2. - Page 133 SYSTEM MAINTENANCE AND TROUBLESHOOTING Type SAVE, then Press RETURN. $ SAVE VPS Flash Memory Data Save (VPS -> PC : Xmodem) 1: Program 2: Parameters 3: System Prompts 4. User Prompts-1 5. User Prompts-2 6. Custom Service Menus 7. Personal Greetings 8.
-
Page 134: Loading New Or Saved Data To The Vps (Load)
SYSTEM MAINTENANCE AND TROUBLESHOOTING 7.2.8 Loading New or Saved Data to the VPS (LOAD) Use the LOAD command to install new data or to restore saved data to the VPS. Execute this command for each data file. When performing this operation, always wait until the process completion indication appears before proceeding. -
Page 135: Print All Of The Vps Parameters (Gprn)
SYSTEM MAINTENANCE AND TROUBLESHOOTING 7.2.9 Print All of the VPS Parameters (GPRN) Use the GRPN command to print all VPS parameter settings (output to screen). Use Ctrl-C at any time to stop printing. Type GPRN, then Press RETURN. $ GPRN 0: All Parameters 1: Mailbox Setting 2: Class of Service Setting... -
Page 136: Custom Service Report (Crep)
SYSTEM MAINTENANCE AND TROUBLESHOOTING 7.2.11 Custom Service Report (CREP) Use the CREP command to display the Custom Service menu access count, the keypad assignments, message recording status and the tree-structure of the Custom Service. Type CREP, Press Space, Enter the Custom Service number (1-100), and Press RETURN. Custom [100] (System) (Access: 9 ) (Menu Msg. -
Page 137: Custom Service Menu Access Count Clear (Cclr)
Use the MWL command to specify the number of times the VPS will attempt to turn on the Message Waiting Lamp of the called extension. Apply this setting when a PBX other than the Panasonic KX-T series telephone system is used. $ MWL Current Setting of M.W.L. -
Page 138: Setting Minimum Recording Length (Mrl)
SYSTEM MAINTENANCE AND TROUBLESHOOTING 7.2.14 Setting Minimum Recording Length (MRL) Use the MRL command to specify the minimum message recording length (0-3 s). Messages shorter than the specified minimum recording length are discarded from the mailbox. Note The minimum recording length can only be set using this command. Type MRL, then Press RETURN. -
Page 139: Utility Command List (Help)
SYSTEM MAINTENANCE AND TROUBLESHOOTING Blank: The prompt has not been recorded (but the default [System Prompt] is active)—WILL BE HEARD Prompt No.: The prompt has been recorded—WILL BE HEARD Prompt No. with an*: The prompt has been recorded but is turned off— WILL NOT BE HEARD "OFF": The prompt has never been recorded and the default... -
Page 140: Quick Setup (Qset)
SYSTEM MAINTENANCE AND TROUBLESHOOTING 7.2.17 Quick Setup (QSET) Use the QSET command initially to setup the VPS very roughly when you use it for the first time or after system initialisation. Note Quick setup requires VT100 emulation software. Type QSET, then Press RETURN. 7.2.18 Circuit Condition Display (LMON) Use the LMON command to display the circuit condition every 1.5 s. - Page 141 SYSTEM MAINTENANCE AND TROUBLESHOOTING To change the mode from "PUTD" to "OFF", Type PUTD again. $ PUTD Target Port : 00 Don't leave enabled after troubleshooting. Note "*"means "enable" for the port. "0" means "disable" for the port. To set the mode for only 1 port, Type PUTD and the port number. $ PUTD 1 Target Port : 0* Don't leave enabled after troubleshooting.
-
Page 142: Wait For Caller Id (Wcid)
SYSTEM MAINTENANCE AND TROUBLESHOOTING 7.2.20 Wait for Caller ID (WCID) Use the WCID command to specify the length of time (in seconds) the VPS must wait for the Caller ID after the VPS has received the incoming call from the PBX. If Caller ID is not needed at all, set the waiting time to "0"... -
Page 143: System Reports
SYSTEM MAINTENANCE AND TROUBLESHOOTING 7.3 SYSTEM REPORTS The System Administrator is able to generate 8 System Reports to monitor VPS operating status. The reports can be displayed on a data terminal or printed. The terminal or printer must be connected to the RS-232C port. (The System Manager is also able to output System Reports.) To select the System Reports Menu, follow the menu path as shown: System Administration Top Menu-2-1... -
Page 144: Mailbox Assignments
SYSTEM MAINTENANCE AND TROUBLESHOOTING 7.3.1 Mailbox Assignments The Mailbox Assignments report provides information about the applied mailbox authorised features and current parameter settings. Note Depending on the PBX extension numbering, the mailbox numbers might be 2- to 5-digit long. To select the Mailbox Assignments Report, follow the menu path as shown: System Administration Top Menu-2-1-1 **Mailbox Assignments 28-JUL-2001 11:30 AM **... - Page 145 SYSTEM MAINTENANCE AND TROUBLESHOOTING * * COS Assignments 29-JUL-2001 11:30 AM * * (pr) (mbox/ dl/ md) ----- ----- ----- COS: Class of Service number Personal Greeting Length RtN: New Message Retention RtS: Saved Message Retention Time Message Length Time CaN: Maximum Message (Un=Unlimited)
-
Page 146: System Service Report
SYSTEM MAINTENANCE AND TROUBLESHOOTING 7.3.3 System Service Report The System Service Report provides information about the VPS’s usable ports, trunk (outside line) groups and Holiday Services. It also indicates the services assigned to each VPS port and each trunk (outside line) group (for Day, Night, Lunch and Break modes), each Holiday Service, and all incoming and outgoing call services. -
Page 147: Port Usage Report
SYSTEM MAINTENANCE AND TROUBLESHOOTING To select the Call Account Report, follow the menu path as shown: System Administration Top Menu-2-1-4 ** Call Account 14-NOV-2001 3:40 PM** MBOX:111 4-JAN 7:46 00:01:32 DIAL:91111111 MBOX:116 7-JAN 2:26 00:03:32 DIAL:92222222 MBOX:114 7-JAN 5:06 00:02:45 DIAL:93333333 MBOX:118 8-JAN... -
Page 148: Flash Memory Usage Report
SYSTEM MAINTENANCE AND TROUBLESHOOTING To clear the Port Usage Statistics Report, follow the menu path as shown: System Administration Top Menu-2-2-1 System Reports - System Report Clear - Port Usage Statistics Clear May I clear port usage report data? (Y/N) : = Type [Y] (yes) or [N] (no). -
Page 149: Flash Memory Usage Statistics Clear
SYSTEM MAINTENANCE AND TROUBLESHOOTING With an optional expansion memory card (KX-TVP52) ** Flash Memory Usage Report 22-JAN-2001 8:30 PM ** Drive Avail Used 119 min 1min 120 min 0min FROM : : 21-JAN-2001 10:20 PM MSGs With an optional expansion memory card (KX-TVP54) ** Flash Memory Usage Report JAN-22-2001 8:30 PM ** Drive... -
Page 150: Mailbox Usage Report
SYSTEM MAINTENANCE AND TROUBLESHOOTING 7.3.9 Mailbox Usage Report The Mailbox Usage Report provides information about the usage at specific mailbox. It includes the number of recorded messages, the total amount of outgoing calling time, and external message, message notification and group message delivery. To select the Mailbox Usage Report, follow the menu path as shown: System Administration Top Menu-2-1-7 Enter the Range : = 111... -
Page 151: Mailbox Usage Statistics Clear
SYSTEM MAINTENANCE AND TROUBLESHOOTING 7.3.10 Mailbox Usage Statistics Clear The Mailbox Usage Report can be cleared of all values and prepared for use again. To clear the Mailbox Usage Report, follow the menu path as shown: System Administration Top Menu-2-2-3 System Reports - System Report Clear - Mailbox Usage Statistics Clear Enter the Range : = May I clear mailbox usage report data ? (Y/N) : =... -
Page 152: Fax Call Statistics Clear
SYSTEM MAINTENANCE AND TROUBLESHOOTING 7.3.12 Fax Call Statistics Clear The Fax Call Report can be cleared of all values and prepared for use again. To clear the Fax Call Statistics Report, follow the menu path as shown: System Administration Top Menu-2-2-4 System Reports - System Report Clear - Fax Call Report Clear May I clear fax call report data ? (Y/N) : = Type [Y] (yes) or [N] (no). -
Page 153: Troubleshooting Guide
SYSTEM MAINTENANCE AND TROUBLESHOOTING 7.4 TROUBLESHOOTING GUIDE Table 30 PROBLEM PROBABLE CAUSE POSSIBLE SOLUTION Nothing is heard from the • Improper connection of jacks. • Confirm that you are using the VPS when accessing the correct extension number for • Bad connection with PBX. VPS. - Page 154 SYSTEM MAINTENANCE AND TROUBLESHOOTING Table 30 PROBLEM PROBABLE CAUSE POSSIBLE SOLUTION Line disconnection occurs • Improper setting of the • Adjust the transfer sequence to while transferring an outside sequence. that of the connected PBX and call. reset (see "Operator Transfer •...
- Page 155 SYSTEM MAINTENANCE AND TROUBLESHOOTING Table 30 PROBLEM PROBABLE CAUSE POSSIBLE SOLUTION Unable to access to Operator • Improper setting of the • Adjust the operator extension operator extension number. number to that of the connected PBX (see "Operator's Extension" in Table 43 in B5.1 Automated Attendant Parameters).
-
Page 156: Specifications
SYSTEM MAINTENANCE AND TROUBLESHOOTING 7.5 SPECIFICATIONS Table 31 Port: 2 Digital/Analogue ports Dialling Method: Touchtone/Pulse (10/20 pps) Flash Time: 100/300/600/900 ms (programmable) CPC Detection None/6.5/150/300/450/600 ms (programmable) Type of Line: Loop start minimum Loop Current: 20 mA minimum Line Voltage: 7 V DC minimum Ringing Voltage: 40 V AC Extension Numbering: 2 to 5 digits (programmable) - Page 157 SYSTEM FEATURES Appendix A SYSTEM FEATURES Installation Manual...
-
Page 158: Appendix A System Features
• See 2.7 CONNECTIONS. Greeting for Caller ID Two-Way Recording, Two-Way Transfer. • See 3.1.1 APT/DPT or Inband Signalling? • See INTEGRATING THE VPS WITH THE PANASONIC KX- TA ANALOGUE PBX AND KX-TD DIGITAL PBX. • See "APT Integration" in Glossary. Installation Manual... - Page 159 DESCRIPTION REFERENCES Auto Configuration creates mailboxes by obtaining extension • See "System Components" in (APT/DPT numbers from the Panasonic KX-TA series or 1.3.2 System Components. Integration Only) KX-TD series telephone system that uses • See 4.1 GUIDELINES FOR DPT Integration.
- Page 160 SYSTEM FEATURES Table 32 FEATURE DESCRIPTION REFERENCES Busy Coverage specifies how the VPS will handle calls to the • See "Busy Coverage Mode" in Mode operator when the line is busy. The Busy Table 22 in 5.4.3 Operator’s Coverage options that are available include: Parameters.
- Page 161 SYSTEM FEATURES Table 32 FEATURE DESCRIPTION REFERENCES Callback Number enables the caller to leave a callback number • See "Notification Setting" in Entry in several different ways depending upon B2 SYSTEM which option is programmed into the VPS. ADMINISTRATION— The VPS can forward the callback number to MAILBOXES.
- Page 162 SYSTEM FEATURES Table 32 FEATURE DESCRIPTION REFERENCES Caller Name allows subscribers to assign up to 30 Caller • See 4.1 GUIDELINES FOR Announcement— ID numbers and record a caller name for each DIGITAL INTEGRATION. Personal Caller ID number from their telephone. The •...
- Page 163 SYSTEM FEATURES Table 32 FEATURE DESCRIPTION REFERENCES Calling a Beeper allows a subscriber to be notified by a beeper • See "Dial Number" and "Type of when he has message(s). If the beeper has a Device" in Table 36 in display, it is possible to send to it a callback B2 SYSTEM number.
- Page 164 SYSTEM FEATURES Table 32 FEATURE DESCRIPTION REFERENCES Class of Service There are 62 COS levels for subscribers. • See 7.3.2 COS (Class of (COS) Service) Assignments. COS 63 is for the Message Manager and COS 64 is for the System Manager. •...
- Page 165 SYSTEM FEATURES Table 32 FEATURE DESCRIPTION REFERENCES Covering Extension forwards calls to a second extension when the • See "Covering Extension" in first extension's subscriber is not available to Table 35 in B2 SYSTEM take the call. The caller can also access the ADMINISTRATION—...
- Page 166 SYSTEM FEATURES Table 32 FEATURE DESCRIPTION REFERENCES Department Dialing is a speed-dialling feature that permits the • See 5.4.2 Department Dialing. caller to quickly reach the desired extension • See "Department Dialing" in by dialling a 1 digit number either during or B5.1 Automated Attendant after the playing of the Department Dialling Parameters.
- Page 167 Note: Depending on the model and/or the THE VPS WITH THE software version of the connected PBX, you PANASONIC KX-TA may not be able to utilise some of the features ANALOGUE PBX AND KX- available only with DPT Integration. For TD DIGITAL PBX.
- Page 168 SYSTEM FEATURES Table 32 FEATURE DESCRIPTION REFERENCES External Message allows a subscriber to send a message to • See "The Extension of the Delivery Service several subscribers and non-subscribers Owner" in Table 35 in (including outside parties) at a specified time B2 SYSTEM (or immediately).
- Page 169 SYSTEM FEATURES Table 32 FEATURE DESCRIPTION REFERENCES Fax Management allows the VPS to automatically route an • See "Fax Management (1-5-7- incoming fax signal to a specific fax machine. 8)" in 5.2.2 Custom Service Up to 2 fax machines can be assigned using Features.
- Page 170 Feature of the PBX to permit a caller to leave • See Section 3 INTEGRATING a message when the mailbox number of the THE VPS WITH PANASONIC called extension is not known. Touchtone KX-T PHONE SYSTEMS. Integration works with the Automated •...
- Page 171 SYSTEM FEATURES Table 32 FEATURE DESCRIPTION REFERENCES Intercom Paging permits callers to page subscribers by PBX • See 4.1 GUIDELINES FOR (APT/DPT paging (there are different kinds of PBX DIGITAL INTEGRATION. Integration Only) paging, and these can be specified by VPS •...
- Page 172 SYSTEM FEATURES Table 32 FEATURE DESCRIPTION REFERENCES Interview Service plays a set of recorded questions when a • See 5.2.9 Interview Service. caller accesses the service. The caller is • See "Interview Mailbox provided an opportunity to answer each Number" in Table 35 in question after it has been asked.
- Page 173 SYSTEM FEATURES Table 32 FEATURE DESCRIPTION REFERENCES Live Call Screening permits the subscriber to monitor incoming • See 4.1 GUIDELINES FOR (APT/DPT calls as messages are being recorded. The DIGITAL INTEGRATION. Integration Only) subscriber has the option of answering calls •...
- Page 174 SYSTEM FEATURES Table 32 FEATURE DESCRIPTION REFERENCES Logical Extension is an extension that always receives calls • See "All Calls Transfer to (All Calls Transfer directly into its mailbox. This feature is used Mailbox" in Table 35 in to Mailbox) by subscribers that are often unavailable or B2 SYSTEM that do not have a telephone.
- Page 175 SYSTEM FEATURES Table 32 FEATURE DESCRIPTION REFERENCES Message Delivery allows a subscriber to check the status of • See 3.2 Checking Mailbox Status messages that have been sent. The sending Distribution in the Subscriber's subscriber has the option of cancelling any of Guide.
- Page 176 SYSTEM FEATURES Table 32 FEATURE DESCRIPTION REFERENCES Message Transfer allows the subscriber to transfer messages to • See "Transferring Messages" in other mailboxes after playing. The subscriber D2 MANAGING THE can also add a personal comment at the GENERAL DELIVERY beginning of the message to be transferred if MAILBOX.
- Page 177 SYSTEM FEATURES Table 32 FEATURE DESCRIPTION REFERENCES Message Waiting automatically illuminates the message • See "Message Waiting Notification—Lamp waiting lamp on the subscriber's or the Notification from an SLT" in Message Manager's telephone when there are 3.1.4 PBX Requirements for unplayed messages waiting in the mailbox.
- Page 178 • See 2.7 CONNECTIONS. an integrated unit. Three integration options • See Section 3 INTEGRATING are available: Inband Integration, APT THE VPS WITH PANASONIC Integration and DPT Integration. KX-T PHONE SYSTEMS. • See Section 4 INTEGRATING THE VPS WITH THE...
- Page 179 SYSTEM FEATURES Table 32 FEATURE DESCRIPTION REFERENCES Personal Greeting permits subscribers to record up to 4 personal • See 4.1 GUIDELINES FOR for Caller ID greetings for calls from pre-assigned Caller DIGITAL INTEGRATION. (APT/DPT ID numbers. Each greeting supports up to 8 •...
- Page 180 SYSTEM FEATURES Table 32 FEATURE DESCRIPTION REFERENCES Play System Prompt allows the "Guidance for Recording" • See "Play System Prompt after After Personal message to be played for the caller after the Personal Greeting" in Table 38 Greeting "Personal Greeting". The "Guidance for in B3 SYSTEM Recording"...
- Page 181 SYSTEM FEATURES Table 32 FEATURE DESCRIPTION REFERENCES Remote Call allows a subscriber and the Message Manager • See 5.5.2 Entering a Mailbox. Forwarding Set to program his extension from a remote • See "Remote Call Forward to (DPT Integration location to forward various types of calls to a CO Setting"...
- Page 182 SYSTEM FEATURES Table 32 FEATURE DESCRIPTION REFERENCES Rotary Telephone provides guidance to callers using rotary • See "Other Parameters-Rotary Service telephone systems or when several seconds Telephone Service" in pass without anything being entered by the B6.7 Other Parameters. caller. •...
- Page 183 SYSTEM FEATURES Table 32 FEATURE DESCRIPTION REFERENCES Special Feature permits mailbox owners to use the following • See "Remote Call Forward to Authorisation special features: Remote Call Forward to CO, CO", "Delete Message Delete Message Confirmation, Message Confirmation", "Authorization Waiting Notification, External Message for Message Notification", Delivery, and Auto Forwarding.
- Page 184 SYSTEM FEATURES Table 32 FEATURE DESCRIPTION REFERENCES Time Service is a timer function that initiates the • See "Service Mode" in this appropriate call handling method depending table. on the time of day: Day, Night, Lunch, and • See "Time Service (1-5-2-2)" in Break Service periods.
- Page 185 SYSTEM FEATURES Table 32 FEATURE DESCRIPTION REFERENCES Two-Way Transfer permits a subscriber to record two-way • See 4.1 GUIDELINES FOR (APT/DPT conversations into another person's mailbox. DIGITAL INTEGRATION. Integration only) • See 4.4.9 Two-Way Transfer Button Assignment via Station Programming. •...
- Page 186 SYSTEM FEATURES Table 32 FEATURE DESCRIPTION REFERENCES Voice Prompts are announcements that instruct the caller. • See 6.1.5 Custom Service Greetings (Enter #6*998,5,4). There are 3 kinds of voice prompts: • See " Prompt Mode" in Tables 38 and 39 in B3 SYSTEM (1) System Prompts (recorded at the factory ADMINISTRATION—...
-
Page 187: Appendix B System Administrator's Guide
SYSTEM ADMINISTRATOR'S GUIDE Appendix B SYSTEM ADMINISTRATOR'S GUIDE Installation Manual... -
Page 188: B1 System Navigation
SYSTEM ADMINISTRATOR'S GUIDE B1 SYSTEM NAVIGATION Use either a VT or RS-232C terminals (ASCII Terminals) to perform System Administration, which includes the setting and changing of system parameters. This can be a personal computer with emulation software. Keyboard Use RS-232C Terminals (ASCII Terminals) When using RS-232C Terminals, Type the number of the option desired and Press RETURN to choose menu options. - Page 189 SYSTEM ADMINISTRATOR'S GUIDE 1. Mallbox 1. Program Setting 2. Class of Service 3. Port/Trunk Service 4. Service 1. Automated 1. Department Setting Attendant Dialing 2. Operator's Parameter 3. Alternate Extension 2. Custom Service Installation Manual...
- Page 190 SYSTEM ADMINISTRATOR'S GUIDE Programming Menu Structure Diagram Mailbox No 1. Mailbox 1. Enter/Edit Entry Setting 2. Delete 1. Mailbox 2. Notification 1. Program 1. 1st Device Setting Setting 3. Password Reset 2. 2nd Device 4. Mailbox Listing 3. 3rd Device 3.
- Page 191 SYSTEM ADMINISTRATOR'S GUIDE 1. Enter 5. System 1. System Group 1. Mailbox Parameter 2. Delete Assignment Group Setting 3. Listing 1. Enter 2. Extension 2. Delete Group 3. Listing 1. Service Mode 2. Time Service 1. Day Service 2. Time Service 2.
-
Page 192: B2 System Administration-Mailboxes
SYSTEM ADMINISTRATOR'S GUIDE B2 SYSTEM ADMINISTRATION—MAILBOXES Up to 1022 Subscriber Mailboxes can be created or edited by following the correct sequence of steps. To access the proper menu for mailbox setup, follow the menu path as shown: System Administration Top Menu-1-1-1-Mailbox No. Table 34 Parameter Value Range... - Page 193 SYSTEM ADMINISTRATOR'S GUIDE Table 35 Parameter Value Range Description/Function (Default) The Extension 2-5 digits Used to transfer calls through the VPS to a subscriber's of the Owner (None) mailbox. Any valid extension number including an Extension Group List number can be assigned. Note: If an Extension Group List number is assigned to a mailbox, all group members are able to share the information stored there.
- Page 194 SYSTEM ADMINISTRATOR'S GUIDE Table 35 Parameter Value Range Description/Function (Default) Interview 2-5 digits Permits a mailbox owner to own an interview mailbox. The Mailbox (None) interview mailbox number must be an unassigned mailbox Number number. Note: The replies to an interview session constitute one message.
- Page 195 SYSTEM ADMINISTRATOR'S GUIDE Notification Setting-Device 1, 2, or 3 Table 36 Parameter Value Range Description/Function (Default) Dial Number Up to 32 digits Assigns a telephone or beeper number to Device 1, 2, or consisting of 1-9, 3. The subscriber can also specify the dial number from his telephone.
- Page 196 SYSTEM ADMINISTRATOR'S GUIDE Table 36 Parameter Value Range Description/Function (Default) No Answer 0-120 min Specifies the time (in minutes) the VPS must wait after Delay Time (30) a no-answer condition is received before making another notification call to Device 1, 2, or 3. Time Frame 1, 2 1-12: h Specifies the daily schedule for the Message Waiting...
- Page 197 SYSTEM ADMINISTRATOR'S GUIDE Table 37 Parameter Value Range Description/Function (Default) Telephone Up to 16 digits Specifies the telephone number to which the callers are Number 1, 2 (None) forwarded when Remote Call Forwarding is set to an outside (CO) line. The telephone number can contain the digits "0-9"...
- Page 198 SYSTEM ADMINISTRATOR'S GUIDE Listing Mailboxes Follow the procedure below to display the mailbox number list. To display the list of all mailbox numbers, follow the menu path as shown: System Administration Top Menu-1-1-4 Installation Manual...
-
Page 199: Parameters
SYSTEM ADMINISTRATOR'S GUIDE B3 SYSTEM ADMINISTRATION—SETTING COS (CLASS OF SERVICE) PARAMETERS The COS-Class of Service parameters define the set of services that are available to mailbox owners. A maximum of 64 (1-64) classes can be specified. A class of service number can be assigned for each mailbox. - Page 200 SYSTEM ADMINISTRATOR'S GUIDE Table 38 Parameter Value Range Description/Function (Default) Personal 8-60 s in 4 s Defines the maximum length of the personal greeting Greeting increments message that can be recorded by the subscriber. Length (16) This parameter applies to: •...
- Page 201 PBX allows the conversation to be recorded. If set to "No", the recording will be automatically saved. Note: The Live Call Screening feature is available if APT/DPT Voice Mail Integration is activated with a Panasonic KX-TA series or KX-TD series telephone system. Installation Manual...
- Page 202 COS NO.10-62: all groups. Group 1) Note: The Intercom Paging feature is available if APT/ DPT Voice Mail Integration is activated with a Panasonic KX-TA series or KX-TD series telephone system. Prompt Mode 1. System Specifies the language used for voice prompts played for 2.
- Page 203 Note: The Remote Call FWD to CO feature is available if DPT Voice Mail Integration is activated with a Panasonic KX-TD series telephone system. Important Note: With respect to PBX programming, it is possible that "Call Forward to CO" is disabled. To enable VPS Remote Call Forwarding, the KX-TD1232, for example, must be programmed properly.
- Page 204 SYSTEM ADMINISTRATOR'S GUIDE Table 38 Parameter Value Range Description/Function (Default) Beeper 1. Caller Select Permits subscribers to use the Callback Number Entry Callback 2. Without feature. No. Entry 3. Before Mode 4. After Caller After recording a message, the caller is 5.
- Page 205 SYSTEM ADMINISTRATOR'S GUIDE Table 38 Parameter Value Range Description/Function (Default) Prompt Mode 1. System When an external message is delivered, the receiver will 2. User 1 be greeted by the VPS in the specified language 3. User 2 (prompt). However, if "Selective" is enabled, then the 4.
- Page 206 SYSTEM ADMINISTRATOR'S GUIDE COS Nos. 63 & 64 (for Managers) To access the proper menu for Class of Service Numbers 63 & 64 for Managers, follow the menu path as shown: System Administration Top Menu-1-2-COS No.(63-64) Only the parameters listed below can be assigned for COS numbers 63 and 64. COS number 64 cannot assign the parameters relating to the Message Waiting Notification and the Remote Call Forward to CO features.
- Page 207 "Telephone No.2" (preprogrammed in the Mailbox Setting), or to any other telephone number. Note: The Remote Call FWD to CO feature is available if DPT Voice Mail Integration is activated with a Panasonic KX-TD series telephone system. Important Note: With respect to PBX programming, it is possible that "Call Forward to CO"...
- Page 208 SYSTEM ADMINISTRATOR'S GUIDE Table 39 Parameter Value Range Description/Function (Default) Authorization 1. Yes If set to "Yes", the Message Manager is able to utilise the for Message 2. No Message Waiting Notification feature. The sub-parameters Notification (Yes) to be set include Beeper Callback No. Entry Mode, MWL Notification for Unreceived Message, and Device Notification for Unreceived Message.
-
Page 209: B4 System Administration-Port/Trunk Service
SYSTEM ADMINISTRATOR'S GUIDE B4 SYSTEM ADMINISTRATION—PORT/TRUNK SERVICE One of 4 incoming call services can be assigned to each VPS port and each PBX trunk (outside line) group: Voice Mail, Automated Attendant, Interview, or Custom Service. The Port Assignment menu and Trunk Group Assignment menu allow the Company Greeting Number, Prompt Mode, and Delayed Answer Time to be programmed. - Page 210 SYSTEM ADMINISTRATOR'S GUIDE Table 40 Parameter Value Range Description/Function (Default) Company 1-32 Specifies the company greeting to be played on the port. Greeting No. S: System Greeting The System Greeting is: "Good Morning/Afternoon/ N: None Evening. Welcome to the Voice Processing System". (System Greeting) Incoming Call...
-
Page 211: B4.2 Trunk Group Assignment
SYSTEM ADMINISTRATOR'S GUIDE Port (1-2)-Night Mode To access the proper menu for Night Mode features for the selected port, follow the menu path as shown: System Administration Top Menu-1-3-1-Port No.(1-2)-2 Port (1-2)-Lunch Mode To access the proper menu for Lunch Mode features for the selected port, follow the menu path as shown: System Administration Top Menu-1-3-1-Port No.(1-2)-3 Port (1-2)-Break Mode... - Page 212 SYSTEM ADMINISTRATOR'S GUIDE Trunk (1-24)-Day Mode To access the proper menu for Day Mode features for the selected PBX trunk (outside line) group, follow the menu path as shown: System Administration Top Menu-1-3-2-Trunk Group No.(1-24)-1 Table 41 Parameter Value Range Description/Function (Default) Company...
- Page 213 SYSTEM ADMINISTRATOR'S GUIDE Table 41 Parameter Value Range Description/Function (Default) Delayed 0-60 s Specifies whether the trunk (outside line) group answers Answer immediately (0) or with delay (1-60 s). Time Trunk (1-24)-Night Mode To access the proper menu for Night Mode features for the selected PBX trunk (outside line) group, follow the menu path as shown: System Administration Top Menu-1-3-2-Trunk Group No.(1-24)-2 Trunk (1-24)-Lunch Mode...
-
Page 214: B5 System Administration-Service Settings
SYSTEM ADMINISTRATOR'S GUIDE B5 SYSTEM ADMINISTRATION—SERVICE SETTINGS B5.1 Automated Attendant Parameters The Automated Attendant Service has 3 main functions: Department or Speed Dialing, Operator's Parameters, and Alternate Extension. To access the proper menu for Automated Attendant Parameters, follow the menu path as shown: System Administration Top Menu-1-4-1 Department Dialing... - Page 215 SYSTEM ADMINISTRATOR'S GUIDE Operator's Parameters Use these parameters to specify the operator's (operator 1, 2, 3) extensions and mailboxes, as well as how to treat operator-seeking calls. Operator's parameters can be individually set for Day, Night, Lunch and Break Modes. To access the proper menu for Operator's Parameters, follow the menu path as shown: System Administration Top Menu-1-4-1-2...
- Page 216 SYSTEM ADMINISTRATOR'S GUIDE Table 43 Parameter Value Range Description/Function (Default) Operator's 1-5 digits Specifies the extension number for Operator 1. Extension Note 1: The default setting (0) cannot be used with the Message Waiting Notification—Lamp feature. An extension number must be assigned that is included in the Extension Numbering Plan.
- Page 217 SYSTEM ADMINISTRATOR'S GUIDE Table 43 Parameter Value Range Description/Function (Default) No Answer 1. Caller Select Specifies how to handle Operator 1 calls when not Coverage 2. Leave Message answered within the time period set by the "Operator No Mode 3. Disconnect Answer Time"...
- Page 218 SYSTEM ADMINISTRATOR'S GUIDE Table 44 Parameter Value Range Description/Function (Default) Operator's 1-5 digits Specifies the extension number for Operator 2. Any valid Extension (None) extension number can be assigned. Operator's 2-5 digits Specifies the mailbox number for Operator 2. Callers to Mailbox No.
- Page 219 SYSTEM ADMINISTRATOR'S GUIDE Operator's Parameters-Day Mode-Operator 3 Operator 3 receives operator-seeking calls when Operator 2 is busy or unanswered and Operator 2's parameters are set as follows: • Busy Coverage Mode—No Answer Coverage • No Answer Coverage Mode—next Operator To access the proper menu for Operator Parameters-Day Mode-Operator 3, follow the menu path as shown: System Administration Top Menu-1-4-1-2-1-3 Table 45...
- Page 220 SYSTEM ADMINISTRATOR'S GUIDE Table 45 Parameter Value Range Description/Function (Default) No Answer 1. Caller Select Specifies how to handle Operator 3 calls when not Coverage 2. Leave Message answered within the time period set by the "Operator No Mode 3. Disconnect Answer Time"...
- Page 221 SYSTEM ADMINISTRATOR'S GUIDE Alternate Extension Assignment Assigns extensions that should be transferred differently from the normal extension transfer sequence. Calls to the extensions in this group will be transferred following the sequence defined by "Alternate Extension Transfer Sequence" (see "Alternate Extension Transfer Sequence"...
-
Page 222: B5.2 Custom Service
SYSTEM ADMINISTRATOR'S GUIDE Alternate Extension-Listing Lists all of the extensions registered in the alternate extension group. To access the proper menu for Alternate Extension-Listing Parameter, follow the menu path as shown: System Administration Top Menu-1-4-1-3-3 B5.2 Custom Service Custom Service is one of 4 incoming call services. By assigning a function to each key, you can provide callers with a customised key operation service. - Page 223 SYSTEM ADMINISTRATOR'S GUIDE Table 47 Parameter Value Range Description/Function (Default) Call Transfer Extn./Mbx/No Specifies the destination to which the call will be Anytime (Extn.) transferred. The "Extn." setting (enter "E") enables callers to be transferred directly to their intended party by dialling the extension number.
- Page 224 SYSTEM ADMINISTRATOR'S GUIDE Table 47 Parameter Value Range Description/Function (Default) Keypad Any of the 14 services listed below (a-n) can be Assignment ( : d, 0: c assigned to the 0 through 9, , and # keys on the 0-9, , # Others: None) telephone keypad.
-
Page 225: B5.3 Caller Id Call Routing Parameters
SYSTEM ADMINISTRATOR'S GUIDE Table 47 Parameter Value Range Description/Function (Default) Keypad (i) Subscriber Service—Allows the caller to access Assignment Subscriber Service. If this option is enabled, it is ( : d, 0: c strongly recommended that each subscriber 0-9, , # Others: None) establish a password;... - Page 226 SYSTEM ADMINISTRATOR'S GUIDE Caller ID Call Routing-Enter To access the proper menu for Caller ID Call Routing-Enter, follow the menu path as shown: System Administration Top Menu-1-4-3-1-Caller ID List No.(1-120) Table 48 Parameter Value Range Description/Function (Default) Caller ID No. P, O or Assigns the telephone number to which the VPS applies Up to 20 digits...
- Page 227 SYSTEM ADMINISTRATOR'S GUIDE Caller ID Call Routing-Delete Permits specified Caller ID List numbers to be deleted from the list. To access the proper menu for Caller ID Call Routing-Delete, follow the menu path as shown: System Administration Top Menu-1-4-3-2-Caller ID List No.(1-120) Caller ID Call Routing-Listing Displays all Caller ID List numbers.
-
Page 228: B6 System Administration-System Parameter Settings
SYSTEM ADMINISTRATOR'S GUIDE B6 SYSTEM ADMINISTRATION—SYSTEM PARAMETER SETTINGS B6.1 System Group Assignment To access the proper menu for System Group Assignment, follow the menu path as shown: System Administration Top Menu-1-5-1 System Group Assignment-Mailbox Group This parameter allows a caller to send a message simultaneously to several mailboxes. These mailboxes may be assembled into a list called a System Group Distribution List. - Page 229 SYSTEM ADMINISTRATOR'S GUIDE Table 49 Parameter Value Range Description/Function (Default) Group Name Up to 16 Specifies a group name. If a group name is not required, characters press RETURN, and specify the mailbox numbers. (None) Any alphanumeric character and [(space)] can be used. Member 2-5 digits Specifies mailbox numbers belonging to this group.
- Page 230 SYSTEM ADMINISTRATOR'S GUIDE Extension Group-Enter To access the proper menu for Extension Group-Enter, follow the menu path as shown: System Administration Top Menu-1-5-1-2-1-Group List No. Table 50 Parameter Value Range Description/Function (Default) Group List 2-5 digits Specifies any vacant extension number. (None) Note: The Extension Group List number can be assigned as "The Extension of the Owner"...
-
Page 231: B6.2 Time Service
SYSTEM ADMINISTRATOR'S GUIDE B6.2 Time Service To access the proper menu for Time Service, follow the menu path as shown: System Administration Top Menu-1-5-2 Time Service-Service Mode The VPS automatically activates the appropriate call handling method according to the Time Service setting (Day/Night, Lunch, and Break Services);... - Page 232 Administrator changes it again, even after the power is cut and restored. PBX Control Mode is available only if APT/DPT Integration is activated with a Panasonic KX-TA series or KX-TD series telephone system. If PBX Control Mode does not function after it has been selected, the VPS will operate in Automatic Mode.
- Page 233 SYSTEM ADMINISTRATOR'S GUIDE Note Break Service and Lunch Service are only available when they are in Day Service period. If Break 3 Service is out of Day Service period, for example, Break 3 Service does not work. To access the proper menu for Time Service-Time Service, follow the menu path as shown: System Administration Top Menu-1-5-2-2 Time Service-Day Service...
- Page 234 SYSTEM ADMINISTRATOR'S GUIDE Table 53 Parameter Value Range Description/Function (Default) 1-12: h Specifies the "Start" and "End" times of the Lunch Service. (Start/End) 00-59: min AM/PM: a.m./p.m. (None) (Start/End) Time Service-Break Service To access the proper menu for Break Service, follow the menu path as shown: System Administration Top Menu-1-5-2-2-3 Table 54 Parameter...
-
Page 235: B6.3 Holiday Setting
SYSTEM ADMINISTRATOR'S GUIDE B6.3 Holiday Setting You can program special settings for up to 20 Holiday Services. On the day(s) specified as holiday(s), settings in this parameter have priority over settings for Trunk Service, Port Service and Caller ID Call Routing. When setting specific day(s) as holiday(s), you have the following 2 options: •... - Page 236 SYSTEM ADMINISTRATOR'S GUIDE Table 55 Parameter Value Range Description/Function (Default) Date DD/MM-DD/MM Specifies the day or the range of days on which to enable Holiday Service setting. DD/MM (DD: Day • If you want to set a single day as a holiday, specify MM: Month) only one date.
-
Page 237: B6.4 Daylight Saving Time (Dst)
SYSTEM ADMINISTRATOR'S GUIDE Holiday Setting-Delete Cancels the Holiday Service Setting by specifying a holiday number (1-20). To access the proper menu for Holiday Setting-Delete, follow the menu path as shown: System Administration Top Menu-1-5-3-2 Holiday Setting-Listing Displays all of the specified holiday names and dates. To access the proper menu for Holiday Setting-Listing, follow the menu path as shown: System Administration Top Menu-1-5-3-3... -
Page 238: B6.5 Prompt Setting
SYSTEM ADMINISTRATOR'S GUIDE Table 56 Parameter Value Range Description/Function (Default) Start Date/End DD: Day Specifies the starting and ending dates of daylight Date MM: Month saving time. The VPS advances 1 h on the starting date (None) of daylight saving time, and restores the time on the ending date. - Page 239 SYSTEM ADMINISTRATOR'S GUIDE Table 57 Parameter Value Range Description/Function (Default) System Prompt Assigns a selection number (1-9) to each prompt. Callers Selection (None) use the numbers to select the desired language for their Number message prompts. This setting is required when either one or both of the following parameters are set to "Selective".
-
Page 240: B6.6 System Caller Name Announcement
SYSTEM ADMINISTRATOR'S GUIDE B6.6 System Caller Name Announcement Up to 120 Caller ID numbers can be assigned to announce prerecorded Caller ID caller names when extension users listen to messages from the assigned numbers left in their mailbox. Extension users can also hear caller names when the VPS forwards calls from the assigned numbers to them (Caller ID Screening). -
Page 241: B6.7 Other Parameters
SYSTEM ADMINISTRATOR'S GUIDE System Caller Name Announcement-Delete Deletes specified Caller ID List numbers from the list. To access the proper menu for System Caller Name Announcement-Delete, follow the menu path as shown: System Administration Top Menu-1-5-6-2-Caller ID List No.(1-120) System Caller Name Announcement-Listing Displays all Caller ID List numbers. - Page 242 SYSTEM ADMINISTRATOR'S GUIDE Table 59 Parameter Value Range Description/Function (Default) Numbering 2-5 digits Specifies the first 1 or 2 digits of the PBX extension Plan consisting numbers. You can add up to 16 entries to the list. Each entry 1-16 of 0-9, X can contain 2-5 digits "0-9", and a letter "X"...
- Page 243 SYSTEM ADMINISTRATOR'S GUIDE Other Parameters-Dialing Parameter To access the proper menu for Dialing Parameter, follow the menu path as shown: System Administration Top Menu-1-5-7-2 Table 60 Parameter Value Range Description/Function (Default) Number of 0-8 digits Specifies the number of digits necessary to access an Digits outside (CO) line.
- Page 244 SYSTEM ADMINISTRATOR'S GUIDE Table 60 Parameter Value Range Description/Function (Default) Outgoing Call Up to 12 digits Specifies the sequence of codes used by the VPS when Setup consisting of calling an outside (CO) line. You can set up to 12 Sequence digits.
- Page 245 SYSTEM ADMINISTRATOR'S GUIDE Table 61 Parameter Value Range Description/Function (Default) Message Port No. Specifies the port numbers used for the Message Waiting Waiting Lamp (1-2) Notification Lamp feature. Ports The VPS turns on the Message Waiting Lamp of the extension using the port specified in this parameter. At least 1 port must be specified.
- Page 246 SYSTEM ADMINISTRATOR'S GUIDE Other Parameters-External Message Delivery Controls the handling of External Message Delivery calls. To access the proper menu for External Message Delivery, follow the menu path as shown: System Administration Top Menu-1-5-7-4 Table 62 Parameter Value Range Description/Function (Default) Retry Times 0-3 times...
- Page 247 SYSTEM ADMINISTRATOR'S GUIDE Other Parameters-Call Hold To access the proper menu for Call Hold, follow the menu path as shown: System Administration Top Menu-1-5-7-5 Table 63 Parameter Value Range Description/Function (Default) Call Hold 1. Disable If set to "Enable", the VPS gives callers the option of Mode 2.
- Page 248 SYSTEM ADMINISTRATOR'S GUIDE Other Parameters-Rotary Telephone Service Specifies how to treat callers who are calling from rotary telephones (unable to input touchtone signals) or who are unable to properly respond to VPS guidance. To access the proper menu for Rotary Telephone Service, follow the menu path as shown: System Administration Top Menu-1-5-7-6 Table 64...
- Page 249 SYSTEM ADMINISTRATOR'S GUIDE Table 65 Parameter Value Range Description/Function (Default) Intercom Up to 12 digits con- Specifies the intercom paging sequence required by Paging the PBX. This can be programmed using up to 12 of sisting of 0-9, , # Sequence the following 8 letters and 12 dial codes.
- Page 250 SYSTEM ADMINISTRATOR'S GUIDE Table 65 Parameter Value Range Description/Function (Default) Paging Code Up to 12 digits Specifies the intercom paging access code required by for Group 1-8 consisting of the PBX. 0-9, ,# for each Paging Code group Note: The Intercom Paging Group Number available for All Groups (Group 1-8: for each subscriber is determined on a COS-by-COS...
- Page 251 SYSTEM ADMINISTRATOR'S GUIDE Table 66 Parameter Value Range Description/Function (Default) Fax No Answer 5-60 s Specifies the length of time (in seconds) the VPS must Time (10) wait before taking other action when there is no answer at either fax extension. Note: This timer applies to the fax call that has been transferred to the main or alternate fax extension.
- Page 252 SYSTEM ADMINISTRATOR'S GUIDE Other Parameters-Disconnect Parameter To access the proper menu for Disconnect Parameter, follow the menu path as shown: System Administration Top Menu-1-5-7-9 Table 67 Parameter Value Range Description/Function (Default) Maximum 5-60 s Specifies the length of time (in seconds) that the VPS Silence Time (10) must wait until it disconnects the call when silence is...
-
Page 253: B7 System Administration-Hardware Settings
SYSTEM ADMINISTRATOR'S GUIDE B7 SYSTEM ADMINISTRATION—HARDWARE SETTINGS For System Administration (system setup, mailbox setup, and system diagnosis), an RS-232C terminal must be connected to the serial interface of the VPS. To access the proper menu for Hardware Setting, follow the menu path as shown: System Administration Top Menu-1-6 B7.1 RS-232C Parameters To access the proper menu for RS-232C Parameter, follow the menu path as shown:... -
Page 254: B7.2 Port Setting
SYSTEM ADMINISTRATOR'S GUIDE B7.2 Port Setting To access the proper menu for Port Setting, follow the menu path as shown: System Administration Top Menu-1-6-2 Port Setting Menu To access the proper menu Port Setting Menu for the selected port, follow the menu path as shown: System Administration Top Menu-1-6-2-Port No.(1-2) Table 69... -
Page 255: B7.3 Pbx Interface Parameters
These parameters specify how the VPS will initiate and control call transfers, setup outgoing calls, and control message waiting lamps on extensions. The procedure for verifying the correct code sequences for non-Panasonic KX-T series telephone systems is to manually execute the sequences from a single line telephone (SLT) with the PBX. - Page 256 SYSTEM ADMINISTRATOR'S GUIDE Table 71 PBX Type Other KX-T series Manufacturers T308/ TD816/1232/ T1232 T336 TA series T616 Integration None None None None None None None Mode Inband Inband Inband Inband Inband Inband Operator Transfer Sequence Extension Transfer Sequence Alternate Extension Transfer Sequence...
- Page 257 SYSTEM ADMINISTRATOR'S GUIDE Table 71 PBX Type Other KX-T series Manufacturers T308/ TD816/1232/ T1232 T336 TA series T616 Release Sequence None for Call Waiting When your KX-TD series telephone system is in DPT Integration mode. When your KX-TA series telephone system is in APT Integration mode. N/A Not available —...
- Page 258 Panasonic KX-T series telephone systems: T1232, TA series, T96, T336, TD816 and TD1232. 3. APT—The VPS communicates with the PBX via the APT interface. This is available only with Panasonic KX-TA series. 4. DPT—The VPS communicates with the PBX via the DPT interface.
- Page 259 SYSTEM ADMINISTRATOR'S GUIDE To program the following 10 Parameters in the next table, use the Special Commands and Dial Codes listed below. You can set up to 12 digits for each parameter. D: Disconnecting F: Hook Flash R: Ringback Tone Detection S: Silence Detection T: Dial Tone Detection W: Wait for 1 s...
- Page 260 SYSTEM ADMINISTRATOR'S GUIDE Table 73 Parameter Value Range Description/Function (Default) Call Waiting The VPS carries out this sequence when performing call Sequence waiting if the extension being called is busy. Release The VPS performs this sequence to release call waiting. Sequence for Call Waiting Inband Signaling Parameters...
- Page 261 SYSTEM ADMINISTRATOR'S GUIDE Table 74 Parameter Value Range Description/Function (Default) Forward to VM Sent to the VPS if the called extension is forwarded to a Busy voice mail port and that voice mail port is not available to accept the call. Forward to Sent to the VPS if the called extension is forwarded to Other...
- Page 262 SYSTEM ADMINISTRATOR'S GUIDE Digit Translation Table Parameters Use the Digit Translation Table to translate the Follow On ID Signal from the PBX into the proper codes for the VPS. This translation table is only effective for the incoming signal. To access the proper menu for Digit Translation Table Parameters, follow the menu path as shown: System Administration Top Menu-1-6-3-3 Digit Translation Table Parameters-Inter-Digit Timeout...
-
Page 263: Appendix C System Manager's Guide
SYSTEM MANAGER'S GUIDE Appendix C SYSTEM MANAGER'S GUIDE Installation Manual... -
Page 264: C1 Accessing The System Manager'smailbox
SYSTEM MANAGER'S GUIDE C1 ACCESSING THE SYSTEM MANAGER'S MAILBOX The System Manager's Mailbox must be accessed before performing any System Manager task. To access the System Manager's Mailbox, three items of information must be known: the telephone number connected directly to the Voice Mail Service, the System Manager's Mailbox Number and the Password for that mailbox (if assigned). -
Page 265: C2 Setting Up Mailboxes
SYSTEM MANAGER'S GUIDE C2 SETTING UP MAILBOXES The System Manager's primary function is to create mailboxes for new subscribers and to maintain system organisation by deleting unneeded passwords and mailboxes. Note While the System Administrator programmes via a personal computer, the System Manager cannot set up mailboxes. - Page 266 SYSTEM MANAGER'S GUIDE Press [2] to accept the entry. As each parameter plays: Press [1] to enter the new parameter or [2] to leave the parameter unchanged. Enter the parameter. Confirm the new parameter is correct and Press [2] to accept it. The All Calls Transfer to Mailbox parameter is the last parameter to be entered.
- Page 267 SYSTEM MANAGER'S GUIDE Deleting a Mailbox Password When a password is forgotten, the System Manager must delete the password before it can be reassigned by the subscriber. Log in the Main Menu. Press [6] for Other Features. Press [1] for the Mailbox Setup. Press [3] for Password Reset.
-
Page 268: C3 Setting Cos (Class Of Service) Parameters
SYSTEM MANAGER'S GUIDE C3 SETTING COS (CLASS OF SERVICE) PARAMETERS Class of Service defines the set of VPS services available to mailbox owners. A maximum of 64 Class of Services can be established. Each Class of Service can be set using the telephone. COS No.63 and No.64 are assigned to the Message Manager and the System Manager respectively. - Page 269 SYSTEM MANAGER'S GUIDE Note While the System Administrator programmes via a personal computer, the System Manager cannot set COS parameters. The VPS plays "Sorry, this function is not available". Log in the Main Menu. Press [6] for Other Features. Press [2] to set Class of Service. Type the Class of Service Number (1-64).
- Page 270 SYSTEM MANAGER'S GUIDE Message Length The current setting plays. Press [1] to change the current length. Type the message length (1-6 min or 0: unlimited). Confirm the entry is correct and Press [2] to accept it. Number of Messages The current setting plays. Press [1] to change the current number. Type the number of messages (5-100).
- Page 271 SYSTEM MANAGER'S GUIDE Play System Prompt after Personal Greeting The current setting plays. Press [1] to change the setting (enable or disable). Confirm the entry is correct and Press [2] to accept it. Call Waiting on Busy The current setting plays. Press [1] to change the setting (enable or disable). Confirm the entry is correct and Press [2] to accept it.
- Page 272 SYSTEM MANAGER'S GUIDE Subscriber Service Prompt Mode The current setting plays. Press [1], [2], or [3] to change the desired mode. • [1] System Prompt • [2] User 1 Prompt • [3] User 2 Prompt Confirm the entry is correct and Press [4] to accept it. Remote Call Forward to CO The current setting plays.
- Page 273 SYSTEM MANAGER'S GUIDE Caller ID Screening The current setting plays. Press [1] to change the setting (enable or disable). Confirm the entry is correct and Press [2] to accept it. Message Notification The current setting plays. Press [1] to change the setting (enable or disable). If the Message Notification is enabled, go to Step 24b below.
- Page 274 SYSTEM MANAGER'S GUIDE External Message Delivery The current setting plays. Press [1] to change the setting (enable or disable). If the External Message Delivery is enabled, set the prompt mode for receiving External Delivery Messages (go to Step 25b below). The current prompt mode plays.
-
Page 275: C4 Setting The System Clock
SYSTEM MANAGER'S GUIDE C4 SETTING THE SYSTEM CLOCK The system clock can be set directly from the telephone. It is important to set the exact time because Message Waiting Notification, External Message Delivery, redialling and rescheduling of External Message Delivery, and Automatic Message Deletion are all scheduled using this setting. - Page 276 SYSTEM MANAGER'S GUIDE Type the current month and Press [#]. Note Press [0] for help. "For example, to enter January, press 1 and #". Type the day and Press [#]. Type the last 2 digits of the year and Press [#]. Press [2] to accept the date.
-
Page 277: C5 Changing The Service Mode Setting
SYSTEM MANAGER'S GUIDE C5 CHANGING THE SERVICE MODE SETTING The VPS automatically activates the appropriate call handling method according to the Time Service setting (Day, Night, Lunch, and Break Services); however, the System Manager or System Administrator can change the current call handling method by selecting a specific Service Mode. - Page 278 SYSTEM MANAGER'S GUIDE Depending on the model and/or the software version of the connected PBX, the PBX Control Mode may not function properly. For more information, consult your dealer. Follow the steps below to assign a Service Mode. Log in the main menu. Press [6] for other features.
-
Page 279: C6 Changing The Company Greeting Setting
SYSTEM MANAGER'S GUIDE C6 CHANGING THE COMPANY GREETING SETTING Company Greeting greets all incoming callers. The System Manager or System Administrator can choose the appropriate company greeting to each individual Time Service period (Day, Night, Lunch, and Break) for each port and trunk (outside line) group. The default is set at the System Greeting prior to factory shipment. - Page 280 SYSTEM MANAGER'S GUIDE Confirm the entry is correct and Press [2] to accept it. Installation Manual...
-
Page 281: C7 Checking System Usage (System Reports)
SYSTEM MANAGER'S GUIDE C7 CHECKING SYSTEM USAGE (SYSTEM REPORTS) The System Manager can generate 8 System Reports to help monitor the VPS operating status. The reports are sent from the RS-232C port to either a printer or a terminal. (The System Administrator is also able to output System Reports.) Obtaining System Reports Log in the Main Menu. - Page 282 SYSTEM MANAGER'S GUIDE example, to specify the mailbox range 101 through 209, enter 101 in Step 5 and 209 in Step Note While the System Administrator programmes via a personal computer, a System Report will not be generated. The System Report starts to be generated after the System Administrator has completed programming and system prompt [>] is displayed on the personal computer.
-
Page 283: C8 Delivering Messages
SYSTEM MANAGER'S GUIDE C8 DELIVERING MESSAGES The System Manager can deliver the same message to all or specified subscribers' mailboxes. When delivering a message to specified mailboxes, he can check the distribution status of each message. Delivering Messages to All Mailboxes (Broadcasting Messages) The Broadcasting Messages feature allows the System Manager to deliver the same message to all subscribers at the same time. - Page 284 SYSTEM MANAGER'S GUIDE Press [2] to accept the number if it is correct. Note Press [2] to add mailbox numbers. Press [3] to review the mailing list. Press [ ] to cancel message transfer. Press [1] to record a message. Record the message at the tone and Press [1].
- Page 285 SYSTEM MANAGER'S GUIDE Checking Mailbox Distribution Use this feature to check if messages have been delivered to recipients. Log in the Main Menu. Press [4] to check distribution status. Press [3] to cancel the message or delete verification. Note Press [1] to listen to messages. Press [1] twice to check the previous message. Press [2] to check the next message.
-
Page 286: C9 Customising The System Manager'smailbox
SYSTEM MANAGER'S GUIDE C9 CUSTOMISING THE SYSTEM MANAGER'S MAILBOX In order to ensure system security, establish a password consisting of up to 10 numeric characters. Anyone requesting access to the System Manager's service will be required to enter this password before proceeding. Note While the System Administrator programmes via a personal computer, the System Manager cannot access this service. -
Page 287: C10 Listening To System Manager Messages
SYSTEM MANAGER'S GUIDE C10 LISTENING TO SYSTEM MANAGER MESSAGES Log in the Main Menu. The VPS plays the number of new messages. Press [1] to listen to the messages. The VPS plays each message, identifying the sender and indicating when the message was recorded. - Page 288 SYSTEM MANAGER'S GUIDE Installation Manual...
-
Page 289: Appendix D Message Manager's Guide
MESSAGE MANAGER'S GUIDE Appendix D MESSAGE MANAGER'S GUIDE Installation Manual... -
Page 290: D1 Accessing The Message Manager'smailbox
MESSAGE MANAGER'S GUIDE D1 ACCESSING THE MESSAGE MANAGER'S MAILBOX The Message Manager's Mailbox must be accessed before performing any Message Manager task. To access the Message Manager's mailbox, three items of information must be known: the telephone number connected directly to the Voice Mail Service, the Message Manager's Mailbox Number, and the Message Manager's Password (if assigned). -
Page 291: D2 Managing The General Delivery Mailbox
MESSAGE MANAGER'S GUIDE D2 MANAGING THE GENERAL DELIVERY MAILBOX One of the Message Manager's functions is to check the General Delivery Mailbox for messages and transfer them to the appropriate mailbox or mailboxes (System Group Distribution Lists may be used). This can be done at any time using the telephone. Listening to Messages The Message Manager can monitor the status of the General Delivery Mailbox through his mailbox. - Page 292 MESSAGE MANAGER'S GUIDE The VPS plays the first (next/last) message. Press [7] to transfer the message. Type the destination mailbox number. Press [2] to accept the number. Press [2] to transfer with comment. Note Press [1] to transfer messages without comment. Press [3] to add a mailbox number. Press [4] to review the Mailing List.
-
Page 293: D3 Setting Up Message Waiting Notification
MESSAGE MANAGER'S GUIDE D3 SETTING UP MESSAGE WAITING NOTIFICATION The VPS can notify the Message Manager when unplayed messages are waiting in his mailbox. Two types of Message Waiting Notification are available: Notification by Message Waiting Lamp and Notification by Calling. Setting Message Waiting Lamp Status The VPS illuminates the message waiting lamp on the extension when a new message is recorded in the Message Manager's Mailbox. - Page 294 MESSAGE MANAGER'S GUIDE Log in the Main Menu. Press [2] to set Message Waiting Notification. Press [2] to change the Device Status. Type the device number (1-3). Note If a telephone number has not been assigned to the selected device number, you cannot set the device status.
- Page 295 MESSAGE MANAGER'S GUIDE Type the telephone number. Press [2] to accept the entry. • [1] Change the telephone number • [2] Accept • [3] Review • [4] Add more digits • [5] Insert a pause • [6] Set dial mode •...
-
Page 296: D4 Customising The Message Manager'smailbox
MESSAGE MANAGER'S GUIDE D4 CUSTOMISING THE MESSAGE MANAGER'S MAILBOX The Message Manager is able to customise the Message Manager's mailbox by specifying: (1) the password; (2) the extension numbers of Operator 1, 2, and 3; or (3) Telephone numbers 1 and 2 as the call forwarding destinations when Remote Call Forwarding is set to an outside (CO) line. - Page 297 MESSAGE MANAGER'S GUIDE The VPS plays the current password setting. Press [1] to change the password. If a password has not yet been assigned, go to Step 4. Press [2] to accept the current setting— Go to Step 6. Type the password and Press [#]. The VPS plays the current password setting.
-
Page 298: D5 Setting The System Clock
MESSAGE MANAGER'S GUIDE D5 SETTING THE SYSTEM CLOCK The Message Manager can set the system clock directly from the telephone. It is important to set the exact time because Message Waiting Notification, External Message Delivery, redialling and rescheduling of External Message Delivery, and Automatic Message Deletion are all scheduled using this setting. - Page 299 MESSAGE MANAGER'S GUIDE Note Press [0] for help. "For example, to enter January, press 1 and #". Type the day and Press [#]. Type the last 2 digits of the year and Press [#]. Press [2] to accept the date entered. Installation Manual...
-
Page 300: D6 Recording Messages
These menus guide callers to the services they require without the need for a human operator. This is the most useful and powerful feature of your Panasonic Voice Processing System. For example, the Message Manager can record menus in a wide variety of foreign languages. - Page 301 MESSAGE MANAGER'S GUIDE Recording Menus and Voice Labels Log in the Main Menu. Press [5] to modify messages. Select the desired number to be recorded. • [1] Record the Company Greetings. • [2] Record the Company Name. • [3] Record the Department Dialling Menu. •...
- Page 302 MESSAGE MANAGER'S GUIDE Repeat Steps 4-8 to record other Company Greetings, Custom Service Menus, and/or Voice Labels. Recording User Prompts Log in the Main Menu. Press [5] to modify messages. Press [6] to modify user prompts. Press [1] to change User Prompt 1, or [2] to change User Prompt 2. To change specific prompts, Go to Step 6.
- Page 303 MESSAGE MANAGER'S GUIDE Repeat Steps 6b to 6h to record other prompts. To change all prompts in a row: Press [2] Enter the prompt number you want to change. (There is a complete list of modifiable prompts in D9 LIST OF MODIFIABLE PROMPTS.) The VPS plays the prompt number.
- Page 304 MESSAGE MANAGER'S GUIDE Enter the Caller ID List Number (1-120) to be modified. Note • Enter [ ] to return to Step 3. • To record system caller names, first Caller ID numbers must be assigned (see B6.6 System Caller Name Announcement). The VPS plays the Caller ID number and its name.
-
Page 305: D7 Remote Call Forwarding Set
MESSAGE MANAGER'S GUIDE D7 REMOTE CALL FORWARDING SET The Message Manager can program his extension (assigned for Operator 1 in the Day Mode) from a remote location to forward various types of calls to a desired extension or an outside telephone. - Page 306 MESSAGE MANAGER'S GUIDE • [1] FWD All • [2] FWD Busy • [3] FWD No Answer • [4] FWD Busy or No Answer • [5] FWD to CO • [6] FWD Cancel For the items selected in Step 3, follow these steps: •...
- Page 307 MESSAGE MANAGER'S GUIDE Note If you hear "Call Forwarding not accepted. Please check the destination number", the forwarding setting has not been completed properly at the PBX, possibly because a nonexistent extension number has been entered as the destination. It is also possible that the model of the connected PBX does not support the Remote Call Forwarding Set, or its software version is lower than required;...
-
Page 308: D8 List Of Prompts For Voice Mail And Aa Service
MESSAGE MANAGER'S GUIDE D8 LIST OF PROMPTS FOR VOICE MAIL AND AA SERVICE There are over 900 voice prompts (all listed in the next section) and they come in 3 types. (1) System Prompts—in English (cannot be modified) (2) User 1 Prompts—Spanish (recordable) (3) User 2 Prompts—recordable However, in many cases it is not necessary to record all the voice prompts (recording over 900 voice prompts is a big undertaking). - Page 309 MESSAGE MANAGER'S GUIDE Table 78 Prompt No. Modifiable Prompts Please wait a moment Welcome to the general delivery mailbox Please leave a message at the tone To end recording, hang up or press 1 for more features To pause and restart recording, press 2 To review, press 1 To accept, press 2 To erase and try again, press 3...
- Page 310 MESSAGE MANAGER'S GUIDE Table 80 Prompt No. Modifiable Prompts If you would like to hold, press 1 To cancel holding, press 2 now Otherwise, I'll try your party again Installation Manual...
-
Page 311: D9 List Of Modifiable Prompts
MESSAGE MANAGER'S GUIDE D9 LIST OF MODIFIABLE PROMPTS The table below shows the modifiable prompts. Record prompts as User 1 or User 2. Some of the modifiable prompts are listed along with their linked prompt number. Whenever possible, record related prompts together so that the assembled sentence flows naturally and sounds like one voice. - Page 312 MESSAGE MANAGER'S GUIDE Table 81 Prompt Modifiable Prompts Linked to Prompt No. (s) APRIL [ 16] [ 17] [594], [ 17] [304], [432], [ 17] [323], [17], [197], [259] [323], [ 17], [197], [258] [158], [379], [ 17] [318], [ 17] [305], [816], [ 17] [159], [ 17] [318], [ 17], [197], [259]...
- Page 313 MESSAGE MANAGER'S GUIDE Table 81 Prompt Modifiable Prompts Linked to Prompt No. (s) Call screening enabled [ 35] Call transferred from the voice [ 36] processing system CALLBACK NUMBER [ 37] Caller ID (number) [ 38], [252] [ 38], [253] Caller ID number and caller name [ 39] deleted...
- Page 314 MESSAGE MANAGER'S GUIDE Table 81 Prompt Modifiable Prompts Linked to Prompt No. (s) Covering extension is (extension [ 57] number) Covering extension not assigned [ 58] Covering extension transfer disabled [ 59] Covering extension transfer enabled [ 60] Custom service menu [ 61] [ 61], [154] Custom service number (number)
- Page 315 MESSAGE MANAGER'S GUIDE Table 81 Prompt Modifiable Prompts Linked to Prompt No. (s) Device notification for unreceived [ 78] message disabled Device notification for unreceived [ 79] message enabled Device number is (number) [ 80] DIAL TONE [ 81] digits [865], [822], [ 82] [411], [822], [ 82] [411], [822], [ 82], [820]...
- Page 316 MESSAGE MANAGER'S GUIDE Table 81 Prompt Modifiable Prompts Linked to Prompt No. (s) ELEVEN [103] ELEVEN [HOUR] [104] ELEVEN [MINUTE] [105] ELEVENTH [106] Enter 1 for AM, or 2 for PM [107] Enter a class of service number from [108] 1 to 64 Enter a group number from 1 to 9 [109]...
- Page 317 MESSAGE MANAGER'S GUIDE Table 81 Prompt Modifiable Prompts Linked to Prompt No. (s) Enter the day of the month, followed [125] by the hash sign Enter the day of the month, followed [126] by the pound sign Enter the day, followed by the hash [127] sign Enter the day, followed by the pound...
- Page 318 MESSAGE MANAGER'S GUIDE Table 81 Prompt Modifiable Prompts Linked to Prompt No. (s) Enter the new time, followed by the [142], [208] hash sign Enter the new time, followed by the [143], [208] pound sign Enter the operator's extension number [144] Enter the owner's extension number [145] Enter the prompt number...
- Page 319 MESSAGE MANAGER'S GUIDE Table 81 Prompt Modifiable Prompts Linked to Prompt No. (s) External delivery message will be [160] sent right away External delivery message will be [161], [447] sent to (name) External message delivery disabled [162] External message delivery enabled [163] FAX messages [824], [164]...
- Page 320 MESSAGE MANAGER'S GUIDE Table 81 Prompt Modifiable Prompts Linked to Prompt No. (s) FIFTY TWO [189] FIFTY TWO [MINUTE] [190] FIRST [191] First telephone number is (telephone [192] number) First telephone number is not [193] assigned FIVE [194] FIVE [HOUR] [195] FIVE [MINUTE] (OWE FIVE) [196]...
- Page 321 MESSAGE MANAGER'S GUIDE Table 81 Prompt Modifiable Prompts Linked to Prompt No. (s) For help, press 0 [149], [208] [149], [665], [208] [717], [706], [679], [726], [753], [208] [717], [706], [679], [753], [208] [143], [208] [141], [208] [148], [208] [148], [664], [208] [142], [208] [140], [208] For interview mailbox management,...
- Page 322 MESSAGE MANAGER'S GUIDE Table 81 Prompt Modifiable Prompts Linked to Prompt No. (s) FORTY SIX [228] FORTY SIX [MINUTE] [229] FORTY THREE [230] FORTY THREE [MINUTE] [231] FORTY TWO [232] FORTY TWO [MINUTE] [233] Forwarding mailbox number is [234] (mailbox number) Forwarding mailbox number is not [235] assigned...
- Page 323 MESSAGE MANAGER'S GUIDE Table 81 Prompt Modifiable Prompts Linked to Prompt No. (s) greeting is not recorded [ 38], [253] Group member deleted [254] Group name erased [255] Group name not recorded [256] Group number (number) [257] has been erased, because message [323], [ 17], [197], [258] retention time expired has not been received...
- Page 324 MESSAGE MANAGER'S GUIDE Table 81 Prompt Modifiable Prompts Linked to Prompt No. (s) If you are using a rotary telephone, [274], [618] stay on the line [274] If you want me to call back later, [268], [711], [690], [275] press 3 If you would like to hold, press 1 [276], [392] Incorrect entry...
- Page 325 MESSAGE MANAGER'S GUIDE Table 81 Prompt Modifiable Prompts Linked to Prompt No. (s) Message back up disabled [298] Message back up enabled [299] Message cancel for live call screening [300] disabled Message cancel for live call screening [301] enabled Message delivery cancelled [302] Message erased [303]...
- Page 326 MESSAGE MANAGER'S GUIDE Table 81 Prompt Modifiable Prompts Linked to Prompt No. (s) Message scanning with information [321] is disabled Message scanning with information [322] is enabled Message sent on (date) [323], [ 17], [197], [259] [323], [ 17], [197], [258] Message to (name) [324], [ 31] Message transferred via (mailbox...
- Page 327 MESSAGE MANAGER'S GUIDE Table 81 Prompt Modifiable Prompts Linked to Prompt No. (s) Night mode first operator's extension [341] is (extension number) Night mode first operator's extension [342] is not assigned Night mode second operator's [343] extension is (extension number) Night mode second operator's [344] extension is not assigned...
- Page 328 MESSAGE MANAGER'S GUIDE Table 81 Prompt Modifiable Prompts Linked to Prompt No. (s) No external delivery message [367] pending No letters have been specified [368] No messages to verify [369] No more messages [370] No one specified by this number [371] No previous message [372]...
- Page 329 MESSAGE MANAGER'S GUIDE Table 81 Prompt Modifiable Prompts Linked to Prompt No. (s) Otherwise, press 2 [676], [392] [697], [392] [532], [647], [392] [651], [392] [276], [392] [533], [647], [392] [654], [392] [720], [392] [653], [392] [ 42], [647], [392] Owner's extension is (extension [393] number)
- Page 330 MESSAGE MANAGER'S GUIDE Table 81 Prompt Modifiable Prompts Linked to Prompt No. (s) Please enter your callback number [411], [822], [ 82] [411], [822], [ 82], [820] Please enter your party's extension [412], [675] [412], [675], [202] [412], [674] [412],[674],[202] Please enter your party's mailbox [413], [675] number...
- Page 331 MESSAGE MANAGER'S GUIDE Table 81 Prompt Modifiable Prompts Linked to Prompt No. (s) Question number (number) [431] received on (date) [304], [432], [ 17] Record caller name at the tone [433] Record company name at the tone [434] Record greeting at the tone [435] Record label at the tone [436]...
- Page 332 MESSAGE MANAGER'S GUIDE Table 81 Prompt Modifiable Prompts Linked to Prompt No. (s) Selection Menu [455] Selection menu erased [456] Selection menu is (selection menu) [457] Sending report now to terminal or [458] printer connected to RS-232C port SEPTEMBER [459] Set the answer length using the [460] following options...
- Page 333 MESSAGE MANAGER'S GUIDE Table 81 Prompt Modifiable Prompts Linked to Prompt No. (s) SIX [MINUTE] (OWE SIX) [481] SIXTEEN [482] SIXTEEN [HOUR] [483] SIXTEEN [MINUTE] [484] SIXTEENTH [485] SIXTH [486] SIXTY [487] SIXTY EIGHT [488] SIXTY FIVE [489] SIXTY FOUR [490] SIXTY NINE [491]...
- Page 334 MESSAGE MANAGER'S GUIDE Table 81 Prompt Modifiable Prompts Linked to Prompt No. (s) Sorry, there is no space for recording [507] in this mailbox Sorry, this function is not available [508], [415] [508] Sorry, this group is full [509], [ 2] [509], [ 1] Sorry, this line is busy [510]...
- Page 335 MESSAGE MANAGER'S GUIDE Table 81 Prompt Modifiable Prompts Linked to Prompt No. (s) TENTH [529] Thank you [530] Thank you for calling [531] The callback number is (telephone [532], [647], [392] number) The callback number is not assigned [533], [647], [392] The FAX transfer situation is as [534] follows...
- Page 336 MESSAGE MANAGER'S GUIDE Table 81 Prompt Modifiable Prompts Linked to Prompt No. (s) THIRTIETH [553] THIRTY [554] THIRTY [MINUTE] [555] THIRTY EIGHT [556] THIRTY EIGHT [MINUTE] [557] THIRTY FIRST [558] THIRTY FIVE [559] THIRTY FIVE [MINUTE] [560] THIRTY FOUR [561] THIRTY FOUR [MINUTE] [562] THIRTY NINE...
- Page 337 MESSAGE MANAGER'S GUIDE Table 81 Prompt Modifiable Prompts Linked to Prompt No. (s) This is a new mailbox [582] This is for message manager [ 51], [583] This is for system manager [ 51], [584] This is the General Delivery Mailbox [585] This is the last message [586] This is the last prompt number...
- Page 338 MESSAGE MANAGER'S GUIDE Table 81 Prompt Modifiable Prompts Linked to Prompt No. (s) To accept, press 2 [732], [603], [678], [614], [677] [738], [603] [647], [603] [732], [603], [678] [639], [603], [733] [647], [603], [661] [647], [603], [682] [647], [603], [733], [608], [692], [740], [693] [647], [603], [733], [608], [692], [740], [693], [691] [647], [603], [721]...
- Page 339 MESSAGE MANAGER'S GUIDE Table 81 Prompt Modifiable Prompts Linked to Prompt No. (s) To add, press 1 [612] [612], [660], [733] [612], [660], [733], [604] [612], [907], [661], [908] To add, press 2 [647], [613] To add, press 4 [732], [603], [678], [614], [677] To answer the call, press 1 [615] Otherwise, press 2 and hang up...
- Page 340 MESSAGE MANAGER'S GUIDE Table 81 Prompt Modifiable Prompts Linked to Prompt No. (s) To change the answer length, press 1 [627], [748], [749], [689] To change the caller name and [637], [636], [634], [743], [628] number, press 5 [637], [636], [634], [743], [628], [869] To change the department dialling [629] menu, press 3...
- Page 341 MESSAGE MANAGER'S GUIDE Table 81 Prompt Modifiable Prompts Linked to Prompt No. (s) To change the password, press 2 [641], [636], [638], [643] [637], [636], [634], [743] [637], [636], [634], [743], [628] [637], [636], [634], [743], [628], [869] To change the personal greeting, [637], [636], [634], [743] press 1 [637], [636], [634], [743], [628]...
- Page 342 MESSAGE MANAGER'S GUIDE Table 81 Prompt Modifiable Prompts Linked to Prompt No. (s) To change, press 1 [647], [603] [532], [647], [392] [533], [647], [392] [647], [603], [661] [647], [603], [682] [647], [603], [733], [608], [692], [740], [693] [647], [603], [733], [608], [692], [740], [693], [691] [647], [613] [647], [603], [721]...
- Page 343 MESSAGE MANAGER'S GUIDE Table 81 Prompt Modifiable Prompts Linked to Prompt No. (s) To delete the password, press 1 [658], [694] To delete, press 1 [659], [708] [659], [705] [659], [694] To delete, press 2 [612], [660], [733] [612], [660], [733], [604] To delete, press 3 [647], [603], [661] [612], [907], [661], [908]...
- Page 344 MESSAGE MANAGER'S GUIDE Table 81 Prompt Modifiable Prompts Linked to Prompt No. (s) [717], [725], [670] To end this call, press [717], [725], [734], [683], [670] [720], [670] [711], [663], [648], [201], [210], [212], [670] [711], [663], [648], [201], [210], [670] [752], [745], [652], [742], [699], [670] [752], [745], [652], [699], [868], [670] [711], [663], [652], [649], [200], [212], [670]...
- Page 345 MESSAGE MANAGER'S GUIDE Table 81 Prompt Modifiable Prompts Linked to Prompt No. (s) To erase this message, press 3 [717], [706], [679], [726], [753], [208] [717], [724], [706], [679], [726], [734], [683], [753], [698] [717], [706], [679], [753], [208] [717], [724], [706], [679], [734], [683], [753], [698] To erase this prompt and use system [714], [680], [757]...
- Page 346 MESSAGE MANAGER'S GUIDE Table 81 Prompt Modifiable Prompts Linked to Prompt No. (s) To generate system service report, [688] press 1 For flash memory usage report management, press 2 For port usage report management, press 3 For mailbox usage report management, press 4 To generate mailbox parameter report, press 5...
- Page 347 MESSAGE MANAGER'S GUIDE Table 81 Prompt Modifiable Prompts Linked to Prompt No. (s) To let the caller select prompt [759], [760], [761], [696], [605] language, press 4 To make this message private, press 1 [697], [392] To message scan, press 8 [717], [724], [706], [679], [726], [734], [683], [753], [698] [717], [724], [706], [679], [734], [683], [753],...
- Page 348 MESSAGE MANAGER'S GUIDE Table 81 Prompt Modifiable Prompts Linked to Prompt No. (s) To play the previous schedule, press 4 [728], [707], [719], [709] [707], [719], [709] To reach the covering extension, press [710] To receive the message, press 1 [268], [711], [690] [268], [711], [690], [275] [711], [663], [648], [201], [210], [212], [670]...
- Page 349 MESSAGE MANAGER'S GUIDE Table 81 Prompt Modifiable Prompts Linked to Prompt No. (s) To repeat, press 1 [720], [670] [720], [392] To repeat, press 3 [647], [603], [721] To replay the previous message [722] information, press 1 To play the next message's information, press 2 To play the message, press 3 To replay the previous message, press...
- Page 350 MESSAGE MANAGER'S GUIDE Table 81 Prompt Modifiable Prompts Linked to Prompt No. (s) To review, press 3 [611], [657], [733] [639], [603], [733] [647], [603], [733], [608], [692], [740], [693] [647], [603], [733], [608], [692], [740], [693], [691] [647], [603], [733], [608], [692], [693] [647], [603], [733], [608], [692], [693], [691] [612], [660], [733] [612], [660], [733], [604]...
- Page 351 MESSAGE MANAGER'S GUIDE Table 81 Prompt Modifiable Prompts Linked to Prompt No. (s) To set leaving a message status, press [741] To set covering extension transfer status, press 2 To set intercom paging status, press 3 To set beeper access status, press 4 To set operator transfer status, press 5 To set returning to top menu automated attendant service status,...
- Page 352 MESSAGE MANAGER'S GUIDE Table 81 Prompt Modifiable Prompts Linked to Prompt No. (s) To specify the mailbox range, press 1 [751], [727] [751], [650] To transfer General Delivery Mailbox [752], [745], [652], [742], [699], [670] messages, press 1 [752], [745], [652], [742], [699], [868], [670] To transfer this message, press 7 [717], [706], [679], [726], [753], [208] [717], [724], [706], [679], [726], [734], [683],...
- Page 353 MESSAGE MANAGER'S GUIDE Table 81 Prompt Modifiable Prompts Linked to Prompt No. (s) TWELVE [HOUR] [769] TWELVE [MINUTE] [770] TWENTY [771] TWENTY [HOUR] [772] TWENTY [MINUTE] [773] TWENTY EIGHT [774] TWENTY EIGHT [MINUTE] [775] TWENTY EIGHTH [776] TWENTY FIFTH [777] TWENTY FIRST [778] TWENTY FIVE...
- Page 354 MESSAGE MANAGER'S GUIDE Table 81 Prompt Modifiable Prompts Linked to Prompt No. (s) TWENTY THREE [799] TWENTY THREE [HOUR] [800] TWENTY THREE [MINUTE] [801] TWENTY TWO [802] TWENTY TWO [HOUR] [803] TWENTY TWO [MINUTE] [804] TWENTYTH [805] [806] TWO [HOUR] [807] TWO [MINUTE] [808]...
- Page 355 MESSAGE MANAGER'S GUIDE Table 81 Prompt Modifiable Prompts Linked to Prompt No. (s) You can add up to (number) [821], [335] [821], [334] You can enter up to (number) [865], [822], [ 82] [411], [822], [ 82] [411], [822], [ 82], [820] [121], [822], [ 82] [875], [822], [ 82] You can not add any more digits...
- Page 356 MESSAGE MANAGER'S GUIDE Table 81 Prompt Modifiable Prompts Linked to Prompt No. (s) Lunch mode second operator's [839] extension is (extension number) Lunch mode second operator's [840] extension is not assigned Lunch mode third operator's [841] extension is (extension number) Lunch mode third operator's [842] extension is not assigned...
- Page 357 MESSAGE MANAGER'S GUIDE Table 81 Prompt Modifiable Prompts Linked to Prompt No. (s) To forward busy or no answer calls, [849], [850], [851], [852], [853], [854] press 4 [849], [850], [851], [852], [854] To forward to a CO line, press 5 [849], [850], [851], [852], [853], [854] To cancel call forwarding, press 6 [849], [850], [851], [852], [853], [854]...
- Page 358 MESSAGE MANAGER'S GUIDE Table 81 Prompt Modifiable Prompts Linked to Prompt No. (s) To change Telephone number 1, press [870] To change Telephone number 2, press Telephone number 1 is not assigned [871] Telephone number 1 is (telephone [872] number) Telephone number 2 is not assigned [873] Telephone number 2 is (telephone...
- Page 359 MESSAGE MANAGER'S GUIDE Table 81 Prompt Modifiable Prompts Linked to Prompt No. (s) To set up mailbox, press 1 [887] To set class of service, press 2 To set the clock, press 3 To change service mode setting, press For port setting, press 1 [888] For trunk setting, press 2 Enter the port number...
- Page 360 MESSAGE MANAGER'S GUIDE Table 81 Prompt Modifiable Prompts Linked to Prompt No. (s) Current service mode is Manual Day [902] mode Current service mode is Manual [903] Night mode Current service mode is Manual [904] Lunch mode Current service mode is Manual [905] Break mode Current service mode is PBX Control...
- Page 361 MESSAGE MANAGER'S GUIDE Receive Message Table 83 [317] Message recorded by (mailbox number) [325] Message transferred via (mailbox number) [ 13] and transferred via (mailbox number) [ 12] and (mailbox number) [ 12] and (mailbox number) [318] Message recorded on (date) [824] You have (number) [ 17]...
- Page 362 MESSAGE MANAGER'S GUIDE External Message Delivery Table 88 [158] External delivery message scheduled for [592] This message is from (name) (name) [379] on (date) [377] of (company name) [ 17] at (time) [157] External delivery message for (name) [161] External delivery message will be sent to [815] was erased (name)
-
Page 363: Glossary
Glossary Glossary Alternate Extension Group Transfers the call coming into the extensions in this group following the sequence specified by "Alternate Extension Transfer Sequence". APT Integration Digital Integration between the KX-TA series and the VPS. Auto Configuration (Available with APT/DPT Integration only.) The VPS can automatically draw information from the KX-TA series, the KX-TD816 or the KX-TD1232. - Page 364 Glossary Called Party ID (Sometimes referred to as Follow-On ID) Allows the PBX to dial extra digits to bring the caller directly to a specified mailbox, rather than to the General Delivery Mailbox. Caller ID Call Routing (Available with APT/DPT Integration only.) The VPS automatically sends calls from pre- assigned Caller ID numbers to the desired extension, mailbox (including System Group Distribution List) or Custom Service.
- Page 365 Glossary Delayed Ringing There are 2 kinds of delayed ringing applications: (1) The VPS is used as the no-answer destination for the Intercept Routing feature of your PBX. (2) DIL 1:N (outside [CO] line to several extensions) terminates on telephones and VPS ports.
- Page 366 Glossary External Message Delivery List Allows the subscriber to create 2 lists to deliver messages to outside parties. Each list can have 8 destinations. External Message Delivery Redial Allows the System Administrator to instruct the VPS when making external message deliveries how many attempts to make when the line is busy or when there is no answer.
- Page 367 Glossary Incomplete Call Handling Service Calls are considered incomplete when there is no answer or if the line is busy. There are 6 options for the Incomplete Call Handling Service: (1) to record a message from the caller, (2) transfer the caller to a covering extension, (3) page the mailbox owner via the PBX, (4) notify the mailbox owner via beeper, (5) transfer the caller to the operator, or...
- Page 368 Glossary Logical Extension (All Calls Transfer to Mailbox) An extension that always receives calls directly into its mailbox. This feature is used by subscribers who are often unavailable or who do not have a telephone. Mailbox Capacity (messages) The number of messages that can be recorded in a subscriber's mailbox: should be set between 5 and 100 messages by the System Administrator or the System Manager.
- Page 369 Glossary Message Waiting Lamp Light on proprietary telephones that lights when there are messages in the mailbox. Message Waiting Notification The VPS can notify subscribers and the Message Manager when they have received messages (if authorised by the System Administrator or the System Manager). There are 3 notification methods: (1) by the Message Waiting Lamp, (2) by a telephone, or (3) by a beeper.
- Page 370 Glossary Personal Greeting for Caller ID (Available with APT/DPT Integration only.) A subscriber can record up to 4 personal greeting messages for calls from pre-assigned Caller ID numbers. Each greeting supports up to 8 Caller ID numbers. Personal Group Distribution List A subscriber can maintain up to 4 distribution lists, each containing a maximum of 20 mailboxes.
- Page 371 Glossary Remote Call Forward to CO (Available with DPT Integration only.) Allows the System Administrator to program Telephone number 1 and Telephone number 2 as the destination to which the callers are forwarded when the Remote Call Forwarding is set to an outside (CO) line. This feature must be enabled in the COS (Class of Service) setting to be utilised.
- Page 372 Glossary System Administrator Unlike the Message Manager and the System Manager, who use a telephone to perform their duties, the System Administrator uses a personal computer to program the VPS. The System Administrator’s handbook is the Installation Manual. System External Message Delivery Duration Time The maximum time allowed for an external message that is to be delivered by the VPS, specified by the System Administrator.
- Page 373 Voice Mail A general term used for messages recorded over the phone from one person to another. Voice Prompt Recorded VPS instructions to callers. These are either system prompts or user prompts. Voice Processing System (e.g., Panasonic KX-TVP50). Installation Manual...
- Page 374 Glossary Installation Manual...
-
Page 375: Index
INDEX INDEX... - Page 376 INDEX Flash Memory Expansion Capabilities Alternate extension group APT integration Auto configuration Group distribution list—personal Auto forwarding Group distribution list—system Automated attendant Hardware settings Broadcasting messages Hold Busy coverage mode Holiday service Call services Inband Integration Call Transfer No Answer Time Incomplete call handling service Call transfer status Initializing the system...
- Page 377 INDEX Quick setup Receive message Remote Call Forwarding Set Rotary telephone service RS-232C parameters SAVE Service access commands Service mode Special feature authorization Specifications—outline Specifications—VPS Subscriber service prompt selection System administration System administrator's guide System clock System components System management System manager's guide System reports Time service...
- Page 378 INDEX...
- Page 379 INDEX...
- Page 380 Kyushu Matsushita Electric Co., Ltd. 1-62, 4-chome, Minoshima, Hakata-ku, Fukuoka 812-8531, Japan Copyright: This manual is copyrighted by Kyushu Matsushita Electric Co., Ltd. (KME). You may print out this manual solely for internal use with this model. Except above, you may not reproduce this manual in any form, in whole or part, without the prior written consent of KME.