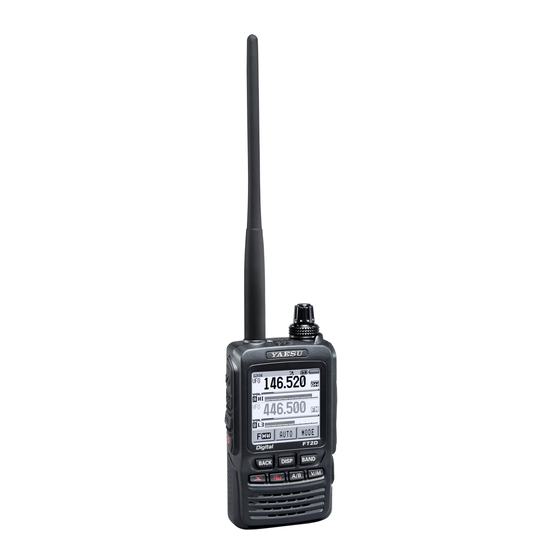
Yaesu FT2DR Instruction Manual
144/430 mhz digital analog transceiver
Hide thumbs
Also See for FT2DR:
- Operating instructions manual (173 pages) ,
- Operating manual (173 pages) ,
- Instruction manual (80 pages)
Table of Contents
Advertisement
Quick Links
FT2DR
Instruction Manual
(WIRES-X Edition)
Thank you for purchasing this Yaesu product.
This instruction manual explains information related to the "WIRES-X Function".
For information on basic operation of the transceiver, please refer to the supplied
FT2DR Operating Manual.
Company names and products in this manual are trademarks or
registered trademarks of the respective company.
144/430 MHz
DIGITAL/ANALOG TRANSCEIVER
C4FM/FM
Advertisement
Table of Contents

Related Manuals for Yaesu FT2DR


Summary of Contents for Yaesu FT2DR
- Page 1 DIGITAL/ANALOG TRANSCEIVER C4FM/FM Instruction Manual (WIRES-X Edition) Thank you for purchasing this Yaesu product. This instruction manual explains information related to the “WIRES-X Function”. For information on basic operation of the transceiver, please refer to the supplied FT2DR Operating Manual.
-
Page 2: Table Of Contents
Using the WIRES-X Contents Listening to audio messages..........37 What is WIRES-X? ..............3 Terminology ..............4 Listening to emergency information in the local node...38 Entering Letters .................7 Listening to routine messages in local nodes ....38 Connecting to a Faraway Station Using WIRES-X ....7 Listening to routine messages on the WIRES-X Finding a local node .............7 server (INT NEWS) ............39... -
Page 3: What Is Wires-X
What is WIRES-X? WIRES (Wide-coverage Internet Repeater Enhancement System) is an Internet communication system which expands the range of amateur radio communication. By relaying radio signals via the Internet, stations can be connected where radio waves cannot reach each other. WIRES uses local nodes (stations connected to the Internet via PCs) as access points which repeat communications of conventional amateur radio stations. -
Page 4: Terminology
What is WIRES-X? Terminology ■ Node Radio repeater connected to the Internet via a PC, which repeats communications of conventional amateur radio stations as an access point ● Local node Node within the radio communication range of a conventional amateur radio station ●... - Page 5 What is WIRES-X? ■ WIRES-X user ID YAESU provides identification names with the WIRES-X nodes. For each node, a DTMF ID (5-digit number) and user ID (alphanumeric characters consisting of up to 10 digits) are provided. If you know the ID of the node you want to connect with, you can transmit the DTMF code from the transceiver, and directly specify the node to connect to by searching by characters (only for digital nodes).
- Page 6 PC. The owner can also delete data and change information such as its name and attribution. The WIRES-X server also has its own news station (INT NEWS) where you can read information and data supplied by YAESU. Internet connection JF7XXX...
-
Page 7: Entering Letters
Entering Letters You assign names to categories, etc., using alphanumeric characters. For details on how to enter letters, refer to “Entering Letters” on page 19 in the FT2DR Operating Manual. Connecting to a Faraway Station Using WIRES-X Finding a local node To communicate using WIRES-X, a WIRES-X node station (local node) must be established within radio contact range of the user transceiver. -
Page 8: Connecting To Local Nodes
Connecting to a Faraway Station Using WIRES-X Connecting to local nodes Rotate the DIAL to set the A-band to the frequency of the desired local node. You can directly enter the frequency using the numerical keypad by touching the A-band display. Press the key. - Page 9 Connecting to a Faraway Station Using WIRES-X Connected to the local node, but unable to connect to Internet nodes or rooms (never before established connection to Internet nodes or rooms) Connected to the local node, but unable to connect to Internet nodes or rooms (previously succeeded in establishing connection to Internet nodes or rooms) Connected to the local node, successfully connected to an Internet node or room (the Internet node or room...
-
Page 10: Connecting To A Node Or Room On The Internet
Connecting to a Faraway Station Using WIRES-X When is displayed, rotate the DIAL. Call signs of nodes and rooms on the Internet you previously connected to flash. While [ X ] is flashing, briefly press the key to re-establish connection to the local node. When any local node cannot be found, [ X ] will disappear in 30 seconds. - Page 11 Connecting to a Faraway Station Using WIRES-X Touch the node or room you want to connect to. Starts connection. By pressing , you can also establish connection while talking. Once connection is successfully established, the menu list of the node (room) you are connected to will appear. If connection is unsuccessful, an error message appears and the screen returns to the list of nodes and rooms.
- Page 12 Connecting to a Faraway Station Using WIRES-X Enter all or part of the room name. The characters you have just entered appear on the screen. For details on how to enter letters, refer to “Entering Letters” on page 7. Touch [ENT]. If connection destinations with the first part of a name partially matching the name you entered are found, they will be listed.
- Page 13 Connecting to a Faraway Station Using WIRES-X ● Connecting to the node or room you have most recently connected If you have previously connected to a node or room on the Internet, it appears and flashes at the bottom of the screen. Touch the flashing node or room to start connection, and once connection is established, the menu list of the node (room) you are connected to will appear.
-
Page 14: Communicating With Others
Connecting to a Faraway Station Using WIRES-X Touch [ID]. Displays the DTMF input screen. Enter the 5-digit DTMF ID. Touch [ENT]. Once connection is successfully established, the node or room appears on the bottom part of the screen. Touch the node or room on the bottom part of the screen. -
Page 15: Useful Functions In Digital Mode
Connecting to a Faraway Station Using WIRES-X Useful functions in digital mode Using preset channels Programming (presetting) a channel frequency allows you to easily connect to a local node. By sharing a channel frequency with other nodes, you can connect the transceiver to a local node even while you are out. - Page 16 Connecting to a Faraway Station Using WIRES-X Rotate the DIAL to select [PRESET], then press the key. Displays the frequency. Tips • Every time the DIAL is rotated, the setting switches between [MANUAL] and [PRESET]. • The default setting is MANUAL. Rotate the DIAL to select the frequency.
-
Page 17: Connecting To Registered Nodes Or Rooms
Connecting to a Faraway Station Using WIRES-X When a local node is found, [ X ] lights up, and the node name and city name appear on the bottom part of the screen. P ] disappears in 30 When any local node cannot be found, seconds. - Page 18 Connecting to a Faraway Station Using WIRES-X Touch [WIRES-X]. Displays the menu list. Touch [3 EDT CATEGORY TAG]. Displays the category name setting screen. Rotate the DIAL to select one of [C1] to [C5], then press key. Displays the character input screen. Enter the category name.
- Page 19 Connecting to a Faraway Station Using WIRES-X Press the key. Returns the screen to the menu list. Repeat steps 3 to 6 to set more category names. Press the key two times. Sets the category name and returns the screen to the frequency display screen. ●...
- Page 20 Connecting to a Faraway Station Using WIRES-X Touch the desired category. The name of the node or room you are currently connected to is added to the list of the registered node and room lists. Press the key. Returns the screen to the menu list. ●...
-
Page 21: Releasing The Wires-X Connection
Connecting to a Faraway Station Using WIRES-X Touch the node or room you want to connect to. Starts connection. By pressing , you can also establish connection while talking. If connection is successful, the menu list of the node or room you are connected to appears. -
Page 22: Connecting To Analog Nodes
Connecting to a Faraway Station Using WIRES-X Connecting to analog nodes When the node you want to connect to is an analog station, use the DTMF function on the transceiver. For details on how to use the DTMF function, refer to “Using the DTMF Function”... -
Page 23: Communicating With Others
Connecting to a Faraway Station Using WIRES-X Communicating with others Press The transceiver switches to transmission mode. Speak into [MIC]. Place the microphone about 5 cm away from your mouth when you speak. Caution Do not continuously transmit over an extended period of time to reduce the risk of overheating, malfunction, or injury. -
Page 24: Confirming The Frequency
Connecting to a Faraway Station Using WIRES-X Confirming the frequency On the WIRES-X screen, press to change to the frequency display screen that was displayed before using WIRES-X. Press again to return to the WIRES-X screen. [Dual band screen] [Single band screen]... -
Page 25: Returning To The Initial Screen
Connecting to a Faraway Station Using WIRES-X [When viewing text data of the local node] Returning to the initial screen While on the WIRES-X screen, press and hold for over one second to display the frequency display screen. On the frequency display screen, press and hold for over one second to return to the WIRES-X startup screen (initial screen). -
Page 26: Using The News Function Of Wires-X
Using the News Function of WIRES-X When using WIRES-X in digital mode, you can transmit/receive messages (text data) and images; you can also record/play audio messages. Viewing messages You can read messages (text data) that are transmitted/received by either a local node, or a node or room on the Internet, from the transceiver. - Page 27 Using the News Function of WIRES-X Touch [DOWNLOAD]. Displays the data type select screen. Touch [MESSAGE]. If data reception is successful, the list of data appears. The list shows the registered data in reverse chronological order. Touch the message you want to view. Downloads the data and displays the content of the message.
-
Page 28: Viewing Text Data On The Wires-X Server (Int News)
Not available on the last list. Viewing text data on the WIRES-X server (INT NEWS) You can read text information provided by Yaesu on the WIRES-X server from the transceiver. Touch the local node, or node or room you want to connect to. - Page 29 Using the News Function of WIRES-X Touch [INT NEWS]. Displays the menu of the WIRES-X server. Touch [NEWS STATION]. Displays the data type select screen. Touch [MESSAGE]. If data reception is successful, the list of data appears. The list shows the registered data in reverse chronological order.
-
Page 30: Viewing Text Data In Nodes Or Rooms On The Internet
Using the News Function of WIRES-X Downloads the data and displays the content of the message. Press the key. Returns the screen to the data list. Viewing text data in nodes or rooms on the Internet Touch the node or room on the Internet you want to connect to. - Page 31 Using the News Function of WIRES-X Touch [MESSAGE]. If data reception is successful, the list of data appears. The list shows the registered data in reverse chronological order. Touch the message you want to view. Downloads the data and displays the content of the message.
-
Page 32: Importing Images
Using the News Function of WIRES-X Importing images You can import images transmitted/received by either a local node, or a node or room on the Internet onto the transceiver. Cautions z To import images, insert a microSD memory card into the transceiver in advance. For details, refer to “Using a microSD Memory Card”... -
Page 33: Importing Images From The Wires-X Server (Int News)
In such a case, “Memory is full” appears, and then the screen returns to the data list. Importing images from the WIRES-X server (INT NEWS) You can import images provided by Yaesu on the WIRES-X server onto the transceiver. Follow steps 1 to 4 in “Viewing text data on the WIRES-X server (INT NEWS)” on page 28 to display the data type select screen. -
Page 34: Importing Data From Nodes Or Rooms On The Internet
Using the News Function of WIRES-X Touch [OK]. Starts downloading and “Waiting” appears. After data import completes, the image appears. To save the data onto the microSD memory card, touch [SAVE]. If you do not want to save the data onto the microSD memory card, touch [DEL]. “Waiting”... -
Page 35: Viewing Imported Data Later
Using the News Function of WIRES-X Follow step 3 in “Importing images from local nodes” on page 32 to import data. Caution readies the transceiver to transmit audio to When the category list or data list is displayed, pressing node or room on the Internet you are currently connected to. Viewing imported data later You can also view the imported data later. - Page 36 Using the News Function of WIRES-X Touch [MESSAGE] or [PICT]. Displays the data list. The list shows the registered data in reverse chronological order. Touch the data you want to view. Displays the content of the message or the image. Press the key.
-
Page 37: Deleting Imported Data
Using the News Function of WIRES-X Deleting imported data Deleting a file Follow steps 1 to 5 “Viewing imported data later” on page 35 to display the content of the message or image data. Touch [DEL]. The confirmation message appears. Touch [OK]. -
Page 38: Listening To Emergency Information In The Local Node
Using the News Function of WIRES-X Listening to emergency information in the local node Follow steps 1 to 2 in “Viewing text data in local nodes” on page 26 to display the menu list of the local node. Touch [EMERGENCY]. Displays the data list. -
Page 39: Listening To Routine Messages On The Wires-X Server (Int News)
Using the News Function of WIRES-X Touch the audio file you want to play. Starts audio playback. “DOWNLOAD” appears and flashes. After playback ends, the screen returns to the data list. During key to display the sender’s location information at the time the audio playback, press the audio file was recorded. -
Page 40: Listening To Routine Messages In Nodes Or Rooms On The Internet
Using the News Function of WIRES-X Touch the audio file you want to play. Starts audio playback. “DOWNLOAD” appears and flashes. After playback ends, the screen returns to the menu list of the node or room you are connected to. During key to display the sender’s location information at the time the audio playback, press the... -
Page 41: Transmitting Messages And Images
Using the News Function of WIRES-X Transmitting messages and images You can transmit data such as messages (text data) and images saved on the microSD memory card inserted into the transceiver, to a local node, or a node or room on the Internet. - Page 42 Using the News Function of WIRES-X Touch [EDIT]. Enter a message. For details on how to enter letters, refer to “Entering Letters” in the FT2DR Operating Manual on page 19. The characters you have just entered appear on the top part of the screen.
-
Page 43: Transmitting Saved Messages Or Images To Local Nodes
Using the News Function of WIRES-X Transmitting saved messages or images to local nodes Follow steps 1 to 2 in “Creating and transmitting messages to local nodes” on page 41 to display the data type select screen. Touch [MESSAGE] or [PICT]. Displays the data list. -
Page 44: Creating And Transmitting Messages To Nodes Or Rooms On The Internet
Using the News Function of WIRES-X Creating and transmitting messages to nodes or rooms on the Internet Display the menu list of the node or room on the Internet. Touch [NEWS STATION]. Displays the upload (transmission)/download (reception) select screen. Touch [UPLOAD]. Displays the data type select screen. -
Page 45: Transmitting Audio Messages
Using the News Function of WIRES-X Transmitting audio messages You can transmit audio messages spoken into the microphone as data to a local node, or node or room on the Internet. Audio files are categorized into the following 2 types: EMERGENCY: Emergency information. -
Page 46: Transmitting Routine Voice Messages To Local Nodes
Using the News Function of WIRES-X Transmitting routine voice messages to local nodes Follow steps 1 to 3 in “Viewing text data in local nodes” on page 26 to display the upload (transmission)/download (reception) select screen. Touch [UPLOAD]. Displays the data type select screen. While pressing speak into [MIC]. -
Page 47: Transmitting Routine Messages To Nodes Or Rooms On The Internet
Using the News Function of WIRES-X Transmitting routine messages to nodes or rooms on the Internet Follow steps 1 to 2 in “Creating and transmitting messages to nodes or rooms on the Internet” on page 44 to display the upload (transmission)/download (reception) select screen. -
Page 48: Using Wires-X And The Gm Function Simultaneously
Using WIRES-X and the GM Function Simultaneously You can use WIRES-X even when using the GM (Group Monitor) function on the transceiver. By forming a group including local nodes and operating the GM function, group members can also utilize WIRES-X to communicate with nodes or rooms on the Internet, including exchanging data. - Page 49 Using WIRES-X and the GM Function Simultaneously Touch the local node. The local node appears and flashes. Touch [GROUP]. Displays the group list. Touch the group to which you want to register the local node. Registers the local node to the selected group. Press Returns the screen to the frequency display screen.
-
Page 50: Confirming The Frequency
Using WIRES-X and the GM Function Simultaneously Confirming the frequency While on the group list screen or the WIRES-X screen, press to switch to the frequency screen that was displayed before starting GM operation. Pressing again returns the screen to the group list or WIRES-X screen. Returning to the group list screen While on the WIRES-X screen, press and hold for over one second to return to the... -
Page 51: Wires-X Setting Mode Menus
WIRES-X Setting Mode Menus WIRES-X setting mode list Setting items Menu/Item Functions (Bold items are default settings.) Setting the operating 1 RPT/WIRES FREQ frequencies for repeaters/ MANUAL/PRESET WIRES-X 144.000 to 146.000 145.780 Setting preset frequencies 430.000 to 440.000 438.980 Setting the item order on the node 2 SEARCH SETUP HISTORY/ACTIVITY &... - Page 52 WIRES-X Setting Mode Menus Touch [1 RPT/WIRES FREQ]. Displays the selection items. Rotate the DIAL to select [MANUAL] or [PRESET]. Every time the DIAL is rotated, the setting switches between [MANUAL] and [PRESET]. MANUAL: Set the frequency every time you look for a local node.
-
Page 53: Setting The Item Order On The Node & Room Lists
WIRES-X Setting Mode Menus Setting the item order on the node & room lists You can select the criteria to sort the list of connection destinations on the Internet. Press and hold the key for over one second. Switches the transceiver to setting mode. Touch [WIRES-X]. -
Page 54: Deleting The Registered Nodes And Rooms
WIRES-X Setting Mode Menus Deleting the registered nodes and rooms You can delete nodes and rooms registered in the 5 categories. Press and hold the key for over one second. Switches the transceiver to setting mode. Touch [WIRES-X]. Displays the menu list. Touch [4 REMOVE ROOM/NODE]. - Page 55 WIRES-X Setting Mode Menus Touch [OK]. Deletes the selected node or room. Touch the key twice. Returns the screen to the frequency display screen.
- Page 56 Copyright 2015 YAESU MUSEN CO., LTD. All rights reserved. No portion of this manual may be reproduced without the permission of YAESU MUSEN CO., LTD. 1506-A0...