
Related Manuals for Daikin altherma EMRQ8AAY1


Summary of Contents for Daikin altherma EMRQ8AAY1
-
Page 1: Installation Manual
INSTALLATION MANUAL Daikin Altherma outdoor unit EMRQ8AAY1 EMRQ10AAY1 EMRQ12AAY1 EMRQ14AAY1 EMRQ16AAY1... - Page 2 2PW40200-11P...
- Page 3 2PW40200-11P...
-
Page 4: Table Of Contents
EMRQ8AAY1 EMRQ14AAY1 Installation manual Daikin Altherma outdoor unit EMRQ10AAY1 EMRQ16AAY1 EMRQ12AAY1 13. Charging refrigerant..............22 ONTENTS Page 13.1. Precautions .................. 22 1. Definitions.................. 2 13.2. Important information regarding the refrigerant used ....23 13.3. Calculating the additional refrigerant charge ....... 23 2. -
Page 5: Definitions
Be sure only to use accessories and optional equipment made by Daikin which are specially designed for use with Caution: the products as of subject in this manual and have them installed by Indicates a potentially hazardous situation which, if not avoided, may an installer. -
Page 6: Combination And Options
Accessory joint — — — — (1) EKHBRD connection is possible for EKHBRD_ABX and EKHBRD_AC. Connection is NOT possible for EKHBRD_AA or EKHBRD_AB models. For more details, see technical data book. Installation manual EMRQ8~16AAY1 Daikin Altherma outdoor unit 4PW61262-1B – 2013.11... -
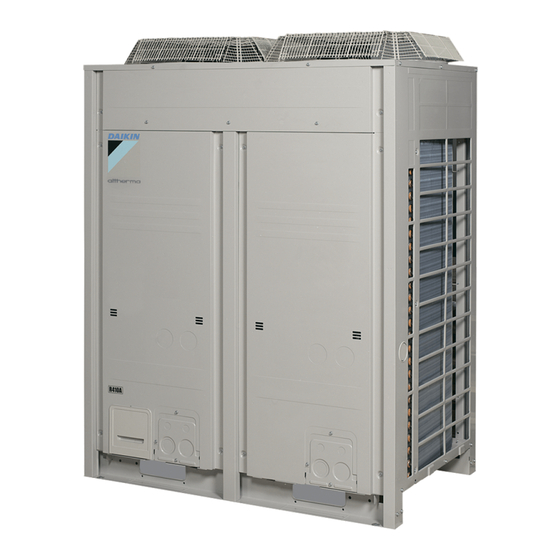
Page 7: Overview Of Unit
"Field settings by push buttons" on page DANGER: ELECTRICAL SHOCK "2. General Safety precautions" on page DANGER: DO NOT TOUCH PIPING AND INTERNAL PARTS "2. General Safety precautions" on page EMRQ8~16AAY1 Installation manual Daikin Altherma outdoor unit 4PW61262-1B – 2013.11... -
Page 8: Main Components In The Unit
Service port (refrigerant charge) Stop valve (liquid pipe) Stop valve (suction pipe) Stop valve (discharge gas pipe) 11 12 22 23 24 17 16 15 8 13 S2PH S1PH SENPL S2NPL Installation manual EMRQ8~16AAY1 Daikin Altherma outdoor unit 4PW61262-1B – 2013.11... -
Page 9: Main Components In The Switch Box
Cable tie mountings. The cable tie mountings allow to fix the field wiring with cable ties to the switch box to ensure strain relief. Magnetic contactor K2M Current sensor PCB EMRQ8~16AAY1 Installation manual Daikin Altherma outdoor unit 4PW61262-1B – 2013.11... -
Page 10: Selecting An Installation Location
Leaked gas may accumulate around the unit, causing an explosion. ■ When installing, take strong winds, typhoons or earthquakes into account. Improper installation may result in the unit turning over. Installation manual EMRQ8~16AAY1 Daikin Altherma outdoor unit 4PW61262-1B – 2013.11... -
Page 11: Weather Dependent Precautions
IMENSIONS AND SERVICE SPACE 7.1. Dimensions of outdoor unit 1162 Baffle plate 129 160 1032 1109 1300 (distances shown are in mm) Pitch of foundation bolt holes (15x22.5 oblong holes) EMRQ8~16AAY1 Installation manual Daikin Altherma outdoor unit 4PW61262-1B – 2013.11... -
Page 12: Service Space
A forklift can only be used for transport as long as the unit remains on its pallet as shown above. (distances shown are in mm) A B C D Sides along the installation site with obstacles Suction side Installation manual EMRQ8~16AAY1 Daikin Altherma outdoor unit 4PW61262-1B – 2013.11... -
Page 13: Unpacking
■ When installed corrosive environment, use a nut with plastic washer (1) to protect the nut tightening part from rust. EMRQ8~16AAY1 Installation manual Daikin Altherma outdoor unit 4PW61262-1B – 2013.11... -
Page 14: Refrigerant Pipe Size And Allowable Pipe Length
(Hp) Suction gas pipe pipe Liquid pipe 19.1 15.9 22.2 19.1 28.6 19.1 12.7 14+16 28.6 22.2 12.7 NOTE Never increase suction gas pipe and discharge gas pipe sizes. Installation manual EMRQ8~16AAY1 Daikin Altherma outdoor unit 4PW61262-1B – 2013.11... -
Page 15: Selection Of Refrigerant Branch Kits
Example 1: Branch with refnet joint range of the maximum allowable pipe length, allowable level difference and allowable length after branching as indicated above. Example 2: Branch with refnet joint and refnet header EMRQ8~16AAY1 Installation manual Daikin Altherma outdoor unit 4PW61262-1B – 2013.11... -
Page 16: Precautions On Refrigerant Piping
Installation of refrigerant piping is possible as front connection or side connection (when taken out from the bottom) as shown in the figure below: Left-side connection Front connection Right-side connection Installation manual EMRQ8~16AAY1 Daikin Altherma outdoor unit 4PW61262-1B – 2013.11... - Page 17 Recover gas and oil from the pinched piping by using a recovery unit. Do not vent gases into the atmosphere. When all gas and oil is recovered from the pinched piping, disconnect the charge hose and close the service ports. EMRQ8~16AAY1 Installation manual Daikin Altherma outdoor unit 4PW61262-1B – 2013.11...
- Page 18 Make sure that the onsite piping does not come in contact with other piping, the bottom frame or side panels of the unit. The connections above to the branch kits, are the responsibility of the installer (field piping). Installation manual EMRQ8~16AAY1 Daikin Altherma outdoor unit 4PW61262-1B – 2013.11...
-
Page 19: Guidelines For Handling Stop Valve
Closing direction to increase efficiency (refer to "Set-up" on page 17). Liquid side Gas side NOTE Do not purge the air with refrigerants. Use a vacuum pump to evacuate the installation. EMRQ8~16AAY1 Installation manual Daikin Altherma outdoor unit 4PW61262-1B – 2013.11... -
Page 20: Installation Of Refrigerant Piping, Leak Test, Vacuuming Before Electrical Installation Is Done (Regular Installation Method)
firmly closed before performing leak test or vacuum drying. "Set-up" on page "Leak test" on page 18, and "Vacuum drying" on page Installation manual EMRQ8~16AAY1 Daikin Altherma outdoor unit 4PW61262-1B – 2013.11... -
Page 21: Leak Test
Leak test and vacuum drying should be done before the power supply is set to the unit. If not, see "10.4. Leak test and vacuum drying" on page 16 more information. EMRQ8~16AAY1 Installation manual Daikin Altherma outdoor unit 4PW61262-1B – 2013.11... -
Page 22: Electrical Wiring Work
(2) European/International Technical Standard setting the limits for harmonic currents produced by equipment connected to public low-voltage systems with input current >16 A and ≤75 A per phase. Installation manual EMRQ8~16AAY1 Daikin Altherma outdoor unit 4PW61262-1B – 2013.11... -
Page 23: System Overview Of Field Wiring
Field piping can be routed from left, right or front. Refer to "10.2. Connecting the refrigerant piping" on page ......Terminal ......Protective earth (screw) BLK......Black BLU......Blue BRN ....... Brown GRN....... Green GRY ....... Grey EMRQ8~16AAY1 Installation manual Daikin Altherma outdoor unit 4PW61262-1B – 2013.11... -
Page 24: Power Supply Routing
Wiring between the units (Indoor - outdoor) (F1+F2 left) holes. Internal transmission wiring (Q1+Q2) Plastic bracket Field supplied clamps Care should be taken for connecting the wires to the terminal block. Installation manual EMRQ8~16AAY1 Daikin Altherma outdoor unit 4PW61262-1B – 2013.11... -
Page 25: Charging Refrigerant
It states the type of refrigerant and necessary amount. earth wire is in case the power supply is pulled loose from the stress relief. EMRQ8~16AAY1 Installation manual Daikin Altherma outdoor unit 4PW61262-1B – 2013.11... -
Page 26: Important Information Regarding The Refrigerant Used
Sticking instructions are illustrated on the backside of that label. ■ For EKHVMYD System liquid piping System discharge piping System suction piping Installation manual EMRQ8~16AAY1 Daikin Altherma outdoor unit 4PW61262-1B – 2013.11... -
Page 27: System With Different Indoor Unit Types
■ Always use protective gloves and protect your eyes when charging refrigerant. System suction piping Distance Correction factor (A) Pipe system a+b+c+d+e+f+g+p h+i+j+k+l+n Refnet Refnet type A+B+C+D+E+G KHRQ22* KHRQ23* EMRQ8~16AAY1 Installation manual Daikin Altherma outdoor unit 4PW61262-1B – 2013.11... -
Page 28: Charging Method
"Field settings by push buttons" on page 27 further explanation on how to do the necessary settings. Push the BS1 MODE button for 5 sec, the H1P LED is on Installation manual EMRQ8~16AAY1 Daikin Altherma outdoor unit 4PW61262-1B – 2013.11... -
Page 29: Start-Up And Configuration
If the recovery is unsuccessfull, call your local dealer. Do not touch any refrigerant which has leaked out of refrigerant piping connections. This may result in frostbite. EMRQ8~16AAY1 Installation manual Daikin Altherma outdoor unit 4PW61262-1B – 2013.11... -
Page 30: Field Settings By Push Buttons
For field setting Settings which are familiar for VRV series may NOT be BS3 RETURN For field setting applied to this Daikin Altherma outdoor unit. BS4 TEST For test operation BS5 RESET For resetting the address when the wiring is changed or 14.3. -
Page 31: Test Operation
When the test operation is fully completed, normal operation will be possible after 5 minutes. Otherwise, refer to "Correcting after abnormal completion of the test operation" on page 29 to take actions for correcting the abnormality. EMRQ8~16AAY1 Installation manual Daikin Altherma outdoor unit 4PW61262-1B – 2013.11... -
Page 32: Operation Of The Unit
NOTE Play it safe! For protection of the PCB, touch the switch box casing by hand in order to eliminate static electricity from your body before performing service. Installation manual EMRQ8~16AAY1 Daikin Altherma outdoor unit 4PW61262-1B – 2013.11... -
Page 33: Service Mode Operation
This should be done by a refrigerant reclaimer. Pay special attention to places, such as a basements, etc. where Follow the same procedure as for vacuuming method. refrigerant can stay, since refrigerant is heavier than air. EMRQ8~16AAY1 Installation manual Daikin Altherma outdoor unit 4PW61262-1B – 2013.11... -
Page 34: Procedure For Checking Maximum Concentration
(mm) 19.1 22.2 28.6 28.6 28.6 • Discharge (mm) 15.9 19.1 19.1 22.2 22.2 Electrical specifications EMRQ Phase Frequency (Hz) Voltage 380~415 Voltage range • Minimum • Maximum Recommended fuses Installation manual EMRQ8~16AAY1 Daikin Altherma outdoor unit 4PW61262-1B – 2013.11... - Page 36 4PW61262-1B 2013.11...