
Related Manuals for Honeywell MAXPRO 2.5


Summary of Contents for Honeywell MAXPRO 2.5
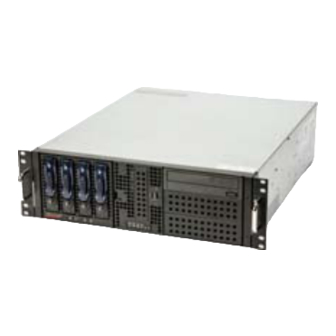
- Page 1 ® MAXPRO NVR 2.5 Commissioning and Installation Guide Document 800-09355V5 – 04/2013...
- Page 2 This page is intentionally left blank.
- Page 3 Revisions Issue Date Description April, 2013 New document...
- Page 4 This page is intentionally left blank.
-
Page 5: Table Of Contents
M A X P R O N V R Table of Contents Table of Contents About This Guide ........11 Overview . - Page 6 M A X P R O N V R Table of Contents Overview ............21 Settings for the MAXPRO NVR Single-box Turnkey Solution .
- Page 7 Configuring MAXPRO NVR ..........56 Configuring the Honeywell cameras with MAXPRO NVR Wizard ..... . . 57 Configuring the System Settings for MAXPRO NVR .
- Page 8 M A X P R O N V R Table of Contents Checking the Creation of Images ........66 Checking the Creation of Clips .
- Page 9 Honeywell ONVIF IP adapter warning message ........
- Page 10 This page is intentionally left blank.
-
Page 11: About This Guide
NVR system. Introducing MAXPRO NVR Honeywell’s MAXPRO NVR line includes turnkey solutions that offer 8 to 32 channels and software solutions that range from 4 to 32 channels. It supports ONVIF and PSIA interoperability standards, as well as RTSP , and features native integration to cameras and... -
Page 12: Introducing Maxpro Nvr
• MAXPRO NVR PE (Professional Edition) supports up to 32 IP cameras. Honeywell’s MAXPRO NVR Single-boxed solution is an ideal solution for entry into IP video surveillance systems. MAXPRO NVR utilizes Honeywell's High-definition cameras to offer a powerful high definition IP recording and security monitoring system for different installations. -
Page 13: Intended Audience
A B O U T T H I S G U I D E Intended Audience solution, but end users will find it as easy as a DVR to configure and operate. MAXPRO NVR Software is an open platform and supports broad third party device integrations with support for PSIA and ONVIF standards, real time streaming protocol (RTSP) standard and native device integrations. -
Page 14: Cautions And Warnings
A B O U T T H I S G U I D E Cautions and Warnings Cautions and Warnings Installation and servicing should be performed only by qualified and experienced technicians to conform to all local codes and to maintain your warranty. WEEE (Waste Electrical and Electronic Equipment). -
Page 15: Important Safeguards
A B O U T T H I S G U I D E Important Safeguards Important Safeguards Read Instructions All the safety and operating instructions should be read before the appliance is operated. Retain Instructions The safety and operating instructions should be retained for future reference. Cleaning Unplug this equipment from the wall outlet before cleaning it. - Page 16 A B O U T T H I S G U I D E Important Safeguards 14. Damage Requiring Service Unplug this equipment from the wall outlet and refer servicing to qualified service personnel under the following conditions: • When the power-supply cord or the plug has been damaged •...
-
Page 17: Warranty And Service
Honeywell will repair or replace, at its sole option, free of charge, any defective products returned prepaid. In the event you have a problem with any Honeywell product, please call Technical Support at 1-800-323-4576 (North America only) for assistance or to request a Return Merchandise Authorization (RMA) number. - Page 18 A B O U T T H I S G U I D E Typographical Conventions Font What it represents Example Heading Installation Cross-reference to external source Refer to the System Administrator Guide. Cross-reference within document See Installation. MAXPRO NVR Commissioning and Installation Guide...
-
Page 19: Commissioning Plan
Installing the Software in the Server and Client Computers Caution: For the Honeywell’s boxed solutions: MAXPRO NVR PE, MAXPRO NVR XE, and MAXPRO NVR SE, the server and client software required is already installed on the box. Hence the instructions in this section for server software fresh installation are NOT applicable. -
Page 20: Configuring Maxpro Nvr
Configuring MAXPRO NVR In this phase, you need to configure the MAXPRO NVR through the user interface. Configuring MAXPRO NVR includes the following: • Configuring the Honeywell cameras with MAXPRO NVR Wizard • Configuring the system level settings • Configuring the disk management settings •... -
Page 21: Setting Up The Maxpro Nvr
Setting up the MAXPRO NVR Overview This chapter describes the settings for setting up the MAXPRO NVR system. • For setting up the MAXPRO NVR Single-box solution, see Settings for the MAXPRO NVR Single-box Turnkey Solution. • For setting up the MAXPRO NVR Software-Only solution, see Settings for the MAXPRO NVR Software-Only Solution. -
Page 22: Settings For The Maxpro Nvr Single-Box Turnkey Solution
S E T T I N G U P T H E M A X P R O N V R Settings for the MAXPRO NVR Single-box Turnkey Solution Settings for the MAXPRO NVR Single-box Turnkey Solution Setting up the MAXPRO NVR unit and client computers is the first phase in the commissioning process. -
Page 23: Connecting The Monitors
This section describes the steps to power on the MAXPRO NVR unit. Note: Honeywell recommends using an Uninterrupted Power Supply (UPS) for the MAXPRO NVR unit and the cameras. Powering the cameras and unit from a UPS ensures that the MAXPRO NVR unit can continue to record video during a power outage. -
Page 24: Lan Properties
S E T T I N G U P T H E M A X P R O N V R Settings for the MAXPRO NVR Single-box Turnkey Solution Note: NIC2 is not available on all NVR options, please refer to the data sheet for more information. - Page 25 OK. The name cannot contain spaces or all numbers or any of the following characters: < >;: “ * + = \ | ?. After changing the computer name, you are prompted to restart the computer. Navigate to the C:\Program Files\Honeywell\MaxproNVR\TrinityFramework\bin folder, and then double-click MaxProNVRMachineNameUtility.exe to open the Maxpro NVR Utility.
-
Page 26: Settings For The Maxpro Nvr Software-Only Solution
S E T T I N G U P T H E M A X P R O N V R Settings for the MAXPRO NVR Software-Only Solution Settings for the MAXPRO NVR Software- Only Solution Setting up the MAXPRO NVR server and client computers is the first phase in the commissioning process. -
Page 27: Maxpro Nvr Distributed System
S E T T I N G U P T H E M A X P R O N V R Settings for the MAXPRO NVR Software-Only Solution MAXPRO NVR Distributed System The following figure illustrates the MAXPRO NVR Distributed system. Figure 2-5 MAXPRO NVR Distributed System MAXPRO NVR Commissioning and Installation Guide... -
Page 28: Configuring The Monitor Display Properties
S E T T I N G U P T H E M A X P R O N V R Configuring the Monitor Display Properties Configuring the Monitor Display Properties The recommended display settings for the monitor are dialog box resolution of 1280 x 1024 pixels and color quality of 65K colors non-interlaced. -
Page 29: Connecting The Keyboard
Keyboards (all the supported models of MAXPRO NVR) can be connected to MAXPRO NVR without any configuration. You can also connect Honeywell’s UltraKey keyboard that represents an industry-leading approach to intelligent, user-friendly control of video management systems. Using the UltraKey keyboard, you can perform actions such as selecting a panel, PTZ operations, selecting a video source such as a camera, and others in the Viewer tab. - Page 30 S E T T I N G U P T H E M A X P R O N V R Connecting the Keyboard This page is intentionally left blank. MAXPRO NVR Commissioning and Installation Guide...
-
Page 31: Installing Maxpro Nvr
Antivirus is not performing any live updates in the background. MAXPRO NVR Software Prerequisites Before you install Honeywell MAXPRO NVR software, please note the MAXPRO NVR Server requirements listed in the following section. MAXPRO NVR Server The computer that is designated as the server must run on one of the following operating systems. -
Page 32: System Requirements
I N S T A L L I N G M A X P R O N V R Overview ® ® Microsoft Windows Server 2008 R2 • Service pack 1 must be installed on the NVR before installing MAXPRO NVR Software. -
Page 33: Maxpro Nvr Software Installation
I N S T A L L I N G M A X P R O N V R MAXPRO NVR Software Installation MAXPRO NVR Software Installation To complete the MAXPRO NVR software installation follow the procedures in these sections. First, How to Install MAXPRO NVR Choose the installation that best suits your requirements, and follow the appropriate... -
Page 34: License Agreement
I N S T A L L I N G M A X P R O N V R How to Install MAXPRO NVR Figure 3-2 License Agreement Read the license agreement, and then click I accept the terms of the license agreement to accept the license agreement. -
Page 35: Validation Of User Credentials
I N S T A L L I N G M A X P R O N V R How to Install MAXPRO NVR Figure 3-4 Choose Destination Folder Click Change if you want to change the destination folder, and then select the folder where MAXPRO NVR must be installed. -
Page 36: Choose Installation Type
I N S T A L L I N G M A X P R O N V R How to Install MAXPRO NVR Note: For Honeywell boxed solutions (XE,SE,PE) the default Windows user name is Administrator and Windows password is Password1. Click Next. A message “Enabling Auto Logon is not secure as the Password will be stored in the Registry. -
Page 37: Full Installation
I N S T A L L I N G M A X P R O N V R Full Installation Full Installation Full installation can be selected to install the Server and Client on the same system. To perform full installation Perform steps 1 through 14 of How to Install MAXPRO NVR, select Full Installation in... -
Page 38: Choose Installation Type
I N S T A L L I N G M A X P R O N V R Full Installation Figure 3-8 Choose Installation Type You have two options to choose. • Click Fresh Installation, if you installing MAXPRO NVR for the first time. Figure 3-9 appears. -
Page 39: Choose Recording Drives
I N S T A L L I N G M A X P R O N V R Full Installation There are two scenarios that you must note here. • For Fresh installation of MAXPRO NVR Database: The default path where the MAXPRO NVR database is created automatically displays for a fresh installation for MAXPRO NVR database. -
Page 40: Summary
I N S T A L L I N G M A X P R O N V R Full Installation Figure 3-11 Summary The approximate time for installing the prerequisites and MAXPRO NVR Products displays. If you want to change any settings, click Back, else click Next. Figure 3-12 appears after the installation is finished. -
Page 41: Reboot Prompt
I N S T A L L I N G M A X P R O N V R Full Installation Click Finish. The installation wizard closes and you are prompted to reboot the computer to complete the MAXPRO NVR installation. Figure 3-13 Reboot prompt Click OK. -
Page 42: Client Installation
I N S T A L L I N G M A X P R O N V R Client Installation Client Installation Client installation gives you an option to install MAXPRO NVR Client on the client workstations. To perform client installation Click Client Installation in Figure 3-6 and click Next. - Page 43 I N S T A L L I N G M A X P R O N V R Client Installation Figure 3-15 Summary If you want to review or change any settings click Back, otherwise click Next The setup status of various components appears.
- Page 44 I N S T A L L I N G M A X P R O N V R Client Installation Click OK. MAXPRO NVR Commissioning and Installation Guide...
-
Page 45: Upgrading Maxpro Nvr
This section describes the procedure for upgrading from MAXPRO NVR (Build 10/Build 11/ Build 15/Build 15 Hotfix/Build 22/Build 23) to MAXPRO NVR 2.5 (Build 29). Honeywell recommends database backup before running the upgrade. Database backup can be done from MAXPRO NVR Agent. -
Page 46: Validation Of User Credentials
Validation of User Credentials Select your Domain Name/Host Name. Type your Windows User Name. Type your Windows Password. Note: For Honeywell boxed solutions (XE,SE,PE) the default Windows user name is Administrator and Windows password is Password1. MAXPRO NVR Commissioning and Installation Guide... -
Page 47: Reboot Prompt
I N S T A L L I N G M A X P R O N V R Upgrading MAXPRO NVR Click Next. Figure 3-20 appears. Figure 3-20 Summary Click Next. The upgrade status of various components appears. After the upgrade is finished, the installation wizard closes and you are prompted to reboot the computer. -
Page 48: Uninstalling Maxpro Nvr
I N S T A L L I N G M A X P R O N V R Uninstalling MAXPRO NVR Uninstalling MAXPRO NVR To uninstall MAXPRO NVR, choose any of the following uninstall procedures that best suit your requirement. -
Page 49: Full Uninstall
I N S T A L L I N G M A X P R O N V R Uninstalling MAXPRO NVR Figure 3-23 Uinstall Complete Click Finish. You are prompted to reboot your computer to complete the uninstall procedure. Full Uninstall The following components are uninstalled: MAXPRO NVR Server and Client components. -
Page 50: Welcome To Maxpro Nvr 2.5 Uninstall Wizard
I N S T A L L I N G M A X P R O N V R Uninstalling MAXPRO NVR Figure 3-24 Welcome to MAXPRO NVR 2.5 Uninstall Wizard Click Next. Figure 3-26 appears. Figure 3-25 Retaining Trinity Database Click Yes or No as applicable. -
Page 51: Retaining Clip Metadata
I N S T A L L I N G M A X P R O N V R Uninstalling MAXPRO NVR Figure 3-26 Retaining Clip Metadata Click Yes or No as applicable. • If you click “Yes” and then click Next, the clip metadata path is retained for future installations of MAXPRO NVR. -
Page 52: Uinstall Complete
I N S T A L L I N G M A X P R O N V R Uninstalling MAXPRO NVR Click Next. The uninstall status of various components appears. Figure 3-29 appears. Go to step 7. Figure 3-28 Uinstall Complete Click Finish. -
Page 53: Configuring Maxpro Nvr
Configuring MAXPRO NVR Overview Configuring MAXPRO NVR involves setting up the system to perform video surveillance and IP recording operations. This is the most important phase for commissioning MAXPRO NVR system as it involves setting up the MAXPRO NVR IP address, organizing devices, users, and roles. -
Page 54: Configuring Maxpro Nvr
The MAXPRO NVR Log On dialog box appears. Caution: Only on the Honeywell provided systems, a default Windows user, Administrator and password Password1 is already configured and hence you are automatically logged in. Type the Username. The default user name is “admin”. -
Page 55: Configuring The Honeywell Cameras With Maxpro Nvr Wizard
Click the Configurator tab to open the Configurator screen.The System page opens by default. Configuring the Honeywell cameras with MAXPRO NVR Wizard Using the MAXPRO NVR Wizard (3 Clicks to Live Video), you can configure Honeywell IP cameras. Refer to the MAXPRO NVR Operator’s Guide for more information. -
Page 56: Performing User Administration
C O N F I G U R I N G M A X P R O N V R Configuring MAXPRO NVR To configure schedules Click the Configurator tab. The System page appears by default. Click the Schedule tab to open the Schedule page. Performing User Administration A user in MAXPRO NVR is responsible for performing various operations like viewing video, reporting alarms, and other video surveillance tasks. -
Page 57: Verifying The Configuration
Verifying the Configuration Overview Verifying the configuration of the MAXPRO NVR is the final phase in the commissioning process. In this phase, you need to verify the working of the MAXPRO NVR. Before you Begin Ensure that the configuration of MAXPRO NVR is complete. Activities to Perform in this Phase In this phase, using the MAXPRO NVR user interface, check for the following one after the other. -
Page 58: Checking The Connection With The Maxpro Nvr Server
V E R I F Y I N G T H E C O N F I G U R A T I O N Checking the Connection with the MAXPRO NVR Server Checking the Connection with the MAXPRO NVR Server The MAXPRO NVR server addresses are stored in profiles. -
Page 59: Checking The Device Listing In The Devices Window
V E R I F Y I N G T H E C O N F I G U R A T I O N Checking the Device listing in the Devices Window Checking the Device listing in the Devices Window By default, the Viewer tab is selected when you log on to MAXPRO NVR. -
Page 60: Checking The Acknowledgement And Clearing Of Alarms
V E R I F Y I N G T H E C O N F I G U R A T I O N Checking the Acknowledgement and Clearing of Alarms Checking the Acknowledgement and Clearing of Alarms Clicking the Alarms tab next to the Device tab opens the Alarms window that lists all the alarms in a floating window. -
Page 61: Checking The Live Video From Cameras
V E R I F Y I N G T H E C O N F I G U R A T I O N Checking the Live Video from Cameras Checking the Live Video from Cameras To ensure that all the cameras are connected and functioning properly, you need to check for live video from them. -
Page 62: Checking The Playback Of Recorded Video
V E R I F Y I N G T H E C O N F I G U R A T I O N Checking the Playback of Recorded Video Checking the Playback of Recorded Video To playback video, the recording from the camera must be available and the recording settings for the camera must be configured. -
Page 63: Checking The Panning, Tilting, And Zooming
V E R I F Y I N G T H E C O N F I G U R A T I O N Checking the Panning, Tilting, and Zooming Checking the Panning, Tilting, and Zooming Using the digital PTZ feature in MAXPRO NVR, you can perform panning and tilting on live and recorded video and clips. -
Page 64: Checking The Creation Of Images
You can double-click the image view option in the site window to view images on the salvo layout. You can view the images in the form of thumbnails or filmstrip. You can also select the image size large, medium, and small as per the requirement. For example, X:\ProgramFiles\Honeywell\TrinityFramework\ImagesAndClips. Here, X: is the hard drive. Note: Refer to the MAXPRO NVR Operator’s Guide... -
Page 65: Checking The Creation Of Clips
V E R I F Y I N G T H E C O N F I G U R A T I O N Checking the Creation of Clips Checking the Creation of Clips You can create clips from recorded video. These clips can be saved with digital signatures. Digital signatures ensure authenticity of clips. -
Page 66: Checking The Salvo View Feature
V E R I F Y I N G T H E C O N F I G U R A T I O N Checking the Salvo View Feature Checking the Salvo View Feature A salvo layout that is customized based on the preferences of the operators is referred to as a salvo view. -
Page 67: Checking The Search For Recorded Video In Maxpro Nvr
V E R I F Y I N G T H E C O N F I G U R A T I O N Checking the Search for Recorded Video in MAXPRO NVR Checking the Search for Recorded Video in MAXPRO NVR Operators can search for recorded video from cameras connected to MAXPRO NVR. -
Page 68: Checking The Generation Of Event History/Operator Log Report
V E R I F Y I N G T H E C O N F I G U R A T I O N Checking the Generation of Event History/ Operator Log Report Checking the Generation of Event History/ Operator Log Report Two types of reports, namely event history report and operator log report, can be generated. -
Page 69: Appendix
Turnkey Solutions (XE,SE,PE) Changing the default Windows Password on MAXPRO NVR MAXPRO NVR boxes shipped from Honeywell are preconfigured with default Windows user, Administrator and password, Password1. You can customize and change the default password. To change the default password, you must change the: •... -
Page 70: Application Tools
A P P E N D I X Customizing MAXPRO NVR Single-box Turnkey Solutions (XE,SE,PE) Changing the NEOStorage Server, Trinity Smart VMD Service, TrinityServer and TrinityController passwords: Click Start>Control Panel>Administrative Tools. A list of services appear. Figure A-1 Application Tools Double-click Services. -
Page 71: Changing The Default Ip Address And Machine Name
A P P E N D I X Customizing MAXPRO NVR Single-box Turnkey Solutions (XE,SE,PE) Click the Log On tab. Type the new password in Password. Type the new password again in Confirm Password. Click OK. Note: Follow the similar procedure to change the password for the Trinity Smart VMD Service, TrinityServer and TrinityController services. -
Page 72: Setting Up Antivirus Software For Maxpro Nvrs
Setting Up Antivirus Software for MAXPRO NVRs Setting Up Antivirus Software for MAXPRO NVRs Honeywell supports installing the following Antivirus software on MAXPRO NVRs.The following Antivirus applications have been tested, and function well with the MAXPRO NVR operational parameters. •... -
Page 73: Index
Firewall settings 55 Flexible, scalable NVR 11 Flexible, software only NVR 11 Form Factor 12 Generating Event History 70 Honeywell’s boxed solutions 19 How to Install MAXPRO™ VMS 33 Immervision 11 Important Safeguards 15 Intended Audience 13 Internet Protocol Version 4 (TCP/IPv4) 25... - Page 74 I N D E X IP expertise 13 Live Video from Cameras 63 MAXPRO NVR 11 MAXPRO NVR 2.5 (Build 29) 45 MAXPRO NVR DVD 33 MAXPRO NVR PE 11 MAXPRO NVR SE 11 MAXPRO NVR Software 11 MAXPRO NVR Software Prerequisites 31 MAXPRO NVR Wizard 20 MAXPRO NVR XE 11 MAXPRO®Mobile.
- Page 75 I N D E X UPS 23 Verifying the Configuration 59, 59, 71 Video storage drive’s data 53 Video Surround 11 Warranty and Service 17 Windows updates 31 MAXPRO NVR Commissioning and Installation Guide...
- Page 76 I N D E X This page is intentionally left blank. MAXPRO NVR Commissioning and Installation Guide...
- Page 77 Document 800-09355V5– 04/2013 © 2013 Honeywell International Inc. All rights reserved. No part of this publication may be reproduced by any means without written permission from Honeywell. The information in this publication is believed to be accurate in all respects. However, Honeywell cannot assume responsibility for any consequences resulting from the use thereof.