
Related Manuals for LG DR7400


Summary of Contents for LG DR7400
-
Page 1: Dvd Recorder
DR7400NSM _HA7BLL_ENG DVD RECORDER OWNER’S MANUAL MODEL : DR7400 Before connecting, operating or adjusting this product, please read this instruction booklet carefully and completely. - Page 2 CAUTION RISK OF ELECTRIC SHOCK DO NOT OPEN CAUTION: TO REDUCE THE RISK OF ELECTRIC SHOCK DO NOT REMOVE COVER (OR BACK) NO USER-SERVICEABLE PARTS INSIDE REFER SERVICING TO QUALIFIED SERVICE PERSONNEL. This lightning flash with arrowhead symbol within an equilateral triangle is intended to alert the user to the presence of uninsulated dangerous voltage within the product’s enclosure that may be of sufficient magnitude to constitute a risk of electric...
-
Page 3: Table Of Contents
Auto Set Up ......11 About DVD Recorder Initial Setup menu ..11 Using the Initial Setup menu . -
Page 4: Introduction
Introduction To ensure proper use of this product, please read this owner’s manual carefully and retain for future reference. This manual provides information on the operation and maintenance of your recorder. Should the unit require service, contact an authorized service location. Symbol Used in this Manual The lightning flash symbol alerts you to the presence of dangerous voltage within the... -
Page 5: Recordable And Playable Discs
Note: If a DVD+RW discs is recorded using a personal computer or other DVD recorder, you cannot format the disc using this recorder. So if you want to use the disc on this recorder, you must format the disc using... -
Page 6: Disc-Related Terms
Disc-related terms DVD +R / DVD +RW DVD +R is two different standards for recordable DVD drives and discs. This format allows information to be recorded onto the DVD disc only once. DVD +RW is two standards for re-writable media, meaning the DVD content can be erased and re- recorded. -
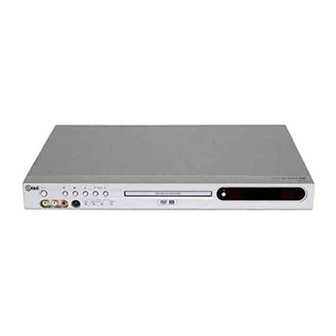
Page 7: Front Panel And Rear Panel
b c d a POWER button Switches the recorder ON or OFF. b PLAY (N) Starts playback. c x (STOP) Stops playback or recording. d z (REC) Starts recording. Press repeatedly to set the recording time. e PROG. (V/v) Scans up or down through memorized channels. f Disc Tray Insert a disc here. -
Page 8: Remote Control
Remote Control 0-9 numerical buttons: Selects numbered options in a menu. b / B / v / V (left/right/up/down): Selects an option in the menu. PR v / V (up/down): Scans up or down through memorized channels. A-B: Repeat sequence. AUDIO: Selects an audio language (DVD) or an audio channel (CD). -
Page 9: Hookup And Settings
Hookup and Settings Connections to Your TV and Aerial 1. Remove the aerial cable plug from your TV set and insert it into the aerial socket at the back of the recorder. 2. Connect the RF. OUT jack on the recorder to the aerial input jack on the TV using the 75-ohm Coaxial Cable supplied (R). -
Page 10: Accessory Audio/Video (A/V) Connections
Accessory Audio/Video (A/V) Connections Connecting to the EURO AV2 jack Connect a VCR or similar recording device to the EURO AV2 jack of this recorder. VCR, Cable Box, or Satellite Tuner, etc. Rear of the recorder Tip: You do not need to turn on the recorder to view the signals from the connected tuner on your TV. -
Page 11: Auto Set Up
Setup menu By using the Setup Displays, you can make various adjustments to items such as picture and sound. 1. Press SETUP and the [DVD Recorder Initial Setup] menu appears. [Timer REC] (Timer Recording) For unattended recording, you can 7 programs within a period of 1 month. -
Page 12: Using The Initial Setup Menu
5. Press SETUP to exit the Setup menu. Notes: Press b to go back to the previous level. To return to the [DVD Recorder Initial Setup] menu, select [<] option on the [Initial Setup] menu then press ENTER. TV Setup... -
Page 13: Program Edit
Program Edit You can edit a channel manually (add, delete, name, move, etc.). 1. Select [Program Edit] option on the [Initial Setup] menu. 2. Press ENTER. The [Program Edit] menu appears. 3. Use v / V / b / B to select a PR number then press ENTER. -
Page 14: Auto Install
Auto Install Re-configure initial settings. Select [Auto Install] option on the [Initial Setup] menu then press ENTER. [Initial Setup Wizard] menu screen appears. See “Auto Set Up” on page 11. Recording Setup Record Mode Set You can set the picture quality for recording; HQ (High Quality), SQ (Standard Quality), LQ (Low Quality), EQ (Extend Quality). -
Page 15: General Setup
General Setup TV Display Selects the aspect ratio of the connected TV. [Pan Scan] Select when a standard 4:3 TV is connected. The video material formatted in the Pan & Scan style is played back in that style (Both sides of the picture are cut off). -
Page 16: Video Setup
Video Setup Quality Set video quality in the aspects of brightness, contrast, hue, or saturation. 1. Select [Quality] option then press B on the [Initial Setup] menu 2. Press v / V to select the desired option then press ENTER. The status bar appears. Example: Brightness 3. -
Page 17: Dolby Digital
Dolby Digital - Dual Mono You can select a audio channel of Dolby Digital. [Stereo] The left channel sound (L) is heard from the left speaker and the right channel sound (R) is heard from the right speaker. [L-Mono] The left channel sound (L) is heard from both speakers. -
Page 18: Preference
Preference TV Type You must select the appropriate system mode for your TV system. • When the selected system does not coincide with the system of your TV, normal color picture may not be displayed. [PAL] When this recorder is connected with PAL-TV. [Auto] When this recorder is connected with Multi system TV. -
Page 19: Default
If you forget your password If you forget your password, to clear the current password, follow the procedure below. 1. Press SETUP to display the [DVD Recorder Initial Setup] menu. 2. Use the Number buttons to enter the 6-digit number “210499”. Confirm message will appear. -
Page 20: Using The Disc Operation Menu
Using the Disc Operation menu 1. Press SETUP and the [DVD Recorder Initial Setup] menu appears. 2. Use b / B to select [Disc Oper] option then press ENTER. Disc Operation Menu appears. 3. Use v / V to select an option. -
Page 21: Finalize
Finalize Finalizing ‘fixes’ the DVD+R recordings in place so that the disc can be played on a regular DVD player or computer equipped with a suitable DVD-ROM drive. Finalizing a disc creates a menu screen for navigating the disc. This is accessed by pressing MENU/LIST or TITLE. -
Page 22: Adapt
Adapt Disc recorded on other recorder will not use on your recorder. You can use the disc after adapting the disc at your recorder. 1. Select [Adapt] option on the [Disc Oper] menu. 2. Press ENTER. [Adapt] menu appears. 3. Select [OK] then press ENTER. Disc Information You can view the informations for loaded DVD+R/RW disc. -
Page 23: General Explanation Of On-Screen Display
General Explanation of On-Screen Display This manual gives basic instructions for operating the recorder. Some DVDs require specific operation or allow only limited operation during playback. When this occurs, the symbol appears on the TV screen, indicating that the operation is not permitted by the recorder or is not available on the disc. -
Page 24: Playback
Playback Playing a DVD, Video CD, or Audio CD Playback Setup Turn the TV on and select the video input source connected to the recorder. Audio system: Turn the audio system on and select the input source connected to the recorder. 1. - Page 25 Search 1. Press SCAN ( ) during playback. 2. Press SCAN ( ) repeatedly to select the required speed. DVD; 5 steps (forward and backward) Video CD, Audio CD; 3 steps (forward and backward) 3. To exit SEARCH mode, press PLAY. Still Picture and Frame-by-Frame Playback 1.
- Page 26 Marker Search To enter a Marker You can start playback from up to 12 memorized points. To enter a marker, press MARKER at the desired point on the disc. The Marker icon appears on the TV screen briefly. Repeat to enter up to 12 markers.
- Page 27 Last Condition Memory This recorder memorizes the user settings for the last disc that you have viewed. Settings remain in memory even if you remove the disc from the recorder or switch off the recorder. If you load a disc that had its settings memorized, the latest stop position is automatically recalled.
-
Page 28: Playing An Mp3 File
Playing an MP3 File The recorder can play MP3 files on CD-ROM, CD-R/RW or DVD±R/RW discs. Before playing MP3 files, read “About MP3 audio files” on the right. 1. Load a disc that contains MP3 files. The Browser menu appears on the TV screen. 2. -
Page 29: Viewing A Jpeg File
Viewing a JPEG File The recorder can play JPEG files on the CD-R/RW or DVD±R/RW. Before playing JPEG recordings, read “About JPEG image files” on page 30. 1. Load a disc that contains JPEG file. The [Browser] menu appears on the TV screen. 2. -
Page 30: Using The Thumbnail Menu For Jpeg File
Using the thumbnail menu for JPEG file If you press STOP during Slide Show, the thumbnail menu will appear. You can find a picture you want to view easily. Use v / V / b / B to select a picture or option icon then press ENTER. -
Page 31: Recording
Recording About DVD recording Notes: This recorder cannot make recordings on CD-R or CD-RW discs. Our company takes no responsibility for recording failure due to power outages, defective discs, or damage to the Recorder. Fingerprints and small scratches on a disc can affect playback and/or recording performance. -
Page 32: Basic Recording From A Tv
Basic Recording from a TV Follow the instructions below to record a TV program. Recording starts immediately and continues until the disc is full or you stop the recording. Note: You must load a recordable disc for DVD recording. 1. Set a recording mode as necessary by pressing REC MODE repeatedly. -
Page 33: Timer Recording
Timer Recording This recorder can be programmed to record up to 7 programs within a period of 1 month. For unattended recording, the timer needs to know the channels to be recorded, the starting and ending time. 1. Press TIMER REC. The [Timer Recording] list screen will appear. -
Page 34: Checking Timer Recording Details
Checking Timer Recording Details Programming can be checked whenever the recorder is turned on. Press TIMER REC. Use v / V to select a timer recording. Press ENTER to edit the selected program. Timer Record menu appears. Press CLEAR to delete the selected program from the Timer Record List. -
Page 35: Editing
Editing You can edit video content using [Title List] menu or [Disc Edit] menu. To use Title List menu, see pages 35-38. To use Disc Edit menu, see pages 39-42. Title List and Chapter List Menu Overview Using the Title List menu you can edit video content. The editing features available in the Title List menu depend on whether you are editing video on DVD. -
Page 36: Deleting A Title
Deleting a Title If you choose to delete a title from the Title List menu, the title is actually deleted from the disc. 1. Use b / B / v / V to choose a title you want to delete on the Title List menu then press ENTER. The menu options appears on the left side of the screen. -
Page 37: Changing Title Thumbnails
Changing Title Thumbnails You can select a favorite scene for the thumbnail picture shown in the Title List menu. 1. Use b / B / v / V to choose a title on the Title List menu then press ENTER. The menu options appears on the left side of the screen. -
Page 38: Adding Chapter Markers
Adding Chapter Markers You can create chapters within a title by inserting chapter marks at the desired points. 1. Use b / B / v / V to choose a chapter on the Chapter List menu then press ENTER. The menu options appears on the left side of the screen. -
Page 39: Using The Disc Edit Menu
Using the Disc Edit menu 1. Press SETUP and the [DVD Recorder Initial Setup] menu appears. 2. Use b / B to select [Disc Edit] option then press ENTER. Disc Edit Menu appears. 3. Use v / V to select a title then press ENTER. -
Page 40: Erasing A Title
Erasing a Title If you choose to erase a title from the [Edit] menu, the title or chapter is actually deleted from the disc. 1. Use b / B / v / V to choose a title you want to erase on the [Edit] menu then press ENTER. -
Page 41: Editing A Title By Chapter
Editing a Title by Chapter The [Chapter Edit] menu is where you can add/delete chapter mark and use other function for chapter. 1. Use b / B / v / V to choose a title on the [Edit] menu then press ENTER. The menu options appears on the right side of the screen. -
Page 42: Deleting Chapter Markers
Deleting Chapter Markers You can delete chapter markers. 1. Use b / B / v / V to choose a chapter on the [Chap Edit] menu then press ENTER. Repeat this step to select additional chapter. The menu options appears on the right side of the screen. -
Page 43: Reference
Adjust the volume of the TV. Controlling other TVs with the remote You can control the sound level, input source, and power switch of non-LG TVs as well. If your TV is listed in the table below, set the appropriate manufacturer code. -
Page 44: Language Codes
Language Codes Use this list to input your desired language for the following initial settings: Disc Audio, Disc Subtitle, Disc Menu. Language Code Language Abkhazian 6566 Fiji Afar 6565 Finnish Afrikaans 6570 French Albanian 8381 Frisian Ameharic 6577 Galician Arabic 6582 Georgian Armenian... -
Page 45: Troubleshooting
Troubleshooting Check the following guide for the possible cause of a problem before contacting service. Symptom The power cord is disconnected. No power. No picture. The TV is not set to receive recorder signal output. The video cable is not connected securely. - Page 46 Symptom The disc was recorded in Video mode. Cannot play a disc recorded using this Some players will not play even a recorder on another finalized disc recorded in Video mode. player. Discs recorded with copy-once material cannot be played on other players. Cannot record or did The remaining blank space on the not record successfully.
-
Page 47: Specifications
Specifications General Power requirements AC 110-240V, 50/60 Hz Power consumption Dimensions (approx.) 430 X 49 X 300 mm (w x h x d) without foot Mass (approx.) 2.7 kg Operating temperature 5˚C to 35˚C Operating humidity 5 % to 90 % Television system PAL I, B/G, I/I, SECAM D/K, K1, SECAM L colour system Recording format... - Page 48 P/NO : 3834RD0052G...