Sony DVO-1000MD Instructions For Use Manual
Hide thumbs
Also See for DVO-1000MD:
- Manual (116 pages) ,
- Instructions for use manual (69 pages) ,
- Specification (4 pages)

Related Manuals for Sony DVO-1000MD


Summary of Contents for Sony DVO-1000MD
-
Page 1: Dvd Recorder
3-855-576-19(1) DVD Recorder Instructions For Use DVO-1000MD © 2005 Sony Corporation... - Page 2 If it is not installed and used in Refer to these numbers whenever you call upon your accordance with the instruction manual, it may cause Sony dealer regarding this product. interference to other equipment. If this unit causes interference (which can be determined by Model No.
- Page 3 If you have any questions about this product, you may This DVD RECORDER is classified as a CLASS 1 call; LASER PRODUCT. Sony Customer Information Service Center 1-800-222- 7669 or http://www.sony.com/ Caution The use of optical instruments with this product will increase eye hazard.
-
Page 4: Table Of Contents
Repeat) ............36 Table of Contents Repeat Playback of a Chapter ......38 Repeat Playback of a Title ........38 Playing From the TITLE LIST Display ....39 Precautions ............. 5 Verifying Information on a Disc ......40 Copyrights .............. 6 Viewing Frozen Pictures ........41 Overview Editing Features .............. -
Page 5: Precautions
When the disc is being loaded in the unit Precautions If you give a violent shock to the unit or move it with a disc loaded because the unit is recording or playing back, the disc may be damaged. Be sure to remove a disc Use and storage before moving the unit. -
Page 6: Copyrights
Regarding part replacement, consult loss of recorded or edited data, or any losses caused by your Sony dealer or a Sony service representative. such malfunctions or loss of data. Please be aware of this policy beforehand. -
Page 7: Overview
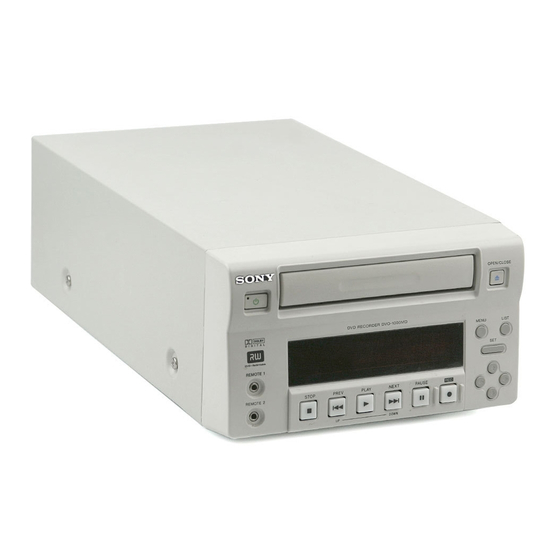
Variety of input/output interfaces Features Digital interfaces The DVO-1000MD is a DVD Recorder designed for use This unit is equipped with an i.LINK connector so that with video equipment such as external equipment. The DV format digital video and audio signals can be input. -
Page 8: Location And Function Of Parts
Location and Function of Parts Front Panel (Power) switch and standby indicator 2 Disc tray 3 OPEN/CLOSE button 7 Disc control section 8 Menu/disc control section 6 Front panel display 5 REMOTE 2 connector 4 REMOTE 1 connector 1 1 (power) switch and standby indicator 4 REMOTE 1 connector (stereo mini jack) Press to power on the unit when the MAIN POWER Connect a SVRM-100A remote control unit (not... - Page 9 6 Front panel display F TITLE indicator Indicates the number of the title which is being recorded or played back. A Disc indicator G CHAP (chapter) indicator B Recording mode indicator Indicates the number of the chapter which is being recorded or played back.
- Page 10 UP: Used to go back to the previous page during C SET button title operation in the TITLE LIST display. Press this button to save new settings, such as selected menu items. C BPLAY button D V, v, B, b (cursor operation) buttons When you press this button, it lights and playback begins.
-
Page 11: Rear Panel
Rear Panel 2 S-VIDEO IN connectors 3 VIDEO IN connectors 4 VIDEO OUT connector 1 MAIN POWER switch 5 S-VIDEO OUT connector 6 MONITOR AUDIO connector qd -AC IN connector 7 AUDIO OUT L/R connectors 8 AUDIO IN L/R connectors 9 REMOTE IN RS-232C connector DV IN (i.LINK) connector USB connector... - Page 12 Use this connector to control this unit by connecting it to equipment such as an external equipment which supports the RS-232C interface. DV IN (i.LINK) connector (6-pin) This connector inputs digital video signals conforming to the i.LINK protocol. Also, this connector is used to control this unit by connecting it to equipment such as an external equipment which supports i.LINK.
-
Page 13: Connection
Connection • Connect the AC power cord last. Notes • Before making connections, be sure to turn the power of any peripheral equipment off. Connecting External Equipment (1) This section gives a connection example to operate the – LCH: Outputs the audio signal of audio channel 1. unit connected to external equipment using a remote –... -
Page 14: Connecting External Equipment (2)
Connecting External Equipment (2) This section gives an example to connect external – RCH: Outputs the audio signal of audio channel 2. equipment for controlling the unit from connected – MIX: Outputs a mixed audio signal from both external equipment channel 1 and channel 2. -
Page 15: Turning The Power On/Off
Push the 1 (power) switch on the front panel to put Turning the Power On/ the unit in the standby mode. Set the MAIN POWER switch on the rear panel to the z (off) side. The standby indicator on the front panel goes off Turning the Power On and the power is turned off. -
Page 16: Setup Preparation
Select the proper video signal system corresponding to Setup Preparation the one used in your area. Before you start to use the unit after you have made the 11,12 required connections, it is necessary to perform the following operations. • Selecting either NTSC or PAL video signal system Select the video signal system used in your region. - Page 17 The SETUP MENU appears. The following display appears when enhanced menu items have been added under the last item of the basic setup menu. Select “MENU GRADE” from the SETUP MENU display. Select “TV SYSTEM” by pressing the v button. Each time you press the v or V button, the highlighted cursor moves down or up item by item.
-
Page 18: Setting The Date And Time
The message “NOW SAVING..” appears and the The TOP menu appears. unit starts to save the setting. When saving is completed, the message disappears. Then, “TV SYSTEM WAS CHANGED PLEASE POWER OFF.” appears on the monitor display, and “POWER OFF!” appears on the front panel display. Note The TV system is not changed even if you push the SET button. - Page 19 Press the v button several times until “DATE/TIME you press the B button, the rightmost digit of the PRESET” is highlighted. date column is highlighted. Front panel display during menu operation The date column appears when you set the date in the date column on the DATE/TIME PRESET sub menu.
-
Page 20: Selecting The Remote Interface
The SETUP MENU appears. Selecting the Remote Interface The REMOTE I/F sub menu of the SETUP MENU allows you to select the interface to be used to control the unit remotely. The factory setting is RS-232C. Select “REMOTE I/F” by pressing the v button. 2,4,6 Press the MENU button. - Page 21 a) This protocol is compatible with the SVO- 9500MD video cassette recorder protocol. b) This setting is not related to the setting for the input signal. c) This protocol is equivalent to the RS-232C protocol. Press the SET button. The message “NOW SAVING...” appears and the unit starts to save the setting.
-
Page 22: Recording
Storage Recording • Do not store discs where they may be subjected to direct sunlight, or in other places where the temperature or humidity is high. • Store discs in their cases. • Finger prints or dust accumulated on the disc cause Handling Discs deterioration of picture quality. - Page 23 switch, check whether the MAIN POWER switch Unloading a disc on the rear panel is set to the ] (on) side. For detailed information on how to turn the power Press the OPEN/CLOSE button with the power on or off, see “Turning the Power On/Off” on page turned on.
-
Page 24: Preparations For Recording
The SETUP MENU appears. Preparations for Recording Selecting Input Signals The INPUT SELECT sub menu of SETUP MENU allows you to select the input signal to be recorded. Select “INPUT SELECT” by pressing the V or v button. 2,3,5 Press the b button. Press the MENU button. -
Page 25: Selecting The Recording Mode
is input or not, taking precedence over a composite Select “SETUP MENU” by pressing the V or v video signal input to the VIDEO IN connector. button and press the b button with “SETUP “S-VIDEO” appears on the front panel display. MENU”... -
Page 26: Recording
The message “NOW SAVING...” appears and the Recording unit starts to save the setting. When the saving is completed, the message disappears and the unit returns to the normal The unit allows you to record up to 49 titles on one disc. display. -
Page 27: Marking Indexes During Recording
For detailed information on how to turn the power The titles are numbered in the sequence they are on or off, see “Turning the Power On/Off” on page recorded. Title 2 Title 1 Title 3 Press the OPEN/CLOSE button. The disc tray opens. The message changes to “OPEN”... -
Page 28: Using A Foot Switch
Press the MENU button. Notes • The indexes are not marked when the RECPAUSE The TOP menu appears. INDEX sub menu (see page 49) of the ENHANCED MENU is set to “OFF.” • Once you press the XPAUSE button to pause the recording operation, data is not recorded until you press the XPAUSE button again to restart recording. -
Page 29: Adding Information To Titles
The FOOT SW sub menu appears. To use an RM-P110 (not supplied) as a keyboard for editing/adding title name and information You should carry out the following operation and menu settings: • Connect the RM-P110 to the RS-232C connector of the unit. -
Page 30: When The Disc Becomes Full During Recording
Press the MENU button. The PRE REC sub menu appears. The TOP menu appears. Select the desired mode by pressing the V or v button. Select “SETUP MENU” by pressing the V or v button, and press the b button with “SETUP Mode Setting MENU”... - Page 31 Select “SETUP MENU” by pressing the V or v button and press the b button with “SETUP Mode Setting MENU” highlighted. GOTO TOP To return to the beginning of the disc. The SETUP MENU appears. END STOP To return to the beginning of the last title, and end recording automatically.
-
Page 32: Finalizing A Disc
The FINALIZE display appears. Finalizing a Disc There is a case where a disc recorded on this unit must be finalized to play it on other equipment compatible with DVD+RW equipment. Proceed as follows to finalize the disc. Even if the disc is finalized, you can use that disc for recording again or you can edit data recorded on the disc. -
Page 33: Formatting A Disc
The FORMAT display appears. Formatting a Disc You can erase all the data recorded on the DVD+RW disc and format that disc so as to be able to use it with the unit. Note When a recorded disc is formatted, all the data, such as title names is erased. -
Page 34: Playback Playback
Press the OPEN/CLOSE button. Playback The disc tray opens. The message changes to “OPEN” on the front panel display. Playback Place the disc to be played on the tray. Press the OPEN/CLOSE button. Usable Discs The disc tray closes. You can use the 4 x DVD+RW discs. The DISC IN display blinks and the message “Now loading...”... -
Page 35: Searching For Desired Point
Jumping to a Desired Chapter Searching for Desired The .PREV/UP or >NEXT/DOWN button Point allows the unit to jump to the chapter before or after the chapter currently being played. Jumping to a Desired Title The B or b button allows the unit to jump to the title before or after the title currently being played. -
Page 36: Repeat Playback
When the >NEXT/DOWN button is pressed twice: Repeat Playback When the target point is the end of the last chapter, the unit jumps to the beginning of the last chapter. Thus, in this case, the unit jumps to point D. You can conduct the following repeat playback operations using the menu. - Page 37 Point A is set and “A” disappears. Then, “B” is The REPEAT A-B display appears. displayed as a white letter. “A” disappears, and “B” is highlighted in white. Select “A-B SET” by pressing the v button. If you return to the previous menu display by pressing the B button after setting only point A The point A set is cancelled.
-
Page 38: Repeat Playback Of A Chapter
With “CLEAR REPEAT” highlighted, press the The TOP menu appears. SET button. Select “REPEAT FUNCTION” by pressing the V The unit exits the A-B repeat mode and stops or v button, and press the b button with “REPEAT playback FUNCTION” highlighted. Conducting repeat playback of the The REPEAT FUNCTION display appears. -
Page 39: Playing From The Title List Display
Proceed as follows to specify a title and conduct repeat Playing From the TITLE playback. LIST Display Press the MENU button. The TOP menu appears. You can select the desired chapter and play it back using the title list. Load the disc to be played. Press the LIST button. -
Page 40: Verifying Information On A Disc
The following display appears. Verifying Information on a Disc You can verify information on a disc. Proceed as follows to display the DISC INFORMATION display. Load a disc and press the MENU button. The TOP menu appears. Select the chapter that you want to play, by pressing the V or v button, and then press the SET button. -
Page 41: Viewing Frozen Pictures
Viewing Frozen Pictures Item Function DISC NAME To display the disc name. MEDIA To display the media type (display Viewing frozen pictures using buttons on only). the unit TITLE COUNT To display the number of titles recorded on a disc (display only). The following two methods are available to view a frozen picture during playback. -
Page 42: Editing
Select the title with information you want to verify Editing by pressing the V or v button, and press the b button. The following display appears. Editing Titles The TITLE LIST menu allows you to carry out the following editing tasks on titles. •... -
Page 43: Protecting A Title
To verify or edit the title information keyboard for editing/adding title name and information” on page 29. When you finish editing: Press the SET button on the unit after carrying out editing task using the RM-P110. The message “SAVING...” appears on the front panel display while the title name or title information is being saved. -
Page 44: Erasing A Title
The following display appears. Setting Content The title is protected. The title is not protected. (factory setting) Press the SET button. Erasing a Title Proceed as follows. When there are plural pages in the title list Load the disc on which titles that you want to erase The following two methods are available to move to are recorded. - Page 45 Select “ERASE” by pressing the V or v button. erase title 30 which is the last title currently recorded, the remaining titles are title 1 to title 29. When you record a title the next time, the new title number will be If you erase titles other than the last one, the capacity of the disc does not change.
-
Page 46: Menu
REPEAT FUNCTION menu Menu This menu allows you to repeat playback between two points (A-B repeat), playback of the chapter and the title. Menu Configuration and the Menu List The unit has two kinds of menus: one is the menu displayed by pressing the MENU button, and the other is the title list menu displayed by pressing the LIST button. -
Page 47: Setup Menu
RS-232C connector (a created when equipment. unit protocol which is compatible the number of OFF: Does not create a next with the SVO-9500MD Sony indexes in one title automatically. video cassette recorder title exceeds 99. protocol). To deactivate ON: Activates the key lock i.LINK: Controls the unit... - Page 48 Item Function Setting Item Function Setting [FRAME]: Displays a frame [OFF]: Processes the signal FREEZE To select the B/W MODE To forcibly MODE type of frozen frozen picture when you push switch the from the VIDEO IN, VIDEO picture the button, then the first field signal process OUT and S-VIDEO OUT displayed when...
- Page 49 SVO9500: Select this when the type INQ unit is used to replace an command of existing Sony SVO-9500MD RS-232C video cassette recorder. protocol is received HOUR To display the Display only...
-
Page 50: Basic Menu Operations
Select the desired basic menu by pressing the V or Basic Menu Operations v button. The selected sub menu is highlighted. This section describes the basic menu operations which are common to each display. This manual describes some menu operations elsewhere. - Page 51 Example Press the SET button. The following screen appears, and the unit starts saving the settings made. When saving is completed, the message disappears, and the unit returns to the normal display. When the following screen appears during a menu operation To return to a higher level Press the B button.
-
Page 52: Miscellaneous
When it detects an display. abnormality, it indicates an error code on the monitor When the error code is displayed, contact your nearest Sony service facilities. Monitor screen Main display section of the front panel display Error indication... - Page 53 It is required to replace the battery with new one. tPush any button to make the alarm message disappears. Contact your nearest Sony dealer to replace the battery with a new one. MOISTURE HAS BEEN DETECTED.
- Page 54 SETUP MENU settings (see page 47). If SERVICE IF THIS ALARM APPEARS the settings made are deactivated again or this AGAIN AFTER ABOVE PROCEDURE. message appears again, contact your nearest Sony dealer. NO DISC. NO DISC! There is no disc loaded.
-
Page 55: Troubleshooting
If the unit appears to be malfunctioning, please check noisy. connectors on the rear panel. tRe-connect them (see page 13). the following before contacting your Sony dealer. • The connections of the input and output connectors are wrong. Symptom Cause and remedies tConnect them correctly (see page 13). -
Page 56: Specifications
Input/Output Connectors Specifications Analog video inputs VIDEO IN (BNC type × 2, loop- through with 75 Ω automatic General terminator), Composite, 1.0 Vp-p, Recording /playback format 75 Ω, sync negative DVD +VR format S-VIDEO IN (4-pin mini DIN × 2, Video: MPEG-2 @ML(CBR, VBR) loop-through with 75 Ω... -
Page 57: Others
SYSTEMS TO RECORD CONTENT OF ANY TYPE. Outputs the FREEZE command. • Always verify that the unit is operating properly before use. SONY WILL NOT BE LIABLE FOR DAMAGES OF 2 INDEX button ANY KIND INCLUDING, BUT NOT LIMITED TO, Outputs the INDEX command. -
Page 58: Marking Indexes
6 REC button Press the INDEX button on the remote control unit Outputs the REC command. one time. 7 PAUSE button The INDEX command is sent and the unit is put in Outputs the PAUSE command. the index scan mode. When the unit receives this command during playback, it pauses playback. - Page 59 Note You cannot erase indexes created at the beginning of recording, ones created by pressing the XPAUSE button of the unit during recording, or ones marked automatically by setting the AUTO INDEX sub menu to ON (see page 47). Set the unit in the index scan mode. Search for the index to be erased.
-
Page 60: Glossary
(or a piece of music) is one title. and left of front, center, and right With the DVO-1000MD, one title is and left of rear. This is called 5.1 the image recorded from the start of channel surround. -
Page 61: Index
alarm messages 52 verifying information 42 Index error messages 52 verifying/editing a title name 42 verifying/editing title information Troubleshooting 55 Playback A-B repeat playback 36 A-B repeat playback 36 adding indexes during playback Video signal system setting 16 disc 34 Chapter fast forward or reverse 34 jumping to 35... - Page 62 Sony Corporation...